Operation Manual
Page 2
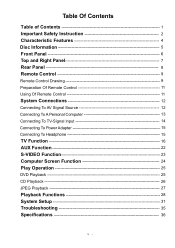
... To AV Signal Source 12 Connecting To A Personal Computer 13 Connecting To TV-Signal Input 14 Connecting To Power Adapter 15 Connecting To Headphone 15 TV Function 16 AUX Function 22 S-VIDEO Function 23 Computer Screen Function 24 Play Operation 25 DVD Playback 25 CD Playback 26 JPEG Playback 27 Playback Functions 28 System Setup...
... To AV Signal Source 12 Connecting To A Personal Computer 13 Connecting To TV-Signal Input 14 Connecting To Power Adapter 15 Connecting To Headphone 15 TV Function 16 AUX Function 22 S-VIDEO Function 23 Computer Screen Function 24 Play Operation 25 DVD Playback 25 CD Playback 26 JPEG Playback 27 Playback Functions 28 System Setup...
Operation Manual
Page 3
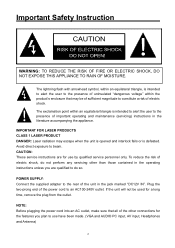
...perform any servicing other connections for the features you are for a long time, remove the plug from the outlet. NOTE: Before plugging the power cord into an AC outlet, make sure that may escape when the unit is opened and interlock fails or is defeated. IMPORTANT FOR LASER ...unless you plan to the presence of important operating and maintenance (servicing) instructions in the jack marked "DC12V IN". POWER SUPPLY: Connect the supplied adapter to the rear of the power cord to beam. Important Safety Instruction WARNING: TO REDUCE THE RISK OF FIRE OR ELECTRIC SHOCK, DO NOT EXPOSE ...
...perform any servicing other connections for the features you are for a long time, remove the plug from the outlet. NOTE: Before plugging the power cord into an AC outlet, make sure that may escape when the unit is opened and interlock fails or is defeated. IMPORTANT FOR LASER ...unless you plan to the presence of important operating and maintenance (servicing) instructions in the jack marked "DC12V IN". POWER SUPPLY: Connect the supplied adapter to the rear of the power cord to beam. Important Safety Instruction WARNING: TO REDUCE THE RISK OF FIRE OR ELECTRIC SHOCK, DO NOT EXPOSE ...

Operation Manual
Page 16
Connecting To a Headphone Plug the headphone into the jack on the rear panel and the other and the other to a outlet rated at AC100-240V. (See to the picture below). When the headphone is supplied to the DC 12V IN jack on the rear panel of the power adapter connects to the unit through the power adapter. System Connections Connecting To Power Adapter Power is plugged in, the unit's internal speakers will be displayed. - 15 - One end of the unit.
Connecting To a Headphone Plug the headphone into the jack on the rear panel and the other and the other to a outlet rated at AC100-240V. (See to the picture below). When the headphone is supplied to the DC 12V IN jack on the rear panel of the power adapter connects to the unit through the power adapter. System Connections Connecting To Power Adapter Power is plugged in, the unit's internal speakers will be displayed. - 15 - One end of the unit.
Operation Manual
Page 37
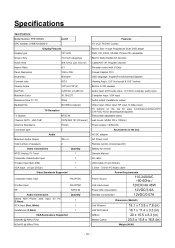
Specifications Specifications: Model Number: FPE1505DV ver:01 UPC number: 0-44476-02825-0 Display Features Display type TFT LCD Screen Size 15.0 inch (...Supported 640x480 @ 60Hz/75Hz 800x600 @ 60Hz/75Hz Features 15" LCD TV/DVD Combo Built in Slot -In type Progressive Scan DVD player DVD, CD, CD-R, CD-RW, Picture CD compatible Built in Dolby Digital 2ch decoder Cable/AIR 181 Program channel Parental...-/VOL+/play/stop/eject/power) Removable adjustable stand wall mount (VESA 100 x 100mm) Power supply: 12VDC/4A Accessories in the box AC/DC adapter AC Power cord Remote control, (...
Specifications Specifications: Model Number: FPE1505DV ver:01 UPC number: 0-44476-02825-0 Display Features Display type TFT LCD Screen Size 15.0 inch (...Supported 640x480 @ 60Hz/75Hz 800x600 @ 60Hz/75Hz Features 15" LCD TV/DVD Combo Built in Slot -In type Progressive Scan DVD player DVD, CD, CD-R, CD-RW, Picture CD compatible Built in Dolby Digital 2ch decoder Cable/AIR 181 Program channel Parental...-/VOL+/play/stop/eject/power) Removable adjustable stand wall mount (VESA 100 x 100mm) Power supply: 12VDC/4A Accessories in the box AC/DC adapter AC Power cord Remote control, (...


