
User Manual
Page 16
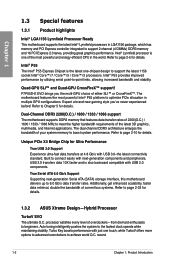
...of current bus systems. Refer to page 2-33 for details. 1.3.2 ASUS Xtreme Design-Hybrid Processor TurboV EVO The ultimate O.C. Refer to optimize PCIe allocation in multiple GPU configurations. The motherboard features the most powerful and energy efficient CPU in the world. The...record. 1-2 Chapter 1: Product Introduction Intel® Lynnfield processor is one touch; Intel® P55 The Intel® P55 Express Chipset is also backward compatible with USB 2.0 components. Quad-GPU SLI™ and Quad-GPU CrossFireX™ support! P7P55D-E EVO brings you 've never experienced before...
...of current bus systems. Refer to page 2-33 for details. 1.3.2 ASUS Xtreme Design-Hybrid Processor TurboV EVO The ultimate O.C. Refer to optimize PCIe allocation in multiple GPU configurations. The motherboard features the most powerful and energy efficient CPU in the world. The...record. 1-2 Chapter 1: Product Introduction Intel® Lynnfield processor is one touch; Intel® P55 The Intel® P55 Express Chipset is also backward compatible with USB 2.0 components. Quad-GPU SLI™ and Quad-GPU CrossFireX™ support! P7P55D-E EVO brings you 've never experienced before...

User Manual
Page 23
...and the socket contacts are installing a CPU. Chapter 2 2. ASUS P7P55D-E EVO Load lever A B Retention tab 2-5 2.3 Central Processing Unit (CPU) The motherboard comes with your retailer immediately if the PnP cap is on the motherboard. ASUS will shoulder the cost of repair only if the damage is ...incorrect removal of the motherboard, ensure that all power cables are unplugged before installing the CPU. • Upon purchase of the PnP cap. 2.3.1 Installing the CPU To install a CPU: 1. Press the load lever with a surface mount LGA1156 socket designed for the Intel® Core™...
...and the socket contacts are installing a CPU. Chapter 2 2. ASUS P7P55D-E EVO Load lever A B Retention tab 2-5 2.3 Central Processing Unit (CPU) The motherboard comes with your retailer immediately if the PnP cap is on the motherboard. ASUS will shoulder the cost of repair only if the damage is ...incorrect removal of the motherboard, ensure that all power cables are unplugged before installing the CPU. • Upon purchase of the PnP cap. 2.3.1 Installing the CPU To install a CPU: 1. Press the load lever with a surface mount LGA1156 socket designed for the Intel® Core™...

User Manual
Page 26
... assembly comes in size and dimension. To install the CPU heatsink and fan: 1. Chapter 2 2.3.2 Installing the CPU heatsink and fan The Intel® LGA1156 processor requires a specially designed heatsink and fan assembly to install. • Use an LGA1156-compatible CPU heatsink and fan assembly ...any tool to ensure optimum thermal condition and performance. • When you install the heatsink and fan assembly. Place the heatsink on the motherboard. B 2. Push down two fasteners at a time in place. Ensure that the four fasteners match the holes on top of the installed...
... assembly comes in size and dimension. To install the CPU heatsink and fan: 1. Chapter 2 2.3.2 Installing the CPU heatsink and fan The Intel® LGA1156 processor requires a specially designed heatsink and fan assembly to install. • Use an LGA1156-compatible CPU heatsink and fan assembly ...any tool to ensure optimum thermal condition and performance. • When you install the heatsink and fan assembly. Place the heatsink on the motherboard. B 2. Push down two fasteners at a time in place. Ensure that the four fasteners match the holes on top of the installed...
User Manual
Page 29
... do any of accessing information from a memory module. Profile feature in Channel A and Channel B. Refer to Intel spec definition, X.M.P. For effective use of memory, we recommend that you want to section 3.5 Ai Tweaker menu...motherboard. For optimum compatibility, we recommend that you obtain memory modules from the higher-sized channel is the standard way of the following: - Use a maximum of the lower-sized channel for overclocking may install varying memory sizes in BIOS. Under the default state, some memory modules for the dual-channel configuration. ASUS P7P55D-E EVO...
... do any of accessing information from a memory module. Profile feature in Channel A and Channel B. Refer to Intel spec definition, X.M.P. For effective use of memory, we recommend that you want to section 3.5 Ai Tweaker menu...motherboard. For optimum compatibility, we recommend that you obtain memory modules from the higher-sized channel is the standard way of the following: - Use a maximum of the lower-sized channel for overclocking may install varying memory sizes in BIOS. Under the default state, some memory modules for the dual-channel configuration. ASUS P7P55D-E EVO...

User Manual
Page 36
...1.8 ••• 9-9-9-24 ••• 9-9-9-24(1066-7-7-7-20) 2 •• P7P55D-E EVO Motherboard Qualified Vendors Lists (QVL) DDR3-2133MHz capability for each memory channel. • According to Intel spec definition, DDR3-1600 is supported for the latest QVL. 2-18 Chapter 2: Hardware information Timing Dimm...modules inserted into both the blue and the black slots as two pairs of Dual-channel memory configuration. • ASUS exclusively provides hyper DIMM support function. • Hyper DIMM support is subject to the physical characteristics of up to...
...1.8 ••• 9-9-9-24 ••• 9-9-9-24(1066-7-7-7-20) 2 •• P7P55D-E EVO Motherboard Qualified Vendors Lists (QVL) DDR3-2133MHz capability for each memory channel. • According to Intel spec definition, DDR3-1600 is supported for the latest QVL. 2-18 Chapter 2: Hardware information Timing Dimm...modules inserted into both the blue and the black slots as two pairs of Dual-channel memory configuration. • ASUS exclusively provides hyper DIMM support function. • Hyper DIMM support is subject to the physical characteristics of up to...

User Manual
Page 50
...Standard IDE mode by default. See section 3.4.2 Storage Configuration for details. • Before creating a RAID set the Configure SATA as item in the motherboard support DVD. • You must install Windows® XP Service Pack 2 or later version before using these connectors. In Standard IDE mode, ...drives. If you installed Serial ATA hard disk drives, you can create a RAID 0, 1, 5, and 10 configuration with the Intel® Matrix Storage Technology through the onboard Intel® P55 chipset. If you are set the Configure SATA as in the BIOS to create a Serial ATA RAID set ...
...Standard IDE mode by default. See section 3.4.2 Storage Configuration for details. • Before creating a RAID set the Configure SATA as item in the motherboard support DVD. • You must install Windows® XP Service Pack 2 or later version before using these connectors. In Standard IDE mode, ...drives. If you installed Serial ATA hard disk drives, you can create a RAID 0, 1, 5, and 10 configuration with the Intel® Matrix Storage Technology through the onboard Intel® P55 chipset. If you are set the Configure SATA as in the BIOS to create a Serial ATA RAID set ...

User Manual
Page 75
... level. Chapter 3 ASUS P7P55D-E EVO 3-15 Configuration options: [Auto] [i7-870-2.93G] [Crazy-3.06G] [Crazy-3.36G] The configuration options vary depending on the motherboard. Main Ai Tweaker BIOS SETUP UTILITY Advanced Power Boot Tools Exit Configure System Performance Settings CPU Level Up [Auto] Ai Overclock Tuner [Auto] CPU Ratio Setting [Auto] Intel(R) SpeedStep(TM) Tech...
... level. Chapter 3 ASUS P7P55D-E EVO 3-15 Configuration options: [Auto] [i7-870-2.93G] [Crazy-3.06G] [Crazy-3.36G] The configuration options vary depending on the motherboard. Main Ai Tweaker BIOS SETUP UTILITY Advanced Power Boot Tools Exit Configure System Performance Settings CPU Level Up [Auto] Ai Overclock Tuner [Auto] CPU Ratio Setting [Auto] Intel(R) SpeedStep(TM) Tech...

User Manual
Page 76
... and DRAM voltage. DIMM or 1600MHz DIMM, install only one DIMM on the motherboard. CPU Level Up Allows you to achieve the desired CPU internal frequency. If .... Auto D.O.C.P. Chapter 3 • When using DIMMs with a frequncy higher than the Intel® CPU spec, use this item to the selected CPU level. eXtreme Memory Profile ... BIOS setup Allows you install memory modules supporting the eXtreme Memory Profile (X.M.P.) Technology, choose this ASUS exclusive DRAM O.C. profile, which applies different settings to obtain a better performance after applying the ...
... and DRAM voltage. DIMM or 1600MHz DIMM, install only one DIMM on the motherboard. CPU Level Up Allows you to achieve the desired CPU internal frequency. If .... Auto D.O.C.P. Chapter 3 • When using DIMMs with a frequncy higher than the Intel® CPU spec, use this item to the selected CPU level. eXtreme Memory Profile ... BIOS setup Allows you install memory modules supporting the eXtreme Memory Profile (X.M.P.) Technology, choose this ASUS exclusive DRAM O.C. profile, which applies different settings to obtain a better performance after applying the ...

User Manual
Page 110
...overclocking, and it may cause instability. Launching and using Intel® Extreme Tuning Utility Launch IXTU by clicking Start > All Programs > Intel > Intel(R) Extreme Tuning Utility > Intel(R) Extreme Tuning Utility. To use IXTU, first set the ASUS/3rd Party UI Priority BIOS item to start overclocking or...Chapter 4 4-10 Chapter 4: Software support To use ASUS utilities (ASUS EPU, TurboV EVO, etc.), set the ASUS/3rd Party UI Priority item in the Ai Tweaker BIOS menu to [3rd Party Utility] and install IXTU from the motherboard support DVD. Main Ai Tweaker BIOS SETUP UTILITY ...
...overclocking, and it may cause instability. Launching and using Intel® Extreme Tuning Utility Launch IXTU by clicking Start > All Programs > Intel > Intel(R) Extreme Tuning Utility > Intel(R) Extreme Tuning Utility. To use IXTU, first set the ASUS/3rd Party UI Priority BIOS item to start overclocking or...Chapter 4 4-10 Chapter 4: Software support To use ASUS utilities (ASUS EPU, TurboV EVO, etc.), set the ASUS/3rd Party UI Priority item in the Ai Tweaker BIOS menu to [3rd Party Utility] and install IXTU from the motherboard support DVD. Main Ai Tweaker BIOS SETUP UTILITY ...

User Manual
Page 111
...the same work as a single drive but at a sustained data transfer rate, double that allows you have to a second drive. The Intel® Matrix Storage technology supported by using Windows® XP SP2 or later versions. • Due to configure Serial ATA hard disk ... and write data in a RAID set as a boot disk. Chapter 4 ASUS P7P55D-E EVO 4-11 The Serial ATA RAID feature is data striping and data mirroring combined without parity (redundancy data) having to the entire system. The motherboard supports the following RAID configurations: RAID 0, RAID 1, RAID 10 and RAID ...
...the same work as a single drive but at a sustained data transfer rate, double that allows you have to a second drive. The Intel® Matrix Storage technology supported by using Windows® XP SP2 or later versions. • Due to configure Serial ATA hard disk ... and write data in a RAID set as a boot disk. Chapter 4 ASUS P7P55D-E EVO 4-11 The Serial ATA RAID feature is data striping and data mirroring combined without parity (redundancy data) having to the entire system. The motherboard supports the following RAID configurations: RAID 0, RAID 1, RAID 10 and RAID ...

User Manual
Page 112
... ] 1. Reset Disks to RAID mode, all SATA ports run at RAID mode together. 4.4.4 Intel® Matrix Storage Manager option ROM utility To enter the Intel® Matrix Storage Manager option ROM utility: 1. Due to chipset limitation, when set (s) using...Intel Corporation. Install the SATA hard disks into the drive bays. 2. Save your changes, and then exit the BIOS Setup. For optimal performance, install identical drives of SATA ports to Non-RAID 4. Go to [RAID]. 4. Refer to Chapter 3 for a RAID configuration: 1. 4.4.2 Installing Serial ATA hard disks The motherboard...
... ] 1. Reset Disks to RAID mode, all SATA ports run at RAID mode together. 4.4.4 Intel® Matrix Storage Manager option ROM utility To enter the Intel® Matrix Storage Manager option ROM utility: 1. Due to chipset limitation, when set (s) using...Intel Corporation. Install the SATA hard disks into the drive bays. 2. Save your changes, and then exit the BIOS Setup. For optimal performance, install identical drives of SATA ports to Non-RAID 4. Go to [RAID]. 4. Refer to Chapter 3 for a RAID configuration: 1. 4.4.2 Installing Serial ATA hard disks The motherboard...

User Manual
Page 116
... . 8. Write-protect the floppy disk to complete the installation. 4-16 Chapter 4: Software support During the OS installation, the system prompts you select Intel(R) ICH8R/ICH9R/ICH10R/DO/PCH SATA RAID Controller. 4. party SCSI or RAID driver. 2. Follow the succeeding screen instructions to avoid a computer virus ...USB floppy disk drive and insert a floppy disk. 3. Press , and then insert the floppy disk with the RAID driver. • The motherboard does not provide a floppy drive connector. Set the optical drive as the destination disk. 6. Go to the Make Disk menu, and then click...
... . 8. Write-protect the floppy disk to complete the installation. 4-16 Chapter 4: Software support During the OS installation, the system prompts you select Intel(R) ICH8R/ICH9R/ICH10R/DO/PCH SATA RAID Controller. 4. party SCSI or RAID driver. 2. Follow the succeeding screen instructions to avoid a computer virus ...USB floppy disk drive and insert a floppy disk. 3. Press , and then insert the floppy disk with the RAID driver. • The motherboard does not provide a floppy drive connector. Set the optical drive as the destination disk. 6. Go to the Make Disk menu, and then click...


