

User Manual
Page 9
P5G41-M LX2 Series specifications summary Back panel I/O ports Internal connectors ASUS unique features BIOS Accessories Support DVD Form factor 1 x PS/2 keyboard port 1 x PS/2 mouse port 1 x COM port 1 x VGA port 1 x LAN (RJ-45) port 4 x USB 2.0/1.1 ports ... BIOS, PnP, DMI 2.0, WfM 2.0, ACPI 2.0a, SM BIOS 2.5 2 x Serial ATA cables 1 x Ultra DMA 100/66 cable 1 x I/O shield 1 x Support DVD 1 x User Manual Drivers ASUS PC Probe II ASUS Update Anti-Virus software (OEM version) MicroATX form factor: 9.6 in x 7.5 in (24.4 cm x 19.1 cm) * Specifications are subject to change without notice. ix
P5G41-M LX2 Series specifications summary Back panel I/O ports Internal connectors ASUS unique features BIOS Accessories Support DVD Form factor 1 x PS/2 keyboard port 1 x PS/2 mouse port 1 x COM port 1 x VGA port 1 x LAN (RJ-45) port 4 x USB 2.0/1.1 ports ... BIOS, PnP, DMI 2.0, WfM 2.0, ACPI 2.0a, SM BIOS 2.5 2 x Serial ATA cables 1 x Ultra DMA 100/66 cable 1 x I/O shield 1 x Support DVD 1 x User Manual Drivers ASUS PC Probe II ASUS Update Anti-Virus software (OEM version) MicroATX form factor: 9.6 in x 7.5 in (24.4 cm x 19.1 cm) * Specifications are subject to change without notice. ix
User Manual
Page 16
...cards. Keep the screw for information on the slot. 5. See Chapter 2 for later use . ASUS P5G41-M LX2 Series 1-7 Unplug the power cord before adding or removing expansion cards. Install the software drivers for the card. 2. Otherwise, conflicts will arise between the two PCI groups, making the system ... When using PCI cards on the system and change the necessary BIOS settings, if any. Turn on shared slots, ensure that the drivers support "Share IRQ" or that they support. The following sub‑sections describe the slots and the expansion cards that the cards do...
...cards. Keep the screw for information on the slot. 5. See Chapter 2 for later use . ASUS P5G41-M LX2 Series 1-7 Unplug the power cord before adding or removing expansion cards. Install the software drivers for the card. 2. Otherwise, conflicts will arise between the two PCI groups, making the system ... When using PCI cards on the system and change the necessary BIOS settings, if any. Turn on shared slots, ensure that the drivers support "Share IRQ" or that they support. The following sub‑sections describe the slots and the expansion cards that the cards do...
User Manual
Page 26
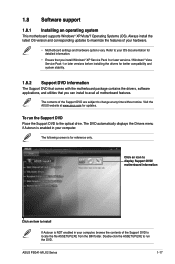
...with the motherboard package contains the drivers, software applications, and utilities that you can install to avail all motherboard features. Refer to change at www.asus.com for reference only. The contents of the Support DVD to the optical drive. ASUS P5G41-M LX2 Series 1-17 Click an icon... to display Support DVD/ motherboard information Click an item to install If Autorun is enabled in your computer. To run the DVD. The DVD automatically displays the Drivers menu if Autorun is NOT ...
...with the motherboard package contains the drivers, software applications, and utilities that you can install to avail all motherboard features. Refer to change at www.asus.com for reference only. The contents of the Support DVD to the optical drive. ASUS P5G41-M LX2 Series 1-17 Click an icon... to display Support DVD/ motherboard information Click an item to install If Autorun is enabled in your computer. To run the DVD. The DVD automatically displays the Drivers menu if Autorun is NOT ...
User Manual
Page 27
..., select the BIOS version that you to download then click Next. ASUS P5G41-M LX2 Series 2-1 Copy the original motherboard BIOS using this utility. The Drivers menu appears. 2. Select the ASUS FTP site nearest you update the BIOS using the ASUS Update utility. 2.1.1 ASUS Update utility The ASUS Update is available in the optical drive. Follow the onscreen instructions...
..., select the BIOS version that you to download then click Next. ASUS P5G41-M LX2 Series 2-1 Copy the original motherboard BIOS using this utility. The Drivers menu appears. 2. Select the ASUS FTP site nearest you update the BIOS using the ASUS Update utility. 2.1.1 ASUS Update utility The ASUS Update is available in the optical drive. Follow the onscreen instructions...


