
User Manual
Page 17
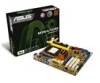
... If any of new features and latest technologies, making it , check the items in the long line of ASUS quality motherboards! ASUS M3N-H/HDMI 1-1 Thank you start installing the motherboard, and hardware devices on it another standout in your package with the list... of the above items is damaged or missing, contact your motherboard package for buying an ASUS® M3N-H/HDMI motherboard! Before you for the following items. Motherboard ASUS M3N-H/HDMI Cables 2�x�S�e�ri�a�l A�T�A�p�o�w�e�...
... If any of new features and latest technologies, making it , check the items in the long line of ASUS quality motherboards! ASUS M3N-H/HDMI 1-1 Thank you start installing the motherboard, and hardware devices on it another standout in your package with the list... of the above items is damaged or missing, contact your motherboard package for buying an ASUS® M3N-H/HDMI motherboard! Before you for the following items. Motherboard ASUS M3N-H/HDMI Cables 2�x�S�e�ri�a�l A�T�A�p�o�w�e�...

User Manual
Page 19
...ATA 3.0 Gb/s technology This motherboard supports the next-generation hard disk drives based on select GeForce GPUs. See page 2-26 for details. ASUS M3N-H/HDMI 1-3 It includes two primary features: GeForce Boost and HybridPower™. DVI (Digital Visual Interface) provides high quality visuals for more information.... for demanding 3D applications and enables low-power operation for audio/video appliances such as HD DVD and Blu-ray Discs, HDMI provides you with M3N series motherboard GPUs. You can switch from the discrete GeForce GPU(s) to -DVI conversion adaptor. See page 2-19 for ...
...ATA 3.0 Gb/s technology This motherboard supports the next-generation hard disk drives based on select GeForce GPUs. See page 2-26 for details. ASUS M3N-H/HDMI 1-3 It includes two primary features: GeForce Boost and HybridPower™. DVI (Digital Visual Interface) provides high quality visuals for more information.... for demanding 3D applications and enables low-power operation for audio/video appliances such as HD DVD and Blu-ray Discs, HDMI provides you with M3N series motherboard GPUs. You can switch from the discrete GeForce GPU(s) to -DVI conversion adaptor. See page 2-19 for ...

User Manual
Page 21
...without preparing a bootable diskette or using an OS-based flash utility. ASUS M3N-H/HDMI 1-5 With better electric conductivity, it ideally protects your motherboard against Electronic Magnetic Interference (EMI). ASUS Q-Connector ASUS Q-Connector allows you easy ways to launch the utility and update the... detects repetitive and stationary noises (non-voice signals) like Skype, online game, video conference and recording. ASUS Q-Shield The specially designed ASUS Q-Shield does without entering the OS. making it convenient and easy to ensure quiet, cool and efficient ...
...without preparing a bootable diskette or using an OS-based flash utility. ASUS M3N-H/HDMI 1-5 With better electric conductivity, it ideally protects your motherboard against Electronic Magnetic Interference (EMI). ASUS Q-Connector ASUS Q-Connector allows you easy ways to launch the utility and update the... detects repetitive and stationary noises (non-voice signals) like Skype, online game, video conference and recording. ASUS Q-Shield The specially designed ASUS Q-Shield does without entering the OS. making it convenient and easy to ensure quiet, cool and efficient ...

User Manual
Page 24
Chapter summary 2 2.1 Before you proceed 2-1 2.2 Motherboard overview 2-2 2.3 Central Processing Unit (CPU 2-6 2.4 System memory 2-11 2.5 Expansion slots 2-17 2.6 Jumper 2-20 2.7 Connectors 2-21 ASUS M3N-H/HDMI
Chapter summary 2 2.1 Before you proceed 2-1 2.2 Motherboard overview 2-2 2.3 Central Processing Unit (CPU 2-6 2.4 System memory 2-11 2.5 Expansion slots 2-17 2.6 Jumper 2-20 2.7 Connectors 2-21 ASUS M3N-H/HDMI

User Manual
Page 25
... mode. 2.1 Before you proceed Take note of the onboard LED. Failure to do so may cause severe damage to the motherboard, peripherals, and/or components. M3N-H/HDMI ® M3N-H/HDMI Onboard LED SB_PWR ON OFF Standy Power Powered Off ASUS M3N-H/HDMI 2-1
... mode. 2.1 Before you proceed Take note of the onboard LED. Failure to do so may cause severe damage to the motherboard, peripherals, and/or components. M3N-H/HDMI ® M3N-H/HDMI Onboard LED SB_PWR ON OFF Standy Power Powered Off ASUS M3N-H/HDMI 2-1

User Manual
Page 27
30.5cm (12.0in) 2.2.3 Motherboard layout 24.5cm (9.6in) KB_USB56 ATX12V CPU_FAN SPDIF_O1 HDMI PWR_FAN SOCKET AM2 DDR DIMM_A1 (64bit, 240-pin module) DDR DIMM_B1 (64bit, 240-pin module) DDR DIMM_A2 (64bit, 240-pin module) DDR ... F_USB34 LAN1_USB12 AUDIO EATXPWR SATA5 SATA6 Attansic F1 CHA_FAN1 PCIEX1_1 nVidia® GeForce 8300 SATA2 SATA4 SATA3 SATA1 PRI_IDE CD ALC883 AAFP SPDIF_OUT PCIEX16_1 M3N-H/HDMI PCI1 VGA PCIEX1_2 PCI2 PCI3 BIOS ® agere L-FW3227 Super I/O SB_PWR CHASSIS CLRTC Lithium Cell CMOS Power FLOPPY COM1 IE1394_2 USB78 USB910 USB1112...
30.5cm (12.0in) 2.2.3 Motherboard layout 24.5cm (9.6in) KB_USB56 ATX12V CPU_FAN SPDIF_O1 HDMI PWR_FAN SOCKET AM2 DDR DIMM_A1 (64bit, 240-pin module) DDR DIMM_B1 (64bit, 240-pin module) DDR DIMM_A2 (64bit, 240-pin module) DDR ... F_USB34 LAN1_USB12 AUDIO EATXPWR SATA5 SATA6 Attansic F1 CHA_FAN1 PCIEX1_1 nVidia® GeForce 8300 SATA2 SATA4 SATA3 SATA1 PRI_IDE CD ALC883 AAFP SPDIF_OUT PCIEX16_1 M3N-H/HDMI PCI1 VGA PCIEX1_2 PCI2 PCI3 BIOS ® agere L-FW3227 Super I/O SB_PWR CHASSIS CLRTC Lithium Cell CMOS Power FLOPPY COM1 IE1394_2 USB78 USB910 USB1112...

User Manual
Page 31
3. When the CPU is locked. 6. The lever clicks on the side tab to indicate that it fits in place, push down the socket lever to secure the CPU. Gold triangle Small triangle 5. Install a CPU heatsink and fan following the instructions that the CPU corner with the gold triangle matches the socket corner with the heatsink package. Position the CPU above the socket such that came with a small triangle. 4. Carefully insert the CPU into the socket until it is in place. ASUS M3N-H/HDMI 2-7
3. When the CPU is locked. 6. The lever clicks on the side tab to indicate that it fits in place, push down the socket lever to secure the CPU. Gold triangle Small triangle 5. Install a CPU heatsink and fan following the instructions that the CPU corner with the gold triangle matches the socket corner with the heatsink package. Position the CPU above the socket such that came with a small triangle. 4. Carefully insert the CPU into the socket until it is in place. ASUS M3N-H/HDMI 2-7

User Manual
Page 33
A clicking sound denotes that the fan and heatsink assembly perfectly fits the retention mechanism module base, otherwise you cannot snap the retention bracket in place. ASUS M3N-H/HDMI 2-9 Attach one end of the retention bracket (near the retention bracket lock) to the retention module base. Align the other end of the retention bracket to the module base. Make sure that the retention bracket is in place. 4. Push down the retention bracket lock on the retention mechanism to secure the heatsink and fan to the retention module base. 3. 2.
A clicking sound denotes that the fan and heatsink assembly perfectly fits the retention mechanism module base, otherwise you cannot snap the retention bracket in place. ASUS M3N-H/HDMI 2-9 Attach one end of the retention bracket (near the retention bracket lock) to the retention module base. Align the other end of the retention bracket to the module base. Make sure that the retention bracket is in place. 4. Push down the retention bracket lock on the retention mechanism to secure the heatsink and fan to the retention module base. 3. 2.

User Manual
Page 35
2.4 System memory 2.4.1 Overview The motherboard comes with four Double Data Rate 2 (DDR2) Dual Inline Memory Modules (DIMM) sockets. The figure illustrates the location of the DDR2 DIMM sockets: M3N-H/HDMI ® M3N-H/HDMI 240-pin DDR2 DIMM sockets Channel Channel A Channel B Sockets DIMM_A1 and DIMM_A2 DIMM_B1 and DIMM_B2 ASUS M3N-H/HDMI 2-11
2.4 System memory 2.4.1 Overview The motherboard comes with four Double Data Rate 2 (DDR2) Dual Inline Memory Modules (DIMM) sockets. The figure illustrates the location of the DDR2 DIMM sockets: M3N-H/HDMI ® M3N-H/HDMI 240-pin DDR2 DIMM sockets Channel Channel A Channel B Sockets DIMM_A1 and DIMM_A2 DIMM_B1 and DIMM_B2 ASUS M3N-H/HDMI 2-11

User Manual
Page 39
Side(s): SS - Visit the ASUS website for the latest QVL. Double-sided DIMM support: • A*: Supports one module inserted into either slot as Single-channel memory configuration. • B*: Supports two modules inserted into either the yellow slots or the black slots as one pair of Dual-channel memory configuration. • C*: Supports four modules inserted into both the yellow slots and the black slots as two pairs of Dual-channel memory configuration. ASUS M3N-H/HDMI 2-15 Single-sided DS -
Side(s): SS - Visit the ASUS website for the latest QVL. Double-sided DIMM support: • A*: Supports one module inserted into either slot as Single-channel memory configuration. • B*: Supports two modules inserted into either the yellow slots or the black slots as one pair of Dual-channel memory configuration. • C*: Supports four modules inserted into both the yellow slots and the black slots as two pairs of Dual-channel memory configuration. ASUS M3N-H/HDMI 2-15 Single-sided DS -

User Manual
Page 41
... the system cover. 2.5.2 Configuring an expansion card After installing the expansion card, configure the it and make the necessary hardware settings for the expansion card. ASUS M3N-H/HDMI 2-17 Before installing the expansion card, read the documentation that you intend to the chassis with the slot and press firmly until the card is...
... the system cover. 2.5.2 Configuring an expansion card After installing the expansion card, configure the it and make the necessary hardware settings for the expansion card. ASUS M3N-H/HDMI 2-17 Before installing the expansion card, read the documentation that you intend to the chassis with the slot and press firmly until the card is...

User Manual
Page 43
... under Hybrid SLI™ mode. • Use only the onboard HDMI/DVI/D-Sub port for video signal output when activating the Hybird Power function under Hybrid SLI™ mode. • Visit www.nvidia.com/hybridsli for the location of the slot. ASUS M3N-H/HDMI 2-19 2.5.6 PCI Express 2.0 x16 slot This motherboard supports PCI Express...
... under Hybrid SLI™ mode. • Use only the onboard HDMI/DVI/D-Sub port for video signal output when activating the Hybird Power function under Hybrid SLI™ mode. • Visit www.nvidia.com/hybridsli for the location of the slot. ASUS M3N-H/HDMI 2-19 2.5.6 PCI Express 2.0 x16 slot This motherboard supports PCI Express...

User Manual
Page 45
... next page for the LAN port LED indications. This port connects the rear speakers in an 8-channel audio configuration. This port connects a headphone or a speaker. ASUS M3N-H/HDMI 2-21
... next page for the LAN port LED indications. This port connects the rear speakers in an 8-channel audio configuration. This port connects a headphone or a speaker. ASUS M3N-H/HDMI 2-21

User Manual
Page 47
... or the desktop or image is not filling the entire display area while using the onboard HDMI out port and the HDMI cable, you are using an HDTV compliance resolution such as 480i, 720i, or 1080i. ASUS M3N-H/HDMI 2-23 To resize your HDTV desktop: 1. Select Resize my desktop and click Resize Desktop. 5. Under Video...
... or the desktop or image is not filling the entire display area while using the onboard HDMI out port and the HDMI cable, you are using an HDTV compliance resolution such as 480i, 720i, or 1080i. ASUS M3N-H/HDMI 2-23 To resize your HDTV desktop: 1. Select Resize my desktop and click Resize Desktop. 5. Under Video...

User Manual
Page 49
M3N-H/HDMI ® PRI_IDE NOTE:Orient the red markings on the Ultra DMA cable connector. Master Slave Master Slave Cable connector ... IDE ribbon cable to PIN 1. If any device jumper is for Ultra DMA 133/100/66/33 IDE devices. ASUS M3N-H/HDMI 2-25 There are three connectors on each Ultra DMA 133/100/66/33 signal cable: blue, black, and gray. PIN1... M3N-H/HDMI IDE connector Single device Two devices Drive jumper setting Cable-Select or Master Cable-Select Master Slave Mode of the ...
M3N-H/HDMI ® PRI_IDE NOTE:Orient the red markings on the Ultra DMA cable connector. Master Slave Master Slave Cable connector ... IDE ribbon cable to PIN 1. If any device jumper is for Ultra DMA 133/100/66/33 IDE devices. ASUS M3N-H/HDMI 2-25 There are three connectors on each Ultra DMA 133/100/66/33 signal cable: blue, black, and gray. PIN1... M3N-H/HDMI IDE connector Single device Two devices Drive jumper setting Cable-Select or Master Cable-Select Master Slave Mode of the ...

User Manual
Page 51
... connect a 1394 cable to 480 Mbps connection speed. USB connectors (10-1 pin USB 78, USB910, USB1112) These connectors are for USB 2.0 ports. ASUS M3N-H/HDMI 2-27 Doing so will damage the motherboard! The USB module is purchased separately. Connect the USB module cable to any of the system chassis. You ...can connect the front panel USB cable to the ASUS Q-Connector (USB, blue) first, and then install the Q-Connector (USB) to a slot opening at the back of these connectors, then install the...
... connect a 1394 cable to 480 Mbps connection speed. USB connectors (10-1 pin USB 78, USB910, USB1112) These connectors are for USB 2.0 ports. ASUS M3N-H/HDMI 2-27 Doing so will damage the motherboard! The USB module is purchased separately. Connect the USB module cable to any of the system chassis. You ...can connect the front panel USB cable to the ASUS Q-Connector (USB, blue) first, and then install the Q-Connector (USB) to a slot opening at the back of these connectors, then install the...

User Manual
Page 53
... the motherboard components. CPU_FAN PWR_FAN CPU FAN PWM CPU FAN IN CPU FAN PWR GND Rotation +12V GND M3N-H/HDMI ® CHA_FAN1 GND +12V Rotation M3N-H/HDMI Fan connectors Only the CPU_FAN and CHA_FAN 1 connectors support the ASUS Q FAN2 feature. These are not jumpers! Do not place jumper caps on the motherboard, making sure that...
... the motherboard components. CPU_FAN PWR_FAN CPU FAN PWM CPU FAN IN CPU FAN PWR GND Rotation +12V GND M3N-H/HDMI ® CHA_FAN1 GND +12V Rotation M3N-H/HDMI Fan connectors Only the CPU_FAN and CHA_FAN 1 connectors support the ASUS Q FAN2 feature. These are not jumpers! Do not place jumper caps on the motherboard, making sure that...

User Manual
Page 55
...ATX power supply plugs. Find the proper orientation and push down firmly until the connectors completely fit. ATX12V +12V DC +12V DC PIN 1 GND GND M3N-H/HDMI ® M3N-H/HDMI ATX power connectors EATXPWR +3 Volts +12 Volts +12 Volts +5V Standby Power OK GND +5 Volts GND +5 Volts GND +3 Volts +3 Volts PIN 1... MB DDR2-800 (x4) Graphics card: PCI Express x16 NVIDIA 7900GTX Serial ATA device: SATA hard disk drive (x2) Optical drives: DVD-RW ASUS M3N-H/HDMI 2-31 The power supply plugs are designed to connect the 4-pin ATX +12 V power plug; otherwise, the system will not boot. •...
...ATX power supply plugs. Find the proper orientation and push down firmly until the connectors completely fit. ATX12V +12V DC +12V DC PIN 1 GND GND M3N-H/HDMI ® M3N-H/HDMI ATX power connectors EATXPWR +3 Volts +12 Volts +12 Volts +5V Standby Power OK GND +5 Volts GND +5 Volts GND +3 Volts +3 Volts PIN 1... MB DDR2-800 (x4) Graphics card: PCI Express x16 NVIDIA 7900GTX Serial ATA device: SATA hard disk drive (x2) Optical drives: DVD-RW ASUS M3N-H/HDMI 2-31 The power supply plugs are designed to connect the 4-pin ATX +12 V power plug; otherwise, the system will not boot. •...

User Manual
Page 57
... Left Audio Channel GND GND Right Audio Channel 11. ASUS M3N-H/HDMI 2-33 Connect the serial port module cable to this connector, then install the module to receive stereo audio input from sound sources such as a CD-ROM, TV tuner, or MPEG card. COM1 M3N-H/HDMI ® M3N-H/HDMI Serial port (COM1) connector The COM module is...
... Left Audio Channel GND GND Right Audio Channel 11. ASUS M3N-H/HDMI 2-33 Connect the serial port module cable to this connector, then install the module to receive stereo audio input from sound sources such as a CD-ROM, TV tuner, or MPEG card. COM1 M3N-H/HDMI ® M3N-H/HDMI Serial port (COM1) connector The COM module is...

User Manual
Page 59
...LED cable to this connector. The speaker allows you turn on the BIOS settings. 14. PWR Ground Reset Ground M3N-H/HDMI System panel connector IDE_LED PWRSW RESET * Requires an ATX power supply • System power LED (2-pin PLED)...is for the chassis-mounted reset button for the HDD Activity LED. PLED SPEAKER PLED+ PLED+5V Ground Ground Speaker M3N-H/HDMI ® PANEL PIN 1 IDE_LED+ IDE_LED- Pressing the power switch for more than four seconds while the system is ... button (2-pin PWRSR) This connector is for the chassis-mounted system warning speaker. ASUS M3N-H/HDMI 2-35
...LED cable to this connector. The speaker allows you turn on the BIOS settings. 14. PWR Ground Reset Ground M3N-H/HDMI System panel connector IDE_LED PWRSW RESET * Requires an ATX power supply • System power LED (2-pin PLED)...is for the chassis-mounted reset button for the HDD Activity LED. PLED SPEAKER PLED+ PLED+5V Ground Ground Speaker M3N-H/HDMI ® PANEL PIN 1 IDE_LED+ IDE_LED- Pressing the power switch for more than four seconds while the system is ... button (2-pin PWRSR) This connector is for the chassis-mounted system warning speaker. ASUS M3N-H/HDMI 2-35


