

Service Guide
Page 3
General Information Overview Some key features that distinguish this computer from earlier PowerBook models include: • New aluminum alloy enclosure • Built-in Bluetooth • Built-in FireWire 800 port • Supports USB 2.0 • Uses double-data rate (DDR) memory • Optional AirPort Extreme card • Optional fiber optic backlit keyboard with ambient light sensors • New battery pack General Information PowerBook G4 (15-inch FW800) Take Apart - 1
General Information Overview Some key features that distinguish this computer from earlier PowerBook models include: • New aluminum alloy enclosure • Built-in Bluetooth • Built-in FireWire 800 port • Supports USB 2.0 • Uses double-data rate (DDR) memory • Optional AirPort Extreme card • Optional fiber optic backlit keyboard with ambient light sensors • New battery pack General Information PowerBook G4 (15-inch FW800) Take Apart - 1
Service Guide
Page 4
...8226; Memory from the previous 15-inch PowerBook is easily installed or replaced through a door in the main battery compartment. • The quantity and types...; tape (922-1731) • Voltmeter (for troubleshooting) • Small low-power magnet (for troubleshooting) • Apple Pro keyboard and mouse (for the take apart procedures. • ESD wrist strap and mat • Soft cloth &#.... Carefully lift the top case to avoid pulling these connectors off the top case. - PowerBook G4 (15-inch FW800) Take Apart General Information New Procedures If you are familiar with taking apart...
...8226; Memory from the previous 15-inch PowerBook is easily installed or replaced through a door in the main battery compartment. • The quantity and types...; tape (922-1731) • Voltmeter (for troubleshooting) • Small low-power magnet (for troubleshooting) • Apple Pro keyboard and mouse (for the take apart procedures. • ESD wrist strap and mat • Soft cloth &#.... Carefully lift the top case to avoid pulling these connectors off the top case. - PowerBook G4 (15-inch FW800) Take Apart General Information New Procedures If you are familiar with taking apart...

Service Guide
Page 5
General Information PowerBook G4 (15-inch FW800) Take Apart - 3 Serial Number Location The serial number is located in the battery bay.
General Information PowerBook G4 (15-inch FW800) Take Apart - 3 Serial Number Location The serial number is located in the battery bay.
Service Guide
Page 9
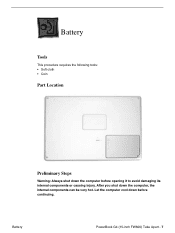
Let the computer cool down before opening it to avoid damaging its internal components or causing injury. Battery PowerBook G4 (15-inch FW800) Take Apart - 7 Battery Tools This procedure requires the following tools: • Soft cloth • Coin Part Location Preliminary Steps Warning: Always shut down the computer before continuing. After you shut down the computer, the internal components can be very hot.
Let the computer cool down before opening it to avoid damaging its internal components or causing injury. Battery PowerBook G4 (15-inch FW800) Take Apart - 7 Battery Tools This procedure requires the following tools: • Soft cloth • Coin Part Location Preliminary Steps Warning: Always shut down the computer before continuing. After you shut down the computer, the internal components can be very hot.
Service Guide
Page 10
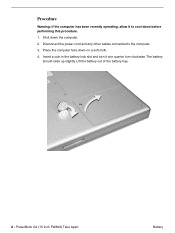
Shut down on a soft cloth. 4. The battery should raise up slightly. Lift the battery out of the battery bay. 8 - Disconnect the power cord and any other cables connected to cool down before performing this procedure. 1. Insert a coin in the battery lock slot and turn clockwise. PowerBook G4 (15-inch FW800) Take Apart Battery Place the computer face down the computer. 2. Procedure Warning: If the computer has been recently operating, allow it one quarter turn it to the computer. 3.
Shut down on a soft cloth. 4. The battery should raise up slightly. Lift the battery out of the battery bay. 8 - Disconnect the power cord and any other cables connected to cool down before performing this procedure. 1. Insert a coin in the battery lock slot and turn clockwise. PowerBook G4 (15-inch FW800) Take Apart Battery Place the computer face down the computer. 2. Procedure Warning: If the computer has been recently operating, allow it one quarter turn it to the computer. 3.

Service Guide
Page 11
Memory Door and Memory Cards PowerBook G4 (15-inch FW800) Take Apart - 9 Memory Door and Memory Cards Tools This procedure requires the following tools: • Soft cloth • #0 Phillips screwdriver Part Location Preliminary Steps Before you begin, remove the battery.
Memory Door and Memory Cards PowerBook G4 (15-inch FW800) Take Apart - 9 Memory Door and Memory Cards Tools This procedure requires the following tools: • Soft cloth • #0 Phillips screwdriver Part Location Preliminary Steps Before you begin, remove the battery.

Service Guide
Page 17
Use Apple System Profiler to verify that the memory is recognized. (Choose the menu bar Apple logo () > About This Mac, click More Info..., select the System Profile tab, open the Memory Overview.) Memory Door and Memory Cards PowerBook G4 (15-inch FW800) Take Apart - 15 Replace the battery. 10. 7. Install the memory door. 9. Cards should be flat and secure on both sides. 8.
Use Apple System Profiler to verify that the memory is recognized. (Choose the menu bar Apple logo () > About This Mac, click More Info..., select the System Profile tab, open the Memory Overview.) Memory Door and Memory Cards PowerBook G4 (15-inch FW800) Take Apart - 15 Replace the battery. 10. 7. Install the memory door. 9. Cards should be flat and secure on both sides. 8.
Service Guide
Page 18
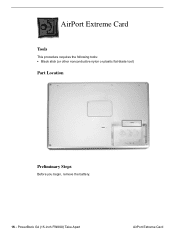
PowerBook G4 (15-inch FW800) Take Apart AirPort Extreme Card AirPort Extreme Card Tools This procedure requires the following tools: • Black stick (or other nonconductive nylon or plastic flat-blade tool) Part Location Preliminary Steps Before you begin, remove the battery. 16 -
PowerBook G4 (15-inch FW800) Take Apart AirPort Extreme Card AirPort Extreme Card Tools This procedure requires the following tools: • Black stick (or other nonconductive nylon or plastic flat-blade tool) Part Location Preliminary Steps Before you begin, remove the battery. 16 -
Service Guide
Page 25
Remove the two screws inside the battery bay. 3. Remove the four screws along the back edge. Top Case PowerBook G4 (15-inch FW800) Take Apart - 23 Place the computer face down on a soft cloth. 2. Remove the two screws from the memory bay. 4. The keyboard is removable only after removing the top case. 1. Preliminary Steps Before you begin, remove the following: • Battery • Memory door Procedure Note: This procedure removes the top case and keyboard assembly.
Remove the two screws inside the battery bay. 3. Remove the four screws along the back edge. Top Case PowerBook G4 (15-inch FW800) Take Apart - 23 Place the computer face down on a soft cloth. 2. Remove the two screws from the memory bay. 4. The keyboard is removable only after removing the top case. 1. Preliminary Steps Before you begin, remove the following: • Battery • Memory door Procedure Note: This procedure removes the top case and keyboard assembly.
Service Guide
Page 36
11. Replace the battery. 16. Install the memory door and four screws. 14. If the computer has the optional keyboard backlight feature, operate the computer in the battery bay. 15. PowerBook G4 (15-inch FW800) Take Apart Top Case Install the two screw in a darkened room to check for keyboard backlight function. 34 - Install the two screws in the memory bay. 13. Testing the computer should include powering on, checking the keyboard and trackpad function. Close the computer, flip it over, and install the four back screws. 12.
11. Replace the battery. 16. Install the memory door and four screws. 14. If the computer has the optional keyboard backlight feature, operate the computer in the battery bay. 15. PowerBook G4 (15-inch FW800) Take Apart Top Case Install the two screw in a darkened room to check for keyboard backlight function. 34 - Install the two screws in the memory bay. 13. Testing the computer should include powering on, checking the keyboard and trackpad function. Close the computer, flip it over, and install the four back screws. 12.

Service Guide
Page 37
Keyboard Tools This procedure requires the following tools: • #0 Phillips screwdriver • Black stick (or other nonconductive nylon or plastic flat-blade tool) Part Location Preliminary Steps Before you begin, remove the following: • Battery • Top case Keyboard PowerBook G4 (15-inch FW800) Take Apart - 35
Keyboard Tools This procedure requires the following tools: • #0 Phillips screwdriver • Black stick (or other nonconductive nylon or plastic flat-blade tool) Part Location Preliminary Steps Before you begin, remove the following: • Battery • Top case Keyboard PowerBook G4 (15-inch FW800) Take Apart - 35

Service Guide
Page 46
PowerBook G4 (15-inch FW800) Take Apart Backup Battery Backup Battery Tools This procedure requires the following tools: • Black stick (or other nonconductive nylon or plastic flat-blade tool) Part Location Preliminary Steps Before you begin, remove the following: • Battery • Top case 44 -
PowerBook G4 (15-inch FW800) Take Apart Backup Battery Backup Battery Tools This procedure requires the following tools: • Black stick (or other nonconductive nylon or plastic flat-blade tool) Part Location Preliminary Steps Before you begin, remove the following: • Battery • Top case 44 -

Service Guide
Page 47
Procedure 1. Note: The backup battery is held down by double-backed tape adhesive on its cover. Use a black stick to release the adhesive holding the backup battery to the optical drive then disconnect the backup battery cable. Backup Battery PowerBook G4 (15-inch FW800) Take Apart - 45
Procedure 1. Note: The backup battery is held down by double-backed tape adhesive on its cover. Use a black stick to release the adhesive holding the backup battery to the optical drive then disconnect the backup battery cable. Backup Battery PowerBook G4 (15-inch FW800) Take Apart - 45

Service Guide
Page 48
Replacement Procedure 1. Remove any protective adhesive cover on the top case over the backup battery may cause damage. 46 - PowerBook G4 (15-inch FW800) Take Apart Backup Battery Notice the curve of the metal bracket along the right edge of the optical drive. Important: If the backup battery is not positioned correctly, sharp edges on the replacement backup battery. 3. Position the backup battery precisely as shown. Connect the backup battery cable to the backup battery and to the logic board. 2.
Replacement Procedure 1. Remove any protective adhesive cover on the top case over the backup battery may cause damage. 46 - PowerBook G4 (15-inch FW800) Take Apart Backup Battery Notice the curve of the metal bracket along the right edge of the optical drive. Important: If the backup battery is not positioned correctly, sharp edges on the replacement backup battery. 3. Position the backup battery precisely as shown. Connect the backup battery cable to the backup battery and to the logic board. 2.

Service Guide
Page 49
Testing the computer should not reset. Backup Battery PowerBook G4 (15-inch FW800) Take Apart - 47 Then power on the computer and disconnect the power adapter, set the system clock, put the computer to the optical drive. 5. 4. Press where shown to secure the backup battery to sleep, remove the main battery for half an hour. The date and time should include plugging in the power adapter and letting the backup battery charge for five seconds and reinstall. Also, insert an optical disc to verify that the optical drive functions properly. Reassemble the computer. 6.
Testing the computer should not reset. Backup Battery PowerBook G4 (15-inch FW800) Take Apart - 47 Then power on the computer and disconnect the power adapter, set the system clock, put the computer to the optical drive. 5. 4. Press where shown to secure the backup battery to sleep, remove the main battery for half an hour. The date and time should include plugging in the power adapter and letting the backup battery charge for five seconds and reinstall. Also, insert an optical disc to verify that the optical drive functions properly. Reassemble the computer. 6.

Service Guide
Page 50
Optical Drive Tools This procedure requires the following tools: • #0 Phillips screwdriver (magnetized) • Thin double-back tape (if the backup battery will not re-stick securely) • Black stick (or other nonconductive nylon or plastic flat-blade tool) Part Location Preliminary Steps Before you begin, remove the following: • Battery • Top case • Backup battery 48 - PowerBook G4 (15-inch FW800) Take Apart Optical Drive
Optical Drive Tools This procedure requires the following tools: • #0 Phillips screwdriver (magnetized) • Thin double-back tape (if the backup battery will not re-stick securely) • Black stick (or other nonconductive nylon or plastic flat-blade tool) Part Location Preliminary Steps Before you begin, remove the following: • Battery • Top case • Backup battery 48 - PowerBook G4 (15-inch FW800) Take Apart Optical Drive

Service Guide
Page 54
... connector to sleep, remove the main battery for half an hour. Then power on , inserting an optical disc and ejecting it to make sure the drive is aligned with the opening and functioning properly. Testing the computer should not reset. 52 - PowerBook G4 (15-inch FW800) Take Apart Optical... Drive The date and time should include powering on the computer and disconnect the power adapter, set the system clock, put the computer to the logic board. 9. Test the backup battery by plugging in the power adapter...
... connector to sleep, remove the main battery for half an hour. Then power on , inserting an optical disc and ejecting it to make sure the drive is aligned with the opening and functioning properly. Testing the computer should not reset. 52 - PowerBook G4 (15-inch FW800) Take Apart Optical... Drive The date and time should include powering on the computer and disconnect the power adapter, set the system clock, put the computer to the logic board. 9. Test the backup battery by plugging in the power adapter...

Service Guide
Page 55
Hard Drive Tools This procedure requires the following tools: • #0 Phillips screwdriver (magnetized) • Black stick (or other nonconductive nylon or plastic flat-blade tool) Part Location Preliminary Steps Before you begin, remove the following: • Battery • Top case Hard Drive PowerBook G4 (15-inch FW800) Take Apart - 53
Hard Drive Tools This procedure requires the following tools: • #0 Phillips screwdriver (magnetized) • Black stick (or other nonconductive nylon or plastic flat-blade tool) Part Location Preliminary Steps Before you begin, remove the following: • Battery • Top case Hard Drive PowerBook G4 (15-inch FW800) Take Apart - 53

Service Guide
Page 59
Modem Tools This procedure requires the following tools: • #0 Phillips screwdriver (magnetized) • Black stick (or other nonconductive nylon or plastic flat-blade tool) Part Location Preliminary Steps Before you begin, remove the following: • Battery • Top case • Hard drive Modem PowerBook G4 (15-inch FW800) Take Apart - 57
Modem Tools This procedure requires the following tools: • #0 Phillips screwdriver (magnetized) • Black stick (or other nonconductive nylon or plastic flat-blade tool) Part Location Preliminary Steps Before you begin, remove the following: • Battery • Top case • Hard drive Modem PowerBook G4 (15-inch FW800) Take Apart - 57

Service Guide
Page 62
3. Check that the modem cable is interfering with its rotation. 60 - Position the modem over the pin and align the screw holes, then press down over the flex connector location to the cable. 4. Reassemble and test the modem. Note: If the modem will not seat on the flex connector, remove the optical drive to gain access to connect the cable. Check the battery latch to make sure nothing is still secured to the modem. 5. PowerBook G4 (15-inch FW800) Take Apart Modem
3. Check that the modem cable is interfering with its rotation. 60 - Position the modem over the pin and align the screw holes, then press down over the flex connector location to the cable. 4. Reassemble and test the modem. Note: If the modem will not seat on the flex connector, remove the optical drive to gain access to connect the cable. Check the battery latch to make sure nothing is still secured to the modem. 5. PowerBook G4 (15-inch FW800) Take Apart Modem

