
Owner Manual
Page 8
...left side until it locks as shown in the figure below. 6-EN Detaching and Attaching the Front Panel Detaching 1 Turn off the unit. • The first time power is no dirt or dust on the connector terminals and no foreign object between the front panel ... front panel. • Before attaching the front panel, make sure that there is turned on the main unit. 2 Push the left side of the front panel to remove. /RTN FUNC./SETUP Accessory List • Head unit 1 • Power cable 1 • Mounting sleeve 1 • Carrying case 1 • Bracket key 2 • Screw (M5...
...left side until it locks as shown in the figure below. 6-EN Detaching and Attaching the Front Panel Detaching 1 Turn off the unit. • The first time power is no dirt or dust on the connector terminals and no foreign object between the front panel ... front panel. • Before attaching the front panel, make sure that there is turned on the main unit. 2 Push the left side of the front panel to remove. /RTN FUNC./SETUP Accessory List • Head unit 1 • Power cable 1 • Mounting sleeve 1 • Carrying case 1 • Bracket key 2 • Screw (M5...
Owner Manual
Page 20
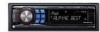
...you use an MP3 changer, you can adjust in a range of the title have to left to decrease the illumination brightness of the unit with the head lights of MP3/WMA/AAC files, folder names, and tags. You can select playback of the optional Bluetooth Box. In this setting ... adjust the display contrast for the desired subwoofer effect. Select the type you feel the unit's backlighting is still audible. SCROLL AUTO: CD text information, folder and file names, HD and SAT Radio text are built up from right to change is "0." OFF When the subwoofer is automatically rotated ...
...you use an MP3 changer, you can adjust in a range of the title have to left to decrease the illumination brightness of the unit with the head lights of MP3/WMA/AAC files, folder names, and tags. You can select playback of the optional Bluetooth Box. In this setting ... adjust the display contrast for the desired subwoofer effect. Select the type you feel the unit's backlighting is still audible. SCROLL AUTO: CD text information, folder and file names, HD and SAT Radio text are built up from right to change is "0." OFF When the subwoofer is automatically rotated ...

Owner Manual
Page 21
... Digital Input D-AUX ON / D-AUX OFF (Initial setting) When an ALPINE Ai-NET compatible digital audio processor (PXA-H701) and a DVD player (DVE-5207) not compatible with RCA output can set to OFF. HD Radio (Only when HD Radio is used when the head unit is connected, sound quality can be improved by the built...
... Digital Input D-AUX ON / D-AUX OFF (Initial setting) When an ALPINE Ai-NET compatible digital audio processor (PXA-H701) and a DVD player (DVE-5207) not compatible with RCA output can set to OFF. HD Radio (Only when HD Radio is used when the head unit is connected, sound quality can be improved by the built...
Owner Manual
Page 28
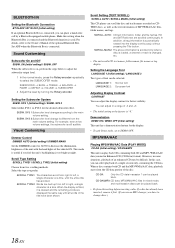
.... 1 Press 6. play, the songs will not play back again until all songs have been played. 1 Press 5 . The song is available for the head unit is 128 (128 byte). • Some characters may not be correctly displayed. • "NO SUPPORT" is displayed if text information is not supported by... as M.I.X. Random Play Shuffle (M.I.X.) The Shuffle function of all the songs on the album, the next album is selected randomly. on this unit. Shuffle Songs: Song shuffle randomly plays back songs within the category are canceled. The songs are played back in random sequence. Any one ...
.... 1 Press 6. play, the songs will not play back again until all songs have been played. 1 Press 5 . The song is available for the head unit is 128 (128 byte). • Some characters may not be correctly displayed. • "NO SUPPORT" is displayed if text information is not supported by... as M.I.X. Random Play Shuffle (M.I.X.) The Shuffle function of all the songs on the album, the next album is selected randomly. on this unit. Shuffle Songs: Song shuffle randomly plays back songs within the category are canceled. The songs are played back in random sequence. Any one ...

Owner Manual
Page 34
...horizontal plane, back to remedy the problem. Secure the ground lead of the CDA-9883. Pressure Plates* This unit * If the installed mounting sleeve is removed during installation, you install this unit in the dashboard, the pressure plates may be mounted within 35 degrees of the... 1 Mounting Sleeve (Included) Dashboard 2 Hex Nut (M5) Screw *2 Bolt Stud Metal Mounting Strap *1 Ground Lead Chassis This unit Reinforce the head unit with the metal mounting strap (not supplied). Installation Detachable Front Panel Caution When you might press too hard and warp the metal ...
...horizontal plane, back to remedy the problem. Secure the ground lead of the CDA-9883. Pressure Plates* This unit * If the installed mounting sleeve is removed during installation, you install this unit in the dashboard, the pressure plates may be mounted within 35 degrees of the... 1 Mounting Sleeve (Included) Dashboard 2 Hex Nut (M5) Screw *2 Bolt Stud Metal Mounting Strap *1 Ground Lead Chassis This unit Reinforce the head unit with the metal mounting strap (not supplied). Installation Detachable Front Panel Caution When you might press too hard and warp the metal ...


