Owners Manual
Page 18
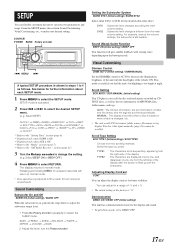
...BAND Rotary encoder g MENU f A typical SETUP procedure is ON. *4 Refer to the "Radio" section (page 7) *5 Refer to the "SAT Radio Receiver" section (page 21) 3 Turn the Rotary encoder to select the SUBW mode. Select ...type you feel the unit's backlighting is changed, etc. • The unit scrolls CD text names, folder names, file names or tag display. SETUP You can flexibly customize the unit to normal mode.... 5. • The initial setting at least 2 seconds will give audible feedback with the head lights of folder and file names, and the tags are displayed one by one, and disappear one ...
...BAND Rotary encoder g MENU f A typical SETUP procedure is ON. *4 Refer to the "Radio" section (page 7) *5 Refer to the "SAT Radio Receiver" section (page 21) 3 Turn the Rotary encoder to select the SUBW mode. Select ...type you feel the unit's backlighting is changed, etc. • The unit scrolls CD text names, folder names, file names or tag display. SETUP You can flexibly customize the unit to normal mode.... 5. • The initial setting at least 2 seconds will give audible feedback with the head lights of folder and file names, and the tags are displayed one by one, and disappear one ...
Owners Manual
Page 19
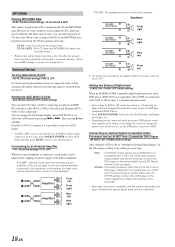
... have to another one. CD-DA : Only CD data can be connected. ... power supply of the unit are driven by connecting an...Head unit) terminal of the processor. • After input selection is received from the CD data portion of the processor. When a disc contains both CD and MP3/WMA data. CD-DA & MP3 : Both CD... player to this setting, the head unit's internal amplifier has no output ...18-EN Setting of CD data only. If a...CD-DA (Initial setting) / PLAY CD-DA & MP3 This product can playback CDs containing both CD... in some situations (some enhanced CDs), playback may be difficult. P-IC...
... have to another one. CD-DA : Only CD data can be connected. ... power supply of the unit are driven by connecting an...Head unit) terminal of the processor. • After input selection is received from the CD data portion of the processor. When a disc contains both CD and MP3/WMA data. CD-DA & MP3 : Both CD... player to this setting, the head unit's internal amplifier has no output ...18-EN Setting of CD data only. If a...CD-DA (Initial setting) / PLAY CD-DA & MP3 This product can playback CDs containing both CD... in some situations (some enhanced CDs), playback may be difficult. P-IC...
Owners Manual
Page 24
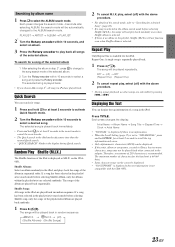
...is selected in the album search mode before selecting Shuffle (M.I .X. The selected song is played back immediately. • Press and hold for the head unit is displayed as M.I .X.), the songs will not function even when Shuffle album is available for at least 2 seconds to activate Quick Search mode.... is not compatible with the above procedure. • For details of a song in the playlist, Shuffle (M.I .X. → (off ) with the CDA-9851. 23-EN To search for at least 2 seconds to play , select (off) with the above procedure. • During repeat playback, no other songs...
...is selected in the album search mode before selecting Shuffle (M.I .X. The selected song is played back immediately. • Press and hold for the head unit is displayed as M.I .X.), the songs will not function even when Shuffle album is available for at least 2 seconds to activate Quick Search mode.... is not compatible with the above procedure. • For details of a song in the playlist, Shuffle (M.I .X. → (off ) with the CDA-9851. 23-EN To search for at least 2 seconds to play , select (off) with the above procedure. • During repeat playback, no other songs...
Owners Manual
Page 32
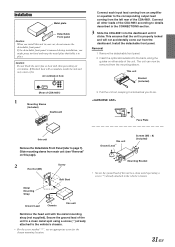
...spot using a screw (*3) already attached to details described in the CONNECTlONS section. 3 Slide the CDA-9851 into the back, along the guides on either side of the CDA-9851. Face Plate this unit Remove the Detachable Front Panel (refer to the vehicle's chassis. • For the screw marked... "*2", use an appropriate screw for the chosen mounting location. 31-EN Metal Mounting Strap *1 Ground Lead Chassis this unit Reinforce the head unit with the...
...spot using a screw (*3) already attached to details described in the CONNECTlONS section. 3 Slide the CDA-9851 into the back, along the guides on either side of the CDA-9851. Face Plate this unit Remove the Detachable Front Panel (refer to the vehicle's chassis. • For the screw marked... "*2", use an appropriate screw for the chosen mounting location. 31-EN Metal Mounting Strap *1 Ground Lead Chassis this unit Reinforce the head unit with the...


