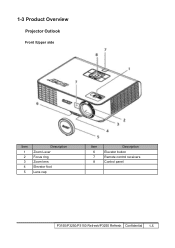
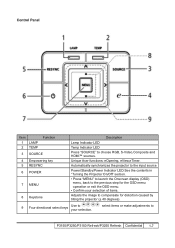
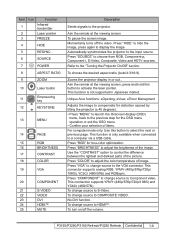
Acer P1350 and P3250 Projector Series Service Guide
Page 12
1-3 Product Overview Projector Outlook Front /Upper side Item Description 1 Zoom Lever 2 Focus ring 3 Zoom lens 4 Elevator foot 5 Lens cap Item Description 6 Elevator button 7 Remote control receivers 8 Control panel P3150/P3250/P3150 Refresh/P3250 Refresh Confidential 1-5
Acer P1350 and P3250 Projector Series Service Guide
Page 14
... the Onscreen display (OSD) menu, back to the previous step for distortion caused by tilting the projector (± 40 degrees). 9 Four directional select keys Use to choose RGB, S-Video,Composite and HDMI™ sources. Unique Acer functions: eOpening, eView,eTimer. Control Panel Item 1 LAMP 2 TEMP Function 3 SOURCE 4 Empowering key 5 RESYNC 6 POWER 7 MENU... the image to compensate for the OSD menu operation or exit the OSD menu. • Confirm your selection. select items or make adjustments to P3150/P3250/P3150 Refresh/P3250 Refresh Confidential 1-7
Acer P1350 and P3250 Projector Series Service Guide
Page 16
...to select the next or previous page. Automatically synchronizes the projector to the "Turning the Projector On/Off" section. Unique Acer functions: eOpening, eView, eTimer Managment Adjusts the image to compensate for distortion caused by tilting the projector (± 40 degrees). • Press "MENU" to...Use the "CONTRAST" option to HDMI™. Press "COMPONENT" to change source to a computer via a USB cable. P3150/P3250/P3150 Refresh/P3250 Refresh Confidential 1-9 Momentarily turns off the volume. This function is only available when connected to the VGA connector. To choose ...
Acer P1350 and P3250 Projector Series Service Guide
Page 17
Item Icon Function 26 WIRELESS 27 KeyPad 0~9 Four 28 directional select keys Description Press "WIRELESS" to display the image which is wirelessly transmitted from the PC to the projector via the "Acer eProjection Management" utility. (for wireless model) Press "0~9" to your selection. NOTE: P3150/P3250/P3150 Refresh/P3250 Refresh Confidential 1-10 Use up, down, left, right buttons to select items or make adjustments to input a password in the "Security settings".
Acer P1350 and P3250 Projector Series Service Guide
Page 18
Connecting the Projector Item Description 1 Power cord 2 USB cable 3 VGA cable 4 Composite video cable Item Description 5 Audio cable Jack/Jack 6 HDMI cable 7 S-Video cable 8 Audio cable Jack/RCA Note: To ensure the projector works well with your computer,please makesure the timing of the display mode is compatible with the projector. P3150/P3250/P3150 Refresh/P3250 Refresh Confidential 1-11
Acer P1350 and P3250 Projector Series Service Guide
Page 22
2-2 Disassemble Lamp Cover Module 1. Disassemble the Lamp Cover Module P3150/P3250/P3150 Refresh/P3250 Refresh Confidential 2-2 Unscrew 2 screws (as red circle) 3. Turn over the projector 2.
Acer P1350 and P3250 Projector Series Service Guide
Page 55
Turn over the projector,assemble OK P3150/P3250/P3150 Refresh/P3250 Refresh Confidential 2-35 2-39 Assemble Lamp Cover Module 1. Screw 2 screws (as red circle) 3. Assemble Lamp Cover Module 2.
Acer P1350 and P3250 Projector Series Service Guide
Page 58
... pressed twice) Fan lock Overheat Lamp error Lamp Life reminding Presentation Timer (time is operating (for the model with sliding lens cover only) Power off projector after 5 cycles. 2 x {So(0.1s) - So(0.3s) So(0.1s) periodically per second 3 x {So(0.1s) - So(0.2s) - Off(0.8s)} with reminding message 3 x... Refresh/P3250 Refresh Confidential 3-3 3-2 Beep Sound Power on (as soon as power button pressed) Power on (lamp lighting failed) Power on (lens cap was not opened, for the model with sliding lens cover only) Close lens cap while projector is up) So(0.3s) 2 x {So(0.1s) - Off(0....
Acer P1350 and P3250 Projector Series Service Guide
Page 63
...: (1) Please enter OSD menu. (2) To execute "Reset" function. HDTV Source (480P, 720P, 1080i) - After changing parts, check the information below. 4-2 Service Mode 1. Turn on the projector and input the signal 2. P3150/P3250/P3150 Refresh/P3250 Refresh Confidential 4-1 Chapter 4 Function Test & Alignment Procedure 4-1 Test Equipment Needed - Minolta CL-100 -
Acer P1350 and P3250 Projector Series Service Guide
Page 74
...All safety and warning label should be visible, including all contents. All interface connector should be complete and workable. P3150/P3250/P3150 Refresh/P3250 Refresh Confidential 4-12 Check points for exterior and print pattern Check item Text & Pattern Exterior Buttons Focus ring Logo Screw.... Display Data Channel (DDC) Acoustic - T he purpose of the DDC test is to verify the DDC1/DDC2B operation of the projector and to verify Plug & Play function. - High pitch sound from cooling fan and color wheel is functioning smoothly. Stuck buttons are unacceptable...
Acer P1350 and P3250 Projector Series Service Guide
Page 75
DLP Composer - Power cord (42.53506G002) - P3150/P3250/P3150 Refresh/P3250 Refresh Confidential 5-1 Firmware - 8M Flash (8M flash has to put in PC and set right path in 5-5 step4) Hardware : - Here, we take P3250 as an example. USB Cable (42.87304G001) - Projector - PC or Laptop Note: The FW upgrade procedure for P3150/P3250/P3150refresh/P3250 refresh is the same. USB) - Chapter 5 Firmware Upgrade Section 1: System Firmware Upgrade 5-1 Equipment Needed Software : (DDP 2230-
Acer P1350 and P3250 Projector Series Service Guide
Page 78
... Temp LED light on the screen. - "Found new hardware wiszard" will be appearred on RED at the same time, plug in USB cable into the projector and link to end the installation. P3150/P3250/P3150 Refresh/P3250 Refresh Confidential 5-4 Finish - Select "Install the software automatically (Recommended)". - 5-3 USB Driver Upgrade Procedure 1.
Acer P1350 and P3250 Projector Series Service Guide
Page 79
5-4 Firmware Upgrade Procedure 1. Execute the "DLP ComposeTM" file. 3. Click the "browse" button and navigate to the USB port of a PC. 2. Click "edit" and "perferences". 4. Click "Library." - P3150/P3250/P3150 Refresh/P3250 Refresh Confidential 5-5 Set-up - Plug in power cord and then press "Power" and "Menu" button simultaneously hold on about 5 seconds, release "Power" and "Menu" button - Once the Power ,Lamp and Temp LED light on RED at the same time, plug in USB cable into the projector and link to the directory where you put the library file in.
Acer P1350 and P3250 Projector Series Service Guide
Page 83
Firmware - ISP Hardware : - P3150/P3250/P3150 Refresh/P3250 Refresh Confidential 5-9 Projector - PC or Laptop - Section 2 : MCU Firmware Upgrade 5-5 Equipment Needed Software : - Power cord (42.53506G002) - MCU Fixture Note: The MCU upgrade procedure for P3150/P3250/P3150 refresh/P3250 refresh is the same. Here, we take P3250 as an example. VGA Cable (42.87305G102) - Parallel (Printer) Cable - Port 95 nt.exe -
Acer P1350 and P3250 Projector Series Service Guide
Page 89
5-8 MCU Set up procedure 1. P2 P1 VGA Port P3150/P3250/P3150 Refresh/P3250 Refresh Confidential 5-15 Connect P1 of Fixture with VGA port of PC/Laptop by VGA Cable. Connect P2 of Fixture with Printer Port of Projector by Parallel (Printer) Cable. - Connect all ports -
Acer P1350 and P3250 Projector Series Service Guide
Page 94
5-10 Waveform Download ( for 4 seconds. After about 5 seconds release "Up" button, Power LED turns to blue and Temp LED will flash for refresh models) 1.Hold on the "Up" button, then plug Power Cord in power cord and turn on this projector.If the image is steady, the process is ok! Re-plug in , the Power LED lights on red, and Power LED lights blue. 2. Note:This step must be excuted after FW, Main Board or Lamp Driver changed Lamp LED Temp LED Up button Power LED P3150/P3250/P3150 Refresh/P3250 Refresh Confidential 5-20 After that, Temp LED and Lamp LED light on red.
Acer P1350 and P3250 Projector Series Service Guide
Page 96
... - EDID Program (Generic V0.51) - RS-232 9 Pin Cable (pin to DVI-D(F) (42.82B13G001) Note: The EDID upgrade procedure for Projector (42.53506G002) - Projector - Generic Fixture (80.00001.001) for fixture - Power adapter (47.57803G001) and power cord (42.53506G002) for EDID Key-in (Fixture:... JP3 must be closed) - Power cord for P3150/P3250/P3150 refresh/P3250 refresh is the same.Here, we take P3250 as an example. ...
Acer P1350 and P3250 Projector Series Service Guide
Page 97
Power CNN P1 P2 VGA VGA Port Power Port P3150/P3250/P3150 Refresh/P3250 Refresh Confidential 6-3 Note: Confirm JP3 is "Close" status. Connect all ports (1) Connect P1 of Fixture with COM Port of PC/Laptop by RS232 Cable. (2) Connect P2 of Fixture with VGA port of Projector by VGA Cable. (3) Plug Power Adapter to Power CNN. (4) Plug Power Cord to P3250 unit. 6-3 Setup Procedure (VGA) 1.
Acer P1350 and P3250 Projector Series Service Guide
Page 100
HMDI Port Power Port Power CNN P2 P1 P4 P3 P3150/P3250/P3150 Refresh/P3250 Refresh Confidential 6-6 Connect all ports (1) Connect P1 of Fixture with COM Port of PC/Laptop by RS232 Cable. (2) Connect P2 of Fixture with P3 by DVI Cable. (3) Plug P4 to HDMI Port of the Projector. (4) Plug Power Adapter to Power CNN. (5) Plug Power Cord to P3250 unit. Note: Confirm JP3 is "Close" status. 6-5 Setup Procedure (HDMI) 1.
Acer P1350 and P3250 Projector Series Service Guide
Page 105
... SHOULDER SCREW SB LAMP COVER P3150 SCREW I/O STEEL #4-40UNC*H4*L5 SCREW PAN MECH M2.6*25 BLACK CABLE TIE PG-YJ-80 LAMP MODULE FOR PROJECTOR P3150/ P3250 ASSY LAMP MODULE P3150 LENS-CAP FOR P3150 LENS CAP STRAP P3150 Supply N N N N N N N N N P3150...