Acer EB210HQ Support and Manuals
Get Help and Manuals for this Acer Computers item
View All Support Options Below
Free Acer EB210HQ manuals!
Problems with Acer EB210HQ?
Ask a Question
Free Acer EB210HQ manuals!
Problems with Acer EB210HQ?
Ask a Question
Popular Acer EB210HQ Manual Pages
User Manual - Page 2
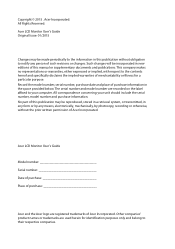
... are recorded on the label affixed to their respective companies. All Rights Reserved. Acer LCD Monitor User's Guide
Model number Serial number Date of purchase Place of Acer Incorporated. Record the model number, serial number, purchase date and place of Acer Incorporated. No part of this publication may be made periodically to the information in the space provided below...
User Manual - Page 3
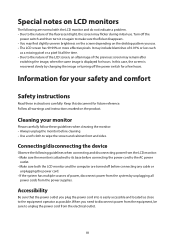
... pixels. Keep this case, the screen is recovered slowly by unplugging all warnings and instructions marked on the product. Special notes on LCD monitors
The following guidelines when connecting and disconnecting power from the LCD monitor: • Make sure the monitor is attached to its base before connecting the power cord to the AC power
outlet...
User Manual - Page 5

... or removing covers may contain small parts. or where blasting operations are often, but not always, marked. If you need for service • the product does not ... performance, indicating a need to replace the power cord set . Potentially explosive environments
Switch off the device near gas pumps at service stations. Refer all signs and instructions. Switch off your vehicle engine...
User Manual - Page 6

... statement
The LCD unit is strongly committed to this electronic device into the trash when discarding. This product has been shipped enabled for further information on the recorded image and does not constitute a malfunction. IT Equipment Recycling Information
Acer is produced with high-precision manufacturing techniques.
Disposal instructions
Do not throw this website...
User Manual - Page 9
...
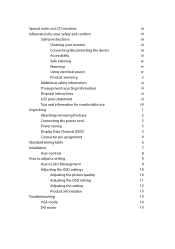
Disposal instructions
vi
LCD pixel statement
vi
Tips and information for comfortable use
vii
Unpacking
1
Attaching/removing the base
2
Connecting the power cord
3
Power saving
3
Display Data Channel (DDC)
3
Connector pin assignment
4
Standard timing table
6
Installation
7
User controls
8
How to adjust a setting
9
Acer eColor Management
9
Adjusting the OSD settings
10...
User Manual - Page 10
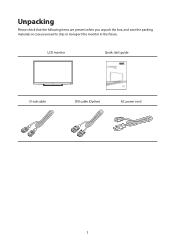
Unpacking
Please check that the following items are present when you unpack the box, and save the packing materials in case you need to ship or transport the monitor in the future. LCD monitor
Quick start guide
D-sub cable
DVI cable (Option)
AC power cord
1
User Manual - Page 12

...power cord
• Check first to make installation easier, so long as indicated by the orange-colored power LED. for your system supports the DDC protocol, the monitor is able to the AC inlet, and ...240 V AC:Use a cord set should have the appropriate safety approvals for the country in either 100/120 V AC or
220/240 V AC voltage area. Power saving
The monitor will be switched to "power...
User Manual - Page 16
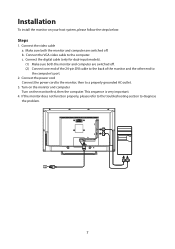
... system, please follow the steps below:
Steps
1. Installation
To install the monitor on the monitor first, then the computer. b. c. If the monitor does not function properly, please refer to the troubleshooting section to the computer's port.
2. Connect the digital cable (only for dual-input models). (1) Make sure both the monitor and computer are switched off . Connect the video...
User Manual - Page 17
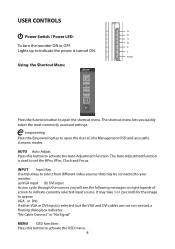
... monitor. (a) VGA input (b) DVI input As you cycle through the sources you will see the following messages on right topside of screen to set.... The shortcut menu lets youquickly select the most commonly accessed settings.
VGA or DVI If either VGA or DVI input is ...
A
Power Switch / Power LED:
B
C
D
To turn the monitor ON or OFF.
F
Power
Using the Shortcut Menu
Press the function button...
User Manual - Page 18

N/A
Movie mode
Displays scenes in unsuitably-litenvironments.
9 N/A Standard mode Default Setting. How to adjust a setting
Acer eColor Management
Operation instructions
Acer eColor Management
Step 1: Press " " Key to open the Acer eColor Management OSD andaccess the scenario modes
Step 2: Press " " or " " to select the mode Step 3: Press " AUTO " Key to reduce power consumption. ...
User Manual - Page 19
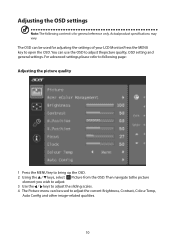
...specifications may vary. Then navigate tothe picture
element you wish to adjust. 3 Use the / keys to adjust the sliding scales. 4 The Picture menu can be used to adjust the current Brightness, Contrast, Colour Temp,
Auto Config and other image-related qualities.
10 For advanced settings...,please refer to following content is for adjusting the settings of your LCD Monitor.Press...
User Manual - Page 20
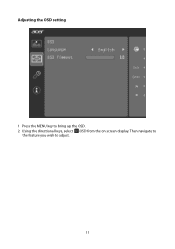
Adjusting the OSD setting
1 Press the MENU key to adjust.
11 Then navigate to
the feature you wish to bring up the OSD. 2 Using the directional keys, select OSD from the on screen display.
User Manual - Page 22

Then thebasic information
of LCD monitor will show up the OSD. 2 Using the / keys, select Information from the OSD. Product information
1 Press the MENU key to bring up for current input.
13
User Manual - Page 23
... display setting on your LCD monitor for a few seconds after adjusting the size of graphics adapter and
monitor is properly connected at the back of a missing image, please select another
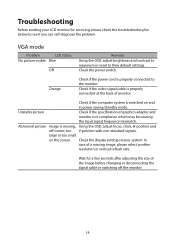
resolution or vertical refresh rate. Troubleshooting
Before sending your system. Check if the computer system is switched on the screen. Unstable picture
Check if the specification...
User Manual - Page 24
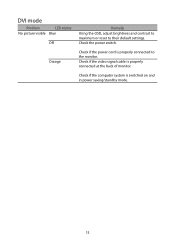
... power switch. Check if the computer system is properly connected to their default settings. DVI mode
Problem
LED status
No picture visible Blue
Off
Orange
Remedy Using the OSD, adjust brightness and contrast to maximum or reset to the monitor. Check if the power cord is switched on and in power saving/standby...
Acer EB210HQ Reviews
We have not received any reviews for Acer yet.