User Guide
Page 5
...of your fax transmission, refer to the fax software instructions installed on the first page of the sending machine or such business, other electronic device, including Fax machines, to send any changes necessary to maintain uninterrupted service. If trouble is experienced with the FCC if you should...you disconnect the equipment until the problem is necessary. In order to do this equipment causes harm to the telephone network, the telephone company will notify you in a margin at (949) 859-4273. 5 Connection to party line service is not practical, the telephone company...
...of your fax transmission, refer to the fax software instructions installed on the first page of the sending machine or such business, other electronic device, including Fax machines, to send any changes necessary to maintain uninterrupted service. If trouble is experienced with the FCC if you should...you disconnect the equipment until the problem is necessary. In order to do this equipment causes harm to the telephone network, the telephone company will notify you in a margin at (949) 859-4273. 5 Connection to party line service is not practical, the telephone company...
User Guide
Page 28
... 47 Opening the display panel 47 Your computer's features and specifications ....48 Turning on the power 48 Adding memory (optional 49 Installing a memory module 50 Removing a memory module 54 Checking total memory 55 Hard Drive Recovery Utilities 56 Creating Recovery CDs/DVDs 57 Hard Disk Drive Recovery options 58 Hard Disk Drive Recovery using the Recovery media 63 Installing drivers and applications 64 Using the Toshiba Dual Pointing Device 64 Using the TouchPad 65 Scrolling with the TouchPad 66 Control buttons 66 Disabling or enabling the TouchPad 66 Using external display...
... 47 Opening the display panel 47 Your computer's features and specifications ....48 Turning on the power 48 Adding memory (optional 49 Installing a memory module 50 Removing a memory module 54 Checking total memory 55 Hard Drive Recovery Utilities 56 Creating Recovery CDs/DVDs 57 Hard Disk Drive Recovery options 58 Hard Disk Drive Recovery using the Recovery media 63 Installing drivers and applications 64 Using the Toshiba Dual Pointing Device 64 Using the TouchPad 65 Scrolling with the TouchPad 66 Control buttons 66 Disabling or enabling the TouchPad 66 Using external display...

User Guide
Page 31
... using the SD card 132 Removing an SD card 133 Using the Ultra SlimBay 133 Removing a module from the Ultra SlimBay ...134 Inserting a module into the Ultra SlimBay.......135 Using an expansion device 135 Using an Optional Toshiba Express Port Replicator with your computer 136 Chapter 5: Utilities 137 TOSHIBA Assist 138 Connect 139 Secure 140 Protect & Fix 141 Optimize 142 TOSHIBA Application Installer 143 Setting passwords 144 Using an instant password 144 Using a supervisor password 144 Using a user password...
... using the SD card 132 Removing an SD card 133 Using the Ultra SlimBay 133 Removing a module from the Ultra SlimBay ...134 Inserting a module into the Ultra SlimBay.......135 Using an expansion device 135 Using an Optional Toshiba Express Port Replicator with your computer 136 Chapter 5: Utilities 137 TOSHIBA Assist 138 Connect 139 Secure 140 Protect & Fix 141 Optimize 142 TOSHIBA Application Installer 143 Setting passwords 144 Using an instant password 144 Using a supervisor password 144 Using a user password...
User Guide
Page 50
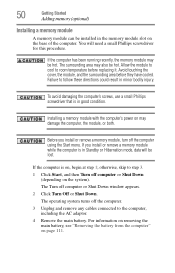
... Standby or Hibernation mode, data will need a small Phillips screwdriver for this procedure. For information on removing the main battery, see "Removing the battery from the computer" on , begin at step 1; The Turn off the computer. 3 Unplug and remove any cables connected to step 3. 1 Click Start, and then Turn off the computer using the Start menu. 50 Getting Started Adding memory (optional) Installing a memory module A memory module can be installed in the memory module slot on may...
... Standby or Hibernation mode, data will need a small Phillips screwdriver for this procedure. For information on removing the main battery, see "Removing the battery from the computer" on , begin at step 1; The Turn off the computer. 3 Unplug and remove any cables connected to step 3. 1 Click Start, and then Turn off the computer using the Start menu. 50 Getting Started Adding memory (optional) Installing a memory module A memory module can be installed in the memory module slot on may...
User Guide
Page 51
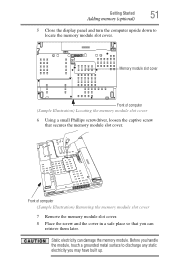
... the module, touch a grounded metal surface to locate the memory module slot cover. Memory module slot cover Front of computer (Sample Illustration) Removing the memory module slot cover 7 Remove the memory module slot cover. 8 Place the screw and the cover in a safe place so that secures the memory module slot cover. Front of computer (Sample Illustration) Locating the memory module slot cover 6 Using a small Phillips screwdriver, loosen the captive screw that you can damage the memory module. Getting Started 51 Adding memory (optional) 5 Close the display panel and turn the...
... the module, touch a grounded metal surface to locate the memory module slot cover. Memory module slot cover Front of computer (Sample Illustration) Removing the memory module slot cover 7 Remove the memory module slot cover. 8 Place the screw and the cover in a safe place so that secures the memory module slot cover. Front of computer (Sample Illustration) Locating the memory module slot cover 6 Using a small Phillips screwdriver, loosen the captive screw that you can damage the memory module. Getting Started 51 Adding memory (optional) 5 Close the display panel and turn the...
User Guide
Page 54
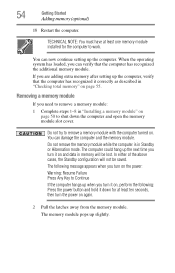
... remove a memory module: 1 Complete steps 1-8 in Standby or Hibernation mode. The memory module pops up the computer. If you are adding extra memory after setting up the next time you turn it on, perform the following: Press the power button and hold it down the computer and open the memory module slot cover. 54 Getting Started Adding memory (optional) 18 Restart the computer. You can now continue setting up slightly. Removing a memory module...
... remove a memory module: 1 Complete steps 1-8 in Standby or Hibernation mode. The memory module pops up the computer. If you are adding extra memory after setting up the next time you turn it on, perform the following: Press the power button and hold it down the computer and open the memory module slot cover. 54 Getting Started Adding memory (optional) 18 Restart the computer. You can now continue setting up slightly. Removing a memory module...
User Guide
Page 55
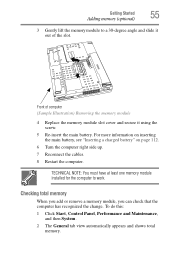
... using the screw. 5 Re-insert the main battery. Checking total memory When you add or remove a memory module, you can check that the computer has recognized the change. For more information on inserting the main battery, see "Inserting a charged battery" on page 112. 6 Turn the computer right side up. 7 Reconnect the cables. 8 Restart the computer. Front of computer (Sample Illustration) Removing the memory module 4 Replace the memory module slot cover...
... using the screw. 5 Re-insert the main battery. Checking total memory When you add or remove a memory module, you can check that the computer has recognized the change. For more information on inserting the main battery, see "Inserting a charged battery" on page 112. 6 Turn the computer right side up. 7 Reconnect the cables. 8 Restart the computer. Front of computer (Sample Illustration) Removing the memory module 4 Replace the memory module slot cover...
User Guide
Page 56
... hard disk drive to recover your hard disk drive or reinstall selected applications and software features or utilities. Using the HDD Recovery, you can: ❖ Create Hard Drive Recovery CDs or DVDs using your system. 56 Getting Started Hard Drive Recovery Utilities If the computer does not recognize the memory configuration, turn off the computer and remove the memory module slot cover (complete steps 1-8 in "Installing a memory module" on page 50), and then check that you create recovery CDs/DVDs before using a writable drive. ❖ Recover your hard disk drive to the factory-set...
... hard disk drive to recover your hard disk drive or reinstall selected applications and software features or utilities. Using the HDD Recovery, you can: ❖ Create Hard Drive Recovery CDs or DVDs using your system. 56 Getting Started Hard Drive Recovery Utilities If the computer does not recognize the memory configuration, turn off the computer and remove the memory module slot cover (complete steps 1-8 in "Installing a memory module" on page 50), and then check that you create recovery CDs/DVDs before using a writable drive. ❖ Recover your hard disk drive to the factory-set...
User Guide
Page 66
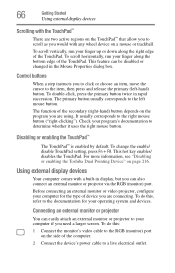
... -hand) button. Check your computer if you need a larger screen. This hot key enables/ disables the TouchPad. Connecting an external monitor or projector You can also connect an external monitor or projector via the RGB (monitor) port. The function of the computer. 2 Connect the device's power cable to a live electrical outlet. Disabling or enabling the TouchPad™ The TouchPad™ is enabled by default. 66 Getting Started Using external display devices Scrolling with the TouchPad™ There are two active regions on the TouchPad™ that...
... -hand) button. Check your computer if you need a larger screen. This hot key enables/ disables the TouchPad. Connecting an external monitor or projector You can also connect an external monitor or projector via the RGB (monitor) port. The function of the computer. 2 Connect the device's power cable to a live electrical outlet. Disabling or enabling the TouchPad™ The TouchPad™ is enabled by default. 66 Getting Started Using external display devices Scrolling with the TouchPad™ There are two active regions on the TouchPad™ that...

User Guide
Page 147
... the User Password icon. 4 Click Delete. 5 Follow the on-screen instructions to exit. Deleting a user password To cancel the power-on a diskette or media of your password, and then enter it again to verify. 6 Click Set. 7 Click OK if you want to save the password to a text file on password function: 1 Click Start, All Programs, Toshiba, Utilities, and then TOSHIBA Assist. The Toshiba Password Utility window appears. 147 (Sample Image) Toshiba Password Utility window 4 Click Set. 5 Enter your...
... the User Password icon. 4 Click Delete. 5 Follow the on-screen instructions to exit. Deleting a user password To cancel the power-on a diskette or media of your password, and then enter it again to verify. 6 Click Set. 7 Click OK if you want to save the password to a text file on password function: 1 Click Start, All Programs, Toshiba, Utilities, and then TOSHIBA Assist. The Toshiba Password Utility window appears. 147 (Sample Image) Toshiba Password Utility window 4 Click Set. 5 Enter your...
User Guide
Page 180
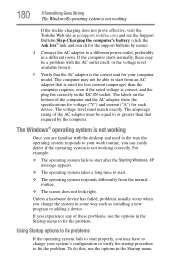
..., and the plug fits correctly in the Startup menu. To do this, use the options in a different room. Using Startup options to fix problems If the operating system fails to fix the problem. Unless a hardware device has failed, problems usually occur when you change your system's configuration or verify the startup procedure to your computer model. The computer may be able to start properly, you experience any of the AC...
..., and the plug fits correctly in the Startup menu. To do this, use the options in a different room. Using Startup options to fix problems If the operating system fails to fix the problem. Unless a hardware device has failed, problems usually occur when you change your system's configuration or verify the startup procedure to your computer model. The computer may be able to start properly, you experience any of the AC...
User Guide
Page 188
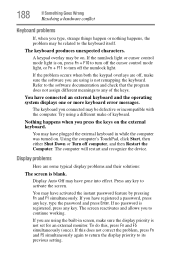
... turn off the cursor control mode light, or Fn + F11 to the keyboard itself. If you have gone into effect. The computer will restart and recognize the device. The keyboard produces unexpected characters. Display Auto Off may have connected an external keyboard and the operating system displays one or more keyboard error messages. If the numlock light or cursor control mode light is registered, press any key, type the password and press Enter...
... turn off the cursor control mode light, or Fn + F11 to the keyboard itself. If you have gone into effect. The computer will restart and recognize the device. The keyboard produces unexpected characters. Display Auto Off may have connected an external keyboard and the operating system displays one or more keyboard error messages. If the numlock light or cursor control mode light is registered, press any key, type the password and press Enter...
User Guide
Page 197
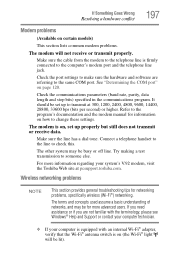
... communications program. Make sure the line has a dial tone. The terms and concepts used assume a basic understanding of networks, and may be set up to the computer's modem port and the telephone line jack. If Something Goes Wrong Resolving a hardware conflict 197 Modem problems (Available on certain models) This section lists common modem problems. The modem will be for networking problems, specifically wireless (Wi-Fi...
... communications program. Make sure the line has a dial tone. The terms and concepts used assume a basic understanding of networks, and may be set up to the computer's modem port and the telephone line jack. If Something Goes Wrong Resolving a hardware conflict 197 Modem problems (Available on certain models) This section lists common modem problems. The modem will be for networking problems, specifically wireless (Wi-Fi...

User Guide
Page 199
... for recent firmware upgrades. If it is not secure. 4 The Windows® operating system will be displayed. ❖ Connect your computer directly to its list of available wireless networks, but does not create a wireless connection using the device, since the connection would not be secure. If Something Goes Wrong Resolving a hardware conflict 199 ❖ Enter IPCONFIG /ALL and press Enter. ❖ The IP address for each active network adapter will now...
... for recent firmware upgrades. If it is not secure. 4 The Windows® operating system will be displayed. ❖ Connect your computer directly to its list of available wireless networks, but does not create a wireless connection using the device, since the connection would not be secure. If Something Goes Wrong Resolving a hardware conflict 199 ❖ Enter IPCONFIG /ALL and press Enter. ❖ The IP address for each active network adapter will now...
User Guide
Page 204
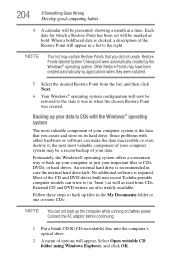
... its hard drive. Connect the AC adaptor before continuing. 1 Put a blank CD-R (CD-recordable) disc into recent Toshiba portable computer models can make the data inaccessible or even destroy it was in the My Documents folder to back up files in when the chosen Restore Point was created. Other Restore Points may have been created automatically by the Windows® operating system. Since problems...
... its hard drive. Connect the AC adaptor before continuing. 1 Put a blank CD-R (CD-recordable) disc into recent Toshiba portable computer models can make the data inaccessible or even destroy it was in the My Documents folder to back up files in when the chosen Restore Point was created. Other Restore Points may have been created automatically by the Windows® operating system. Since problems...

User Guide
Page 247
.... K keyboard shortcut - Memory cache installed on the motherboard to create a complete screen image. A group of computers that you use to add or remove devices from a storage device (such as a mouse. When an electric current passes through the electrodes, the molecules in combination with the Fn key can set system options or control system parameters, such as the battery save mode. (2) A key or combination of using a pointing device such as a hard disk) into...
.... K keyboard shortcut - Memory cache installed on the motherboard to create a complete screen image. A group of computers that you use to add or remove devices from a storage device (such as a mouse. When an electric current passes through the electrodes, the molecules in combination with the Fn key can set system options or control system parameters, such as the battery save mode. (2) A key or combination of using a pointing device such as a hard disk) into...
User Guide
Page 253
... adding memory 49 adjusting recording quality 128 Alt keys 85 audio files 127 audio features 127 B backing up files 83 battery alarms 108 changing 110 charge indicator light 46, 105 charge not lasting 187 charging 44, 46 conserving power 108 disposal 115 low charge 107 monitoring power 46, 105 not charging 186 power profile 213 power profile hot key 110 real-time clock (RTC) 102 removing 111 BIOS Setup see TOSHIBA Hardware Setup button power 49, 57 start 119 C CD creating...
... adding memory 49 adjusting recording quality 128 Alt keys 85 audio files 127 audio features 127 B backing up files 83 battery alarms 108 changing 110 charge indicator light 46, 105 charge not lasting 187 charging 44, 46 conserving power 108 disposal 115 low charge 107 monitoring power 46, 105 not charging 186 power profile 213 power profile hot key 110 real-time clock (RTC) 102 removing 111 BIOS Setup see TOSHIBA Hardware Setup button power 49, 57 start 119 C CD creating...
User Guide
Page 254
... a power source 44 connection set up 123 control buttons 66 Ctrl keys 85 D desktop creating new icon 118 major features 118 desktop exploration 117 desktop icons 118 Device Manager 184 checking properties 185 disabling a device 184 devices keyboard 68 mouse 68 Disk Defragmenter 191 disk drive corrupted/damaged data files 191 missing files/trouble accessing a disk 190 running slow 191 diskette drive cannot insert a diskette 191 cannot read a diskette 192 connecting 70 external, connecting 70 display...
... a power source 44 connection set up 123 control buttons 66 Ctrl keys 85 D desktop creating new icon 118 major features 118 desktop exploration 117 desktop icons 118 Device Manager 184 checking properties 185 disabling a device 184 devices keyboard 68 mouse 68 Disk Defragmenter 191 disk drive corrupted/damaged data files 191 missing files/trouble accessing a disk 190 running slow 191 diskette drive cannot insert a diskette 191 cannot read a diskette 192 connecting 70 external, connecting 70 display...
User Guide
Page 256
... 84 function keys 85 hot keys 217 not working 178 overlay keys 86 troubleshooting 188 using 84 Windows® special keys 85 keyboard, external 68 keyboard, full-size 84 L lock computer, using 80 M main battery removing 111 memory adding 49 problem solving 185 removing expansion slot cover 51 memory module inserting 52 installation 50 removing 55 microphone 127 modem connecting to telephone line 121 determining COM port 120 problem solving 197 resetting port to default settings 120 upgrading 120 monitor 66 connecting 66 not working 189 mouse installing 68 mouse utility 156 N network accessing...
... 84 function keys 85 hot keys 217 not working 178 overlay keys 86 troubleshooting 188 using 84 Windows® special keys 85 keyboard, external 68 keyboard, full-size 84 L lock computer, using 80 M main battery removing 111 memory adding 49 problem solving 185 removing expansion slot cover 51 memory module inserting 52 installation 50 removing 55 microphone 127 modem connecting to telephone line 121 determining COM port 120 problem solving 197 resetting port to default settings 120 upgrading 120 monitor 66 connecting 66 not working 189 mouse installing 68 mouse utility 156 N network accessing...
User Guide
Page 257
... Device Manager 184 disabling a device 184 disk drive is slow 191 display is blank 188 external display not working 190 external monitor 189 faulty memory 185 hardware conflict 182, 183 high-pitched noise 193 illegal operation 177 Internet bookmarked site not found 182 Internet connection is slow 181 keyboard not responding 178 missing files/trouble accessing a disk 190 modem not receiving or transmitting 197 no sound 193 non-system disk or disk error 179, 192 PC Card...
... Device Manager 184 disabling a device 184 disk drive is slow 191 display is blank 188 external display not working 190 external monitor 189 faulty memory 185 hardware conflict 182, 183 high-pitched noise 193 illegal operation 177 Internet bookmarked site not found 182 Internet connection is slow 181 keyboard not responding 178 missing files/trouble accessing a disk 190 modem not receiving or transmitting 197 no sound 193 non-system disk or disk error 179, 192 PC Card...


