
User Manual
Page 1
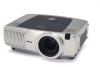
Guida operativa TECHNICAL FOCUS ZOOM KEYSTONE SEARCH RESET MENU M1-D INPUT TEMP LAMP INTER RGB LENS SHIFT BNG COMPONENT S-VIDEO VIDEO STANDBY/ON ENGLISH TECHNICAL TECHNICAL Operating Guide Manuel d'utilisation-Guide d'utilisation Bedienungsanleitung-Benutzerhandbuch Manual de usuario-Guía de funcionamiento Manuale d'istruzioni - Projector TLP-X4500 User's Manual -
Guida operativa TECHNICAL FOCUS ZOOM KEYSTONE SEARCH RESET MENU M1-D INPUT TEMP LAMP INTER RGB LENS SHIFT BNG COMPONENT S-VIDEO VIDEO STANDBY/ON ENGLISH TECHNICAL TECHNICAL Operating Guide Manuel d'utilisation-Guide d'utilisation Bedienungsanleitung-Benutzerhandbuch Manual de usuario-Guía de funcionamiento Manuale d'istruzioni - Projector TLP-X4500 User's Manual -

User Manual
Page 2
... manual is not permitted without express written authority. NOTE • The information in this manual. • The reproduction, transmission or use of their respective owners. 1 Projector User's Manual - Them read the "Before using" section of Microsoft Corporation. Operating Guide Thank you for future reference. TRADEMARK ACKNOWLEDGMENT : • VGA and XGA are... manual. All other sections of this manual to change without notice. • The manufacturer assumes no responsibility for any errors that may appear in this projector.
... manual is not permitted without express written authority. NOTE • The information in this manual. • The reproduction, transmission or use of their respective owners. 1 Projector User's Manual - Them read the "Before using" section of Microsoft Corporation. Operating Guide Thank you for future reference. TRADEMARK ACKNOWLEDGMENT : • VGA and XGA are... manual. All other sections of this manual to change without notice. • The manufacturer assumes no responsibility for any errors that may appear in this projector.

User Manual
Page 7
... the product exhibits a distinct change in that the product is damaged. In the unlikely event of the lamp rupturing, thoroughly clean the area around the projector and discard any way. Also, when you to determine that area. 6 18.Servicing Do not attempt to qualified service personnel under the following the operating...
... the product exhibits a distinct change in that the product is damaged. In the unlikely event of the lamp rupturing, thoroughly clean the area around the projector and discard any way. Also, when you to determine that area. 6 18.Servicing Do not attempt to qualified service personnel under the following the operating...

User Manual
Page 8
... locations, such as near heating equipment. Place and Manner of 20° or more degrees. Before Using (continued) POWER SUPPLY CORD SELECTION If your LCD projector. Doing so could shorten the life of cable. This is exposed to a warm location. Always replace the fuse cover after moving it was originally packed...
... locations, such as near heating equipment. Place and Manner of 20° or more degrees. Before Using (continued) POWER SUPPLY CORD SELECTION If your LCD projector. Doing so could shorten the life of cable. This is exposed to a warm location. Always replace the fuse cover after moving it was originally packed...

User Manual
Page 9
... plastic products touching the unit for future reference. 8 located at the time of replacing a lamp. (Ask a dealer where the unit was purchased or your LCD projector. Model No. If cleaning with a chemically saturated cloth, be done at the bottom of your nearby service station about an air filter for replacement.) In...
... plastic products touching the unit for future reference. 8 located at the time of replacing a lamp. (Ask a dealer where the unit was purchased or your LCD projector. Model No. If cleaning with a chemically saturated cloth, be done at the bottom of your nearby service station about an air filter for replacement.) In...

User Manual
Page 11
... can memorize 4 settings by using a UHB (ultra high brightness) lamp and a highly efficient optical system. Use special caution for reducing projector noise to use the LENS SHIFT buttons. GKeystone Distortion Correction Quick correction of the "User's Manual - NOTE • Keep the original... packing material for closer viewing. For moving the projector, be realized. GUser Memory Function This projector can be shifted vertically. When you want to project various computer signals as well as NTSC/PAL/SECAM video signals...
... can memorize 4 settings by using a UHB (ultra high brightness) lamp and a highly efficient optical system. Use special caution for reducing projector noise to use the LENS SHIFT buttons. GKeystone Distortion Correction Quick correction of the "User's Manual - NOTE • Keep the original... packing material for closer viewing. For moving the projector, be realized. GUser Memory Function This projector can be shifted vertically. When you want to project various computer signals as well as NTSC/PAL/SECAM video signals...

User Manual
Page 12
...PRECAUTIONS ʜ7 EXEMPTION CLAUSES ʜʜʜʜ9 OTHER CAAAUTIONS AND INFORMATIONS 9 Projector Features 10 Preparation 10 Part Names 12 Projector 12 Control Buttons 13 Remote control 13 Setting Up 14 Arrangement 14 Adjusting The Projector's Elevator 15 Using The Lens shift Buttons ʜ15 Connecting Your Devices ʜ...46 Air Filter 47 Caring For The Air Filterʜʜʜʜ47 Other Care 48 Caring For The Inside Of The Projector 48 Caring For The Lens ʜʜʜʜʜ48 Caring For The Cabinet And Remote Control 48 Troubleshooting 49 Related ...
...PRECAUTIONS ʜ7 EXEMPTION CLAUSES ʜʜʜʜ9 OTHER CAAAUTIONS AND INFORMATIONS 9 Projector Features 10 Preparation 10 Part Names 12 Projector 12 Control Buttons 13 Remote control 13 Setting Up 14 Arrangement 14 Adjusting The Projector's Elevator 15 Using The Lens shift Buttons ʜ15 Connecting Your Devices ʜ...46 Air Filter 47 Caring For The Air Filterʜʜʜʜ47 Other Care 48 Caring For The Inside Of The Projector 48 Caring For The Lens ʜʜʜʜʜ48 Caring For The Cabinet And Remote Control 48 Troubleshooting 49 Related ...

User Manual
Page 13
...) - Part Names Projector TEMP LAMP STANDBY/ON VIDEO MENU 3 5 4 FOCUS ZOOM KEYSTONE SEARCH RESET M1-D INPUT INTER RGB LENS SHIFT BNG COMPONENT S-VIDEO 6 1 2 1 Elevator button 2 Elevator foot 3 Remote ... REMOTE CONTROL CONTROL NETWORK AUDIO IN2 RGB RGB OUT R/CR/PR G/Y B/CB/PB H V AUDIO OUT CR/PR Ca/Pa Y K BNC R-AUDIO IN-L VIDEO S-VIDEO C MI H J 9 0 Projector (Rear/Left) A RGB port B M1-D port C BNC port D AUDIO IN 1 port E AUDIO IN 2 port F CONTROL port G NETWORK port H AUDIO IN R/L port I VIDEO IN port J S-VIDEO...
...) - Part Names Projector TEMP LAMP STANDBY/ON VIDEO MENU 3 5 4 FOCUS ZOOM KEYSTONE SEARCH RESET M1-D INPUT INTER RGB LENS SHIFT BNG COMPONENT S-VIDEO 6 1 2 1 Elevator button 2 Elevator foot 3 Remote ... REMOTE CONTROL CONTROL NETWORK AUDIO IN2 RGB RGB OUT R/CR/PR G/Y B/CB/PB H V AUDIO OUT CR/PR Ca/Pa Y K BNC R-AUDIO IN-L VIDEO S-VIDEO C MI H J 9 0 Projector (Rear/Left) A RGB port B M1-D port C BNC port D AUDIO IN 1 port E AUDIO IN 2 port F CONTROL port G NETWORK port H AUDIO IN R/L port I VIDEO IN port J S-VIDEO...

User Manual
Page 14
... w ZOOM q TEMP LAMP STANDBY/ON LENS SHIFT BNG COMPONENT S-VIDEO VIDEO MENU INTER RESET FOCUS ZOOM RGB M1-D INPUT KEYSTONE SEARCH Control Panel on the Projector Remote Control 1 STANDBY/ON button 4 LENS SHIFT buttons 6 SEARCH button q ZOOM buttons w FOCUS buttons e KEYSTONE button r MENU button t RESET button y ENTER button ( Mouse left button...
... w ZOOM q TEMP LAMP STANDBY/ON LENS SHIFT BNG COMPONENT S-VIDEO VIDEO MENU INTER RESET FOCUS ZOOM RGB M1-D INPUT KEYSTONE SEARCH Control Panel on the Projector Remote Control 1 STANDBY/ON button 4 LENS SHIFT buttons 6 SEARCH button q ZOOM buttons w FOCUS buttons e KEYSTONE button r MENU button t RESET button y ENTER button ( Mouse left button...

User Manual
Page 15
... turned off and the power code is disconnected. • Do not set up and move the projector, while it is hot. • Install the projector in the table are calculated for a full size screen. (±10%) Reference for the 16:9 aspect ratio B A D B Screen Side view C A [type (m)] 40(1.0) 60(1.5) 70(1.8) 80(2.0) ...(20.2) 98(249) 229(581) 221(560) 600(15.2) 895(22.7) 110(280) 257(654) 14 Refer to the illustrations and tables below to the projector and easily accessible. max. 24(61) 46(1.2) 71(1.8) 12(30) 24(61) 36(91) 71(1.8) 107(2.7) 18(46) 36(91) 42(107) 83(2.1) 126(3.2) 21...
... turned off and the power code is disconnected. • Do not set up and move the projector, while it is hot. • Install the projector in the table are calculated for a full size screen. (±10%) Reference for the 16:9 aspect ratio B A D B Screen Side view C A [type (m)] 40(1.0) 60(1.5) 70(1.8) 80(2.0) ...(20.2) 98(249) 229(581) 221(560) 600(15.2) 895(22.7) 110(280) 257(654) 14 Refer to the illustrations and tables below to the projector and easily accessible. max. 24(61) 46(1.2) 71(1.8) 12(30) 24(61) 36(91) 71(1.8) 107(2.7) 18(46) 36(91) 42(107) 83(2.1) 126(3.2) 21...

User Manual
Page 16
...elevator feet will lock into position. 3 As necessary, you want to finely adjust the picture position, use the LENS SHIFT buttons of the projector by twisting the elevator feet by hand. Elevator feet Using The Lens Shift Buttons The lens of projection. You can use to prevent a ...burn. BLANK ASPECT LASER Remote control 15 LENS SHIFT LENS SHIFT buttons Projector LASER INDICATOR STANDBY/ON VIDEO RGB ++ LENS SHIFT FOCUS -- + ZOOM - Elevator buttons TEMP LAMP STANDBY/ON LENS SHIFT BNG COMPONENT S-VIDEO VIDEO...
...elevator feet will lock into position. 3 As necessary, you want to finely adjust the picture position, use the LENS SHIFT buttons of the projector by twisting the elevator feet by hand. Elevator feet Using The Lens Shift Buttons The lens of projection. You can use to prevent a ...burn. BLANK ASPECT LASER Remote control 15 LENS SHIFT LENS SHIFT buttons Projector LASER INDICATOR STANDBY/ON VIDEO RGB ++ LENS SHIFT FOCUS -- + ZOOM - Elevator buttons TEMP LAMP STANDBY/ON LENS SHIFT BNG COMPONENT S-VIDEO VIDEO...
User Manual
Page 17
... of connection is attempted. • Please use other abnormalities that may result in malfunction and/or damage to the device and/or projector. Incorrect connecting could result in the computer, its operating system and peripheral equipment (i.e. ATTENTION • Make sure that you may not...manual of connectors and RS-232C communication data. • Some cables have multiple display screen modes. display devices). • This projector is compatible with this projector is a Plug-and-Play monitor. 16 Plug-and-Play may not be recommended to the correct port. CAUTION • TURN...
... of connection is attempted. • Please use other abnormalities that may result in malfunction and/or damage to the device and/or projector. Incorrect connecting could result in the computer, its operating system and peripheral equipment (i.e. ATTENTION • Make sure that you may not...manual of connectors and RS-232C communication data. • Some cables have multiple display screen modes. display devices). • This projector is compatible with this projector is a Plug-and-Play monitor. 16 Plug-and-Play may not be recommended to the correct port. CAUTION • TURN...

User Manual
Page 18
... CR/PR Ca/Pa Y BNC R-AUDIO IN-L VIDEO S-VIDEO Computer RGB out RGB cable Audio out Stereo Mini cable RS-232C port RS-232C cable Projector A RGB E AUDIO IN 2 F CONTROL E AUDIO IN1 AUDIO IN2 A RGB REMOTE CONTROL FG CONTROL NETWORK RGB OUT AUDIO OUT CR/PR Ca/Pa Y R/...VIDEO S-VIDEO Network port CAT-5 cable G NETWORK I If using a M1-D input (to the following (for example) for connecting your devices. Examples of the projector. You can see the ports. Setting Up (continued) Please refer to mouse control) DVI port B M1-D USB port M1-D cable Audio out Stereo Mini ...
... CR/PR Ca/Pa Y BNC R-AUDIO IN-L VIDEO S-VIDEO Computer RGB out RGB cable Audio out Stereo Mini cable RS-232C port RS-232C cable Projector A RGB E AUDIO IN 2 F CONTROL E AUDIO IN1 AUDIO IN2 A RGB REMOTE CONTROL FG CONTROL NETWORK RGB OUT AUDIO OUT CR/PR Ca/Pa Y R/...VIDEO S-VIDEO Network port CAT-5 cable G NETWORK I If using a M1-D input (to the following (for example) for connecting your devices. Examples of the projector. You can see the ports. Setting Up (continued) Please refer to mouse control) DVI port B M1-D USB port M1-D cable Audio out Stereo Mini ...

User Manual
Page 19
Setting Up (continued) Examples of connection with a VCR/DVD Player VCR/DVD Player Projector Audio out (R) Audio out (L) Video out R-AUDIO IN-L VIDEO R-AUDIO IN AUDIO IN-L H VIDEO IN I I If using a s-video signal S-video out S-video cable J S -VIDEO Audio ...
Setting Up (continued) Examples of connection with a VCR/DVD Player VCR/DVD Player Projector Audio out (R) Audio out (L) Video out R-AUDIO IN-L VIDEO R-AUDIO IN AUDIO IN-L H VIDEO IN I I If using a s-video signal S-video out S-video cable J S -VIDEO Audio ...

User Manual
Page 20
... for use with the power cord's specified voltage range. • Only use the power cord that came with amplifier) Speaker Audio in Stereo Mini cable Projector M AUDIO OUT AUDIO IN1 AUDIO IN2 RGB RGB OUT REMOTE CONTROL M AUDIO OUT CR/PR Ca/Pa CONTROL Y NETWORK R/CR/PR G/Y B/CB/PB H... S-VIDEO Connecting The Power Supply WARNING • Use extra caution when connecting the power cord as incorrect or faulty connections may result in RGB cable Projector L RGB OUT AUDIO IN1 AUDIO IN2 RGB L RGB OUT REMOTE CONTROL AUDIO OUT CR/PR Ca/Pa CONTROL Y NETWORK R/CR/PR G/Y B/CB/PB H ...
... for use with the power cord's specified voltage range. • Only use the power cord that came with amplifier) Speaker Audio in Stereo Mini cable Projector M AUDIO OUT AUDIO IN1 AUDIO IN2 RGB RGB OUT REMOTE CONTROL M AUDIO OUT CR/PR Ca/Pa CONTROL Y NETWORK R/CR/PR G/Y B/CB/PB H... S-VIDEO Connecting The Power Supply WARNING • Use extra caution when connecting the power cord as incorrect or faulty connections may result in RGB cable Projector L RGB OUT AUDIO IN1 AUDIO IN2 RGB L RGB OUT REMOTE CONTROL AUDIO OUT CR/PR Ca/Pa CONTROL Y NETWORK R/CR/PR G/Y B/CB/PB H ...

User Manual
Page 22
.... Remote Control (continued) Operating The Remote Control CAUTION • Do not disassemble the remote control. • Do not place the remote control near the projector's lens, fan, or vents. • Do not drop or otherwise expose the remote control to physical impact. • Do not get the remote control... to send a remote signal to the sensor directly, please try. • Since the remote control uses infrared light to send signals to the projector (Class1 LED), be sure to use the remote control in an area free from obstacles that could block the remote control's output signal to the...
.... Remote Control (continued) Operating The Remote Control CAUTION • Do not disassemble the remote control. • Do not place the remote control near the projector's lens, fan, or vents. • Do not drop or otherwise expose the remote control to physical impact. • Do not get the remote control... to send a remote signal to the sensor directly, please try. • Since the remote control uses infrared light to send signals to the projector (Class1 LED), be sure to use the remote control in an area free from obstacles that could block the remote control's output signal to the...

User Manual
Page 23
...Function CAUTION • Before connecting, read the manuals of the device you can use the remote control, depending on the right. memo The projector would be used with Windows 95 OSR 2.1 or higher. Connect the M1-D port of the computer. memo The USB control can be ...enumerated as a simplified mouse or keyboard of the projector to the computer via the M1-D cable. memo The function can be enabled. LASER INDICATOR STANDBY/ON VIDEO RGB ++ LENS SHIFT FOCUS -- +...
...Function CAUTION • Before connecting, read the manuals of the device you can use the remote control, depending on the right. memo The projector would be used with Windows 95 OSR 2.1 or higher. Connect the M1-D port of the computer. memo The USB control can be ...enumerated as a simplified mouse or keyboard of the projector to the computer via the M1-D cable. memo The function can be enabled. LASER INDICATOR STANDBY/ON VIDEO RGB ++ LENS SHIFT FOCUS -- +...

User Manual
Page 24
... Press the STANDBY/ON button. STANDBY/ON STANDBY/ON button / indicator 2 Press the STANDBY/ON button again while "Power off in right order. The projector lamp will go off , and the STANDBY/ON indicator will begin blanking orange. SC + ZOOM - STANDBY/ON STANDBY/ON button / indicator 2 Set... the power switch to solid orange when the lamp cooling is completely on /off ?" The projector lamp will light up and the STANDBY/ON indicator will begin blinking green. S STANDBY/ON and light to [ | ] (ON). The STANDBY/ON indicator...
... Press the STANDBY/ON button. STANDBY/ON STANDBY/ON button / indicator 2 Press the STANDBY/ON button again while "Power off in right order. The projector lamp will go off , and the STANDBY/ON indicator will begin blanking orange. SC + ZOOM - STANDBY/ON STANDBY/ON button / indicator 2 Set... the power switch to solid orange when the lamp cooling is completely on /off ?" The projector lamp will light up and the STANDBY/ON indicator will begin blinking green. S STANDBY/ON and light to [ | ] (ON). The STANDBY/ON indicator...

User Manual
Page 25
... displays the picture of the remote control. M1-D RGB BNC VIDEO S-VIDEO COMPONENT I Using SEARCH button Press the SEARCH button of the projector. Operating Selecting An Input Signal 1 Select an input signal. Pressing the button automatically cycles through the input ports as shown below . M1...-D RGB BNC I Using the INPUT dial Turn the INPUT dial of the projector or the remote control. SEARCH button M1-D RGB INPUT BNC COMPONENT S-VIDEO ENTER VIDEO INPUT dial SEARCH RESET MENU LENS SHIFT COMPONENTBNG ...
... displays the picture of the remote control. M1-D RGB BNC VIDEO S-VIDEO COMPONENT I Using SEARCH button Press the SEARCH button of the projector. Operating Selecting An Input Signal 1 Select an input signal. Pressing the button automatically cycles through the input ports as shown below . M1...-D RGB BNC I Using the INPUT dial Turn the INPUT dial of the projector or the remote control. SEARCH button M1-D RGB INPUT BNC COMPONENT S-VIDEO ENTER VIDEO INPUT dial SEARCH RESET MENU LENS SHIFT COMPONENTBNG ...

User Manual
Page 29
...ESC MENU POSITION RESET AUTO MAGNFY PinP VOLUME ON FREEZE MUTE OFF KEYSTONE SEARCH 1 2 3 ID CHANGE FREEZE button NOTE • If the projector continues projecting the same image for too long. As illustrated on the right, a dialog will appear on the screen, and the screen will...of video or the signal input state is pressed. LASER INDICATOR STANDBY/ON VIDEO RGB ++ LENS SHIFT FOCUS -- + ZOOM - And after a couple of projector is changed. Using The Magnify Feature 1 Press the MAGNIFY ON button. LASER INDICATOR STANDBY/ON VIDEO RGB ++ LENS SHIFT FOCUS -- + ZOOM - blanking ...
...ESC MENU POSITION RESET AUTO MAGNFY PinP VOLUME ON FREEZE MUTE OFF KEYSTONE SEARCH 1 2 3 ID CHANGE FREEZE button NOTE • If the projector continues projecting the same image for too long. As illustrated on the right, a dialog will appear on the screen, and the screen will...of video or the signal input state is pressed. LASER INDICATOR STANDBY/ON VIDEO RGB ++ LENS SHIFT FOCUS -- + ZOOM - And after a couple of projector is changed. Using The Magnify Feature 1 Press the MAGNIFY ON button. LASER INDICATOR STANDBY/ON VIDEO RGB ++ LENS SHIFT FOCUS -- + ZOOM - blanking ...


