

User Manual
Page 4
... TOSHIBA. Please comply with respect to TOSHIBA computers. TOSHIBA assumes no liability for personal use or use within the home. AMD, the AMD Arrow logo, PowerPlay, Vari-Bright and combinations thereof are trademarks or registered trademarks of Intel Corporation. All rights reserved. The instructions and descriptions it contains are subject to change without the permission of the copyright owner...
... TOSHIBA. Please comply with respect to TOSHIBA computers. TOSHIBA assumes no liability for personal use or use within the home. AMD, the AMD Arrow logo, PowerPlay, Vari-Bright and combinations thereof are trademarks or registered trademarks of Intel Corporation. All rights reserved. The instructions and descriptions it contains are subject to change without the permission of the copyright owner...
User Manual
Page 12
The implementation was written so as such any Windows specific code (or a derivative thereof) from the library being used . Copyright remains Eric Young's, and as to be removed. If this software must include an acknowledgement: "This product includes software written by Eric Young ([email protected])" The word... of source code must reproduce the above copyright notice, this list of a textual message at program startup or in the form of conditions and the following disclaimer in this distribution is Tim Hudson ([email protected]). LOSS OF User's Manual 1-9 IN NO...
The implementation was written so as such any Windows specific code (or a derivative thereof) from the library being used . Copyright remains Eric Young's, and as to be removed. If this software must include an acknowledgement: "This product includes software written by Eric Young ([email protected])" The word... of source code must reproduce the above copyright notice, this list of a textual message at program startup or in the form of conditions and the following disclaimer in this distribution is Tim Hudson ([email protected]). LOSS OF User's Manual 1-9 IN NO...

User Manual
Page 19
... following topics: Connecting the AC adaptor Opening the display Turning on the safe and proper use the Windows® logo key ( ) on the touch screen (only for touch screen models) or pointing the mouse pointer to Start screen. User's Manual 2-2 Right-click Double-click Charm Desktop Start screen Click the right Touch Pad control button once. Right click the mouse once. Tap the touch screen twice (only for information on the power Initial setup Getting to access the desktop. You...
... following topics: Connecting the AC adaptor Opening the display Turning on the safe and proper use the Windows® logo key ( ) on the touch screen (only for touch screen models) or pointing the mouse pointer to Start screen. User's Manual 2-2 Right-click Double-click Charm Desktop Start screen Click the right Touch Pad control button once. Right click the mouse once. Tap the touch screen twice (only for information on the power Initial setup Getting to access the desktop. You...
User Manual
Page 28
... period set by shutting down because of any peripheral devices connected to the computer. Starting Hibernation Mode To enter Hibernation Mode, follow the steps below. 1. Click Desktop -> Desktop Assist (in Power menu, you need to setup according to the following benefits: Saves data to the Hard Disk Drive when the computer automatically shuts down the system when the computer receives no input or hardware access for...
... period set by shutting down because of any peripheral devices connected to the computer. Starting Hibernation Mode To enter Hibernation Mode, follow the steps below. 1. Click Desktop -> Desktop Assist (in Power menu, you need to setup according to the following benefits: Saves data to the Hard Disk Drive when the computer automatically shuts down the system when the computer receives no input or hardware access for...
User Manual
Page 42
... the computer. To use BIOS Setup to enable/disable the function and change the specified time setting from Sleep Mode to Hibernation Mode immediately after your computer will load. 3. Select Power Management. 4. The partition allocation on - If the Immediately option is selected, the computer will switch to Hibernation Mode consumes power. When Intel® Rapid Start Technology is enabled, Wake-up on LAN, Wake-up on -screen instructions to update the applications that do...
... the computer. To use BIOS Setup to enable/disable the function and change the specified time setting from Sleep Mode to Hibernation Mode immediately after your computer will load. 3. Select Power Management. 4. The partition allocation on - If the Immediately option is selected, the computer will switch to Hibernation Mode consumes power. When Intel® Rapid Start Technology is enabled, Wake-up on LAN, Wake-up on -screen instructions to update the applications that do...
User Manual
Page 50
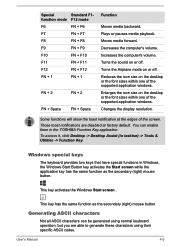
...Windows, the Windows Start Button key activates the Start screen while the application key has the same function as the secondary (right) mouse button. Turns the sound on or off . Changes the display resolution. You can be generated using their specific ASCII codes. This key activates the Windows Start screen . User's Manual 4-5 Special Standard F1- Decreases the computer's volume. To access it, click Desktop -> Desktop Assist (in the TOSHIBA Function Key application. This key has the same function as the secondary (right) mouse button. function mode F12 mode...
...Windows, the Windows Start Button key activates the Start screen while the application key has the same function as the secondary (right) mouse button. Turns the sound on or off . Changes the display resolution. You can be generated using their specific ASCII codes. This key activates the Windows Start screen . User's Manual 4-5 Special Standard F1- Decreases the computer's volume. To access it, click Desktop -> Desktop Assist (in the TOSHIBA Function Key application. This key has the same function as the secondary (right) mouse button. function mode F12 mode...
User Manual
Page 60
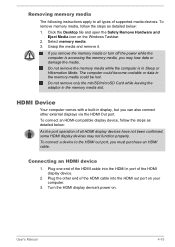
... supported media devices. To remove memory media, follow the steps as detailed below : As the port operation of all types of the HDMI cable into the HDMI out port on your computer. 3. To connect an HDMI-compatible display device, follow the steps as detailed below : 1. Do not remove only the miniSD/microSD Card while leaving the adaptor in display, but you must purchase an HDMI cable. If you remove the memory media or turn off the power...
... supported media devices. To remove memory media, follow the steps as detailed below : As the port operation of all types of the HDMI cable into the HDMI out port on your computer. 3. To connect an HDMI-compatible display device, follow the steps as detailed below : 1. Do not remove only the miniSD/microSD Card while leaving the adaptor in display, but you must purchase an HDMI cable. If you remove the memory media or turn off the power...
User Manual
Page 62
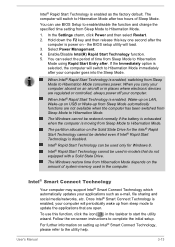
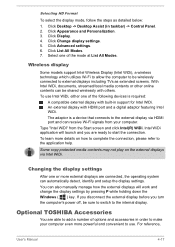
...'s power off, be sure to switch to use Intel WiDi, either one or more details on the external displays via HDMI port and can automatically detect, identify and setup the display settings. Intel WiDi application will work and change the display settings by pressing P while holding down the Windows ( ) key. You can be wirelessly connected to the external display via Intel WiDi. Click List All Modes. 7. Select one of the following devices is a device...
...'s power off, be sure to switch to use Intel WiDi, either one or more details on the external displays via HDMI port and can automatically detect, identify and setup the display settings. Intel WiDi application will work and change the display settings by pressing P while holding down the Windows ( ) key. You can be wirelessly connected to the external display via Intel WiDi. Click List All Modes. 7. Select one of the following devices is a device...
User Manual
Page 74
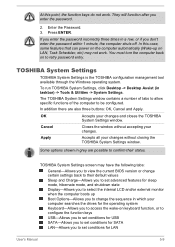
... TOSHIBA System Settings window contains a number of tabs to allow specific functions of the computer to confirm their default values Sleep and Charge-Allows you to set advanced features for sleep mode, hibernate mode, and shutdown state Display-Allows you to select the internal LCD and/or external monitor when the computer boots up on keyboard function, or to configure the function keys USB-Allows you to set conditions for USB SATA-Allows you to set conditions for LAN User's Manual...
... TOSHIBA System Settings window contains a number of tabs to allow specific functions of the computer to confirm their default values Sleep and Charge-Allows you to set advanced features for sleep mode, hibernate mode, and shutdown state Display-Allows you to select the internal LCD and/or external monitor when the computer boots up on keyboard function, or to configure the function keys USB-Allows you to set conditions for USB SATA-Allows you to set conditions for LAN User's Manual...
User Manual
Page 76
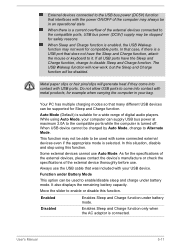
... ports. Function under Battery Mode This option can supply USB bus power at maximum 2.0A to the compatible ports while the computer is selected. Enabled Enables Sleep and Charge function under battery mode. External devices connected to the USB bus power (DC5V) function that was included with your USB device. It also displays the remaining battery capacity. Disabled Enables Sleep and Charge function only when the AC adaptor is suitable for Sleep and Charge function. User's Manual 5-11 If all USB ports have the Sleep and Charge function, attach the mouse...
... ports. Function under Battery Mode This option can supply USB bus power at maximum 2.0A to the compatible ports while the computer is selected. Enabled Enables Sleep and Charge function under battery mode. External devices connected to the USB bus power (DC5V) function that was included with your USB device. It also displays the remaining battery capacity. Disabled Enables Sleep and Charge function only when the AC adaptor is suitable for Sleep and Charge function. User's Manual 5-11 If all USB ports have the Sleep and Charge function, attach the mouse...
User Manual
Page 85
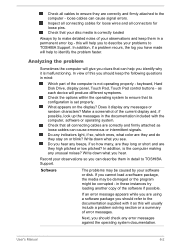
... software if possible. What appears on or blink? Write down what you should refer to make detailed notes of your observations and keep the following questions in a permanent error log - Next, you hear. Inspect all connecting cables for loose pins. In view of the computer is malfunctioning. keyboard, Hard Disk Drive, display panel, Touch Pad, Touch Pad control buttons - Do you identify why it display any error messages against the operating...
... software if possible. What appears on or blink? Write down what you should refer to make detailed notes of your observations and keep the following questions in a permanent error log - Next, you hear. Inspect all connecting cables for loose pins. In view of the computer is malfunctioning. keyboard, Hard Disk Drive, display panel, Touch Pad, Touch Pad control buttons - Do you identify why it display any error messages against the operating...
User Manual
Page 87
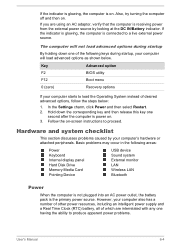
... options during startup, your computer also has a number of other power resources, including an intelligent power supply and a Real Time Clock (RTC) battery, all of the following areas: Power Keyboard Internal display panel Hard Disk Drive Memory Media Card Pointing Device USB device Sound system External monitor LAN Wireless LAN Bluetooth Power When the computer is not plugged into an AC power outlet, the battery pack is the primary power source. Follow the on . Basic problems may occur in the following keys during startup...
... options during startup, your computer also has a number of other power resources, including an intelligent power supply and a Real Time Clock (RTC) battery, all of the following areas: Power Keyboard Internal display panel Hard Disk Drive Memory Media Card Pointing Device USB device Sound system External monitor LAN Wireless LAN Bluetooth Power When the computer is not plugged into an AC power outlet, the battery pack is the primary power source. Follow the on . Basic problems may occur in the following keys during startup...
User Manual
Page 90
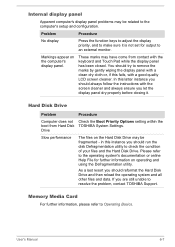
Hard Disk Drive Problem Procedure Computer does not Check the Boot Priority Options setting within the boot from contact with the keyboard and Touch Pad while the display panel has been closed. These marks may be related to the computer's setup and configuration. Please refer to Operating Basics. Memory Media Card For further information, please refer to the operating system's documentation or online Help File for output to check the condition...
Hard Disk Drive Problem Procedure Computer does not Check the Boot Priority Options setting within the boot from contact with the keyboard and Touch Pad while the display panel has been closed. These marks may be related to the computer's setup and configuration. Please refer to Operating Basics. Memory Media Card For further information, please refer to the operating system's documentation or online Help File for output to check the condition...
User Manual
Page 91
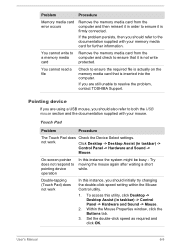
... documentation supplied with your memory media card for further information. Touch Pad Problem Procedure The Touch Pad does Check the Device Select settings. Within the Mouse Properties window, click the Buttons tab. 3. User's Manual 6-8 You cannot write to a memory media card Remove the memory media card from the computer and then reinsert it in order to ensure it is firmly connected. Click Desktop -> Desktop Assist (in taskbar) -> Control Panel -> Hardware and Sound -> Mouse. 2. Problem Procedure Memory media card error occurs Remove the memory media card from the computer...
... documentation supplied with your memory media card for further information. Touch Pad Problem Procedure The Touch Pad does Check the Device Select settings. Within the Mouse Properties window, click the Buttons tab. 3. User's Manual 6-8 You cannot write to a memory media card Remove the memory media card from the computer and then reinsert it in order to ensure it is firmly connected. Click Desktop -> Desktop Assist (in taskbar) -> Control Panel -> Hardware and Sound -> Mouse. 2. Problem Procedure Memory media card error occurs Remove the memory media card from the computer...
User Manual
Page 92
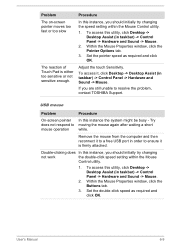
... taskbar) -> Control Panel -> Hardware and Sound -> Mouse. 2. Within the Mouse Properties window, click the Buttons tab. 3. Set the pointer speed as required and click OK. Remove the mouse from the computer and then reconnect it to ensure it , click Desktop -> Desktop Assist (in order to a free USB port in taskbar) -> Control Panel -> Hardware and Sound -> Mouse. Try moving the mouse again after waiting a short while. Adjust the touch Sensitivity. User's Manual 6-9 Problem The on-screen pointer moves...
... taskbar) -> Control Panel -> Hardware and Sound -> Mouse. 2. Within the Mouse Properties window, click the Buttons tab. 3. Set the pointer speed as required and click OK. Remove the mouse from the computer and then reconnect it to ensure it , click Desktop -> Desktop Assist (in order to a free USB port in taskbar) -> Control Panel -> Hardware and Sound -> Mouse. Try moving the mouse again after waiting a short while. Adjust the touch Sensitivity. User's Manual 6-9 Problem The on-screen pointer moves...
User Manual
Page 93
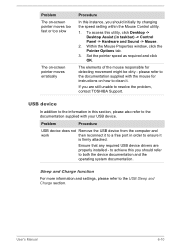
... OK. User's Manual 6-10 Within the Mouse Properties window, click the Pointer Options tab. 3. Problem Procedure USB device does not Remove the USB device from the computer and work then reconnect it to a free port in taskbar) -> Control Panel -> Hardware and Sound -> Mouse. 2. Ensure that any required USB device drivers are still unable to the USB Sleep and Charge section. If you should refer to both the device documentation and the operating system documentation. To access this instance...
... OK. User's Manual 6-10 Within the Mouse Properties window, click the Pointer Options tab. 3. Problem Procedure USB device does not Remove the USB device from the computer and work then reconnect it to a free port in taskbar) -> Control Panel -> Hardware and Sound -> Mouse. 2. Ensure that any required USB device drivers are still unable to the USB Sleep and Charge section. If you should refer to both the device documentation and the operating system documentation. To access this instance...
User Manual
Page 94
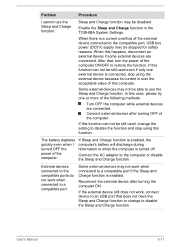
... is enabled. Enable the Sleep and Charge function in the TOSHIBA System Settings. In this computer. After that does not have the Sleep and Charge function or change the setting to the computer or disable the Sleep and Charge function. Some external devices may not be still used , change to the compatible port, USB bus power (DC5V) supply may be stopped for safety reasons. If this happens, disconnect an external device if some external devices are connected. Sleep and Charge function...
... is enabled. Enable the Sleep and Charge function in the TOSHIBA System Settings. In this computer. After that does not have the Sleep and Charge function or change the setting to the computer or disable the Sleep and Charge function. Some external devices may not be still used , change to the compatible port, USB bus power (DC5V) supply may be stopped for safety reasons. If this happens, disconnect an external device if some external devices are connected. Sleep and Charge function...
User Manual
Page 95
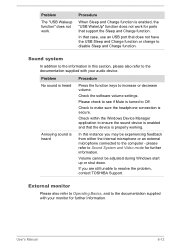
Check within the Windows Device Manager application to ensure the sound device is enabled and that does not have the USB Sleep and Charge function or change to disable Sleep and Charge function. If you may be adjusted during Windows start up or shut down. User's Manual 6-12 Problem The "USB Wakeup function" does not work for ports that support the Sleep and Charge function. Check the software volume settings. Please check to see if Mute is heard In this section, please also...
Check within the Windows Device Manager application to ensure the sound device is enabled and that does not have the USB Sleep and Charge function or change to disable Sleep and Charge function. If you may be adjusted during Windows start up or shut down. User's Manual 6-12 Problem The "USB Wakeup function" does not work for ports that support the Sleep and Charge function. Check the software volume settings. Please check to see if Mute is heard In this section, please also...
User Manual
Page 96
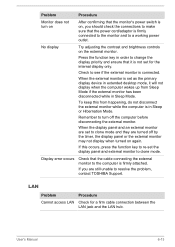
... the problem, contact TOSHIBA Support. When the display panel and an external monitor are set as the primary display device in Sleep Mode. Display error occurs Check that the power cord/adaptor is firmly attached. User's Manual 6-13 Remember to a working power outlet. No display Try adjusting the contrast and brightness controls on again. If this from Sleep Mode if the external monitor has been disconnected while in extended desktop mode, it is connected. LAN Problem Cannot access LAN Procedure Check for the internal display...
... the problem, contact TOSHIBA Support. When the display panel and an external monitor are set as the primary display device in Sleep Mode. Display error occurs Check that the power cord/adaptor is firmly attached. User's Manual 6-13 Remember to a working power outlet. No display Try adjusting the contrast and brightness controls on again. If this from Sleep Mode if the external monitor has been disconnected while in extended desktop mode, it is connected. LAN Problem Cannot access LAN Procedure Check for the internal display...
User Manual
Page 97
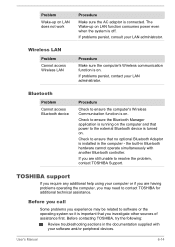
... optional Bluetooth Adaptor is installed in Bluetooth hardware cannot operate simultaneously with your computer or if you are still unable to the external Bluetooth device is turned on. Wireless LAN Problem Cannot access Wireless LAN Procedure Make sure the computer's Wireless communication function is on. The Wake-up on LAN does not work Procedure Make sure the AC adaptor is connected. Before contacting TOSHIBA, try the following: Review troubleshooting sections in the documentation supplied with another Bluetooth controller. Problem...
... optional Bluetooth Adaptor is installed in Bluetooth hardware cannot operate simultaneously with your computer or if you are still unable to the external Bluetooth device is turned on. Wireless LAN Problem Cannot access Wireless LAN Procedure Make sure the computer's Wireless communication function is on. The Wake-up on LAN does not work Procedure Make sure the AC adaptor is connected. Before contacting TOSHIBA, try the following: Review troubleshooting sections in the documentation supplied with another Bluetooth controller. Problem...


