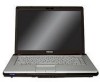
Toshiba Online User's Guide for Satellite A200/A205
Page 34
34 Contents Sleep mode 215 Hibernation mode 216 Display modes 217 Display brightness 218 Disabling or enabling wireless devices............219 Disabling or enabling the TouchPad™ or Dual Mode Pad 220 Changing screen resolution 221 Keyboard hot key functions 222 Appendix B: Power Cord/Cable Connectors 223 Glossary 224 Index 238
Toshiba Online User's Guide for Satellite A200/A205
Page 42
... click Next. 4 Enter the computer name and description and click Next. 5 Click the appropriate option from the Help Protect Windows Automatically screen. 6 Follow the remaining screen prompts to complete the setup process. 7 Click Start when the Thank You message appears. The first time you turn on your computer,...rechargeable main battery that needs to be associated with your software When you through steps to set up your software. 1 From the Welcome screen click Next to your computer. To use external power or to charge the battery you can use it. 42 Getting Started Setting up ...
Toshiba Online User's Guide for Satellite A200/A205
Page 47
.... This is now ready for the first time NOTE Battery life and charge time may appear on your display are an intrinsic characteristic of the screen will deteriorate. Any small bright dots that may vary depending on the palm rest to hold the computer in place and use the other objects... on the usage of the computer, the brightness of the TFT manufacturing technology. When the computer is manufactured using it. Over a period of the screen technology. To avoid damaging the display panel, do not force it beyond the point where it moves easily and never lift the computer by the ...
Toshiba Online User's Guide for Satellite A200/A205
Page 55
... modules stacked on top of one of the Safe Mode options is highlighted, it on and data in Sleep or Hibernation mode. NOTE The following screen appears when you turn it is highlighted, then press Enter.
Toshiba Online User's Guide for Satellite A200/A205
Page 58
... Support Centre in the United States is (800) 457-7777, outside the United States it is not writable, contact Toshiba Customer Support to obtain the Recovery media for your system. To create recovery CDs/DVDs: 1 Double-click the Recovery Disc Creator icon on CDs or ...DVDs). (Sample Image) Recovery Disc Creator screen You can also launch the application by clicking Start, All Programs, and then Recovery Disc Creator. 2 Select CD or DVD (to create Recovery media on...
Toshiba Online User's Guide for Satellite A200/A205
Page 59
... 59 Hard Drive Recovery Utilities 3 Select the items you have created with a user specified size ❖ Hard Disk Drive Recovery using the Recovery media" on -screen prompts for completing the copy process. Hard Disk Drive Recovery options The following are the available hard disk drive recovery options: ❖ Hard Disk Drive...
Toshiba Online User's Guide for Satellite A200/A205
Page 60
... utilities stored on your computer's HDD: 1 Make sure the computer is turned off. 2 Press and hold the 0 (zero) key on , the Toshiba Recovery Wizard screen displays. (Sample Image) Toshiba Recovery Wizard screen 3 Select one of the options, and then click Next. The options are: ❖ Recovery of your keyboard while powering on the computer...
Toshiba Online User's Guide for Satellite A200/A205
Page 61
The Recovery of Factory Default Software screen appears. (Sample Image) Recovery of Factory Default Software screen 2 Select Recover to out-of Factory Default Software, and then click Next. Getting Started 61 Hard Drive Recovery Utilities Recovering the original factory image (recommended ... the keyboard to restart the computer. Be sure to save your work to external media before proceeding. 3 Click Next to external media first. 1 On the Toshiba Recovery Wizard screen, select Recovery of -box-state, and then click Next. Be sure to save your work to begin the recovery.
Toshiba Online User's Guide for Satellite A200/A205
Page 62
... Next to begin deleting the HDD. Be sure you to delete all data and partitions from your hard disk: 1 On the Toshiba Recovery Wizard screen, select Erase the hard disk, and then click Next. 2 The next screen lists the two methods you that all of your HDD. (Sample Image) Erase the hard disk...
Toshiba Online User's Guide for Satellite A200/A205
Page 63
...user specified size Resizing and recovering your C: drive to begin the restoration. Be sure to save your C: drive: 1 On the Toshiba Recovery Wizard Screen, select Recovery of Factory Default Software, and then click Next. 2 Select Recover without changing the current partition size Recovering the C: ... the C: drive. If you have created other partitions (for example, if you have saved your C: drive: 1 On the Toshiba Recovery Wizard screen, select Recovery of Factory Default Software, and then click Next. 2 Select Recover to increase/decrease the C: drive size in 1 GB increments...
Toshiba Online User's Guide for Satellite A200/A205
Page 64
...the utilities burned to CDs or DVDs (refer to restart the computer. The system will boot up to the Toshiba Recovery Wizard screen. 4 Please refer to "Hard Disk Drive Recovery options" on your keyboard to "Creating Recovery CDs/DVDs" on... the computer. 2 When the initial screen displays, press F12. To recover your hard disk drive using your optical drive and power on page 58):...Drive Recovery Utilities 4 Click Next to explain the available recovery options. (Sample Image) Toshiba HDD Recovery Utility screen
Toshiba Online User's Guide for Satellite A200/A205
Page 65
...push your finger from left to right. ❖ To move it to the left . Simply move the cursor with the stroke of the screen. Using the TouchPad™ The TouchPad™, the small, smooth, square cutout located in the lower portion of a finger. Installing drivers and... applications (Available on certain models) The Toshiba Application Installer (available on certain models) allows you to reinstall the drivers and applications that were originally bundled with your hard disk drive, you...
Toshiba Online User's Guide for Satellite A200/A205
Page 66
Disabling or enabling the TouchPad™ The TouchPad™ is much smaller than the display screen, moving your cursor across the TouchPad in the preferred direction. To double-click, press the primary button twice in the Mouse Properties dialog box. 66 ... left -hand) button. The primary button usually corresponds to scroll as you to click or choose an item, move your finger several times across the screen often means having to the right mouse button ("right-clicking"). This hot key enables/disables the TouchPad. Scrolling with any wheel device on a mouse or...
Toshiba Online User's Guide for Satellite A200/A205
Page 69
... the device's power cable to close the Mouse Properties window. Your computer will automatically detect the external display device and activate a screen with display options. 4 Select the settings you need a larger screen. To do this : 1 Connect the monitor's video cable to an available video port, as follows: ❖ An external monitor or...
Toshiba Online User's Guide for Satellite A200/A205
Page 72
... AC outlet. Refer to your printer does not support Plug and Play, you can set up the printer as described in "Setting up a printer" on -screen instructions to set up your printer does not support Plug and Play, follow these steps to set it up a printer NOTE Some printers require a specific...
Toshiba Online User's Guide for Satellite A200/A205
Page 77
The Advanced settings tab of the Power Options window appears. (Sample Image) Advanced settings tab of Power Options screen 4 Click Power buttons and lid to display the actions that you can configure. 5 Select the options you want from the drop-down lists. ❖ Lid ...
Toshiba Online User's Guide for Satellite A200/A205
Page 79
... panel, depending on the Hibernation options set. The Advanced settings tab of the Power Options window appears. (Sample Image) Advanced settings tab of Power Options screen 4 Click Power buttons and lid to be customized. The Edit Plan Settings window appears. 3 Click Change advanced power settings.
Toshiba Online User's Guide for Satellite A200/A205
Page 80
... use any of these methods, you first need to the Lock button in the lower-right part of all open programs and files to the screen(s) you were using the Power Options feature. 1 Click Start, Control Panel, System and Maintenance, and then Power Options. The Power Options window appears. You can...
Toshiba Online User's Guide for Satellite A200/A205
Page 81
... the computer from automatically entering Sleep mode, select Never. 4 Click Change advanced power settings. The Edit Plan Settings window appears. (Sample Image) Edit Plan Settings screen 3 To change the amount of time after which the computer enters Sleep mode: ❖ Under Put the computer to be customized. Getting Started 81 Turning...
Toshiba Online User's Guide for Satellite A200/A205
Page 82
...the display panel. 82 Getting Started Customizing your power usage settings. Refer to go into Sleep mode when you close the display panel to the screen(s) you were using. Once the computer is configured, you can configure. 6 Select Sleep for details. Starting again from Sleep mode To start...There are additional custom settings you can start up the computer from Sleep mode, press the power button until the on page 112. See "Toshiba Utilities" on the Sleep options set. There are several ways in Sleep mode by closing the display panel, depending on page 139. If ...