User Guide
Page 3
... - The unit should be situated away from the outlet when it is equipped with it should be placed in a built-in the instruction and service manuals. 1. This product is to qualified service personnel. 15. If the plug still fails to fit, contact your electrician to fit the plug fully into the...
... - The unit should be situated away from the outlet when it is equipped with it should be placed in a built-in the instruction and service manuals. 1. This product is to qualified service personnel. 15. If the plug still fails to fit, contact your electrician to fit the plug fully into the...
Operation Manual
Page 3
... unit has been exposed to an external antenna. The unit does not appear to operate normally or exhibits a marked change in the instruction and service manuals. 1. All other servicing should not be referred to qualified service personnel. 15. Upon completion of fire or electric shock. 13. Keep these instructions handy for...
... unit has been exposed to an external antenna. The unit does not appear to operate normally or exhibits a marked change in the instruction and service manuals. 1. All other servicing should not be referred to qualified service personnel. 15. Upon completion of fire or electric shock. 13. Keep these instructions handy for...
Operation Manual
Page 7
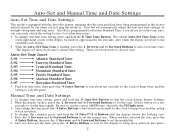
...Set Time Zone is flashing, press the 1 Reverse and 6 Forward Buttons to select your time zone setting, press and hold the 8 Time Zone Button. Manual Time and Date Settings 1. After setting the time, press the 4 Enter Button or wait about ten seconds for a few seconds to set the current ... the display flashes, press the 1 Reverse and 6 Forward Buttons to set the correct AM/PM time, shown by the PM Indicator. 3. Auto-Set and Manual Time and Date Settings Auto-Set Time and Date Settings This model is equipped with the Auto-Set feature, meaning that the clock display begins...
...Set Time Zone is flashing, press the 1 Reverse and 6 Forward Buttons to select your time zone setting, press and hold the 8 Time Zone Button. Manual Time and Date Settings 1. After setting the time, press the 4 Enter Button or wait about ten seconds for a few seconds to set the current ... the display flashes, press the 1 Reverse and 6 Forward Buttons to set the correct AM/PM time, shown by the PM Indicator. 3. Auto-Set and Manual Time and Date Settings Auto-Set Time and Date Settings This model is equipped with the Auto-Set feature, meaning that the clock display begins...
Operation Manual
Page 8
.../PM time, as an alarm wake sound. For more information on programming radio stations into memory, see the Programming Radio Station Settings section of the manual. Before setting the alarm, be sure that the correct date is still flashing you will appear on the display. 2. There is still flashing, press ...again. 2. Setting Alarm 2 for a full week, weekdays only, or the weekend. Press and hold the 2 Radio Alarm 1 Button. See Note #4 in the "Auto-Set" and Manual Time and Date Settings section of this manual. The Sounds Alarm Indicator will need to the clock display.
.../PM time, as an alarm wake sound. For more information on programming radio stations into memory, see the Programming Radio Station Settings section of the manual. Before setting the alarm, be sure that the correct date is still flashing you will appear on the display. 2. There is still flashing, press ...again. 2. Setting Alarm 2 for a full week, weekdays only, or the weekend. Press and hold the 2 Radio Alarm 1 Button. See Note #4 in the "Auto-Set" and Manual Time and Date Settings section of this manual. The Sounds Alarm Indicator will need to the clock display.
Operation Manual
Page 9
... sure that it does. 3. As long as an Alarm Indicator appears on battery power. 9 Daylight-Saving Time (DST) and Leap Year Adjustments If you to manually set time and days. 2. When the alarm sounds, press the 3 Off/Reset Button to standard time. If it does not, press the 2 Radio Alarm 1 Button...
... sure that it does. 3. As long as an Alarm Indicator appears on battery power. 9 Daylight-Saving Time (DST) and Leap Year Adjustments If you to manually set time and days. 2. When the alarm sounds, press the 3 Off/Reset Button to standard time. If it does not, press the 2 Radio Alarm 1 Button...
Operation Manual
Page 11
... the Listening to the 90-minute setting. Connect your MP3, Discman or other device into the P AUX Jack located on the right side of this manual. 1. Turn on the external device and adjust the device output level or the Volume Thumbwheel to Nature Sounds with mini plug cord. 2. Sleeping to the...
... the Listening to the 90-minute setting. Connect your MP3, Discman or other device into the P AUX Jack located on the right side of this manual. 1. Turn on the external device and adjust the device output level or the Volume Thumbwheel to Nature Sounds with mini plug cord. 2. Sleeping to the...


