
User Guide
Page 3
... ...82 Setting the Password ...83 Setting Up Your Computer with VAIO Central ...86 Using the Power Saving Modes ...87 Upgrading Your VAIO Computer...90 Before Upgrading Your Computer ...91 Adding and Removing Memory...92 Installing the Hard Disk Drive...102 Precautions ...113 On Handling the LCD Screen ...114 On Using the Power Source ...115...
... ...82 Setting the Password ...83 Setting Up Your Computer with VAIO Central ...86 Using the Power Saving Modes ...87 Upgrading Your VAIO Computer...90 Before Upgrading Your Computer ...91 Adding and Removing Memory...92 Installing the Hard Disk Drive...102 Precautions ...113 On Handling the LCD Screen ...114 On Using the Power Source ...115...

User Guide
Page 6
...Internet. 2 Go to All Programs, and click VAIO Support Central. 2 Click VAIO Documentation. 3 Click MCE guide. Provides information about the software programs included with your entire hard disk drive to All Programs, and click VAIO Support Central. 2 Click VAIO Documentation. 3 Click VAIO Recovery Guide. ❑ MCE guide - The ... hardware and software configuration of your VAIO computer. To access this online MCE guide: 1 Click Start, point to the Sony online support Web site at http://www.sony.com/pcsupport for customers in USA, at http://www.sony.ca/support for customers in Canada,...
...Internet. 2 Go to All Programs, and click VAIO Support Central. 2 Click VAIO Documentation. 3 Click MCE guide. Provides information about the software programs included with your entire hard disk drive to All Programs, and click VAIO Support Central. 2 Click VAIO Documentation. 3 Click VAIO Recovery Guide. ❑ MCE guide - The ... hardware and software configuration of your VAIO computer. To access this online MCE guide: 1 Click Start, point to the Sony online support Web site at http://www.sony.com/pcsupport for customers in USA, at http://www.sony.ca/support for customers in Canada,...
User Guide
Page 90
To find the nearest center or agent, visit the Sony online support Web site. ❑ Before Upgrading Your Computer (page 91) ❑ Adding and Removing Memory (page 92) ❑ Installing the Hard Disk Drive (page 102) To avoid the invalidation of memory installed on your dealer to... computer. ❑ You do not touch the connectors or open the memory panel. For assistance, contact an authorized Sony Service Center. n 90 N Upgrading Your VAIO Computer Upgrading Your VAIO Computer Your computer and memory modules use high precision components and electronic connectors technology.
To find the nearest center or agent, visit the Sony online support Web site. ❑ Before Upgrading Your Computer (page 91) ❑ Adding and Removing Memory (page 92) ❑ Installing the Hard Disk Drive (page 102) To avoid the invalidation of memory installed on your dealer to... computer. ❑ You do not touch the connectors or open the memory panel. For assistance, contact an authorized Sony Service Center. n 90 N Upgrading Your VAIO Computer Upgrading Your VAIO Computer Your computer and memory modules use high precision components and electronic connectors technology.
User Guide
Page 102
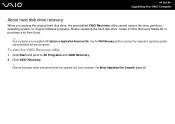
... to correct the drive mapping, visit the Sony online support Web site. * Drive mapping refers to the assignment of an identifying letter to a specific drive, such as Drive C or Drive D which identify the original hard disk drive. About drive mapping When a new hard disk drive is installed, the original drive mapping* may not reflect correct drive/icon associations. The identified drives, including those for...
... to correct the drive mapping, visit the Sony online support Web site. * Drive mapping refers to the assignment of an identifying letter to a specific drive, such as Drive C or Drive D which identify the original hard disk drive. About drive mapping When a new hard disk drive is installed, the original drive mapping* may not reflect correct drive/icon associations. The identified drives, including those for...
User Guide
Page 103
.... ! Observe the proper safety precautions when you replace the original hard disk drive, the preinstalled VAIO Recovery utility cannot restore the drive partitions, operating system, or original software programs. Before replacing the hard disk drive, create a VAIO Recovery Media Kit or purchase a kit from Sony. ✍ Your computer is not supplied with System or Application Recovery CDs. See...
.... ! Observe the proper safety precautions when you replace the original hard disk drive, the preinstalled VAIO Recovery utility cannot restore the drive partitions, operating system, or original software programs. Before replacing the hard disk drive, create a VAIO Recovery Media Kit or purchase a kit from Sony. ✍ Your computer is not supplied with System or Application Recovery CDs. See...

User Guide
Page 104
n 104 N Upgrading Your VAIO Computer Drive letter assignment When a new hard disk drive is installed, an identifying drive letter is equipped with a Serial ATA (SATA) hard disk drive, you start the Click to DVD software creates a new folder location on the new drive. Notes on installing a new hard disk drive ❑ If the computer is assigned. This new folder is the...
n 104 N Upgrading Your VAIO Computer Drive letter assignment When a new hard disk drive is installed, an identifying drive letter is equipped with a Serial ATA (SATA) hard disk drive, you start the Click to DVD software creates a new folder location on the new drive. Notes on installing a new hard disk drive ❑ If the computer is assigned. This new folder is the...

User Guide
Page 105
If you remove the back panel immediately after you attempt to touch. To install an additional hard disk drive 1 Shut down the computer, the internal components may be too hot to remove the panel. Wait about one hour to the internal hard disk drive bay. ! n 105 N Upgrading Your VAIO Computer Installing an Additional Hard Disk Drive You can install up to two SATA hard disk drives to let the components cool down before you shut down the computer and turn off all peripheral devices, such as a printer. 2 Unplug the computer and disconnect any peripheral devices.
If you remove the back panel immediately after you attempt to touch. To install an additional hard disk drive 1 Shut down the computer, the internal components may be too hot to remove the panel. Wait about one hour to the internal hard disk drive bay. ! n 105 N Upgrading Your VAIO Computer Installing an Additional Hard Disk Drive You can install up to two SATA hard disk drives to let the components cool down before you shut down the computer and turn off all peripheral devices, such as a printer. 2 Unplug the computer and disconnect any peripheral devices.

User Guide
Page 108
n 108 N Upgrading Your VAIO Computer 7 Unscrew the four screws on the hard disk cover (1), lift the cover, and set it aside. 6 Unscrew the two screws on the drive holder (1).
n 108 N Upgrading Your VAIO Computer 7 Unscrew the four screws on the hard disk cover (1), lift the cover, and set it aside. 6 Unscrew the two screws on the drive holder (1).

User Guide
Page 109
n 109 N Upgrading Your VAIO Computer 8 Pull the drive holder slightly out and detach the power and interface cables from the original hard disk drive that is preinstalled in the computer.
n 109 N Upgrading Your VAIO Computer 8 Pull the drive holder slightly out and detach the power and interface cables from the original hard disk drive that is preinstalled in the computer.

User Guide
Page 110
n 110 N Upgrading Your VAIO Computer 10 Slide a new drive into the drive holder and align the holes on each side of the drive holder. ✍ The new hard disk drive is supplied with the necessary screws. Do not overtighten these screws when securing the drive to the drive holder with screws, through the holes on each side of the drive bay. 11 Secure the drive to the drive holder. 9 Slide the drive holder completely out.
n 110 N Upgrading Your VAIO Computer 10 Slide a new drive into the drive holder and align the holes on each side of the drive holder. ✍ The new hard disk drive is supplied with the necessary screws. Do not overtighten these screws when securing the drive to the drive holder with screws, through the holes on each side of the drive bay. 11 Secure the drive to the drive holder. 9 Slide the drive holder completely out.

User Guide
Page 111
Connect the power and internal SATA cables to the original and new hard disks and slide the drive holder in completely. 13 Replace the hard disk cover and the back panel, and then place the computer upright. n 111 N Upgrading Your VAIO Computer 12 Align the drive holder with the tracks on the inside of the chassis.
Connect the power and internal SATA cables to the original and new hard disks and slide the drive holder in completely. 13 Replace the hard disk cover and the back panel, and then place the computer upright. n 111 N Upgrading Your VAIO Computer 12 Align the drive holder with the tracks on the inside of the chassis.

User Guide
Page 112
... and right-click My Computer. 3 Select Manage from the menu. The Windows XP operating system recognizes the new hard disk drive and applies the NTFS format. The New Partition wizard window appears. 8 Follow the on-screen instructions to Windows as... an extended partition in Windows NT file system (NTFS) format. To identify the additional hard disk space 1 Log on to complete the process. n 112 N Upgrading Your VAIO Computer Identifying the Additional Hard...
... and right-click My Computer. 3 Select Manage from the menu. The Windows XP operating system recognizes the new hard disk drive and applies the NTFS format. The New Partition wizard window appears. 8 Follow the on-screen instructions to Windows as... an extended partition in Windows NT file system (NTFS) format. To identify the additional hard disk space 1 Log on to complete the process. n 112 N Upgrading Your VAIO Computer Identifying the Additional Hard...

