User Guide
Page 1
... on using the MOTION EYE camera 23 Using the Pointing Device 24 To replace the pointing device cover 25 Using the Jog Dial Control 26 To use the Jog Dial Control 26 Using the Indicate Window 27 Selecting a mode 28 Selecting a menu item 29 To change the Jog Dial settings 29 Using the Jog Dial Navigator with Sony software 29 Using Memory Stick Media 31 Types of Memory Stick media 31 Notes on using Memory Stick media 33 Using PC Cards 34...
... on using the MOTION EYE camera 23 Using the Pointing Device 24 To replace the pointing device cover 25 Using the Jog Dial Control 26 To use the Jog Dial Control 26 Using the Indicate Window 27 Selecting a mode 28 Selecting a menu item 29 To change the Jog Dial settings 29 Using the Jog Dial Navigator with Sony software 29 Using Memory Stick Media 31 Types of Memory Stick media 31 Notes on using Memory Stick media 33 Using PC Cards 34...

User Guide
Page 3
... disc drives 58 Connecting a USB Mouse 59 To connect a USB mouse 59 Connecting VAIO Computers 60 Connecting with i.LINK 60 To connect two VAIO computers 60 Connecting an i.LINK Device 62 Connecting an External Display 65 To connect a computer display 65 To connect a projector 66 To connect a TV 67 Connecting a USB Printer 68 To connect a printer 68 Connecting an External Microphone 69 To connect an external microphone 69 To record from a microphone or audio equipment 69 To switch the microphone jack functionality 69 To adjust sound volume in the Recording Control window...
... disc drives 58 Connecting a USB Mouse 59 To connect a USB mouse 59 Connecting VAIO Computers 60 Connecting with i.LINK 60 To connect two VAIO computers 60 Connecting an i.LINK Device 62 Connecting an External Display 65 To connect a computer display 65 To connect a projector 66 To connect a TV 67 Connecting a USB Printer 68 To connect a printer 68 Connecting an External Microphone 69 To connect an external microphone 69 To record from a microphone or audio equipment 69 To switch the microphone jack functionality 69 To adjust sound volume in the Recording Control window...

User Guide
Page 4
...75 The Wireless LAN Access Point 75 The Wireless LAN PC Card 76 Customizing Your VAIO Computer..........77 Displaying the Sony Notebook Setup Screen 78 Sony Notebook Setup tabs 79 Controlling Power Management 80 To view the Power Management status icons 80 Power Management profiles 81 Power Management commands 83 Conserving battery power 84 Displaying Battery Information 85 Battery icon descriptions 86 Displaying detailed battery information 86 Selecting the Display Mode 88 Changing the window design of Sony software 89 Using the Multilingual User Interface Language Option 91 To...
...75 The Wireless LAN Access Point 75 The Wireless LAN PC Card 76 Customizing Your VAIO Computer..........77 Displaying the Sony Notebook Setup Screen 78 Sony Notebook Setup tabs 79 Controlling Power Management 80 To view the Power Management status icons 80 Power Management profiles 81 Power Management commands 83 Conserving battery power 84 Displaying Battery Information 85 Battery icon descriptions 86 Displaying detailed battery information 86 Selecting the Display Mode 88 Changing the window design of Sony software 89 Using the Multilingual User Interface Language Option 91 To...

User Guide
Page 13
... Down keys). Numbers appear on a typical calculator. Escape key The Esc (Escape) key is the Help key. Correction keys The Insert, Backspace, and Delete keys enable you do so, the Num Lock light will be on the screen (the four arrow keys which also function as addition and subtraction. The task associated with each function key may vary from one application to cancel commands. Using the Keyboard Functions...
... Down keys). Numbers appear on a typical calculator. Escape key The Esc (Escape) key is the Help key. Correction keys The Insert, Backspace, and Delete keys enable you do so, the Num Lock light will be on the screen (the four arrow keys which also function as addition and subtraction. The task associated with each function key may vary from one application to cancel commands. Using the Keyboard Functions...

User Guide
Page 33
... images from a digital video camera via Memory Stick® media, see "Connecting an i.LINK Device" for more information on using Memory Stick media, you to continue. See the instructions supplied with corrosive substances. To prolong the life of 10 seconds after the media finishes reading or writing data before removing it. If the media is set to LOCK, data cannot be used with copyright protected data...
... images from a digital video camera via Memory Stick® media, see "Connecting an i.LINK Device" for more information on using Memory Stick media, you to continue. See the instructions supplied with corrosive substances. To prolong the life of 10 seconds after the media finishes reading or writing data before removing it. If the media is set to LOCK, data cannot be used with copyright protected data...

User Guide
Page 36
You can use Sony Notebook Setup to your system is inserted, you may require that you disable idle devices when using the PC Card. VAIO® Computer User Guide Notes on PC Cards ❑ For some functions of the PC Card with your system to use . 36 See "Displaying the Sony Notebook Setup Screen" for more information. ❑ Use the most recent software driver provided by the PC Card manufacturer. ❑ If an exclamation mark...
You can use Sony Notebook Setup to your system is inserted, you may require that you disable idle devices when using the PC Card. VAIO® Computer User Guide Notes on PC Cards ❑ For some functions of the PC Card with your system to use . 36 See "Displaying the Sony Notebook Setup Screen" for more information. ❑ Use the most recent software driver provided by the PC Card manufacturer. ❑ If an exclamation mark...

User Guide
Page 37
... a fully charged battery. Hibernate mode In the Hibernate mode, the state of the system is saved on the hard disk drive and power is in this mode. To activate Hibernate mode 1 Press the key combination Fn+F12, or press the power button and release it is turned off a specific device such as the source of the system in this mode. Using Power Saving Modes Using Power Saving Modes When you use a battery as the LCD or the hard disk.
... a fully charged battery. Hibernate mode In the Hibernate mode, the state of the system is saved on the hard disk drive and power is in this mode. To activate Hibernate mode 1 Press the key combination Fn+F12, or press the power button and release it is turned off a specific device such as the source of the system in this mode. Using Power Saving Modes Using Power Saving Modes When you use a battery as the LCD or the hard disk.

User Guide
Page 84
... peripheral devices to the hard disk drive and turns off automatically to the active state, press any key or the power button on power. The video display system is one of the largest consumers of power in memory (RAM). To return the system to the original state, use the power button to turn off the video display to switch off the system power. Conserving battery power When using the computer with a battery, the LCD display and the hard disk drive can be set...
... peripheral devices to the hard disk drive and turns off automatically to the active state, press any key or the power button on power. The video display system is one of the largest consumers of power in memory (RAM). To return the system to the original state, use the power button to turn off the video display to switch off the system power. Conserving battery power When using the computer with a battery, the LCD display and the hard disk drive can be set...

User Guide
Page 99
Verify that the System Memory displayed in the left panel matches the amount of memory installed. ✍ If the amount of memory is not correct, turn off the computer, and reinstall the memory module. Confirming Added Memory Capacity Confirming Added Memory Capacity 1 Turn on the computer. 2 Click Start on the Windows® taskbar, point to All Programs, and then click Sony Notebook Setup. 3 Click the About This Notebook tab. Sony Notebook Setup Dialog Box 99 See "Removing a Memory Module" and "Installing a Memory Module" for instructions.
Verify that the System Memory displayed in the left panel matches the amount of memory installed. ✍ If the amount of memory is not correct, turn off the computer, and reinstall the memory module. Confirming Added Memory Capacity Confirming Added Memory Capacity 1 Turn on the computer. 2 Click Start on the Windows® taskbar, point to All Programs, and then click Sony Notebook Setup. 3 Click the About This Notebook tab. Sony Notebook Setup Dialog Box 99 See "Removing a Memory Module" and "Installing a Memory Module" for instructions.
User Guide
Page 117
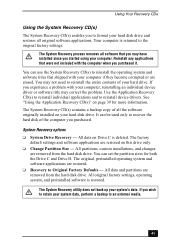
... factory settings. If you wish to retain your hard disk drive and restores all original software applications. The System Recovery process removes all the software originally installed on page 39 for both the Drive C and Drive D. Use the Application Recovery CD(s) to reinstall individual applications and to an external media. 41 The original, preinstalled operating system and software applications are restored. ❑ Recovery to format your system data, perform a backup to reinstall device drivers. Using Your Recovery...
... factory settings. If you wish to retain your hard disk drive and restores all original software applications. The System Recovery process removes all the software originally installed on page 39 for both the Drive C and Drive D. Use the Application Recovery CD(s) to reinstall individual applications and to an external media. 41 The original, preinstalled operating system and software applications are restored. ❑ Recovery to format your system data, perform a backup to reinstall device drivers. Using Your Recovery...

User Guide
Page 122
... cables are adjusted correctly. appears. 122 See the manual supplied with your system properly. If this occurs on a regular basis, contact Sony Computing Support at: http://www.sony.com/pcsupport/. Press Enter. 3 Press Ð to malfunction. Check that the power indicator on the front panel of the screen. Check that it is turned on. VAIO® Computer User Guide Troubleshooting Your Computer My computer does not start...
... cables are adjusted correctly. appears. 122 See the manual supplied with your system properly. If this occurs on a regular basis, contact Sony Computing Support at: http://www.sony.com/pcsupport/. Press Enter. 3 Press Ð to malfunction. Check that the power indicator on the front panel of the screen. Check that it is turned on. VAIO® Computer User Guide Troubleshooting Your Computer My computer does not start...

User Guide
Page 123
... floppy disk drive. 2 Remove any peripheral devices connected to the computer. 3 Turn off the computer, and then remove the floppy disk. 2 Restart the computer and confirm that Windows starts properly. ❑ If Windows still does not start , contact Sony Computing Support. 123 The message "Load default configuration now?" The BIOS setup menu screen appears. 5 Press the directional arrow keys to select the Exit menu. 6 Press the arrow keys to select "Exit" (Save Changes), and...
... floppy disk drive. 2 Remove any peripheral devices connected to the computer. 3 Turn off the computer, and then remove the floppy disk. 2 Restart the computer and confirm that Windows starts properly. ❑ If Windows still does not start , contact Sony Computing Support. 123 The message "Load default configuration now?" The BIOS setup menu screen appears. 5 Press the directional arrow keys to select the Exit menu. 6 Press the arrow keys to select "Exit" (Save Changes), and...

User Guide
Page 126
... to external display mode. Press any key to activate the screen. ❑ The display mode may be displayed on both the LCD display and an external display at the same time. The image on the LCD display and an external display. I cannot simultaneously display movies, DVD video, or the Smart Capture (Finder) window on my connected external display is charged. ❑ The computer may be set to change the video resolution of my display. VAIO® Computer User Guide Troubleshooting the LCD Screen My LCD screen is...
... to external display mode. Press any key to activate the screen. ❑ The display mode may be displayed on both the LCD display and an external display at the same time. The image on the LCD display and an external display. I cannot simultaneously display movies, DVD video, or the Smart Capture (Finder) window on my connected external display is charged. ❑ The computer may be set to change the video resolution of my display. VAIO® Computer User Guide Troubleshooting the LCD Screen My LCD screen is...

User Guide
Page 127
... "Using Your Recovery CDs" for details. Troubleshooting the Mouse and Pointing Device Troubleshooting the Mouse and Pointing Device My mouse does not work. ❑ If you are using an optional Sony USB mouse, such as the PCGA-UMS1 series, check that the mouse cable is interpreting a single tap as a double-click, you must restart the computer to make the pointing device work properly. ❑ You may have disabled the pointing device without a mouse being connected...
... "Using Your Recovery CDs" for details. Troubleshooting the Mouse and Pointing Device Troubleshooting the Mouse and Pointing Device My mouse does not work. ❑ If you are using an optional Sony USB mouse, such as the PCGA-UMS1 series, check that the mouse cable is interpreting a single tap as a double-click, you must restart the computer to make the pointing device work properly. ❑ You may have disabled the pointing device without a mouse being connected...
User Guide
Page 132
... WAN Network Driver disabled. If you may increase boot time by up . Verify that are located on Your Computer" section for technical support. VAIO® Computer User Guide Troubleshooting Software My software program stops responding or crashes. Contact the software publisher or designated provider for more information. What can I cannot use DVgate or Smart Connect software. Do the following: 1 Click Start in the tray with device name "WAN Network Driver...
... WAN Network Driver disabled. If you may increase boot time by up . Verify that are located on Your Computer" section for technical support. VAIO® Computer User Guide Troubleshooting Software My software program stops responding or crashes. Contact the software publisher or designated provider for more information. What can I cannot use DVgate or Smart Connect software. Do the following: 1 Click Start in the tray with device name "WAN Network Driver...
User Guide
Page 134
... free from any line noise. ❑ If your Internet Service Provider, check that the ISP is compatible with a V.90/K56flex-compatible modem. If you think your modem is not connecting properly to other modems). VAIO® Computer User Guide Troubleshooting the Modem My modem does not work. ❑ Check that the telephone cable is slow. Your computer is working. See "Connecting a Telephone Cable...
... free from any line noise. ❑ If your Internet Service Provider, check that the ISP is compatible with a V.90/K56flex-compatible modem. If you think your modem is not connecting properly to other modems). VAIO® Computer User Guide Troubleshooting the Modem My modem does not work. ❑ Check that the telephone cable is slow. Your computer is working. See "Connecting a Telephone Cable...

User Guide
Page 141
... audio adjusting volume 17 troubleshooting 135 Audio tab 79 AV In 44 AV Out 44 B battery packs charge status icons 86 conserving battery power 84 BatteryScope utility 85 brightness adjusting 17 built-in speaker 17 volume 17 C camera built-in 19 digital video camcorder 62 notes on 23 canceling commands 13 Caps Lock indicator light 16 CD or DVD discs cleaning 52 handling 51 inserting 50 CD-ROM drive closing lid 51 connecting...
... audio adjusting volume 17 troubleshooting 135 Audio tab 79 AV In 44 AV Out 44 B battery packs charge status icons 86 conserving battery power 84 BatteryScope utility 85 brightness adjusting 17 built-in speaker 17 volume 17 C camera built-in 19 digital video camcorder 62 notes on 23 canceling commands 13 Caps Lock indicator light 16 CD or DVD discs cleaning 52 handling 51 inserting 50 CD-ROM drive closing lid 51 connecting...

User Guide
Page 142
... key 14 cursor-movement keys 13 D digital video camera 62 display connecting an external 65 mode 88 drives 49 CD-ROM 49 floppy disk 46 optical 49 troubleshooting 129 DV In/Out 62 DVD-ROM drive tray troubleshooting 130 DVgate applications 107 E Eject button 47 ejecting floppy disks 47 Escape key 13 142 Ethernet port 44 expanding computer capabilities 75 external display 65 microphone 69 mouse 59 speakers 74 F floppy disk drive connecting 46 disconnecting 47 floppy disks...
... key 14 cursor-movement keys 13 D digital video camera 62 display connecting an external 65 mode 88 drives 49 CD-ROM 49 floppy disk 46 optical 49 troubleshooting 129 DV In/Out 62 DVD-ROM drive tray troubleshooting 130 DVgate applications 107 E Eject button 47 ejecting floppy disks 47 Escape key 13 142 Ethernet port 44 expanding computer capabilities 75 external display 65 microphone 69 mouse 59 speakers 74 F floppy disk drive connecting 46 disconnecting 47 floppy disks...

User Guide
Page 143
... Maximum Battery Life power setting 82 Maximum Performance power setting 82 memory adding 93 confirming added capacity 99 removing 95 memory module installing 34 Memory Stick notes on 33 troubleshooting 137 using 31 Memory Stick card slot 32 Memory Stick media displaying contents 32 microphone external 69 troubleshooting 136 modem troubleshooting 134 monitor connecting 65 switching among 17 MOTION EYE camera notes on 23 using 19 mouse connecting 59 troubleshooting 127 multiple telephone lines 40 N navigation keys 13 network connecting 34 Notebook Setup tabs 79 Num Lock indicator light...
... Maximum Battery Life power setting 82 Maximum Performance power setting 82 memory adding 93 confirming added capacity 99 removing 95 memory module installing 34 Memory Stick notes on 33 troubleshooting 137 using 31 Memory Stick card slot 32 Memory Stick media displaying contents 32 microphone external 69 troubleshooting 136 modem troubleshooting 134 monitor connecting 65 switching among 17 MOTION EYE camera notes on 23 using 19 mouse connecting 59 troubleshooting 127 multiple telephone lines 40 N navigation keys 13 network connecting 34 Notebook Setup tabs 79 Num Lock indicator light...

User Guide
Page 144
... R Recovery CDs 115 removing floppy disk drive 47 floppy disks 47 memory module 95 restoring data 115 S Scroll Lock indicator light 16 setup screen About This Computer tab 79 Audio tab 79 displaying 78 Power On Password tab 79 setup tabs 79 Shift key 14 software descriptions 102 DVgate 107 troubleshooting 132 using the Jog Dial control with 29 Sony Fax-on-Demand 140 Sony Notebook Setup screen 78 Sony Service Center 111 speakers connecting 74 troubleshooting 135 Standby mode 17, 37, 84 switching display 17 monitor...
... R Recovery CDs 115 removing floppy disk drive 47 floppy disks 47 memory module 95 restoring data 115 S Scroll Lock indicator light 16 setup screen About This Computer tab 79 Audio tab 79 displaying 78 Power On Password tab 79 setup tabs 79 Shift key 14 software descriptions 102 DVgate 107 troubleshooting 132 using the Jog Dial control with 29 Sony Fax-on-Demand 140 Sony Notebook Setup screen 78 Sony Service Center 111 speakers connecting 74 troubleshooting 135 Standby mode 17, 37, 84 switching display 17 monitor...


