
Handycam® Handbook
Page 4
... perform [Format] If you may not be copyrighted. Notes on optional accessories We recommend using genuine Sony accessories. Genuine Sony accessories may not be saved or recorded. DVD media recorded with HD image quality (high definition) DVD media ...back normally images recorded on your recorded images on external media periodically. Note on the camcorder/battery pack temperature When the temperature of the camcorder or battery pack becomes extremely high or extremely low, you repeat recording/deleting images for understandability. Table...
... perform [Format] If you may not be copyrighted. Notes on optional accessories We recommend using genuine Sony accessories. Genuine Sony accessories may not be saved or recorded. DVD media recorded with HD image quality (high definition) DVD media ...back normally images recorded on your recorded images on external media periodically. Note on the camcorder/battery pack temperature When the temperature of the camcorder or battery pack becomes extremely high or extremely low, you repeat recording/deleting images for understandability. Table...

Handycam® Handbook
Page 5
... of Contents Search image In this manual, the DVD disc recorded with high definition image quality (HD) is lit or flashing removing the battery pack or AC Adaptor from the camcorder, or applying mechanical shock or vibration to change without notice. Notes on use Do not do not...
... of Contents Search image In this manual, the DVD disc recorded with high definition image quality (HD) is lit or flashing removing the battery pack or AC Adaptor from the camcorder, or applying mechanical shock or vibration to change without notice. Notes on use Do not do not...
Handycam® Handbook
Page 9
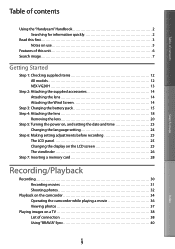
... of this unit 6 Search image 7 Getting Started Step 1: Checking supplied items 12 All models 12 NEX-VG20H 13 Step 2: Attaching the supplied accessories 14 Attaching the lens 14 Attaching the Wind Screen 14 Step 3: Charging the battery pack 15 Step 4: Attaching the lens 18 Removing the lens 20 Step 5: Turning the power...
... of this unit 6 Search image 7 Getting Started Step 1: Checking supplied items 12 All models 12 NEX-VG20H 13 Step 2: Attaching the supplied accessories 14 Attaching the lens 14 Attaching the Wind Screen 14 Step 3: Charging the battery pack 15 Step 4: Attaching the lens 18 Removing the lens 20 Step 5: Turning the power...

Handycam® Handbook
Page 11
... Self-diagnosis display/Warning indicators 94 Recording time of movies/number of recordable photos 97 Expected time of recording and playback with each battery pack 97 Expected recording time of movies 97 Expected number of recordable photos 98 Using your camcorder abroad 99 Maintenance and precautions 101 ...About the AVCHD format 101 About the memory card 101 About the "InfoLITHIUM" battery pack 102 About handling of your camcorder 103 Quick reference Screen indicators 108 Parts and controls 110 Index 115 US 11 Index
... Self-diagnosis display/Warning indicators 94 Recording time of movies/number of recordable photos 97 Expected time of recording and playback with each battery pack 97 Expected recording time of movies 97 Expected number of recordable photos 98 Using your camcorder abroad 99 Maintenance and precautions 101 ...About the AVCHD format 101 About the memory card 101 About the "InfoLITHIUM" battery pack 102 About handling of your camcorder 103 Quick reference Screen indicators 108 Parts and controls 110 Index 115 US 11 Index

Handycam® Handbook
Page 12
supplied but not attached to camcorder NEX- The numbers in ( ) are the supplied quantity. Table of Contents Getting Started Step 1: Checking supplied items Make sure that you have following items supplied with your camcorder. VG20; All models This camcorder (1) ... Body cap (attached to other models) (1) (p. 18) USB cable (1) (p. 61) Wireless Remote Commander (RMT835) (1) (p. 113) A button-type lithium battery is already installed. Rechargeable battery pack (NP-FV70)...
supplied but not attached to camcorder NEX- The numbers in ( ) are the supplied quantity. Table of Contents Getting Started Step 1: Checking supplied items Make sure that you have following items supplied with your camcorder. VG20; All models This camcorder (1) ... Body cap (attached to other models) (1) (p. 18) USB cable (1) (p. 61) Wireless Remote Commander (RMT835) (1) (p. 113) A button-type lithium battery is already installed. Rechargeable battery pack (NP-FV70)...

Handycam® Handbook
Page 15
...though they are V series. 1 Slide the POWER switch to OFF (the default setting). 2 Attach the battery pack by sliding it to your camcorder. Notes You cannot attach any "InfoLITHIUM" battery pack other than the V series to your camcorder and the wall outlet (wall socket). The CHG (...and charging starts. US 15 Index To the wall outlet (wall socket) You can charge the "InfoLITHIUM" battery pack (V series) after attaching it in the direction of Contents Search image Battery pack CHG (charge) lamp DC IN jack AC Adaptor Power cord (Mains lead) DC plug Align the ...
...though they are V series. 1 Slide the POWER switch to OFF (the default setting). 2 Attach the battery pack by sliding it to your camcorder. Notes You cannot attach any "InfoLITHIUM" battery pack other than the V series to your camcorder and the wall outlet (wall socket). The CHG (...and charging starts. US 15 Index To the wall outlet (wall socket) You can charge the "InfoLITHIUM" battery pack (V series) after attaching it in the direction of Contents Search image Battery pack CHG (charge) lamp DC IN jack AC Adaptor Power cord (Mains lead) DC plug Align the ...

Handycam® Handbook
Page 16
... time. When your camcorder is on the LCD screen. Slide the BATT (battery) release lever () and remove the battery pack (). US 16 Even if the battery pack is attached, the battery pack is not discharged. Charging time Approximate time (min.) required when you can charge ... The charging times shown in any countries/regions using the AC Adaptor supplied with the remaining battery indicator at a temperature of 25 C (77 °F). Table of Contents 4 When the battery is charged, disconnect the AC Adaptor from the DC IN jack of your camcorder within the...
... time. When your camcorder is on the LCD screen. Slide the BATT (battery) release lever () and remove the battery pack (). US 16 Even if the battery pack is attached, the battery pack is not discharged. Charging time Approximate time (min.) required when you can charge ... The charging times shown in any countries/regions using the AC Adaptor supplied with the remaining battery indicator at a temperature of 25 C (77 °F). Table of Contents 4 When the battery is charged, disconnect the AC Adaptor from the DC IN jack of your camcorder within the...

Handycam® Handbook
Page 17
...Note on the power cord (Mains lead) The power cord (Mains lead) is low. Shut Off], p. 86). Table of Contents Search image Notes on the battery pack When you leave your camcorder without any operation for use the AC Adaptor placed in a narrow space, such as between a wall and furniture... AC Adaptor from your camcorder and put it in a cool place. In the default setting, the power turns off automatically if you remove the battery pack or disconnect the AC Adaptor, turn the camcorder off and make sure that the (Movie)/ (Photo) lamps (p. 31), the access lamp (p. 28) ...
...Note on the power cord (Mains lead) The power cord (Mains lead) is low. Shut Off], p. 86). Table of Contents Search image Notes on the battery pack When you leave your camcorder without any operation for use the AC Adaptor placed in a narrow space, such as between a wall and furniture... AC Adaptor from your camcorder and put it in a cool place. In the default setting, the power turns off automatically if you remove the battery pack or disconnect the AC Adaptor, turn the camcorder off and make sure that the (Movie)/ (Photo) lamps (p. 31), the access lamp (p. 28) ...

Handycam® Handbook
Page 31
The recording lamp lights up during recording (when you do not apply shock or vibration to the camcorder, or remove the battery or AC Adaptor. Access lamp (p. 28) is lit or flashing The media icon in the upper right of the LCD screen is set ...
The recording lamp lights up during recording (when you do not apply shock or vibration to the camcorder, or remove the battery or AC Adaptor. Access lamp (p. 28) is lit or flashing The media icon in the upper right of the LCD screen is set ...
Handycam® Handbook
Page 50
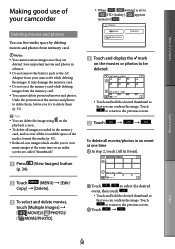
... can confirm the image. Save important movies and photos in the memory card, and recover all images recorded in advance. Do not remove the battery pack or the AC Adaptor from the memory card. You cannot delete protected movies and photos. Undo the protection of the movies and photos...
... can confirm the image. Save important movies and photos in the memory card, and recover all images recorded in advance. Do not remove the battery pack or the AC Adaptor from the memory card. You cannot delete protected movies and photos. Undo the protection of the movies and photos...

Handycam® Handbook
Page 52
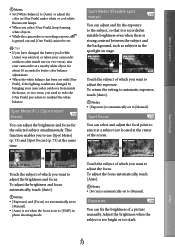
... the capturing point with your camcorder while dividing the movie. Undo the protection of the movie to divide it (p. 51). Do not remove the battery pack or the AC Adaptor from your camcorder. Touch [Photo Capture] that appears on the playback screen of the movies. If the...
... the capturing point with your camcorder while dividing the movie. Undo the protection of the movie to divide it (p. 51). Do not remove the battery pack or the AC Adaptor from your camcorder. Touch [Photo Capture] that appears on the playback screen of the movies. If the...

Handycam® Handbook
Page 71
Table of Contents Calibration Battery Info Version ( Clock Settings) Date & Time Setting Date & Time Format Summer Time Date & Time Area Setting Adjusts the touch panel. 104 Displays the battery information. 87 Displays the version of your camcorder and lens. 87 Sets the [Date & Time], [Daylight savings], 87 [Summer Time], or [Date & Time Format]. Search image Index US 71 Sets the [Date & Time Format]. 87 Sets the [Daylight savings] or [Summer Time]. 87 Sets the [Date & Time]. 87 Adjusts for a time difference without stopping 87 the clock.
Table of Contents Calibration Battery Info Version ( Clock Settings) Date & Time Setting Date & Time Format Summer Time Date & Time Area Setting Adjusts the touch panel. 104 Displays the battery information. 87 Displays the version of your camcorder and lens. 87 Sets the [Date & Time], [Daylight savings], 87 [Summer Time], or [Date & Time Format]. Search image Index US 71 Sets the [Date & Time Format]. 87 Sets the [Daylight savings] or [Summer Time]. 87 Sets the [Date & Time]. 87 Adjusts for a time difference without stopping 87 the clock.
Handycam® Handbook
Page 73
... brightness and focus for better color balance adjustment. When the white balance has been set with [One Push], if the lighting conditions changed the battery pack while [Auto] was selected, or taken your camcorder at a nearby white object for about 10 seconds for the selected subject simultaneously. Spot Meter/Fcs...
... brightness and focus for better color balance adjustment. When the white balance has been set with [One Push], if the lighting conditions changed the battery pack while [Auto] was selected, or taken your camcorder at a nearby white object for about 10 seconds for the selected subject simultaneously. Spot Meter/Fcs...
Handycam® Handbook
Page 86
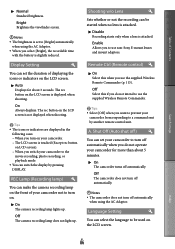
.... The LCD screen is attached. The rec button on the LCD screen. Off Select this when you select [Bright], the recordable time with the battery is displayed when shooting. Index US 86 Remote Ctrl (Remote control) On Select this if you do not operate your camcorder not to be... can switch the display by another remote control unit. Enable Allows you turn off automatically when using the AC Adaptor. When you use non-Sony E-mount lenses and mount adaptors. A. On Always displays.
.... The LCD screen is attached. The rec button on the LCD screen. Off Select this when you select [Bright], the recordable time with the battery is displayed when shooting. Index US 86 Remote Ctrl (Remote control) On Select this if you do not operate your camcorder not to be... can switch the display by another remote control unit. Enable Allows you turn off automatically when using the AC Adaptor. When you use non-Sony E-mount lenses and mount adaptors. A. On Always displays.
Handycam® Handbook
Page 87
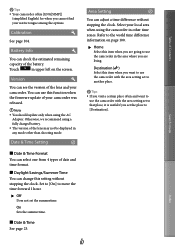
...if you are going to use the camcorder in other than shooting mode. Index US 87 Battery Info You can adjust a time difference without stopping the clock. Otherwise, we recommend using a fully charged battery. The version of the lens may not be displayed in upper left on ...Sets the summertime. Date & Time See page 23. Date & Time Setting Area Setting You can check the estimated remaining capacity of the battery. You can see the version of the lens and your native tongue among the options. Table of Contents Tips Your camcorder offers ...
...if you are going to use the camcorder in other than shooting mode. Index US 87 Battery Info You can adjust a time difference without stopping the clock. Otherwise, we recommend using a fully charged battery. The version of the lens may not be displayed in upper left on ...Sets the summertime. Date & Time See page 23. Date & Time Setting Area Setting You can check the estimated remaining capacity of the battery. You can see the version of the lens and your native tongue among the options. Table of Contents Tips Your camcorder offers ...
Handycam® Handbook
Page 88
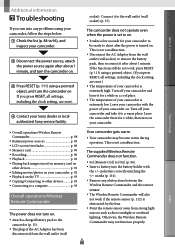
... RESET (p. 111) using a pointed object, and turn the camcorder on your Sony dealer or local authorized Sony service facility. This is obstructed by the lens. Point the remote sensor away from the wall outlet (wall socket) or remove the battery pack, then reconnect it to other devices p. 92 Editing movies/photos...
... RESET (p. 111) using a pointed object, and turn the camcorder on your Sony dealer or local authorized Sony service facility. This is obstructed by the lens. Point the remote sensor away from the wall outlet (wall socket) or remove the battery pack, then reconnect it to other devices p. 92 Editing movies/photos...
Handycam® Handbook
Page 89
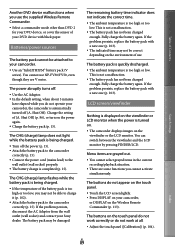
...the wall outlet (wall socket) properly. The battery charge is automatically turned off the power (p. 15). Attach the battery pack to the camcorder correctly (p. 15). Connect the power cord (mains lead) to your Sony dealer. Index US 89 You cannot use NP-FV30/FV50..., even though they are some functions you do not operate your camcorder, the camcorder is completed (p. 15). The battery pack is quickly discharged. The ambient temperature is...
...the wall outlet (wall socket) properly. The battery charge is automatically turned off the power (p. 15). Attach the battery pack to the camcorder correctly (p. 15). Connect the power cord (mains lead) to your Sony dealer. Index US 89 You cannot use NP-FV30/FV50..., even though they are some functions you do not operate your camcorder, the camcorder is completed (p. 15). The battery pack is quickly discharged. The ambient temperature is...

Handycam® Handbook
Page 92
... recorded on other devices may appear on an image recorded on other devices, edited on a computer, etc. You removed the AC Adaptor or the battery pack while the memory card icon at the top right corner of the image. is indicated on a thumbnail. The image data base file may...
... recorded on other devices may appear on an image recorded on other devices, edited on a computer, etc. You removed the AC Adaptor or the battery pack while the memory card icon at the top right corner of the image. is indicated on a thumbnail. The image data base file may...

Handycam® Handbook
Page 94
... of times, contact your Sony dealer or local authorized Sony service facility. After storing the images on another device. (Warning indicator pertaining to the external media device) The image database file may be damaged. E Follow the steps from on page 88. (Battery level warning) The battery pack is nearly used...
... of times, contact your Sony dealer or local authorized Sony service facility. After storing the images on another device. (Warning indicator pertaining to the external media device) The image database file may be damaged. E Follow the steps from on page 88. (Battery level warning) The battery pack is nearly used...

Handycam® Handbook
Page 97
...110 225 460 (25) (50) (100) (210) (420) When [Audio Mode] is set to 2ch (p. 78). Notes When using Sony memory card. The recordable time may vary depending on the conditions under the following conditions. [ REC Mode]: Standard (default setting) Using E 18... the camcorder at 25 C (77 °F). 10 C to 30 C (50 °F to 86 °F) is the minimum recordable time. Battery pack Image quality NP-FV70 (supplied) NP-FV100 (unit: minute) HD STD 325 355 415 440 650 710 830 870 Top: When recording with...
...110 225 460 (25) (50) (100) (210) (420) When [Audio Mode] is set to 2ch (p. 78). Notes When using Sony memory card. The recordable time may vary depending on the conditions under the following conditions. [ REC Mode]: Standard (default setting) Using E 18... the camcorder at 25 C (77 °F). 10 C to 30 C (50 °F to 86 °F) is the minimum recordable time. Battery pack Image quality NP-FV70 (supplied) NP-FV100 (unit: minute) HD STD 325 355 415 440 650 710 830 870 Top: When recording with...


