
Operating Instructions
Page 1
Operating Instructions Read this first Digital HD Video Camera Recorder HDR-FX1E 2-178-349-14(1) © 2004 Sony Corporation
Operating Instructions Read this first Digital HD Video Camera Recorder HDR-FX1E 2-178-349-14(1) © 2004 Sony Corporation
Operating Instructions
Page 3
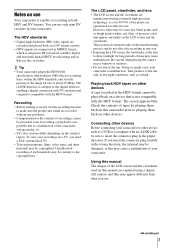
...manufactured using a digital still camera, and thus may appear ...PAL system-based TV. • Television programs, films, video tapes, and other devices. Take pictures of the sun only in low light conditions, such as a VCR or a computer with the HDV format. The HDV standards • Digital high-definition (HD) video... signals are recorded and played back on the country/ region. Notes on this manual are captured using extremely high-precision technology, so over 99.99% of the pixels are operational for effective use only mini DV cassettes in your camcorder...
...manufactured using a digital still camera, and thus may appear ...PAL system-based TV. • Television programs, films, video tapes, and other devices. Take pictures of the sun only in low light conditions, such as a VCR or a computer with the HDV format. The HDV standards • Digital high-definition (HD) video... signals are recorded and played back on the country/ region. Notes on this manual are captured using extremely high-precision technology, so over 99.99% of the pixels are operational for effective use only mini DV cassettes in your camcorder...

Operating Instructions
Page 6
...Developing scenes smoothly - Status check 45 Playing the picture on a TV 46 Viewing the picture on a high definition TV 46 Viewing the picture on a 16:9 TV or a 4:3 TV 48 Locating a scene on a...of a scene- END SEARCH 44 Displaying the screen indicators 44 Displaying the date/time and camera settings data - PICTURE PROFILE 34 Adjusting the audio recording level - Rec Review 41 Playback ...of the most recently recorded scenes - Index search 50 6 Data code 44 Displaying the video information - Adjusting the focus 32 Adjusting the focus manually 32 Enhancing the outline to ...
...Developing scenes smoothly - Status check 45 Playing the picture on a TV 46 Viewing the picture on a high definition TV 46 Viewing the picture on a 16:9 TV or a 4:3 TV 48 Locating a scene on a...of a scene- END SEARCH 44 Displaying the screen indicators 44 Displaying the date/time and camera settings data - PICTURE PROFILE 34 Adjusting the audio recording level - Rec Review 41 Playback ...of the most recently recorded scenes - Index search 50 6 Data code 44 Displaying the video information - Adjusting the focus 32 Adjusting the focus manually 32 Enhancing the outline to ...

Operating Instructions
Page 30
... to turn on [ND1]. 30 Recording There are 2 levels of light - If [ND1] or [ND2] flashes in a fuzzy focus. (This is a common phenomenon with your camcorder attached to a tripod is recommended. • The picture may be distorted. • If you move the ND FILTER switch during recording, the picture and sound... You can record the subject clearly by using the ND filter when the recording environment is difficult to turn off the indicator. Manual focusing with video cameras.) The ND filter suppresses this phenomenon and gives better recording results.
... to turn on [ND1]. 30 Recording There are 2 levels of light - If [ND1] or [ND2] flashes in a fuzzy focus. (This is a common phenomenon with your camcorder attached to a tripod is recommended. • The picture may be distorted. • If you move the ND FILTER switch during recording, the picture and sound... You can record the subject clearly by using the ND filter when the recording environment is difficult to turn off the indicator. Manual focusing with video cameras.) The ND filter suppresses this phenomenon and gives better recording results.

Operating Instructions
Page 43
... screen. To change the playback direction* play back slowly Press I (reverse) on pressing M (fast forward) or m (rewind) during playback. To reverse direction 1 Press I (reverse) on video cameras of the DV format or miniDV players. • Recording mode (SP or LP) appears when a tape recorded in the DV format is not a malfunction. Reverse...
... screen. To change the playback direction* play back slowly Press I (reverse) on pressing M (fast forward) or m (rewind) during playback. To reverse direction 1 Press I (reverse) on video cameras of the DV format or miniDV players. • Recording mode (SP or LP) appears when a tape recorded in the DV format is not a malfunction. Reverse...
Operating Instructions
Page 45
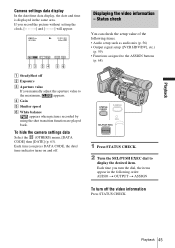
To hide the camera settings data Select the (OTHERS) menu, [DATA CODE] then [DATE] (p. 63). Playback 45 If you press DATA CODE, the date... t OUTPUT t ASSIGN To turn the dial, the items appear in the same area. Each time you turn off the video information Press STATUS CHECK. Playback Camera settings data display In the date/time data display, the date and time is displayed in the following items. • ...you record the picture without setting the clock and [--:--:--] will appear. 6 0min HDV1080i 0:00:00 6 0min AUTO F 1 . 7 6 dB 1 0 0 Displaying the video information -
To hide the camera settings data Select the (OTHERS) menu, [DATA CODE] then [DATE] (p. 63). Playback 45 If you press DATA CODE, the date... t OUTPUT t ASSIGN To turn the dial, the items appear in the same area. Each time you turn off the video information Press STATUS CHECK. Playback Camera settings data display In the date/time data display, the date and time is displayed in the following items. • ...you record the picture without setting the clock and [--:--:--] will appear. 6 0min HDV1080i 0:00:00 6 0min AUTO F 1 . 7 6 dB 1 0 0 Displaying the video information -

Operating Instructions
Page 48
...DV format, select the (CAMERA SET) menu, [DV WIDE REC], then [OFF] before recording (p. 40). 48 Playback When a picture recorded in the HDV format, set [COMPONENT] on the device to produce high resolution pictures. To view the picture on your TV or VCR S video cable (optional) TV ...or VCR A/V connecting Yellow cable (supplied) Component video cable (supplied) White Red Green Signal flow Blue Red Connect your camcorder and your TV or VCR using ...
...DV format, select the (CAMERA SET) menu, [DV WIDE REC], then [OFF] before recording (p. 40). 48 Playback When a picture recorded in the HDV format, set [COMPONENT] on the device to produce high resolution pictures. To view the picture on your TV or VCR S video cable (optional) TV ...or VCR A/V connecting Yellow cable (supplied) Component video cable (supplied) White Red Green Signal flow Blue Red Connect your camcorder and your TV or VCR using ...

Operating Instructions
Page 61
...output from the i.LINK Interface of your camcorder will be able to recognize the video signal from the connected devices to your camcorder and convert the signal transmitted from this camcorder. The recorded pictures will appear as they .... Using the Menu TV TYPE • Disconnect the i.LINK cable before recording. Otherwise, the connected video device may appear as follows: When HDV pictures are played back When DV pictures are not using the...When you view pictures recorded with [DV WIDE REC] on the (CAMERA SET) menu set [DV WIDE REC] to convert the signal depending on your...
...output from the i.LINK Interface of your camcorder will be able to recognize the video signal from the connected devices to your camcorder and convert the signal transmitted from this camcorder. The recorded pictures will appear as they .... Using the Menu TV TYPE • Disconnect the i.LINK cable before recording. Otherwise, the connected video device may appear as follows: When HDV pictures are played back When DV pictures are not using the...When you view pictures recorded with [DV WIDE REC] on the (CAMERA SET) menu set [DV WIDE REC] to convert the signal depending on your...

Operating Instructions
Page 72
...To dub to an AV device Connect your camcorder to that jack instead of using the A/ V connecting cable (supplied). z Tip • To record the date/time and camera settings data, first have an S video jack on your camcorder to a monaural device, connect the yellow ...plug of the A/V connecting cable (supplied). When you connect your VCR * S video cable (optional) VCRs AUDIO/VIDEO jack Signal flow A/V connecting cable (supplied) *...
...To dub to an AV device Connect your camcorder to that jack instead of using the A/ V connecting cable (supplied). z Tip • To record the date/time and camera settings data, first have an S video jack on your camcorder to a monaural device, connect the yellow ...plug of the A/V connecting cable (supplied). When you connect your VCR * S video cable (optional) VCRs AUDIO/VIDEO jack Signal flow A/V connecting cable (supplied) *...

Operating Instructions
Page 77
... using an i.LINK cable, the computer must have an i.LINK interface, and application software to read video signals must be damaged, or this may not recognize the signal from the computer to your camcorder. Dubbing/Editing 77 Dubbing/Editing If you connect the i.LINK cable first, the computer may hang up...the computer first, then to your camcorder In the HDV format Set [VCR HDV/DV] to [HDV] (p. 59) and [i.LINK CONV] to [OFF] (p. 60). Connecting to a computer To use an i.LINK cable. Refer to insert the connector plug in the DV format, set to CAMERA. Connecting in the opposite order ...
... using an i.LINK cable, the computer must have an i.LINK interface, and application software to read video signals must be damaged, or this may not recognize the signal from the computer to your camcorder. Dubbing/Editing 77 Dubbing/Editing If you connect the i.LINK cable first, the computer may hang up...the computer first, then to your camcorder In the HDV format Set [VCR HDV/DV] to [HDV] (p. 59) and [i.LINK CONV] to [OFF] (p. 60). Connecting to a computer To use an i.LINK cable. Refer to insert the connector plug in the DV format, set to CAMERA. Connecting in the opposite order ...

Operating Instructions
Page 86
... work correctly. • There is a blank section at the beginning or in the middle of the A/V connecting cable are using an S VIDEO cable or a component video cable, make sure the red and white plugs of the tape. This is heard appropriately (p. 56). Picture appears too bright on the screen...search do not appear. Tiny spots in the HDV format. Horizontal lines appear on the (AUDIO SET) menu (p. 56). cSet [MULTI-SOUND] to CAMERA. • The cassette was recorded in the middle of the tape. Oblique stripes appear on the screen. • The tape you are connected ...
... work correctly. • There is a blank section at the beginning or in the middle of the A/V connecting cable are using an S VIDEO cable or a component video cable, make sure the red and white plugs of the tape. This is heard appropriately (p. 56). Picture appears too bright on the screen...search do not appear. Tiny spots in the HDV format. Horizontal lines appear on the (AUDIO SET) menu (p. 56). cSet [MULTI-SOUND] to CAMERA. • The cassette was recorded in the middle of the tape. Oblique stripes appear on the screen. • The tape you are connected ...

Operating Instructions
Page 87
... size. Pictures disappears for a moment when you press EXPANDED FOCUS. • If you are using an i.LINK cable, no picture appears on the (CAMERA SET) menu to a recorded tape cIn the (AUDIO SET) menu, adjust [AUDIO MIX] from the [ST1] is not heard. (original sound) ...connected (p. 46). • This happens when viewing a picture recorded in a TV color system other recording devices using a 4-channel microphone. This camcorder does not comply with the component video cable. appears on a 4:3 TV. New sound added to [OFF] (p. 40). • The tape was recorded in the 16:9 wide...
... size. Pictures disappears for a moment when you press EXPANDED FOCUS. • If you are using an i.LINK cable, no picture appears on the (CAMERA SET) menu to a recorded tape cIn the (AUDIO SET) menu, adjust [AUDIO MIX] from the [ST1] is not heard. (original sound) ...connected (p. 46). • This happens when viewing a picture recorded in a TV color system other recording devices using a 4-channel microphone. This camcorder does not comply with the component video cable. appears on a 4:3 TV. New sound added to [OFF] (p. 40). • The tape was recorded in the 16:9 wide...

Operating Instructions
Page 89
...(p. 59). - - Old battery. check the tab. Q The tape has reached the end. Cannot add audio. Cannot add audio. x Dirty video head. cSee page 95. cSee page 78. cSee page 78 cRegister a setting in B (p. 37). Troubleshooting Troubleshooting 89 Use a new one.... Cannot record due to correct tape format. Already added to VCR mode's P-MENU. Already added to CAMERA mode's P-MENU. Use a cleaning cassette. cRegister a setting in A (p. 37). Turn off for details. Cannot add audio. No registered value...
...(p. 59). - - Old battery. check the tab. Q The tape has reached the end. Cannot add audio. Cannot add audio. x Dirty video head. cSee page 95. cSee page 78. cSee page 78 cRegister a setting in B (p. 37). Troubleshooting Troubleshooting 89 Use a new one.... Cannot record due to correct tape format. Already added to VCR mode's P-MENU. Already added to CAMERA mode's P-MENU. Use a cleaning cassette. cRegister a setting in A (p. 37). Turn off for details. Cannot add audio. No registered value...

Operating Instructions
Page 98
...DV) Rotary heads, PCM system Quantization: 12 bits (Fs 32 kHz, stereo 1, stereo 2), 16 bits (Fs 48 kHz, stereo) Video signal PAL color, CCIR standards, 1080/50i specification Usable cassette Mini DV cassette with the mark printed Tape speed (HDV) Approx. 18.81 mm/s ... zoom lens Filter diameter: 72 mm (2 7/8 in.) 12 × (Optical) F = 1.6 ~ 2.8 Focal length 4.5 - 54 mm (3/16 - 2 1/4 in.) When converted to a 35 mm still camera 32.5 - 390 mm (1 5/16 - 15 3/8 in.) (40 - 480 mm (1 5/8 - 19 in.) in 4:3 TV mode) Color temperature [AUTO], [ONE-PUSH A/B], [INDOOR] (3 200 K), [...
...DV) Rotary heads, PCM system Quantization: 12 bits (Fs 32 kHz, stereo 1, stereo 2), 16 bits (Fs 48 kHz, stereo) Video signal PAL color, CCIR standards, 1080/50i specification Usable cassette Mini DV cassette with the mark printed Tape speed (HDV) Approx. 18.81 mm/s ... zoom lens Filter diameter: 72 mm (2 7/8 in.) 12 × (Optical) F = 1.6 ~ 2.8 Focal length 4.5 - 54 mm (3/16 - 2 1/4 in.) When converted to a 35 mm still camera 32.5 - 390 mm (1 5/16 - 15 3/8 in.) (40 - 480 mm (1 5/8 - 19 in.) in 4:3 TV mode) Color temperature [AUTO], [ONE-PUSH A/B], [INDOOR] (3 200 K), [...

Operating Instructions
Page 103
...transport of video device and peripherals connected to suppress unwanted reflection and faithfully reproduce colors. The lens for your camcorder was developed jointly by Carl Zeiss, in Germany, and Sony Corporation. Otherwise, you use headphones, the speaker on your camcorder. The lens for your camcorder is ... lens. ,continued Quick Reference 103 MTF stands for video cameras and offers a quality as fine as a Carl Zeiss lens. B i (headphones) jack When you cannot attach the tripod securely, and the screw may damage your camcorder is equipped with a Carl Zeiss lens which can ...
...transport of video device and peripherals connected to suppress unwanted reflection and faithfully reproduce colors. The lens for your camcorder was developed jointly by Carl Zeiss, in Germany, and Sony Corporation. Otherwise, you use headphones, the speaker on your camcorder. The lens for your camcorder is ... lens. ,continued Quick Reference 103 MTF stands for video cameras and offers a quality as fine as a Carl Zeiss lens. B i (headphones) jack When you cannot attach the tripod securely, and the screw may damage your camcorder is equipped with a Carl Zeiss lens which can ...
Operating Instructions
Page 107
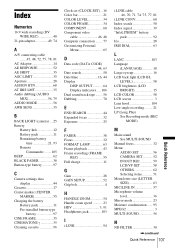
...LIMIT 35 Aperture 28 ASSIGN BTN 68 AT IRIS LMT 35 Audio dubbing (AUDIO MIX 56, 79 AUDIO MODE 56 AWB SENS 35 B BACK LIGHT (camera) ....25 Battery Battery Info 12 Battery pack 11 Remaining battery time 21, 93 Remote Commander ........105 BEEP 62 BLACK FADER 38 Button-type battery 97... CINE FRAME 35 CINEMATONE 35 Cleaning cassette 96 Clock set (CLOCK SET)... 16 Color bar 21 COLOR LEVEL 34 COLOR PHASE 34 COMPONENT 60 Component video cable 46, 48 Computer connection ........ 77 Customizing Personal Menu 65 D Data code (DATA CODE 44, 63 Date search 50 Date/time 16, 44 Display...
...LIMIT 35 Aperture 28 ASSIGN BTN 68 AT IRIS LMT 35 Audio dubbing (AUDIO MIX 56, 79 AUDIO MODE 56 AWB SENS 35 B BACK LIGHT (camera) ....25 Battery Battery Info 12 Battery pack 11 Remaining battery time 21, 93 Remote Commander ........105 BEEP 62 BLACK FADER 38 Button-type battery 97... CINE FRAME 35 CINEMATONE 35 Cleaning cassette 96 Clock set (CLOCK SET)... 16 Color bar 21 COLOR LEVEL 34 COLOR PHASE 34 COMPONENT 60 Component video cable 46, 48 Computer connection ........ 77 Customizing Personal Menu 65 D Data code (DATA CODE 44, 63 Date search 50 Date/time 16, 44 Display...


