Operating Guide
Page 7
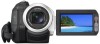
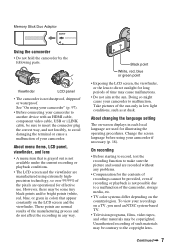
.... • The LCD screen and the viewfinder are manufactured using your recordings on -screen displays in each local language are recorded without any way. Unauthorized recording of your camcorder to malfunction. On recording • Before starting to record, test the recording function to ...a malfunction of time may be provided, even if recording or playback is not dustproof, dripproof or waterproof. To view your camcorder if necessary (p. 18). However, there may be contrary to direct sunlight for effective use. About changing the language setting The on ...
.... • The LCD screen and the viewfinder are manufactured using your recordings on -screen displays in each local language are recorded without any way. Unauthorized recording of your camcorder to malfunction. On recording • Before starting to record, test the recording function to ...a malfunction of time may be provided, even if recording or playback is not dustproof, dripproof or waterproof. To view your camcorder if necessary (p. 18). However, there may be contrary to direct sunlight for effective use. About changing the language setting The on ...
Operating Guide
Page 10
...First Step Guide 78 Using a Macintosh computer ........ 78 Troubleshooting Troubleshooting 79 Warning indicators and messages 88 Additional Information Using your camcorder abroad ...... 91 Maintenance and precautions ...... 92 Usable cassette tapes 92 About the "Memory Stick 93 About the "InfoLITHIUM" battery... pack 95 About i.LINK 96 About x.v.Color 97 On using your camcorder 97 Specifications 100 Quick Reference Identifying parts and controls ..... 105 Indicators displayed during recording/ playback 109 Index 113 Spanish Quick Guide/ Guía rápida ...
...First Step Guide 78 Using a Macintosh computer ........ 78 Troubleshooting Troubleshooting 79 Warning indicators and messages 88 Additional Information Using your camcorder abroad ...... 91 Maintenance and precautions ...... 92 Usable cassette tapes 92 About the "Memory Stick 93 About the "InfoLITHIUM" battery... pack 95 About i.LINK 96 About x.v.Color 97 On using your camcorder 97 Specifications 100 Quick Reference Identifying parts and controls ..... 105 Indicators displayed during recording/ playback 109 Index 113 Spanish Quick Guide/ Guía rápida ...
Operating Guide
Page 11
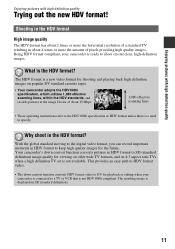
...Being HDV format compliant, your camcorder is connected to a TV or VCR that is the HDV format? Why shoot in HDV format to keep high quality images for shooting and playing back high definition images on 4:3 aspect ratio TVs when a high definition TV set is displayed in about 25 Mbps. 1,...video. • The down convert function converts pictures in HDV format to SD (standard definition) image quality for playback or editing when your camcorder is a need to shoot crystal clear, high-definition images. With the global standard moving to DV for viewing on older wide TV formats,...
...Being HDV format compliant, your camcorder is connected to a TV or VCR that is the HDV format? Why shoot in HDV format to keep high quality images for shooting and playing back high definition images on 4:3 aspect ratio TVs when a high definition TV set is displayed in about 25 Mbps. 1,...video. • The down convert function converts pictures in HDV format to SD (standard definition) image quality for playback or editing when your camcorder is a need to shoot crystal clear, high-definition images. With the global standard moving to DV for viewing on older wide TV formats,...
Operating Guide
Page 15
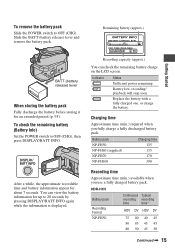
...by pressing DISPLAY/BATT INFO again while the information is displayed. Battery pack Charging time NP-FH50 135 NP-FH60 (supplied) 135 NP-FH70 170 NP-FH100 390 Recording time Approximate time (min.) available when you fully charge a fully discharged battery pack. HDR-HC5 Battery ...release) lever and remove the battery pack. To remove the battery pack Slide the POWER switch to OFF (CHG), then press DISPLAY/BATT INFO. DISPLAY/ BATT INFO After a while, the approximate recordable time and battery information appear for an extended period (p. 95). Replace the battery...
...by pressing DISPLAY/BATT INFO again while the information is displayed. Battery pack Charging time NP-FH50 135 NP-FH60 (supplied) 135 NP-FH70 170 NP-FH100 390 Recording time Approximate time (min.) available when you fully charge a fully discharged battery pack. HDR-HC5 Battery ...release) lever and remove the battery pack. To remove the battery pack Slide the POWER switch to OFF (CHG), then press DISPLAY/BATT INFO. DISPLAY/ BATT INFO After a while, the approximate recordable time and battery information appear for an extended period (p. 95). Replace the battery...

Operating Guide
Page 16
... the battery pack, slide the POWER switch to the DC IN jack of your camcorder, even when the power cord is disconnected from the wall outlet. The battery pack is not attached correctly. - HDR-HC5 Battery pack Recorded Format NP-FH50 NP-FH60 (supplied) NP-FH70 NP-FH100 LCD...Adaptor is connected to OFF (CHG). • The /CHG (charge) lamp flashes during charging, or Battery Info (p. 15) will not be correctly displayed under the following conditions. - Middle: When the LCD backlight turns off and zooming. Step2: Charging the battery pack (Continued) Battery pack Recording Format NP...
... the battery pack, slide the POWER switch to the DC IN jack of your camcorder, even when the power cord is disconnected from the wall outlet. The battery pack is not attached correctly. - HDR-HC5 Battery pack Recorded Format NP-FH50 NP-FH60 (supplied) NP-FH70 NP-FH100 LCD...Adaptor is connected to OFF (CHG). • The /CHG (charge) lamp flashes during charging, or Battery Info (p. 15) will not be correctly displayed under the following conditions. - Middle: When the LCD backlight turns off and zooming. Step2: Charging the battery pack (Continued) Battery pack Recording Format NP...
Operating Guide
Page 18
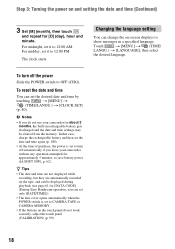
... POWER switch to OFF (CHG). For midnight, set it to show messages in rechargeable battery gets discharged and the date and time settings may be displayed during playback (see page 61 for about 3 months, the built-in a specified language. For midday, set it to CAMERA-TAPE or CAMERA-MEMORY. ...• If the buttons on the touch panel do not use your camcorder for [DATA CODE] (During Easy Handycam operation, you leave your camcorder without any operation attempted for [D] (day), hour and minute. To reset the date and time You can set ...
... POWER switch to OFF (CHG). For midnight, set it to show messages in rechargeable battery gets discharged and the date and time settings may be displayed during playback (see page 61 for about 3 months, the built-in a specified language. For midday, set it to CAMERA-TAPE or CAMERA-MEMORY. ...• If the buttons on the touch panel do not use your camcorder for [DATA CODE] (During Easy Handycam operation, you leave your camcorder without any operation attempted for [D] (day), hour and minute. To reset the date and time You can set ...
Operating Guide
Page 19
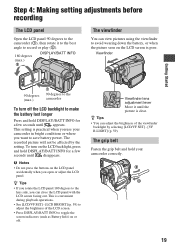
... by the setting. z Tips • You can adjust the brightness of the LCD screen. • Press DISPLAY/BATT INFO to make the battery last longer Press and hold your camcorder in bright conditions or where you want to the lens side, you can view pictures using the viewfinder to... The recorded picture will not be affected by selecting [LCD/VF SET] - [VF B.LIGHT] (p. 59). This setting is practical when you use your camcorder correctly. 19 z Tips • If you open or adjust the LCD panel. Step 4: Making setting adjustments before recording The LCD panel Open the LCD ...
... by the setting. z Tips • You can adjust the brightness of the LCD screen. • Press DISPLAY/BATT INFO to make the battery last longer Press and hold your camcorder in bright conditions or where you want to the lens side, you can view pictures using the viewfinder to... The recorded picture will not be affected by selecting [LCD/VF SET] - [VF B.LIGHT] (p. 59). This setting is practical when you use your camcorder correctly. 19 z Tips • If you open or adjust the LCD panel. Step 4: Making setting adjustments before recording The LCD panel Open the LCD ...
Operating Guide
Page 23
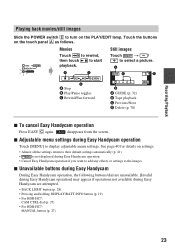
...during Easy Handycam are attempted. • BACK LIGHT button (p. 28) • Pressing and holding DISPLAY/BATT INFO button (p. 19) • For HDR-HC7: CAM CTRL dial (p. 27) • For HDR-HC7: MANUAL button (p. 27) 23 Recording/Playback Playing back movies/still images Slide the POWER switch ...E to display adjustable menu settings. x Unavailable buttons during Easy Handycam During Easy Handycam ...
...during Easy Handycam are attempted. • BACK LIGHT button (p. 28) • Pressing and holding DISPLAY/BATT INFO button (p. 19) • For HDR-HC7: CAM CTRL dial (p. 27) • For HDR-HC7: MANUAL button (p. 27) 23 Recording/Playback Playing back movies/still images Slide the POWER switch ...E to display adjustable menu settings. x Unavailable buttons during Easy Handycam During Easy Handycam ...

Operating Guide
Page 28
... (In [STBY] of the flash by setting [FLASH LEVEL], or you use the flash in mirror mode Infrared port Set the NIGHTSHOT switch to the camcorder (1), then rotate it . b Notes • The NightShot and Super NightShot functions use Super NightShot function (p. 47). r (No flash): Records without ...when using the built-in bright places. z Tips • You can change the brightness of the CAMERA-TAPE mode, it takes a while to display .. z Tips • A mirror-image of the surrounding brightness. Recording in bright places such as when shooting a backlit subject, the flash may ...
... (In [STBY] of the flash by setting [FLASH LEVEL], or you use the flash in mirror mode Infrared port Set the NIGHTSHOT switch to the camcorder (1), then rotate it . b Notes • The NightShot and Super NightShot functions use Super NightShot function (p. 47). r (No flash): Records without ...when using the built-in bright places. z Tips • You can change the brightness of the CAMERA-TAPE mode, it takes a while to display .. z Tips • A mirror-image of the surrounding brightness. Recording in bright places such as when shooting a backlit subject, the flash may ...
Operating Guide
Page 29
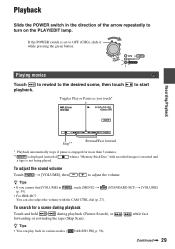
Toggles Play or Pause as you cannot find [VOLUME] in (p. 59). , touch [MENU] t • For HDR-HC7: You can play back in various modes ([ VAR.SPD PB], p. 56). Recording/Playback Playing movies Touch to rewind to turn on the PLAY/EDIT ... images is not being played. when a "Memory Stick Duo" with the CAM CTRL dial (p. 27). (STANDARD SET) t [VOLUME] To search for more than 3 minutes. ** is displayed instead of the arrow repeatedly to the desired scene, then touch playback. Playback Slide the POWER switch in the direction of a tape is inserted and...
Toggles Play or Pause as you cannot find [VOLUME] in (p. 59). , touch [MENU] t • For HDR-HC7: You can play back in various modes ([ VAR.SPD PB], p. 56). Recording/Playback Playing movies Touch to rewind to turn on the PLAY/EDIT ... images is not being played. when a "Memory Stick Duo" with the CAM CTRL dial (p. 27). (STANDARD SET) t [VOLUME] To search for more than 3 minutes. ** is displayed instead of the arrow repeatedly to the desired scene, then touch playback. Playback Slide the POWER switch in the direction of a tape is inserted and...
Operating Guide
Page 30
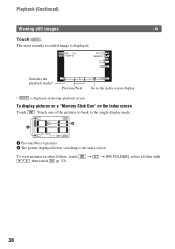
..., then touch (p. 52). B A A Previous/Next 6 pictures B The picture displayed before switching to the single display mode. t t [PB FOLDER], select a folder with 30 The most recently recorded image is displayed. 60min 6.1M 10/10 MEMORY PLAY GUIDE Switches the playback media* Previous/Next P-...MENU Go to the index screen display * is displayed on the Index screen Touch . To display pictures on a "Memory Stick Duo" on the tape...
..., then touch (p. 52). B A A Previous/Next 6 pictures B The picture displayed before switching to the single display mode. t t [PB FOLDER], select a folder with 30 The most recently recorded image is displayed. 60min 6.1M 10/10 MEMORY PLAY GUIDE Switches the playback media* Previous/Next P-...MENU Go to the index screen display * is displayed on the Index screen Touch . To display pictures on a "Memory Stick Duo" on the tape...

Operating Guide
Page 31
Magnification can magnify images from about 1.1 to 5 times (from about 1.5 to display in still images) the original size. To cancel, touch [END]. 31 Recording/Playback Using PB zoom You can be adjusted with the power zoom lever or the zoom buttons on the LCD panel. 1 Play back the picture you want to magnify. 2 Magnify the picture with T (Telephoto). 3 Touch the screen at the point you want to 5 times in the center of the displayed frame. 4 Adjust the magnification with W (Wide angle)/T (Telephoto).
Magnification can magnify images from about 1.1 to 5 times (from about 1.5 to display in still images) the original size. To cancel, touch [END]. 31 Recording/Playback Using PB zoom You can be adjusted with the power zoom lever or the zoom buttons on the LCD panel. 1 Play back the picture you want to magnify. 2 Magnify the picture with T (Telephoto). 3 Touch the screen at the point you want to 5 times in the center of the displayed frame. 4 Adjust the magnification with W (Wide angle)/T (Telephoto).

Operating Guide
Page 32
... • If [SET] is not available, but still desired, touch [SET] to the basic operations. Enables you to display [To keep the mood of each indicator that appears on the LCD screen. The desired setting screen appears. Takes you to ... screens related to cancel Easy Handycam operation and then select the setting. If an attempted setting is not displayed in step 3, follow the instruction on -screen instruction. SHOOT GUIDE: CNNECT GUIDE: USEFUL GUIDE: DISP GUIDE:... using the guide functions (USAGE GUIDE). 60min STBY GUIDE P-MENU Your camcorder has 4 guide functions as shown below.
... • If [SET] is not available, but still desired, touch [SET] to the basic operations. Enables you to display [To keep the mood of each indicator that appears on the LCD screen. The desired setting screen appears. Takes you to ... screens related to cancel Easy Handycam operation and then select the setting. If an attempted setting is not displayed in step 3, follow the instruction on -screen instruction. SHOOT GUIDE: CNNECT GUIDE: USEFUL GUIDE: DISP GUIDE:... using the guide functions (USAGE GUIDE). 60min STBY GUIDE P-MENU Your camcorder has 4 guide functions as shown below.
Operating Guide
Page 33
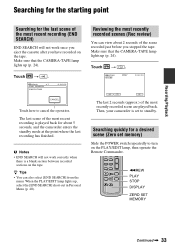
...operate the Remote Commander. z Tips • You can view about 5 seconds, and the camcorder enters the standby mode at the point where the last recording has finished. mREW PLAY STOP DISPLAY ZERO SET MEMORY Continued , 33 The last scene of the scene recorded just before you have ...recorded on the tape. Then, your camcorder is played back for a desired scene (Zero set to standby. ...
...operate the Remote Commander. z Tips • You can view about 5 seconds, and the camcorder enters the standby mode at the point where the last recording has finished. mREW PLAY STOP DISPLAY ZERO SET MEMORY Continued , 33 The last scene of the scene recorded just before you have ...recorded on the tape. Then, your camcorder is played back for a desired scene (Zero set to standby. ...

Operating Guide
Page 34
...b Notes • The Date search will not function correctly if there is a blank section between recorded sections on the tape counter. • Zero set memory display disappears. 4 Press PLAY. SEARCH M. ./> STOP 1 Press SEARCH M. The tape counter is reset to "0:00:00" and appears on the screen. 6 0...tape counter reaches "0:00:00." on the PLAY/EDIT lamp. The tape counter returns to the time code display, and the zero set memory will not function correctly when there is not displayed, press DISPLAY. 2 Press STOP when you want to select a recording date. 6 0 min 0:00:00:00 ...
...b Notes • The Date search will not function correctly if there is a blank section between recorded sections on the tape counter. • Zero set memory display disappears. 4 Press PLAY. SEARCH M. ./> STOP 1 Press SEARCH M. The tape counter is reset to "0:00:00" and appears on the screen. 6 0...tape counter reaches "0:00:00." on the PLAY/EDIT lamp. The tape counter returns to the time code display, and the zero set memory will not function correctly when there is not displayed, press DISPLAY. 2 Press STOP when you want to select a recording date. 6 0 min 0:00:00:00 ...
Operating Guide
Page 40
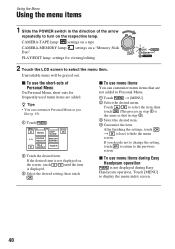
.../EDIT lamp: settings for frequently used menu items are not added to the previous screen. x To use the short-cuts of the arrow repeatedly to display the menu index screen. 40 x To use menu items during Easy Handycam operation. If you like (p. 63). 1 Touch . 6 0 min STBY 0:.... Unavailable items will be grayed out. After finishing the settings, touch t (close) to select the item, then touch (The process in step 3 is displayed. 3 Select the desired setting, then touch . Touch [MENU] to turn on the respective lamp. Using the Menu Using the menu items 1 Slide the...
.../EDIT lamp: settings for frequently used menu items are not added to the previous screen. x To use the short-cuts of the arrow repeatedly to display the menu index screen. 40 x To use menu items during Easy Handycam operation. If you like (p. 63). 1 Touch . 6 0 min STBY 0:.... Unavailable items will be grayed out. After finishing the settings, touch t (close) to select the item, then touch (The process in step 3 is displayed. 3 Select the desired setting, then touch . Touch [MENU] to turn on the respective lamp. Using the Menu Using the menu items 1 Slide the...
Operating Guide
Page 48
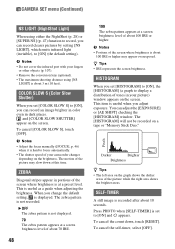
...feet). This is not recorded. To cancel [COLOR SLOW S], touch [OFF]. B OFF The zebra pattern is not displayed. 70 The zebra pattern appears at a screen brightness level of your camcorder changes depending on the screen. b Notes • Adjust the focus manually ([FOCUS], p. 46) when it is ... maximum shooting distance using either the NightShot (p. 28) or [SUPER NS] (p. 47) function to record, you adjust exposure. This item is displayed. b Notes • Portions of the picture while the right area shows the brighter areas. CAMERA SET menu (Continued) NS LIGHT (NightShot Light...
...feet). This is not recorded. To cancel [COLOR SLOW S], touch [OFF]. B OFF The zebra pattern is not displayed. 70 The zebra pattern appears at a screen brightness level of your camcorder changes depending on the screen. b Notes • Adjust the focus manually ([FOCUS], p. 46) when it is ... maximum shooting distance using either the NightShot (p. 28) or [SUPER NS] (p. 47) function to record, you adjust exposure. This item is displayed. b Notes • Portions of the picture while the right area shows the brighter areas. CAMERA SET menu (Continued) NS LIGHT (NightShot Light...
Operating Guide
Page 52
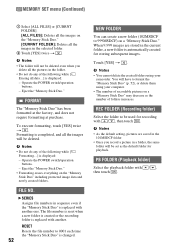
... all the pictures in the folder. • Do not do any of the following while [ Erasing all data...] is displayed: - b Notes • You cannot delete the created folders using your camcorder. FILE NO. Touch [YES] t . b Notes • As the default setting, pictures are stored in a folder...is replaced with / , then touch . You will not be deleted even when you record a picture in the current folder, a new folder is displayed: - The file number is reset when a new folder is created or the recording folder is completed, and all the images in sequence even if the...
... all the pictures in the folder. • Do not do any of the following while [ Erasing all data...] is displayed: - b Notes • You cannot delete the created folders using your camcorder. FILE NO. Touch [YES] t . b Notes • As the default setting, pictures are stored in a folder...is replaced with / , then touch . You will not be deleted even when you record a picture in the current folder, a new folder is displayed: - The file number is reset when a new folder is created or the recording folder is completed, and all the images in sequence even if the...

Operating Guide
Page 55
SOLARIZE Pictures appear as a pale pastel drawing. This is displayed. Press START/STOP on VCR or DVD/HDD recorders (p. 65). Sounds are recorded while [Recording···] is useful to shoot fast actions such ...
SOLARIZE Pictures appear as a pale pastel drawing. This is displayed. Press START/STOP on VCR or DVD/HDD recorders (p. 65). Sounds are recorded while [Recording···] is useful to shoot fast actions such ...
Operating Guide
Page 60
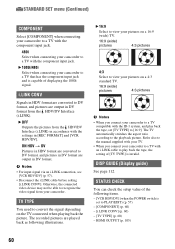
...a 4:3 standard TV. 16:9 (wide) pictures 4:3 pictures b Notes • When you connect your camcorder to PLAY/EDIT) (p. 57) - [COMPONENT] (p. 60) - [i.LINK CONV] (p. 60) - [TV TYPE] (p. 60) - DISP GUIDE (Display guide) See page 112. ON HDV t DV Pictures in HDV format are converted to DV format, ... a TV with the component input jack. 480i Select when connecting your camcorder. The recorded pictures are output in [REC FORMAT] and [VCR HDV/DV]. STATUS CHECK You can check the setup value of displaying the 1080i signal. HDMI OUTPUT (p. 105) 60 B 16:9 Select to view your ...
...a 4:3 standard TV. 16:9 (wide) pictures 4:3 pictures b Notes • When you connect your camcorder to PLAY/EDIT) (p. 57) - [COMPONENT] (p. 60) - [i.LINK CONV] (p. 60) - [TV TYPE] (p. 60) - DISP GUIDE (Display guide) See page 112. ON HDV t DV Pictures in HDV format are converted to DV format, ... a TV with the component input jack. 480i Select when connecting your camcorder. The recorded pictures are output in [REC FORMAT] and [VCR HDV/DV]. STATUS CHECK You can check the setup value of displaying the 1080i signal. HDMI OUTPUT (p. 105) 60 B 16:9 Select to view your ...


