
Operating Instructions
Page 55
...-R Creating a Music Video/ Slideshow Printing images Creating a video CD using "PicturePackage" (page 64) Viewing images saved on your computer Installing the USB driver. • Installation of the USB driver is installed. 55 Using your computer Enjoying your Windows computer For details on using a Macintosh computer, refer to your computer (page 57) Preparation...
...-R Creating a Music Video/ Slideshow Printing images Creating a video CD using "PicturePackage" (page 64) Viewing images saved on your computer Installing the USB driver. • Installation of the USB driver is installed. 55 Using your computer Enjoying your Windows computer For details on using a Macintosh computer, refer to your computer (page 57) Preparation...
Operating Instructions
Page 56
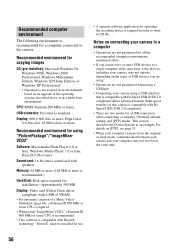
...in a multi-boot environment. Recommended computer environment The following environment is required in order to write to CD-Rs. Notes on connecting your camera, may not operate, depending on an upgrade of USB devices you connect two or more is recommended.) Hard Disk: Disk space required for ... or more, High Color (16-bit color, 65,000 colors) or more Recommended environment for installation-approximately 500 MB Display: Video card (Direct Draw driver compliant) with 4 MB of VRAM • For automatic creation of a Music Video/ Slideshow (page 64), a Pentium III 500 MHz or faster ...
...in a multi-boot environment. Recommended computer environment The following environment is required in order to write to CD-Rs. Notes on connecting your camera, may not operate, depending on an upgrade of USB devices you connect two or more is recommended.) Hard Disk: Disk space required for ... or more, High Color (16-bit color, 65,000 colors) or more Recommended environment for installation-approximately 500 MB Display: Video card (Direct Draw driver compliant) with 4 MB of VRAM • For automatic creation of a Music Video/ Slideshow (page 64), a Pentium III 500 MHz or faster ...

Operating Instructions
Page 57
... For a computer with recorded images into the camera. 57 Stage 1: Installing the USB Driver • A driver is software that enable equipment connected to the computer to operate properly. • When using Windows XP, start from the camera to your computer This section describes the process ...using a Windows computer as Administrator (authorized Administrators). 2 Insert the CD-ROM into the computer, then click [USB Driver] when the install menu screen appears. 2 Your computer...
... For a computer with recorded images into the camera. 57 Stage 1: Installing the USB Driver • A driver is software that enable equipment connected to the computer to operate properly. • When using Windows XP, start from the camera to your computer This section describes the process ...using a Windows computer as Administrator (authorized Administrators). 2 Insert the CD-ROM into the computer, then click [USB Driver] when the install menu screen appears. 2 Your computer...
Operating Instructions
Page 64
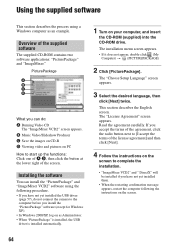
... you can install the "PicturePackage" and "ImageMixer VCD2" software using a Windows computer as Administrator. • When "PicturePackage" is installed, the USB driver is installed automatically. 1 Turn on your computer, and insert the CD-ROM (supplied) into the CD-ROM drive. Read the agreement carefully. Using the...the desired language, then click [Next] twice. The "License Agreement" screen appears. Installing the software You can do not connect the camera to start up the functions: Click one of A-D, then click the button at the lower right of the screen. Overview of the...
... you can install the "PicturePackage" and "ImageMixer VCD2" software using a Windows computer as Administrator. • When "PicturePackage" is installed, the USB driver is installed automatically. 1 Turn on your computer, and insert the CD-ROM (supplied) into the CD-ROM drive. Read the agreement carefully. Using the...the desired language, then click [Next] twice. The "License Agreement" screen appears. Installing the software You can do not connect the camera to start up the functions: Click one of A-D, then click the button at the lower right of the screen. Overview of the...
Operating Instructions
Page 81
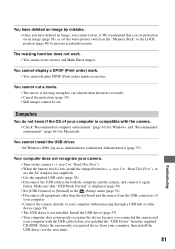
We recommend that "USB Mode Normal" is compatible with the USB cable before you installed the "USB Driver" from your camera. • Turn on the camera (t step 2 in "Read This First"). • When the battery level is low, install the charged batteries (t step 1 in the (Setup) menu (page 53). ...long enough to cut (shorter than the keyboard and the mouse from both the computer and the camera, and connect it . Your computer does not recognize your computer, then install the USB driver (see the next item). 81 Troubleshooting You cannot cut . Make sure that you cannot restore it...
We recommend that "USB Mode Normal" is compatible with the USB cable before you installed the "USB Driver" from your camera. • Turn on the camera (t step 2 in "Read This First"). • When the battery level is low, install the charged batteries (t step 1 in the (Setup) menu (page 53). ...long enough to cut (shorter than the keyboard and the mouse from both the computer and the camera, and connect it . Your computer does not recognize your computer, then install the USB driver (see the next item). 81 Troubleshooting You cannot cut . Make sure that you cannot restore it...
Operating Instructions
Page 82
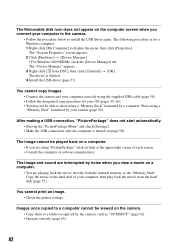
... the USB driver (page 57). Copy the movie to the hard disk of each screen. • Consult the computer or software manufacturer. The "Device Manager" appears. 3 Right-click [ Sony DSC], then click [Uninstall] t [OK]. You cannot print an image. • Check the printer settings. The image cannot be viewed on the camera. • Copy...
... the USB driver (page 57). Copy the movie to the hard disk of each screen. • Consult the computer or software manufacturer. The "Device Manager" appears. 3 Right-click [ Sony DSC], then click [Uninstall] t [OK]. You cannot print an image. • Check the printer settings. The image cannot be viewed on the camera. • Copy...

Operating Instructions
Page 98
... display...........86 Self-timer t step 5 in "Read This First" Sepia 36 Setting the clock t step 2 in "Read This First" Setup 36, 43, 44 Camera 1 45 Camera 2 48 Internal Memory Tool ...49 Memory Stick Tool .......50 Setup 1 52 Setup 2 53 Setup 1 52 Setup 2 53 Sharpness 36 Shooting Movie t step 5 ...TV 74 Twilight mode t step 5 in "Read This First" Twilight portrait mode t step 5 in "Read This First" U Underexposure 11 USB Connect 53 USB Driver 57 Using your camera abroad t step 1 in "Read This First" V VGA t step 4 in "Read This First" Video CD 64, 67 Video Out 53 Viewing Movie t ...
... display...........86 Self-timer t step 5 in "Read This First" Sepia 36 Setting the clock t step 2 in "Read This First" Setup 36, 43, 44 Camera 1 45 Camera 2 48 Internal Memory Tool ...49 Memory Stick Tool .......50 Setup 1 52 Setup 2 53 Setup 1 52 Setup 2 53 Sharpness 36 Shooting Movie t step 5 ...TV 74 Twilight mode t step 5 in "Read This First" Twilight portrait mode t step 5 in "Read This First" U Underexposure 11 USB Connect 53 USB Driver 57 Using your camera abroad t step 1 in "Read This First" V VGA t step 4 in "Read This First" Video CD 64, 67 Video Out 53 Viewing Movie t ...


