Cyber-shot® Handbook
Page 5
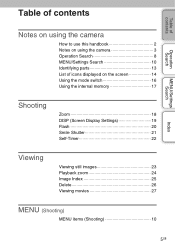
Table of contents Table of contents Operation Search MENU/Settings Search Index Notes on using the camera How to use this handbook 2 Notes on using the camera 3 Operation Search 8 MENU/Settings Search 10 Identifying parts 13 List of icons displayed on the screen 14 Using the mode switch 16 Using the internal memory 17 Shooting Zoom 18 DISP (Screen Display Settings 19 Flash 20 Smile Shutter 21 Self-Timer 22 Viewing Viewing still images 23 Playback zoom 24 Image Index 25 Delete 26 Viewing movies 27 MENU (Shooting) MENU items (Shooting 10 5GB
Table of contents Table of contents Operation Search MENU/Settings Search Index Notes on using the camera How to use this handbook 2 Notes on using the camera 3 Operation Search 8 MENU/Settings Search 10 Identifying parts 13 List of icons displayed on the screen 14 Using the mode switch 16 Using the internal memory 17 Shooting Zoom 18 DISP (Screen Display Settings 19 Flash 20 Smile Shutter 21 Self-Timer 22 Viewing Viewing still images 23 Playback zoom 24 Image Index 25 Delete 26 Viewing movies 27 MENU (Shooting) MENU items (Shooting 10 5GB
Cyber-shot® Handbook
Page 9
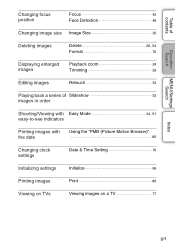
... Search MENU/Settings Search Changing focus position Focus 42 Face Detection 48 Changing image size Image Size 35 Deleting images Delete 26, 54 Format 70 Displaying enlarged images Playback zoom 24 Trimming 53 Editing images Retouch 53 Playing back a series of Slideshow 52 images in order Shooting/Viewing with Easy Mode 34, 51 easy-to-see indicators Printing images with the date Using the "PMB (Picture Motion Browser)" 80 Changing clock settings Date & Time Setting 76 Initializing settings Initialize 66 Printing images Print 86 Viewing on TVs Viewing images...
... Search MENU/Settings Search Changing focus position Focus 42 Face Detection 48 Changing image size Image Size 35 Deleting images Delete 26, 54 Format 70 Displaying enlarged images Playback zoom 24 Trimming 53 Editing images Retouch 53 Playing back a series of Slideshow 52 images in order Shooting/Viewing with Easy Mode 34, 51 easy-to-see indicators Printing images with the date Using the "PMB (Picture Motion Browser)" 80 Changing clock settings Date & Time Setting 76 Initializing settings Initialize 66 Printing images Print 86 Viewing on TVs Viewing images...
Cyber-shot® Handbook
Page 10
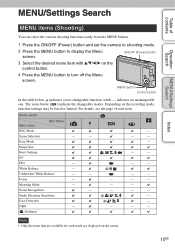
... - Face Detection - indicates an unchangeable one. Metering Mode - - - Image Size Burst Settings - - Underwater White Balance - - - - For details, see the page of contents Operation Search MENU/Settings Search Index MENU items (Shooting) You can select the various shooting functions easily from the MENU button. 1 Press the ON/OFF (Power) button and set the camera to shooting mode. 2 Press the MENU button to turn off the Menu screen. MENU/Settings Search Table of each mode are available for each item. Easy Mode - EV ISO - - - Focus - - - -
... - Face Detection - indicates an unchangeable one. Metering Mode - - - Image Size Burst Settings - - Underwater White Balance - - - - For details, see the page of contents Operation Search MENU/Settings Search Index MENU items (Shooting) You can select the various shooting functions easily from the MENU button. 1 Press the ON/OFF (Power) button and set the camera to shooting mode. 2 Press the MENU button to turn off the Menu screen. MENU/Settings Search Table of each mode are available for each item. Easy Mode - EV ISO - - - Focus - - - -
Cyber-shot® Handbook
Page 12
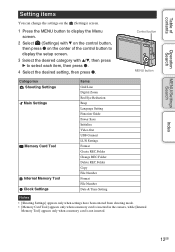
Control button MENU button Categories Shooting Settings Main Settings Memory Card Tool Internal Memory Tool Clock Settings Items Grid Line Digital Zoom Red Eye Reduction Beep Language Setting Function Guide Power Save Initialize Video Out USB Connect LUN Settings Format Create REC.Folder Change REC.Folder Delete REC.Folder Copy File Number Format File Number Date & Time Setting Notes • [Shooting Settings] appears only when settings have been entered from shooting mode. • [Memory Card Tool] appears only when a memory card is inserted in the camera, while [Internal Memory Tool] ...
Control button MENU button Categories Shooting Settings Main Settings Memory Card Tool Internal Memory Tool Clock Settings Items Grid Line Digital Zoom Red Eye Reduction Beep Language Setting Function Guide Power Save Initialize Video Out USB Connect LUN Settings Format Create REC.Folder Change REC.Folder Delete REC.Folder Copy File Number Format File Number Date & Time Setting Notes • [Shooting Settings] appears only when settings have been entered from shooting mode. • [Memory Card Tool] appears only when a memory card is inserted in the camera, while [Internal Memory Tool] ...
Cyber-shot® Handbook
Page 15
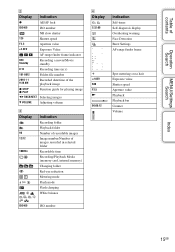
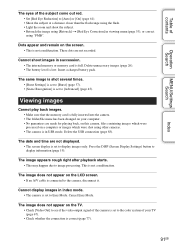
...Standby Recording a movie/Movie standby 0:12 Recording time (m:s) 101-0012 Folder-file number 2010 1 1 9:30 AM Recorded date/time of the playback image z STOP z PLAY Function guide for playing image bB BACK/NEXT Selecting images V VOLUME Adjusting volume C Display 96 12/12 100Min Indication Recording folder Playback folder Number of recordable images Image number/Number of images recorded in selected folder Recordable time Recording/Playback Media (memory card, internal memory) Changing folder Red-eye reduction Metering mode Flash mode Flash charging White balance D Display C:32...
...Standby Recording a movie/Movie standby 0:12 Recording time (m:s) 101-0012 Folder-file number 2010 1 1 9:30 AM Recorded date/time of the playback image z STOP z PLAY Function guide for playing image bB BACK/NEXT Selecting images V VOLUME Adjusting volume C Display 96 12/12 100Min Indication Recording folder Playback folder Number of recordable images Image number/Number of images recorded in selected folder Recordable time Recording/Playback Media (memory card, internal memory) Changing folder Red-eye reduction Metering mode Flash mode Flash charging White balance D Display C:32...
Cyber-shot® Handbook
Page 25
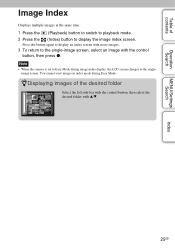
... view images in index mode during image index display, the LCD screen changes to Easy Mode during Easy Mode. Note • When the camera is set to the single- zDisplaying images of contents Operation Search MENU/Settings Search Index Image Index Displays multiple images at the same time. 1 Press the (Playback) button to switch to playback mode. 2 Press the (Index) button to the single-image screen, select an image with v/V. 25GB image screen. Table of the desired folder Select the left side bar with the control button...
... view images in index mode during image index display, the LCD screen changes to Easy Mode during Easy Mode. Note • When the camera is set to the single- zDisplaying images of contents Operation Search MENU/Settings Search Index Image Index Displays multiple images at the same time. 1 Press the (Playback) button to switch to playback mode. 2 Press the (Index) button to the single-image screen, select an image with v/V. 25GB image screen. Table of the desired folder Select the left side bar with the control button...
Cyber-shot® Handbook
Page 37
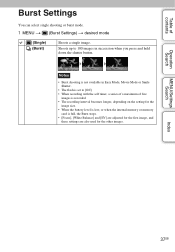
... Settings) t desired mode (Single) (Burst) Shoots a single image. MENU/Settings Search Index 37GB Notes • Burst shooting is full, the Burst stops. • [Focus], [White Balance] and [EV] are adjusted for the first image, and these settings are also used for the image size. • When the battery level is low, or when the internal memory or memory card is not available in succession when you press and hold down the shutter button...
... Settings) t desired mode (Single) (Burst) Shoots a single image. MENU/Settings Search Index 37GB Notes • Burst shooting is full, the Burst stops. • [Focus], [White Balance] and [EV] are adjusted for the first image, and these settings are also used for the image size. • When the battery level is low, or when the internal memory or memory card is not available in succession when you press and hold down the shutter button...
Cyber-shot® Handbook
Page 69
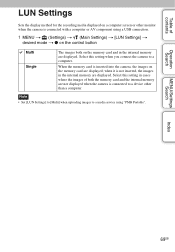
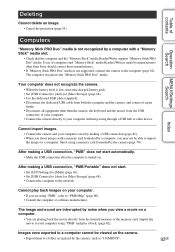
Select this setting in the internal memory are displayed. Note • Set [LUN Settings] to [Multi] when uploading images to a computer. MENU/Settings Search Index 69GB Select this setting when you connect the camera to a media service using a USB connection. 1 MENU t (Settings) t (Main Settings) t [LUN Settings] t desired mode t z on the control button Multi Single The images both on the memory card are displayed. Table of both the memory card and the internal memory are not displayed when the camera is connected to a device other than a computer...
Select this setting in the internal memory are displayed. Note • Set [LUN Settings] to [Multi] when uploading images to a computer. MENU/Settings Search Index 69GB Select this setting when you connect the camera to a media service using a USB connection. 1 MENU t (Settings) t (Main Settings) t [LUN Settings] t desired mode t z on the control button Multi Single The images both on the memory card are displayed. Table of both the memory card and the internal memory are not displayed when the camera is connected to a device other than a computer...
Cyber-shot® Handbook
Page 79
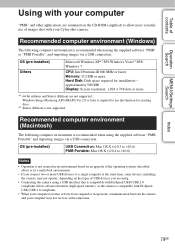
approximately 500 MB Display: Screen resolution: 1,024 × 768 dots or more *1 64-bit editions and Starter (Edition) are using. • Connecting the camera using a USB interface that is compatible with Hi-Speed USB (USB 2.0 compliant) allows advanced transfer (high speed transfer), as the camera is required to use of USB devices you are not supported. Windows Image Mastering API (IMAPI) Ver.2.0 or later is compatible with Hi-Speed USB (USB 2.0 compliant). • When your...
approximately 500 MB Display: Screen resolution: 1,024 × 768 dots or more *1 64-bit editions and Starter (Edition) are using. • Connecting the camera using a USB interface that is compatible with Hi-Speed USB (USB 2.0 compliant) allows advanced transfer (high speed transfer), as the camera is required to use of USB devices you are not supported. Windows Image Mastering API (IMAPI) Ver.2.0 or later is compatible with Hi-Speed USB (USB 2.0 compliant). • When your...
Cyber-shot® Handbook
Page 80
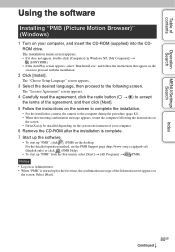
.... 6 Remove the CD-ROM after the installation is complete. 7 Start up the software. • To start up for the first time, the confirmation message of the Information tool appears on as Administrator. • When "PMB" is started up "PMB" from the Start menu, select [Start] t [All Programs] t (PMB). Table of contents Operation Search MENU/Settings Search Index Using the software Installing "PMB (Picture Motion Browser)" (Windows) 1 Turn on the screen to...
.... 6 Remove the CD-ROM after the installation is complete. 7 Start up the software. • To start up for the first time, the confirmation message of the Information tool appears on as Administrator. • When "PMB" is started up "PMB" from the Start menu, select [Start] t [All Programs] t (PMB). Table of contents Operation Search MENU/Settings Search Index Using the software Installing "PMB (Picture Motion Browser)" (Windows) 1 Turn on the screen to...
Cyber-shot® Handbook
Page 87
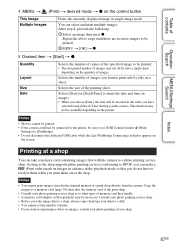
... data to a disk. • You cannot set [USB Connect] under (Main Settings) to [PictBridge]. • Do not disconnect the dedicated USB cable while the (PictBridge Connecting) indicator appears on images, consult your photo printing service shop as the shop supports photo printing services conforming to a photo printing service shop. Consult your photo printing service shop. • Before you choose [Date], the date will be inserted in the internal memory at the shop. Copy the images to a memory card (page 74), then take a memory card containing images shot...
... data to a disk. • You cannot set [USB Connect] under (Main Settings) to [PictBridge]. • Do not disconnect the dedicated USB cable while the (PictBridge Connecting) indicator appears on images, consult your photo printing service shop as the shop supports photo printing services conforming to a photo printing service shop. Consult your photo printing service shop. • Before you choose [Date], the date will be inserted in the internal memory at the shop. Copy the images to a memory card (page 74), then take a memory card containing images shot...
Cyber-shot® Handbook
Page 91
... the LCD screen. • If an A/V cable is in index mode. • The camera is low. Insert a charged battery pack. Delete the USB connection (page 83). The same image is shot several times. • [Burst Settings] is set to the color system of the subject come out red. • Set [Red Eye Reduction] to [Auto] or [On] (page 61). • Shoot the subject at a distance closer than the flash range using the flash. • Light the...
... the LCD screen. • If an A/V cable is in index mode. • The camera is low. Insert a charged battery pack. Delete the USB connection (page 83). The same image is shot several times. • [Burst Settings] is set to the color system of the subject come out red. • Set [Red Eye Reduction] to [Auto] or [On] (page 61). • Shoot the subject at a distance closer than the flash range using the flash. • Light the...
Cyber-shot® Handbook
Page 92
... the charged battery pack. • Set [USB Connect] to [Auto] or [Mass Storage] (page 68). • Use the dedicated USB cable (supplied). • Disconnect the dedicated USB cable from the internal memory or the memory card. Shoot using "PMB" and play back images on . After making a USB connection, "PMB" does not start . • Set [LUN Settings] to [Multi] (page 69). • Set [USB Connect] to [Auto] or [Mass Storage] (page 68). • Connect the computer to a folder recognized by the camera, such...
... the charged battery pack. • Set [USB Connect] to [Auto] or [Mass Storage] (page 68). • Use the dedicated USB cable (supplied). • Disconnect the dedicated USB cable from the internal memory or the memory card. Shoot using "PMB" and play back images on . After making a USB connection, "PMB" does not start . • Set [LUN Settings] to [Multi] (page 69). • Set [USB Connect] to [Auto] or [Mass Storage] (page 68). • Connect the computer to a folder recognized by the camera, such...
Cyber-shot® Handbook
Page 94
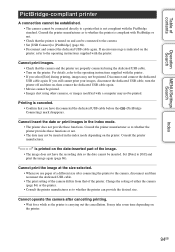
... contents Operation Search MENU/Settings Search PictBridge-compliant printer A connection cannot be established. • The camera cannot be connected directly to a printer that is turned on and can provide the desired size. Set [Date] to the operating instructions supplied with the printer. • If you still cannot print your images, disconnect the dedicated USB cable, turn the printer off and then on, then connect the dedicated USB cable again. • Movies cannot be printed. • Images shot using the dedicated USB cable. • Turn...
... contents Operation Search MENU/Settings Search PictBridge-compliant printer A connection cannot be established. • The camera cannot be connected directly to a printer that is turned on and can provide the desired size. Set [Date] to the operating instructions supplied with the printer. • If you still cannot print your images, disconnect the dedicated USB cable, turn the printer off and then on, then connect the dedicated USB cable again. • Movies cannot be printed. • Images shot using the dedicated USB cable. • Turn...

Cyber-shot® Handbook
Page 96
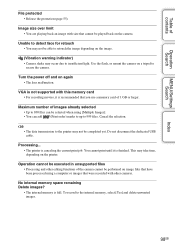
... the memory card several times. • The internal memory has experienced a format error, or an unformatted memory card is inserted. Table of contents Operation Search MENU/Settings Search Index Warning indicators and messages Self-diagnosis display If a code starting with the camera, or the data is damaged. Insert a new memory card. Messages If the following corrective actions a few times, the camera may flash even though there are still 5 to 10 minutes of remaining battery time left. System error • Turn the power...
... the memory card several times. • The internal memory has experienced a format error, or an unformatted memory card is inserted. Table of contents Operation Search MENU/Settings Search Index Warning indicators and messages Self-diagnosis display If a code starting with the camera, or the data is damaged. Insert a new memory card. Messages If the following corrective actions a few times, the camera may flash even though there are still 5 to 10 minutes of remaining battery time left. System error • Turn the power...
Cyber-shot® Handbook
Page 97
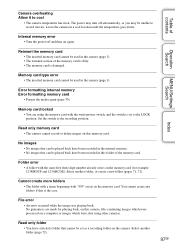
Operation Search Reinsert the memory card • The inserted memory card cannot be set to record movies. Set the switch to cool • The camera temperature has risen. Folder error • A folder with the same first three digit number already exists on the memory card (for playing back, on this camera, files containing images which were processed on a computer or images which were shot using the memory card with "999" exists on again. Read only folder • You have...
Operation Search Reinsert the memory card • The inserted memory card cannot be set to record movies. Set the switch to cool • The camera temperature has risen. Folder error • A folder with the same first three digit number already exists on the memory card (for playing back, on this camera, files containing images which were processed on a computer or images which were shot using the memory card with "999" exists on again. Read only folder • You have...
Cyber-shot® Handbook
Page 98
... selected when using a computer or images that cannot be played back on the printer. Table of the camera cannot be completed yet. Image size over limit • You are playing back an image with size that were recorded with this memory card • For recording movies, it is canceling the current print job. VGA is not supported with other editing functions of contents Operation Search MENU/Settings Search Index File protected • Release...
... selected when using a computer or images that cannot be played back on the printer. Table of the camera cannot be completed yet. Image size over limit • You are playing back an image with size that were recorded with this memory card • For recording movies, it is canceling the current print job. VGA is not supported with other editing functions of contents Operation Search MENU/Settings Search Index File protected • Release...

Cyber-shot® Handbook
Page 103
... D Date & Time Setting 76 Delete 26, 54 Delete REC.Folder 73 Digital Zoom 60 DISP 19 DPOF 56 DRO 50 E Easy Mode Shooting 34 Viewing 51 EV 38 Exposure 38 F Face Detection 48 File Number 75 Flash 20 Focus 42 Folder Changing 72 Creating 71 Deleting 73 Selecting 58 Format 70 Function Guide 64 G Gourmet 31 Grid Line 59 H High Sensitivity 31 Index I Identifying parts 13 Image Index 25 Image Size 35 Initialize 66 Install 80 Intelligent Auto Adjustment 29 Internal memory...
... D Date & Time Setting 76 Delete 26, 54 Delete REC.Folder 73 Digital Zoom 60 DISP 19 DPOF 56 DRO 50 E Easy Mode Shooting 34 Viewing 51 EV 38 Exposure 38 F Face Detection 48 File Number 75 Flash 20 Focus 42 Folder Changing 72 Creating 71 Deleting 73 Selecting 58 Format 70 Function Guide 64 G Gourmet 31 Grid Line 59 H High Sensitivity 31 Index I Identifying parts 13 Image Index 25 Image Size 35 Initialize 66 Install 80 Intelligent Auto Adjustment 29 Internal memory...
Marketing Specifications (Camera Only)
Page 1
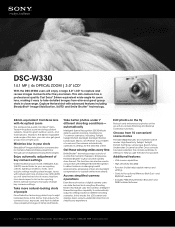
... -camera Trimming and Red-Eye Correction functions. Take better photos under 7 different shooting conditions- Choose from landscapes to fast action sporting events without having to simplify your shots SteadyShot® image stabilization compensates for the selected scene. Once a mode has been selected, the camera optimizes its settings for camera shake and helps prevent blur through use of this mode, the LCD screen only displays basic, easy-to-understand functions to manually change key cameras settings...
... -camera Trimming and Red-Eye Correction functions. Take better photos under 7 different shooting conditions- Choose from landscapes to fast action sporting events without having to simplify your shots SteadyShot® image stabilization compensates for the selected scene. Once a mode has been selected, the camera optimizes its settings for camera shake and helps prevent blur through use of this mode, the LCD screen only displays basic, easy-to-understand functions to manually change key cameras settings...
Marketing Specifications (Camera Only)
Page 2
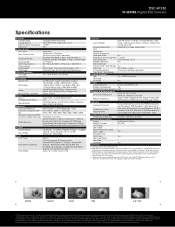
.... DSC-W330 W-SERIES Digital Still Camera Specifications General Camera Type Image Device Effective Pixels Resolution Processor Optics & Lens Lens Type Lens Construction Aperture Range Focal Length 35mm Equivalency Optical Zoom Digital Zoom Total Zoom LCD & Viewfinder LCD Type Viewfinder Recording Media Slot Still Images Video Microphone / Speaker Focus Focus Intelligent Auto Focus Macro Mode Exposure Exposure Metering Exposure Compensation ISO Backlight Correction HDR Dynamic Range Optimizer White Balance Shutter Shutter Speed Burst Mode Flash Flash Type Flash Effective...
.... DSC-W330 W-SERIES Digital Still Camera Specifications General Camera Type Image Device Effective Pixels Resolution Processor Optics & Lens Lens Type Lens Construction Aperture Range Focal Length 35mm Equivalency Optical Zoom Digital Zoom Total Zoom LCD & Viewfinder LCD Type Viewfinder Recording Media Slot Still Images Video Microphone / Speaker Focus Focus Intelligent Auto Focus Macro Mode Exposure Exposure Metering Exposure Compensation ISO Backlight Correction HDR Dynamic Range Optimizer White Balance Shutter Shutter Speed Burst Mode Flash Flash Type Flash Effective...


