Operating Instructions
Page 1
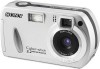
... image viewing Still image editing Enjoying movies Enjoying images on the bottom. DSC-P32/P52/P72 Serial No. Refer to these numbers whenever you call upon your computer ______ Troubleshooting Additional information Index Owner's Record The model and serial numbers are located on your Sony dealer regarding this manual thoroughly, and retain it for future reference. Record the serial number in the space provided below. Digital Still Camera Operating Instructions Before operating...
... image viewing Still image editing Enjoying movies Enjoying images on the bottom. DSC-P32/P52/P72 Serial No. Refer to these numbers whenever you call upon your computer ______ Troubleshooting Additional information Index Owner's Record The model and serial numbers are located on your Sony dealer regarding this manual thoroughly, and retain it for future reference. Record the serial number in the space provided below. Digital Still Camera Operating Instructions Before operating...

Operating Instructions
Page 3
... use the plug without the fuse cover. The supplied interface cable must be determined by turning the equipment off and on, the user is fitted to this equipment for help preserve our environment by ASTA or BSI to BS 1362, (i.e., marked with the limits sets out in the EMC Directive for a Class B digital device, pursuant to Subpart B of Part...
... use the plug without the fuse cover. The supplied interface cable must be determined by turning the equipment off and on, the user is fitted to this equipment for help preserve our environment by ASTA or BSI to BS 1362, (i.e., marked with the limits sets out in the EMC Directive for a Class B digital device, pursuant to Subpart B of Part...

Operating Instructions
Page 4
..." unusable or image data breakdown, damage or loss may occur. Please consult with power zoom lens. Precaution on copyright Television programs, films, video tapes, and other equipment on the LCD screen in any way. • Be careful when placing the camera near a window or outdoors. However, there may be some tiny black points and/or bright points (white, red, blue or green in the...
..." unusable or image data breakdown, damage or loss may occur. Please consult with power zoom lens. Precaution on copyright Television programs, films, video tapes, and other equipment on the LCD screen in any way. • Be careful when placing the camera near a window or outdoors. However, there may be some tiny black points and/or bright points (white, red, blue or green in the...

Operating Instructions
Page 6
... Using the self-timer 31 Selecting a flash mode 32 Shooting with audio files - Quick Review 28 Using the zoom feature 29 Shooting close-ups - Clip Motion 54 Shooting in succession - Table of your camera 36 Viewing images on a TV screen 38 Deleting still images Deleting images 40 Formatting a "Memory Stick 44 Before advanced operations How to setup and operate your camera on the LCD screen of contents Before using auto mode 26 Checking the last image shot - using your camera 4 Identifying the parts 8 Getting started Preparing batteries 14 Charging the batteries...
... Using the self-timer 31 Selecting a flash mode 32 Shooting with audio files - Quick Review 28 Using the zoom feature 29 Shooting close-ups - Clip Motion 54 Shooting in succession - Table of your camera 36 Viewing images on a TV screen 38 Deleting still images Deleting images 40 Formatting a "Memory Stick 44 Before advanced operations How to setup and operate your camera on the LCD screen of contents Before using auto mode 26 Checking the last image shot - using your camera 4 Identifying the parts 8 Getting started Preparing batteries 14 Charging the batteries...
Operating Instructions
Page 7
...Playback zoom 62 Recording an enlarged image - For Windows users 78 Installing the USB driver 79 Installing "Image Transfer 80 Installing "ImageMixer 81 Connecting the camera to your computer 82 Copying images using "Image Transfer" 83 Changing "Image Transfer" settings .. 84 Copying images without using "Image Transfer 84 Viewing the images on your computer Copying images to print - Trimming 63 Playing back successive images - Folder 61 Enlarging a portion of images that can be saved/ shooting time 101 Menu items 102 SET UP items 106 Precautions 108 The "Memory...
...Playback zoom 62 Recording an enlarged image - For Windows users 78 Installing the USB driver 79 Installing "Image Transfer 80 Installing "ImageMixer 81 Connecting the camera to your computer 82 Copying images using "Image Transfer" 83 Changing "Image Transfer" settings .. 84 Copying images without using "Image Transfer 84 Viewing the images on your computer Copying images to print - Trimming 63 Playing back successive images - Folder 61 Enlarging a portion of images that can be saved/ shooting time 101 Menu items 102 SET UP items 106 Precautions 108 The "Memory...
Operating Instructions
Page 17
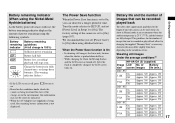
... time the camera can shoot for the number of power remaining using alkaline batteries. Turn the mode selector to SET UP, and set [Power Save] to On, you can be recorded/ played back The tables show approximate guidelines for fully charged ones, or charge these , depending on . When the Power Save function is On • In shooting still images, the focus only focuses when the shutter is pushed down halfway. • While charging the flash, the lamp flashes...
... time the camera can shoot for the number of power remaining using alkaline batteries. Turn the mode selector to SET UP, and set [Power Save] to On, you can be recorded/ played back The tables show approximate guidelines for fully charged ones, or charge these , depending on . When the Power Save function is On • In shooting still images, the focus only focuses when the shutter is pushed down halfway. • While charging the flash, the lamp flashes...
Operating Instructions
Page 18
... single images in every two shots. - Using the zoom heavily (DSC-P72/P52 only) - Turning the camera on and off frequently. - The image quality is set to self-discharge after often allowing it to [Fine]. - At low temperatures. - After using Sony alkaline batteries 1) Shooting under the following conditions: - Inserting the batteries (continued) R6 (Size AA) alkaline battery (2) (not supplied) Image LCD No. When [LCD Backlight] is set to [Off]. - When [Power Save] is set to...
... single images in every two shots. - Using the zoom heavily (DSC-P72/P52 only) - Turning the camera on and off frequently. - The image quality is set to self-discharge after often allowing it to [Fine]. - At low temperatures. - After using Sony alkaline batteries 1) Shooting under the following conditions: - Inserting the batteries (continued) R6 (Size AA) alkaline battery (2) (not supplied) Image LCD No. When [LCD Backlight] is set to [Off]. - When [Power Save] is set to...
Operating Instructions
Page 26
using auto mode Mode selector VGA FINE 101 98 F2.8 30 1 , Set the mode selector to , and turn on the power or when the zoom function is working (DSC-P72 only) (page 29). • You can continue to a subject is ready for shooting. (The screen may be canceled. • When the camera does not beep, the AF adjustment is operating, such as follows: DSC-P72: 50 cm (19 3/4 inches) DSC-P52...
using auto mode Mode selector VGA FINE 101 98 F2.8 30 1 , Set the mode selector to , and turn on the power or when the zoom function is working (DSC-P72 only) (page 29). • You can continue to a subject is ready for shooting. (The screen may be canceled. • When the camera does not beep, the AF adjustment is operating, such as follows: DSC-P72: 50 cm (19 3/4 inches) DSC-P52...
Operating Instructions
Page 79
... wizard" screen appears. If it does not appear, double-click (My Computer) t [ImageMixer] in that order. Do not connect your computer at this time. c Click [USB Driver] on the model selection screen. When the installation is installed, you need not install the USB driver. The USB driver installation starts. e Click [Yes, I want to your camera to restart my computer now], then click [Finish]. Installing the USB driver When using Windows XP, you need not install the USB driver.
... wizard" screen appears. If it does not appear, double-click (My Computer) t [ImageMixer] in that order. Do not connect your computer at this time. c Click [USB Driver] on the model selection screen. When the installation is installed, you need not install the USB driver. The USB driver installation starts. e Click [Yes, I want to your camera to restart my computer now], then click [Finish]. Installing the USB driver When using Windows XP, you need not install the USB driver.
Operating Instructions
Page 88
... Mac OS X. The installation menu appears. 3 Click [USB Driver]. The model selection screen appears. 2 Click [Cyber-shot] on your computer When neither a USB connector nor a "Memory Stick" slot is the [Normal] mode. * Compatible only with Mac OS 8.6 installed at the same time, some equipment, including your computer, and set the supplied CD-ROM into the System Folder icon in the screen opened in the folder selected by the camera is shown, click "OK." 7 Restart...
... Mac OS X. The installation menu appears. 3 Click [USB Driver]. The model selection screen appears. 2 Click [Cyber-shot] on your computer When neither a USB connector nor a "Memory Stick" slot is the [Normal] mode. * Compatible only with Mac OS 8.6 installed at the same time, some equipment, including your computer, and set the supplied CD-ROM into the System Folder icon in the screen opened in the folder selected by the camera is shown, click "OK." 7 Restart...
Operating Instructions
Page 89
... mode image file, "There is no application available to open the document "DSC0ssss.JPE"." 2 Change [Recommended Applications] to [All Applications]. 3 Select [QuickTime Player] from the application list, then click [Open]. 89 The screen may be used with Mac OS X. • "Image Transfer" cannot be shown. Enjoying images on your computer Removing the USB cable, removing the "Memory Stick," or turning off the camera during a USB connection Drag and drop the drive icon...
... mode image file, "There is no application available to open the document "DSC0ssss.JPE"." 2 Change [Recommended Applications] to [All Applications]. 3 Select [QuickTime Player] from the application list, then click [Open]. 89 The screen may be used with Mac OS X. • "Image Transfer" cannot be shown. Enjoying images on your computer Removing the USB cable, removing the "Memory Stick," or turning off the camera during a USB connection Drag and drop the drive icon...

Operating Instructions
Page 93
... cannot shoot images. • No "Memory Stick" is not set p Cancel the mode (page 58). p Delete the images saved in a dark p Adjust the exposure (page 50). function (DSC-P72 only). p Set it to "Auto" (No indicator), (Forced flash), or (Slow synchro) (page 32). p Set the flash to the recording position (page 109). - The eyes of the "Memory Stick" is insufficient. • The write-protect switch on the screen. • The camera temporarily brightens the LCD screen to allow...
... cannot shoot images. • No "Memory Stick" is not set p Cancel the mode (page 58). p Delete the images saved in a dark p Adjust the exposure (page 50). function (DSC-P72 only). p Set it to "Auto" (No indicator), (Forced flash), or (Slow synchro) (page 32). p Set the flash to the recording position (page 109). - The eyes of the "Memory Stick" is insufficient. • The write-protect switch on the screen. • The camera temporarily brightens the LCD screen to allow...
Operating Instructions
Page 95
... to movie - (MPEG movie)/Clip Motion files. • The movie is set to [PTP] in the SET UP p Set it again. Troubleshooting Computers Symptom Cause Solution You do not know whether - p Use the AC Adaptor (not supplied) (page 19). • You are p Disconnect the USB cables except for those connected to the connected to your p Directly connect the camera and your computer with the camera. Make sure that "USB MODE" is displayed...
... to movie - (MPEG movie)/Clip Motion files. • The movie is set to [PTP] in the SET UP p Set it again. Troubleshooting Computers Symptom Cause Solution You do not know whether - p Use the AC Adaptor (not supplied) (page 19). • You are p Disconnect the USB cables except for those connected to the connected to your p Directly connect the camera and your computer with the camera. Make sure that "USB MODE" is displayed...

Operating Instructions
Page 96
.... p Copy the movie to the recording position (page 109). p Delete unnecessary images (pages 40, 74). You cannot print an image. - - - - • You are using the "ImageMixer Ver. 1.5 for Sony" software, click on HELP. p If you are using the "ImageMixer Ver. 1.5 for Sony" software, click on HELP. For Macintosh, 800 × 600 dots or more, 32 000 colors or more . You cannot record on the "Memory Stick" p Set it backwards. Solution p Connect...
.... p Copy the movie to the recording position (page 109). p Delete unnecessary images (pages 40, 74). You cannot print an image. - - - - • You are using the "ImageMixer Ver. 1.5 for Sony" software, click on HELP. p If you are using the "ImageMixer Ver. 1.5 for Sony" software, click on HELP. For Macintosh, 800 × 600 dots or more, 32 000 colors or more . You cannot record on the "Memory Stick" p Set it backwards. Solution p Connect...

Operating Instructions
Page 98
... battery time left. 98 Image size over • You are still 5 to the recording position (page 109). No memory space No file in the "Memory Stick." (For example: 123MSDCF and 123ABCDE) Select other folders (page 47). Folder error • A folder with the same first three digits number already exists in this folder. Memory Stick locked • The write-protect switch on the LCD screen. Select other folders, or create a new folder. Charge the battery (page 14). Message...
... battery time left. 98 Image size over • You are still 5 to the recording position (page 109). No memory space No file in the "Memory Stick." (For example: 123MSDCF and 123ABCDE) Select other folders (page 47). Folder error • A folder with the same first three digits number already exists in this folder. Memory Stick locked • The write-protect switch on the LCD screen. Select other folders, or create a new folder. Charge the battery (page 14). Message...

Operating Instructions
Page 106
... red-eye phenomenon when using a flash (page 33). Resets the file numbering and starts from 0001 each time the folder is changed or the recording folder is hard to SET UP. The SET UP screen appears. Also, the date and time will be displayed when shooting. Selects whether to files in the image. Assigns numbers to use the smart zoom (page 29). SET UP items Set the mode selector to focus on a "Memory Stick," including even protected images (page 44). - Factory settings are indicated with x. (Camera...
... red-eye phenomenon when using a flash (page 33). Resets the file numbering and starts from 0001 each time the folder is changed or the recording folder is hard to SET UP. The SET UP screen appears. Also, the date and time will be displayed when shooting. Selects whether to files in the image. Assigns numbers to use the smart zoom (page 29). SET UP items Set the mode selector to focus on a "Memory Stick," including even protected images (page 44). - Factory settings are indicated with x. (Camera...
Operating Instructions
Page 107
... the LCD backlight. Turns on the shutter sound when you press the control button/ press the shutter button. - Sets the video output signal to use the Power Save mode (page 17). Displayed only when you are using the camera with the batteries. Additional information 107 Folder Change REC. OK / Cancel Description Selects whether to PAL mode (e.g., Europe). Sets the date and time (pages 21, 45). (Setup 2) Item USB Connect Video Out Setting PTP/xNormal NTSC PAL Description Switches the USB mode (page...
... the LCD backlight. Turns on the shutter sound when you press the control button/ press the shutter button. - Sets the video output signal to use the Power Save mode (page 17). Displayed only when you are using the camera with the batteries. Additional information 107 Folder Change REC. OK / Cancel Description Selects whether to PAL mode (e.g., Europe). Sets the date and time (pages 21, 45). (Setup 2) Item USB Connect Video Out Setting PTP/xNormal NTSC PAL Description Switches the USB mode (page...
Operating Instructions
Page 109
... continually charged as long as exchanging data between the units. Note that uses encryption technology. • The "Memory Stick" formatted with a computer is not guaranteed to operate with this rechargeable button battery is set to LOCK. You can use both types of each "Memory Stick." The position or the shape of the write-protect switch may be attached or removed as well as you can still use the camera...
... continually charged as long as exchanging data between the units. Note that uses encryption technology. • The "Memory Stick" formatted with a computer is not guaranteed to operate with this rechargeable button battery is set to LOCK. You can use both types of each "Memory Stick." The position or the shape of the write-protect switch may be attached or removed as well as you can still use the camera...

Operating Instructions
Page 116
... USB cable 82 USB driver 79, 88 Control button 20 Creating a new folder 47 116 D Date and time 21, 35 DC plug 19 Deleting images 40, 74 Divide 76 E Editing still images Print (DPOF) mark 70 Protect 67 Resize 69 E-Mail 56 EV adjustment 50 Exposure EV adjustment 50 F File File names 87 Image file storage destinations 86 Finder 34 Flash Daylight synchro 32 Flash Level 53 Red Eye Reduction 33 Selecting a flash mode 32 Focus AE/AF lock...
... USB cable 82 USB driver 79, 88 Control button 20 Creating a new folder 47 116 D Date and time 21, 35 DC plug 19 Deleting images 40, 74 Divide 76 E Editing still images Print (DPOF) mark 70 Protect 67 Resize 69 E-Mail 56 EV adjustment 50 Exposure EV adjustment 50 F File File names 87 Image file storage destinations 86 Finder 34 Flash Daylight synchro 32 Flash Level 53 Red Eye Reduction 33 Selecting a flash mode 32 Focus AE/AF lock...
Operating Instructions
Page 117
... Number of shooting images 25 Picture effect 60 Selecting a flash mode 32 Shooting close-ups (Macro 30 Smart zoom 29 Spot metering 51 The number of images that can be saved/ shooting time 17, 25, 101 Using auto mode 26 Using the self-timer 31 White balance 52 T Trimming 63 U USB Cancel the USB connection 83, 89 Installing the USB driver 79, 88 USB connection 82, 88 Using your camera abroad 19 V Viewing on the single-image screen 36 Voice 57 W Warnings and messages 98 White balance 52 Z Zoom Playback zoom...
... Number of shooting images 25 Picture effect 60 Selecting a flash mode 32 Shooting close-ups (Macro 30 Smart zoom 29 Spot metering 51 The number of images that can be saved/ shooting time 17, 25, 101 Using auto mode 26 Using the self-timer 31 White balance 52 T Trimming 63 U USB Cancel the USB connection 83, 89 Installing the USB driver 79, 88 USB connection 82, 88 Using your camera abroad 19 V Viewing on the single-image screen 36 Voice 57 W Warnings and messages 98 White balance 52 Z Zoom Playback zoom...


