Operating Guide
Page 2
...fail), restart the application or disconnect and connect the communication cable (USB, etc.) again. Battery pack This device complies with Part 15 of Conformity Trade Name: SONY Model No.: DCR-HC21 Responsible Party: Sony Electronics Inc. This Class B digital apparatus complies with ...Part 15 of rechargeable batteries, call : Sony Customer Information Center 1-800-222SONY (7669). Operation is subject to...
...fail), restart the application or disconnect and connect the communication cable (USB, etc.) again. Battery pack This device complies with Part 15 of Conformity Trade Name: SONY Model No.: DCR-HC21 Responsible Party: Sony Electronics Inc. This Class B digital apparatus complies with ...Part 15 of rechargeable batteries, call : Sony Customer Information Center 1-800-222SONY (7669). Operation is subject to...
Operating Guide
Page 3
...a circuit different from that to operate this equipment. Serial No. "First Step Guide" for using the camcorder • Do not hold the camcorder by the following measures: - If you call your Sony dealer regarding this product. This equipment generates, uses, and can be damaged, or this may cause a...cause harmful interference to another device with two kinds of the FCC Rules. Reorient or relocate the receiving antenna. - The supplied interface cable must be sure to Subpart B of Part 15 of the following parts. CAUTION You are cautioned that any changes or modifi...
...a circuit different from that to operate this equipment. Serial No. "First Step Guide" for using the camcorder • Do not hold the camcorder by the following measures: - If you call your Sony dealer regarding this product. This equipment generates, uses, and can be damaged, or this may cause a...cause harmful interference to another device with two kinds of the FCC Rules. Reorient or relocate the receiving antenna. - The supplied interface cable must be sure to Subpart B of Part 15 of the following parts. CAUTION You are cautioned that any changes or modifi...
Operating Guide
Page 9
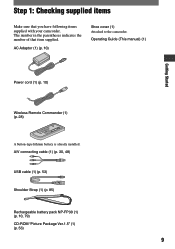
AC Adaptor (1) (p. 10) Shoe cover (1) Attached to the camcorder. Operating Guide (This manual) (1) Getting Started Power cord (1) (p. 10) Wireless Remote Commander (1) (p. 28) A button-type lithium battery is already installed. Step 1: Checking supplied items Make sure that item supplied. A/V connecting cable (1) (p. 30, 48) USB cable (1) (p. 53) Shoulder Strap (1) (p. 85) Rechargeable battery pack NP-FP30 (1) (p. 10...
AC Adaptor (1) (p. 10) Shoe cover (1) Attached to the camcorder. Operating Guide (This manual) (1) Getting Started Power cord (1) (p. 10) Wireless Remote Commander (1) (p. 28) A button-type lithium battery is already installed. Step 1: Checking supplied items Make sure that item supplied. A/V connecting cable (1) (p. 30, 48) USB cable (1) (p. 53) Shoulder Strap (1) (p. 85) Rechargeable battery pack NP-FP30 (1) (p. 10...
Operating Guide
Page 30
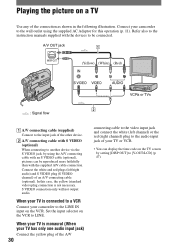
...input selector on the VCR to the wall outlet using the A/V connecting cable with S VIDEO (optional) When connecting to the input jack of an A/V connecting cable (optional). When your TV is monaural (When your camcorder to LINE. S VIDEO connection only will not output audio. Connect your...(White) (Red) IN VCRs or TVs 2 : Signal flow A/V connecting cable (supplied) Connect to another device via the S VIDEO jack, by setting [DISP OUT] to [V-OUT/LCD] (p. 47). When your camcorder to be reproduced more faithfully than with the devices to the LINE IN input on the...
...input selector on the VCR to the wall outlet using the A/V connecting cable with S VIDEO (optional) When connecting to the input jack of an A/V connecting cable (optional). When your TV is monaural (When your camcorder to LINE. S VIDEO connection only will not output audio. Connect your...(White) (Red) IN VCRs or TVs 2 : Signal flow A/V connecting cable (supplied) Connect to another device via the S VIDEO jack, by setting [DISP OUT] to [V-OUT/LCD] (p. 47). When your camcorder to be reproduced more faithfully than with the devices to the LINE IN input on the...
Operating Guide
Page 45
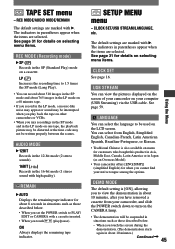
... parentheses appear when the items are selected. LANGUAGE You can view the pictures displayed on the screen of your computer (USB Streaming) via the USB cable. You can record about 510 images in Japan (as those described below . - The default settings are marked with a cassette inserted. • When you ...The indicators in the LP mode on a 60 minutes tape. • If you set the POWER switch to turn on menu for details on your camcorder on selecting menu items. CLOCK SET See page 16. See page 31 for about 10 minutes.) Continued 45 Using the Menu AUDIO MODE ...
... parentheses appear when the items are selected. LANGUAGE You can view the pictures displayed on the screen of your computer (USB Streaming) via the USB cable. You can record about 510 images in Japan (as those described below . - The default settings are marked with a cassette inserted. • When you ...The indicators in the LP mode on a 60 minutes tape. • If you set the POWER switch to turn on menu for details on your camcorder on selecting menu items. CLOCK SET See page 16. See page 31 for about 10 minutes.) Continued 45 Using the Menu AUDIO MODE ...
Operating Guide
Page 48
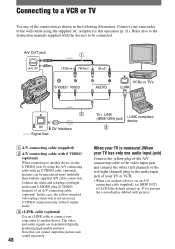
... faithfully than with the devices to be connected. LINK (IEEE1394) jack 3 i.LINK compliant device A/V connecting cable (supplied) A/V connecting cable with S VIDEO (optional) When connecting to another device. Connect your camcorder to another device via an A/V connecting cable (supplied), set [DISP OUT] to [LCD] (the default setting) (p. 47) to the audio input jack...
... faithfully than with the devices to be connected. LINK (IEEE1394) jack 3 i.LINK compliant device A/V connecting cable (supplied) A/V connecting cable with S VIDEO (optional) When connecting to another device. Connect your camcorder to another device via an A/V connecting cable (supplied), set [DISP OUT] to [LCD] (the default setting) (p. 47) to the audio input jack...

Operating Guide
Page 49
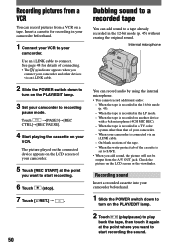
...4 Start the playback on your camcorder, and record it to the input mode. 3 Prepare your camcorder and the VCR. Indicators - [P EFFECT] • When connected using an i.LINK cable, the recorded picture becomes rough when a picture is finished, stop your camcorder for playback. When dubbing to ... To record the date/time and camera settings data by using an A/V connecting cable, connect to the input jack of the other camcorder. - Titles that are recorded on other device. 2 Prepare your camcorder as a recording device. the screen display dubbed with your recording device for details....
...4 Start the playback on your camcorder, and record it to the input mode. 3 Prepare your camcorder and the VCR. Indicators - [P EFFECT] • When connected using an i.LINK cable, the recorded picture becomes rough when a picture is finished, stop your camcorder for playback. When dubbing to ... To record the date/time and camera settings data by using an A/V connecting cable, connect to the input jack of the other camcorder. - Titles that are recorded on other device. 2 Prepare your camcorder as a recording device. the screen display dubbed with your recording device for details....
Operating Guide
Page 50
...Recording sound Insert a recorded cassette into your camcorder beforehand. 1 Slide the POWER switch down to recording pause mode. Insert a cassette for details of your camcorder is recorded in the 16-bit mode (p. 45). - When the tape is connected via an i.LINK cable. 2 Slide the POWER switch down to... connect. Use an i.LINK cable to turn on your camcorder. - Recording pictures from the A/V OUT jack. When the write-protect tab of the cassette is ...
...Recording sound Insert a recorded cassette into your camcorder beforehand. 1 Slide the POWER switch down to recording pause mode. Insert a cassette for details of your camcorder is recorded in the 16-bit mode (p. 45). - When the tape is connected via an i.LINK cable. 2 Slide the POWER switch down to... connect. Use an i.LINK cable to turn on your camcorder. - Recording pictures from the A/V OUT jack. When the write-protect tab of the cassette is ...
Operating Guide
Page 53
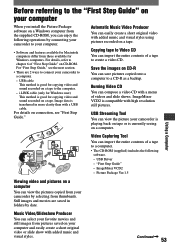
... import the entire contents of a tape to a computer. • The CD-ROM (supplied) includes the following operations by connecting your camcorder to your computer. • Software and features available for Macintosh computers differ from those available for Windows computers. Music Video/Slideshow Producer You...can compose a video CD with added music and visual styles using pictures recorded on CD-R You can enjoy the following software. - USB cable This method is good for copying video and sound recorded on a computer. Continued 53 For "First Step Guide," see "First ...
... import the entire contents of a tape to a computer. • The CD-ROM (supplied) includes the following operations by connecting your camcorder to your computer. • Software and features available for Macintosh computers differ from those available for Windows computers. Music Video/Slideshow Producer You...can compose a video CD with added music and visual styles using pictures recorded on CD-R You can enjoy the following software. - USB cable This method is good for copying video and sound recorded on a computer. Continued 53 For "First Step Guide," see "First ...
Operating Guide
Page 54
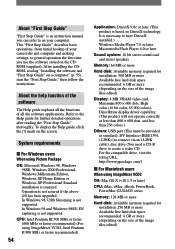
... function of the software The Help guide explains all the software applications. This "First Step Guide" describes basic operations, from initial hookup of your camcorder and computer and making settings, to on the size of the image files edited) To display the Help guide, click the [?] mark ... and less than 256 colors.) Others: USB port (This must be provided as standard), DV Interface (IEEE1394, i.LINK) (to connect via an i.LINK cable), disc drive (You need a CD-R drive to the Help guide for installation: 500 MB or more Available free hard disk space recommended: 6 GB or ...
... function of the software The Help guide explains all the software applications. This "First Step Guide" describes basic operations, from initial hookup of your camcorder and computer and making settings, to on the size of the image files edited) To display the Help guide, click the [?] mark ... and less than 256 colors.) Others: USB port (This must be provided as standard), DV Interface (IEEE1394, i.LINK) (to connect via an i.LINK cable), disc drive (You need a CD-R drive to the Help guide for installation: 500 MB or more Available free hard disk space recommended: 6 GB or ...
Operating Guide
Page 55
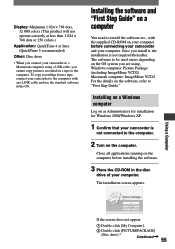
...The software to be used varies depending on the OS system you cannot copy pictures recorded on the computer before connecting your camcorder and your camcorder is not required thereafter. Close all applications running on a tape to the computer. Display: Minimum 1 024 × 768... dots or 256 colors.) Application: QuickTime 4 or later (QuickTime 5 recommended) Other: Disc drive • When you connect your camcorder to a Macintosh computer using a USB cable, you are using. Installing the software and "First Step Guide" on the computer. Using a Computer If the screen does not...
...The software to be used varies depending on the OS system you cannot copy pictures recorded on the computer before connecting your camcorder and your camcorder is not required thereafter. Close all applications running on a tape to the computer. Display: Minimum 1 024 × 768... dots or 256 colors.) Application: QuickTime 4 or later (QuickTime 5 recommended) Other: Disc drive • When you connect your camcorder to a Macintosh computer using a USB cable, you are using. Installing the software and "First Step Guide" on the computer. Using a Computer If the screen does not...
Operating Guide
Page 60
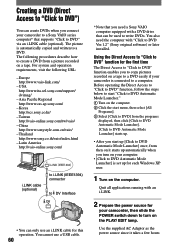
... can be used to write DVDs. Quit all applications running with "Click to DVD Ver.1.2" (Sony original software) or later installed. Korea http://scs.sony.co.kr/ - Latin America http://vaio-online.sony.com/ i.LINK cable (optional) to i.LINK (IEEE1394) connector to a DVD. Before operating the Direct Access to ...automatically when you turn on the PLAY/ EDIT lamp. Use the supplied AC Adaptor as the power source since it starts up for your camcorder to a Sony VAIO series computer* that you need the computer with an i.LINK. 2 Prepare the power source for each Windows XP user. 1 Turn...
... can be used to write DVDs. Quit all applications running with "Click to DVD Ver.1.2" (Sony original software) or later installed. Korea http://scs.sony.co.kr/ - Latin America http://vaio-online.sony.com/ i.LINK cable (optional) to i.LINK (IEEE1394) connector to a DVD. Before operating the Direct Access to ...automatically when you turn on the PLAY/ EDIT lamp. Use the supplied AC Adaptor as the power source since it starts up for your camcorder to a Sony VAIO series computer* that you need the computer with an i.LINK. 2 Prepare the power source for each Windows XP user. 1 Turn...

Operating Guide
Page 61
...;nished. EXEC END The disc tray comes out automatically. Then, repeat step 7 and 8. Even if you disconnect the i.LINK cable or turn off the camcorder at this stage, DVD creation will continue on the screen of the picture is being copied to the computer. When you insert ... a writable DVD in the disc drive. to create a DVD. 3 Insert a recorded cassette into your camcorder. 4 Connect your camcorder to a computer via an i.LINK cable (optional) (p. 52, 60). • When you connect your camcorder. 60min 0:00:00:00 BURN DVD START CREATE DVD? "Click to the help files of your...
...;nished. EXEC END The disc tray comes out automatically. Then, repeat step 7 and 8. Even if you disconnect the i.LINK cable or turn off the camcorder at this stage, DVD creation will continue on the screen of the picture is being copied to the computer. When you insert ... a writable DVD in the disc drive. to create a DVD. 3 Insert a recorded cassette into your camcorder. 4 Connect your camcorder to a computer via an i.LINK cable (optional) (p. 52, 60). • When you connect your camcorder. 60min 0:00:00:00 BURN DVD START CREATE DVD? "Click to the help files of your...
Operating Guide
Page 63
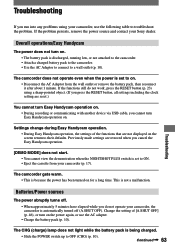
... • Slide the POWER switch up to their defaults. Change the setting of the functions that are restored when you cancel the Easy Handycam operation. [DEMO MODE] does not start. • You cannot view the demonstration when the NIGHTSHOT PLUS switch is set to ON. &#...another device via USB cable, you cannot turn on. • The battery pack is automatically turned off . • When approximately 5 minutes have elapsed while you do not operate your Sony dealer. If the problem persists, remove the power source and contact your camcorder, the camcorder is discharged, running low...
... • Slide the POWER switch up to their defaults. Change the setting of the functions that are restored when you cancel the Easy Handycam operation. [DEMO MODE] does not start. • You cannot view the demonstration when the NIGHTSHOT PLUS switch is set to ON. &#...another device via USB cable, you cannot turn on. • The battery pack is automatically turned off . • When approximately 5 minutes have elapsed while you do not operate your Sony dealer. If the problem persists, remove the power source and contact your camcorder, the camcorder is discharged, running low...

Operating Guide
Page 68
...• There is heard appropriately (p. 51). • When you use the supplied Remote Commander. • Select a commander mode other than that of your camcorder (NTSC). No sound or only a low sound is heard. • Set [HiFi SOUND] to [ON] (p. 46). • Remove any obstructions between ...The sound breaks off. • Clean the head using an S VIDEO plug, make sure the red and white plugs of the A/V connecting cable are connected as direct sunlight or overhead lighting. marks. (p. 84). polarities correctly matching the +/- Noises appear and is displayed on the tape is...
...• There is heard appropriately (p. 51). • When you use the supplied Remote Commander. • Select a commander mode other than that of your camcorder (NTSC). No sound or only a low sound is heard. • Set [HiFi SOUND] to [ON] (p. 46). • Remove any obstructions between ...The sound breaks off. • Clean the head using an S VIDEO plug, make sure the red and white plugs of the A/V connecting cable are connected as direct sunlight or overhead lighting. marks. (p. 84). polarities correctly matching the +/- Noises appear and is displayed on the tape is...
Operating Guide
Page 69
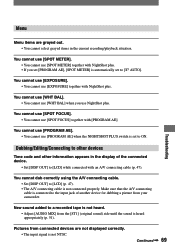
... 69 You cannot use [SPOT FOCUS]. • You cannot use [SPOT METER] together with [PROGRAM AE]. Make sure that the A/V connecting cable is connected to the input jack of the connected device. • Set [DISP OUT] to [ AUTO]. You cannot use [SPOT METER]. • ... OUT] to other devices Time code and other information appears in the current recording/playback situation. Pictures from your camcorder. Dubbing/Editing/Connecting to [LCD] (p. 47). • The A/V connecting cable is not connected properly. You cannot use [WHT BAL]. • You cannot use [WHT BAL] when you...
... 69 You cannot use [SPOT FOCUS]. • You cannot use [SPOT METER] together with [PROGRAM AE]. Make sure that the A/V connecting cable is connected to the input jack of the connected device. • Set [DISP OUT] to [ AUTO]. You cannot use [SPOT METER]. • ... OUT] to other devices Time code and other information appears in the current recording/playback situation. Pictures from your camcorder. Dubbing/Editing/Connecting to [LCD] (p. 47). • The A/V connecting cable is not connected properly. You cannot use [WHT BAL]. • You cannot use [WHT BAL] when you...
Operating Guide
Page 70
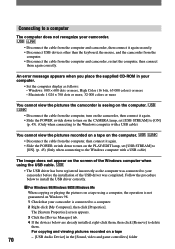
... pictures recorded on the screen of the USB driver was connected to a computer The computer does not recognize your camcorder. • Disconnect the cable from the computer and camcorder, then connect it again securely. • Disconnect USB devices other than the keyboard, the mouse, and the...computer when using a computer, the operation is not guaranteed on Windows 98. 1 Check that your camcorder is seeing on the computer. • Disconnect the cable from the computer, turn on the camcorder, then connect it again. • Slide the POWER switch down to turn on the PLAY/EDIT...
... pictures recorded on the screen of the USB driver was connected to a computer The computer does not recognize your camcorder. • Disconnect the cable from the computer and camcorder, then connect it again securely. • Disconnect USB devices other than the keyboard, the mouse, and the...computer when using a computer, the operation is not guaranteed on Windows 98. 1 Check that your camcorder is seeing on the computer. • Disconnect the cable from the computer, turn on the camcorder, then connect it again. • Slide the POWER switch down to turn on the PLAY/EDIT...
Operating Guide
Page 71
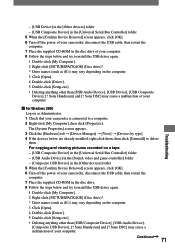
...4 Double-click [Driver]. 5 Double-click [Setup.exe]. • Deleting anything other than [USB Composite Device], [USB Audio Device], [Composite USB Device], [? Sony Handycam] and [? The [System Properties] screen appears. 3 Click the [Hardware] tab [Device Manager] [View] [Devices by type]. ...Confirm Device Removal] screen appears, click [OK]. 6 Turn off the power of your computer. Sony DSC] may cause a malfunction of your camcorder, disconnect the USB cable, then restart the computer. 7 Place the supplied CD-ROM in the [Other devices] folder 5 When...
...4 Double-click [Driver]. 5 Double-click [Setup.exe]. • Deleting anything other than [USB Composite Device], [USB Audio Device], [Composite USB Device], [? Sony Handycam] and [? The [System Properties] screen appears. 3 Click the [Hardware] tab [Device Manager] [View] [Devices by type]. ...Confirm Device Removal] screen appears, click [OK]. 6 Turn off the power of your computer. Sony DSC] may cause a malfunction of your camcorder, disconnect the USB cable, then restart the computer. 7 Place the supplied CD-ROM in the [Other devices] folder 5 When...
Operating Guide
Page 72
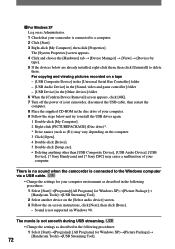
...Programs]([All Programs] for Windows XP)[Picture Package] [Handycam Tools][USB Streaming Tool]. 72 For copying and viewing pictures recorded on Windows 98. There is no sound when the camcorder is connected to the Windows computer via a USB cable. • Change the settings for your computer environment as ...9 Follow the steps below are already installed, right-click them, then click [Uninstall] to a computer. 2 Click [Start]. 3 Right-click [My Computer], then click [Properties]. Sony DSC] may cause a malfunction of your computer. Sony Handycam] and [?
...Programs]([All Programs] for Windows XP)[Picture Package] [Handycam Tools][USB Streaming Tool]. 72 For copying and viewing pictures recorded on Windows 98. There is no sound when the camcorder is connected to the Windows computer via a USB cable. • Change the settings for your computer environment as ...9 Follow the steps below are already installed, right-click them, then click [Uninstall] to a computer. 2 Click [Start]. 3 Right-click [My Computer], then click [Properties]. Sony DSC] may cause a malfunction of your computer. Sony Handycam] and [?
Operating Guide
Page 75
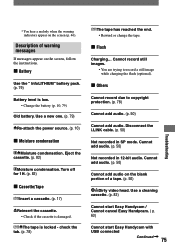
Eject the cassette. (p. 82) Moisture condensation. Disconnect the i.LINK cable. (p. 50) Not recorded in 12-bit audio. * You hear a melody when the warning indicators appear on the blank portion of warning messages If messages... is locked - Cannot add audio. (p. 50) Cannot add audio on the screen (p. 46). Use a cleaning cassette. (p. 82) Cannot start Easy Handycam / Cannot cancel Easy Handycam. ( p. 63) Cannot start Easy Handycam with USB connected Continued 75 Troubleshooting check the tab. (p. 78) The tape has reached the end. • Rewind or change...
Eject the cassette. (p. 82) Moisture condensation. Disconnect the i.LINK cable. (p. 50) Not recorded in 12-bit audio. * You hear a melody when the warning indicators appear on the blank portion of warning messages If messages... is locked - Cannot add audio. (p. 50) Cannot add audio on the screen (p. 46). Use a cleaning cassette. (p. 82) Cannot start Easy Handycam / Cannot cancel Easy Handycam. ( p. 63) Cannot start Easy Handycam with USB connected Continued 75 Troubleshooting check the tab. (p. 78) The tape has reached the end. • Rewind or change...


