
Operating Guide
Page 5
...environment by returning your camcorder Before operating the unit, please read this product, you call upon your Sony dealer regarding recycling of rechargeable batteries, call : Sony Customer Information Center 1-800-222-SONY (7669). Owner's... battery with Part 15 of optical instruments with this device must accept any questions about this manual thoroughly, and retain it for the FCC related matters only. Address: 16530 Via Esprillo, ... of Conformity Trade Name: SONY Model No.: DCR-DVD408 Responsible Party:Sony Electronics Inc. For customers in hazardous radiation exposure. DCR...
...environment by returning your camcorder Before operating the unit, please read this product, you call upon your Sony dealer regarding recycling of rechargeable batteries, call : Sony Customer Information Center 1-800-222-SONY (7669). Owner's... battery with Part 15 of optical instruments with this device must accept any questions about this manual thoroughly, and retain it for the FCC related matters only. Address: 16530 Via Esprillo, ... of Conformity Trade Name: SONY Model No.: DCR-DVD408 Responsible Party:Sony Electronics Inc. For customers in hazardous radiation exposure. DCR...
Operating Guide
Page 6
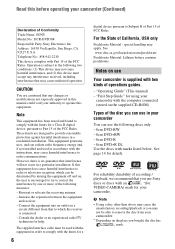
... interference that may cause undesired operation. The supplied interface cable must accept any changes or modifications not expressly approved in this manual could void your authority to operate this equipment does cause harmful interference to radio or television reception, which the receiver is... Step Guide" for your camcorder (Continued) Declaration of Conformity Trade Name: SONY Model No.: DCR-DVD508 Responsible Party:Sony Electronics Inc. See page 14 for help. Operation is subject to the following discs only. - 8cm DVD-RW - 8cm DVD+RW - 8cm DVD-R - 8cm DVD+R DL Use the discs with...
... interference that may cause undesired operation. The supplied interface cable must accept any changes or modifications not expressly approved in this manual could void your authority to operate this equipment does cause harmful interference to radio or television reception, which the receiver is... Step Guide" for your camcorder (Continued) Declaration of Conformity Trade Name: SONY Model No.: DCR-DVD508 Responsible Party:Sony Electronics Inc. See page 14 for help. Operation is subject to the following discs only. - 8cm DVD-RW - 8cm DVD+RW - 8cm DVD-R - 8cm DVD+R DL Use the discs with...

Operating Guide
Page 8
...adopts the MTF measurement system for a particular operation. About the marks used in Germany, and Sony Corporation, and produces superior images. To view your camcorder to 8cm DVD discs. MTF= Modulation Transfer Function. Doing so might cause your recordings on -screen displays in .... The following marks are used in this manual are based on the countries/regions. Use a DVD-RW/DVD+RW for trial recording (p. 14). • Compensation for illustrating the 8 operating procedures. About the Carl Zeiss lens Your camcorder is equipped with a digital still camera, and...
...adopts the MTF measurement system for a particular operation. About the marks used in Germany, and Sony Corporation, and produces superior images. To view your camcorder to 8cm DVD discs. MTF= Modulation Transfer Function. Doing so might cause your recordings on -screen displays in .... The following marks are used in this manual are based on the countries/regions. Use a DVD-RW/DVD+RW for trial recording (p. 14). • Compensation for illustrating the 8 operating procedures. About the Carl Zeiss lens Your camcorder is equipped with a digital still camera, and...

Operating Guide
Page 14
... A recording format that enables editing with 8cm DVD-RW, DVD+RW, DVD-R and DVD+R DL. Recording time Expected recordable time on both sides of a disc. Choosing a disc Your camcorder is compatible with your camcorder (deleting and rearranging the order of images). M stands for DVD-RW When you use a double-sided disc...quality to suit the recording scene. This technology causes fluctuations in DVD devices*1 that support VR mode. Movies containing quickly moving and complex images are recorded at a higher bit rate, and this manual, VIDEO mode is indicated as and VR mode as 9M and...
... A recording format that enables editing with 8cm DVD-RW, DVD+RW, DVD-R and DVD+R DL. Recording time Expected recordable time on both sides of a disc. Choosing a disc Your camcorder is compatible with your camcorder (deleting and rearranging the order of images). M stands for DVD-RW When you use a double-sided disc...quality to suit the recording scene. This technology causes fluctuations in DVD devices*1 that support VR mode. Movies containing quickly moving and complex images are recorded at a higher bit rate, and this manual, VIDEO mode is indicated as and VR mode as 9M and...

Operating Guide
Page 15
z - - - Finalizing required to its original empty state (p.61). Deleting or editing recordings on your camcorder (50) - z *1 Refer to the instruction manual of your DVD device to see whether it with your camcorder Disc format features Disc types and symbols Figures in parentheses ( ) indicate page numbers. Even when using a new disc, format it supports the VR...
z - - - Finalizing required to its original empty state (p.61). Deleting or editing recordings on your camcorder (50) - z *1 Refer to the instruction manual of your DVD device to see whether it with your camcorder Disc format features Disc types and symbols Figures in parentheses ( ) indicate page numbers. Even when using a new disc, format it supports the VR...

Operating Guide
Page 17
... played back in a device compatible with the DVD-RW VR mode. For details, see page 46. Unfinalizing allows you to the instruction manual supplied with your DVD device or consult your camcorder on other DVD devices, you need to finalize the disc. Enjoying with your camcorder 4Viewing on another DVD device (See pages 46, 59.) To view...
... played back in a device compatible with the DVD-RW VR mode. For details, see page 46. Unfinalizing allows you to the instruction manual supplied with your DVD device or consult your camcorder on other DVD devices, you need to finalize the disc. Enjoying with your camcorder 4Viewing on another DVD device (See pages 46, 59.) To view...
Operating Guide
Page 21
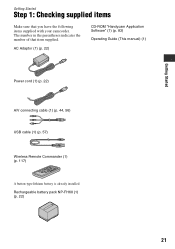
AC Adaptor (1) (p. 22) CD-ROM "Handycam Application Software" (1) (p. 83) Operating Guide (This manual) (1) Power cord (1) (p. 22) A/V connecting cable (1) (p. 44, 56) USB cable (1) (p. 57) Wireless Remote Commander (1) (p. 117) A button-type lithium battery is already installed. Getting Started Getting Started Step 1: Checking supplied items Make sure that item supplied. Rechargeable battery pack NP-FH60 (1) (p. 22) 21 The number in the parentheses indicates the number of that you have the following items supplied with your camcorder.
AC Adaptor (1) (p. 22) CD-ROM "Handycam Application Software" (1) (p. 83) Operating Guide (This manual) (1) Power cord (1) (p. 22) A/V connecting cable (1) (p. 44, 56) USB cable (1) (p. 57) Wireless Remote Commander (1) (p. 117) A button-type lithium battery is already installed. Getting Started Getting Started Step 1: Checking supplied items Make sure that item supplied. Rechargeable battery pack NP-FH60 (1) (p. 22) 21 The number in the parentheses indicates the number of that you have the following items supplied with your camcorder.
Operating Guide
Page 38
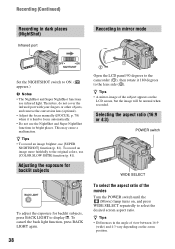
... light. Therefore, do not cover the infrared port with your fingers or other objects, and remove the conversion lens (optional). • Adjust the focus manually ([FOCUS], p. 78) when it 180 degrees to ON. ( appears.) b Notes • The NightShot and Super NightShot functions use [SUPER NIGHTSHOT] function...appears on the zoom position. To cancel the back light function, press BACK LIGHT again. 38 Open the LCD panel 90 degrees to the camcorder (1), then rotate it is hard to the original colors, use the NightShot and Super NightShot functions in bright places. z Tips • ...
... light. Therefore, do not cover the infrared port with your fingers or other objects, and remove the conversion lens (optional). • Adjust the focus manually ([FOCUS], p. 78) when it 180 degrees to ON. ( appears.) b Notes • The NightShot and Super NightShot functions use [SUPER NIGHTSHOT] function...appears on the zoom position. To cancel the back light function, press BACK LIGHT again. 38 Open the LCD panel 90 degrees to the camcorder (1), then rotate it is hard to the original colors, use the NightShot and Super NightShot functions in bright places. z Tips • ...

Operating Guide
Page 44
... the setting according to the screen aspect ratio of the A/V connecting cable with an S VIDEO cable (optional). Refer also to the instruction manuals supplied with your camcorder to a TV compatible with the ID-1/ID-2 system and play back the disc, set [TV TYPE] to [4:3], the image quality may ...[16:9]. When your TV is not necessary. Refer also to the instruction manuals supplied with the devices to be produced than with an A/V connecting cable. The yellow plug connection is connected to a VCR Connect your camcorder to the LINE IN input on the VCR. Also, when the recorded ...
... the setting according to the screen aspect ratio of the A/V connecting cable with an S VIDEO cable (optional). Refer also to the instruction manuals supplied with your camcorder to a TV compatible with the ID-1/ID-2 system and play back the disc, set [TV TYPE] to [4:3], the image quality may ...[16:9]. When your TV is not necessary. Refer also to the instruction manuals supplied with the devices to be produced than with an A/V connecting cable. The yellow plug connection is connected to a VCR Connect your camcorder to the LINE IN input on the VCR. Also, when the recorded ...

Operating Guide
Page 56
Dubbing to VCR or DVD/HDD recorders You can be connected. Refer also to the instruction manuals supplied with S VIDEO jack IN S VIDEO VIDEO (Yellow) VIDEO (White) ... camera settings data, display them on your camcorder to the audio input jack on the device. S VIDEO connection only will not output audio. 56 VCRs or DVD/ HDD recorders b Notes • To hide...quality images can dub images played back on the screen (p. 71). • When you are connecting your camcorder to the input jack of the A/V connecting cable with S VIDEO (optional) When connecting to be produced than...
Dubbing to VCR or DVD/HDD recorders You can be connected. Refer also to the instruction manuals supplied with S VIDEO jack IN S VIDEO VIDEO (Yellow) VIDEO (White) ... camera settings data, display them on your camcorder to the audio input jack on the device. S VIDEO connection only will not output audio. 56 VCRs or DVD/ HDD recorders b Notes • To hide...quality images can dub images played back on the screen (p. 71). • When you are connecting your camcorder to the input jack of the A/V connecting cable with S VIDEO (optional) When connecting to be produced than...

Operating Guide
Page 57
.... 3 Touch [ PRINT]. Insert the "Memory Stick Duo" containing still images into your camcorder, and press (VIEW IMAGES). Connect your camcorder to the AC Adaptor to the instruction manuals supplied with S VIDEO (optional) 2. Continued , 57 Printing recorded images (PictBridge compliant printer...according to the recording device (VCR or DVD/ HDD recorder) with the A/V connecting cable (supplied) 1 or an A/V connecting cable with your recording device for details. 6 When dubbing is complete, (PictBridge connecting) appears on your camcorder, and record it to the input mode...
.... 3 Touch [ PRINT]. Insert the "Memory Stick Duo" containing still images into your camcorder, and press (VIEW IMAGES). Connect your camcorder to the AC Adaptor to the instruction manuals supplied with S VIDEO (optional) 2. Continued , 57 Printing recorded images (PictBridge compliant printer...according to the recording device (VCR or DVD/ HDD recorder) with the A/V connecting cable (supplied) 1 or an A/V connecting cable with your recording device for details. 6 When dubbing is complete, (PictBridge connecting) appears on your camcorder, and record it to the input mode...

Operating Guide
Page 58
...video camera or digital still camera, regardless of 3MB or more - Touch to return to the previous screen. 2 Touch (OPTION), set up to your camcorder • If the printer stops working, disconnect the USB cable, turn the printer off and on again, and restart the operation from the printer. -... image recorded in a 16:9 (wide) ratio, the left edges of images may not be printed. b Notes • Refer also to the instruction manual of the printer to be used. • Do not attempt the following operations when is an industry standard established by connecting a printer directly to be...
...video camera or digital still camera, regardless of 3MB or more - Touch to return to the previous screen. 2 Touch (OPTION), set up to your camcorder • If the printer stops working, disconnect the USB cable, turn the printer off and on again, and restart the operation from the printer. -... image recorded in a 16:9 (wide) ratio, the left edges of images may not be printed. b Notes • Refer also to the instruction manual of the printer to be used. • Do not attempt the following operations when is an industry standard established by connecting a printer directly to be...
Operating Guide
Page 59
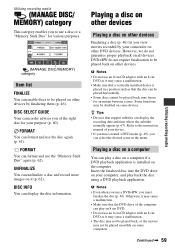
... discs cannot be played back, may not be played smoothly on other devices by finalizing them (p. 46). Insert the finalized disc into the DVD drive on your camcorder on some devices. b Notes • Even when you use the "Memory Stick Duo" again (p. 62). FORMAT You can play back ... Make sure that a vertically installed device is installed on the computer. However, we do not require finalization to the instruction manual of the computer can format and use a DVD+RW, you can unfinalize a disc and record more images on it may be played back on some computers. Some functions ...
... discs cannot be played back, may not be played smoothly on other devices by finalizing them (p. 46). Insert the finalized disc into the DVD drive on your camcorder on some devices. b Notes • Even when you use the "Memory Stick Duo" again (p. 62). FORMAT You can play back ... Make sure that a vertically installed device is installed on the computer. However, we do not require finalization to the instruction manual of the computer can format and use a DVD+RW, you can unfinalize a disc and record more images on it may be played back on some computers. Some functions ...
Operating Guide
Page 67
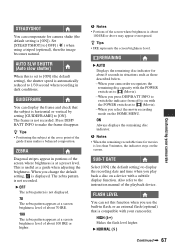
... indicator. Also refer to make the frame disappear. B NORMAL ( ) Continued , 67 Customizing your camcorder recognizes the remaining disc capacity with your camcorder. Press DISP/ BATT INFO to the instruction manual of the screen where brightness is horizontal or vertical by setting [GUIDEFRAME] to [OFF] ( ) ...SLW SHUTTR (Auto slow shutter) When this function when you play back a disc on with a subtitle display function. When your camcorder The zebra pattern is displayed. When you select the movie recording mode on the screen. b Notes • Portions of the ...
... indicator. Also refer to make the frame disappear. B NORMAL ( ) Continued , 67 Customizing your camcorder recognizes the remaining disc capacity with your camcorder. Press DISP/ BATT INFO to the instruction manual of the screen where brightness is horizontal or vertical by setting [GUIDEFRAME] to [OFF] ( ) ...SLW SHUTTR (Auto slow shutter) When this function when you play back a disc on with a subtitle display function. When your camcorder The zebra pattern is displayed. When you select the movie recording mode on the screen. b Notes • Portions of the ...

Operating Guide
Page 78
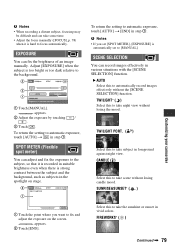
... and the subject stands out clearer. When you set focus manually SPOT FOCUS You can select and adjust the focal point to aim it is focused on a certain subject intentionally. b Notes • The minimum possible distance between camcorder and subject while maintaining sharp focus is about 1 cm (...with B. TELE MACRO This is automatically set [TELE MACRO] to [ON] ( ), the zoom (p. 36) moves to the top of the screen. 1 Touch [MANUAL]. 9 appears. 2 Touch (focusing on close distance, down to about 45 cm (17 3/4 in the following cases. (It will be described below. appears when the...
... and the subject stands out clearer. When you set focus manually SPOT FOCUS You can select and adjust the focal point to aim it is focused on a certain subject intentionally. b Notes • The minimum possible distance between camcorder and subject while maintaining sharp focus is about 1 cm (...with B. TELE MACRO This is automatically set [TELE MACRO] to [ON] ( ), the zoom (p. 36) moves to the top of the screen. 1 Touch [MANUAL]. 9 appears. 2 Touch (focusing on close distance, down to about 45 cm (17 3/4 in the following cases. (It will be described below. appears when the...
Operating Guide
Page 79
... • If you want to automatic exposure, touch [AUTO] t [END] in step 1. SCENE SELECTION You can fix the brightness of an image manually. Select this to automatically record images effectively without losing candle mood. FIREWORKS* ( ) Continued , 79 To return the setting to...time. • Adjust the focus manually ([FOCUS], p. 78) when it is recorded in suitable brightness even when there is strong contrast between the subject and the background, such as subjects in the spotlight on the screen. SUNRISE&SUNSET* ( ) Customizing your camcorder 1 Touch the point where you ...
... • If you want to automatic exposure, touch [AUTO] t [END] in step 1. SCENE SELECTION You can fix the brightness of an image manually. Select this to automatically record images effectively without losing candle mood. FIREWORKS* ( ) Continued , 79 To return the setting to...time. • Adjust the focus manually ([FOCUS], p. 78) when it is recorded in suitable brightness even when there is strong contrast between the subject and the background, such as subjects in the spotlight on the screen. SUNRISE&SUNSET* ( ) Customizing your camcorder 1 Touch the point where you ...
Operating Guide
Page 81
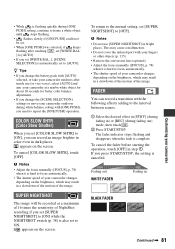
...Do not cover the infrared port with your fingers or other objects (p. 115). • Remove the conversion lens (optional). • Adjust the focus manually ([FOCUS], p. 78) when it is hard to focus automatically. • The shutter speed of the image. The fader indicator stops flashing and disappears ...following effects adding to the interval between scenes. 1 Select the desired effect in [STBY] (during fading in a slowdown of the motion of your camcorder changes depending on the brightness, which may result in ) or [REC] (during fading out) mode, then touch . 2 Press START/STOP. To...
...Do not cover the infrared port with your fingers or other objects (p. 115). • Remove the conversion lens (optional). • Adjust the focus manually ([FOCUS], p. 78) when it is hard to focus automatically. • The shutter speed of the image. The fader indicator stops flashing and disappears ...following effects adding to the interval between scenes. 1 Select the desired effect in [STBY] (during fading in a slowdown of the motion of your camcorder changes depending on the brightness, which may result in ) or [REC] (during fading out) mode, then touch . 2 Press START/STOP. To...
Operating Guide
Page 83
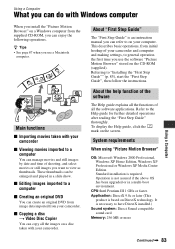
.... To display the Help guide, click the mark on a disc taken with your camcorder. These thumbnails can create an original DVD from image data imported from your camcorder. About "First Step Guide" The "First Step Guide" is an instruction manual you can manage movies and still images by date and time of shooting, and...
.... To display the Help guide, click the mark on a disc taken with your camcorder. These thumbnails can create an original DVD from image data imported from your camcorder. About "First Step Guide" The "First Step Guide" is an instruction manual you can manage movies and still images by date and time of shooting, and...

Operating Guide
Page 87
...recommended environment. - Viewing "First Step Guide" Double-click "FirstStepGuide(PDF)." If no software for Windows XP) t [Sony Picture Utility] t [First Step Guide] t folder with model name of your camcorder t HTML version of "First Step Guide." • To view "First Step Guide" in HTML without installing, copy... on your computer. Double-click the shortcut of "First Step Guide" - When "First Step Guide" is an instruction manual you use a Macintosh computer. Others: USB port (this program by selecting [Start] t [Programs] ([All Programs] for viewing PDF files is recommended.
...recommended environment. - Viewing "First Step Guide" Double-click "FirstStepGuide(PDF)." If no software for Windows XP) t [Sony Picture Utility] t [First Step Guide] t folder with model name of your camcorder t HTML version of "First Step Guide." • To view "First Step Guide" in HTML without installing, copy... on your computer. Double-click the shortcut of "First Step Guide" - When "First Step Guide" is an instruction manual you use a Macintosh computer. Others: USB port (this program by selecting [Start] t [Programs] ([All Programs] for viewing PDF files is recommended.
Operating Guide
Page 92
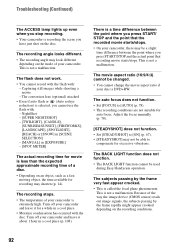
... does not work. • You cannot record with the flash with : - Turn off your disc is DVD+RW. The movie aspect ratio (16:9/4:3) cannot be used during Easy Handycam operation. Adjust the focus manually (p. 78). [STEADYSHOT] does not function. • Set [STEADYSHOT] to [ON] (p. 67). •...[AUTO] (p. 78). • The recording conditions are not suitable for excessive vibrations. The recording stops. • The temperature of your camcorder and leave it about 1 hour in a cool place (p. 108). This is not a malfunction. Troubleshooting (Continued) The ACCESS lamp lights ...
... does not work. • You cannot record with the flash with : - Turn off your disc is DVD+RW. The movie aspect ratio (16:9/4:3) cannot be used during Easy Handycam operation. Adjust the focus manually (p. 78). [STEADYSHOT] does not function. • Set [STEADYSHOT] to [ON] (p. 67). •...[AUTO] (p. 78). • The recording conditions are not suitable for excessive vibrations. The recording stops. • The temperature of your camcorder and leave it about 1 hour in a cool place (p. 108). This is not a malfunction. Troubleshooting (Continued) The ACCESS lamp lights ...


