

Camera Operations Guide
Page 2
... nearest you. and CANADA RECYCLING LITHIUM-ION BATTERIES Lithium-Ion batteries are recyclable. b Notice If static electricity or electromagnetic interference causes data transfer to rain or moisture. This Class B digital apparatus complies with Part 15 of rechargeable batteries, call toll free 1-800-822- 8837,... or visit http://www.rbrc.org/ Caution: Do not handle damaged or leaking LithiumIon batteries. Read this first Before operating the unit,...
... nearest you. and CANADA RECYCLING LITHIUM-ION BATTERIES Lithium-Ion batteries are recyclable. b Notice If static electricity or electromagnetic interference causes data transfer to rain or moisture. This Class B digital apparatus complies with Part 15 of rechargeable batteries, call toll free 1-800-822- 8837,... or visit http://www.rbrc.org/ Caution: Do not handle damaged or leaking LithiumIon batteries. Read this first Before operating the unit,...

Camera Operations Guide
Page 4
... • Be careful not to malfunction. Finger rest LCD panel Battery pack 4 Take pictures of the sun only in low light conditions, such as a wrist strap (p. 142). • When you are using the touch panel, place your camcorder to direct sunlight for effective use. Note on connecting other device ...manufactured using extremely high-precision technology, so over 99.99% of the LCD screen and the viewfinder used on this manual are captured using a digital still camera, and thus may appear different from what you see. • The on-screen displays in each local language are used as ...
... • Be careful not to malfunction. Finger rest LCD panel Battery pack 4 Take pictures of the sun only in low light conditions, such as a wrist strap (p. 142). • When you are using the touch panel, place your camcorder to direct sunlight for effective use. Note on connecting other device ...manufactured using extremely high-precision technology, so over 99.99% of the LCD screen and the viewfinder used on this manual are captured using a digital still camera, and thus may appear different from what you see. • The on-screen displays in each local language are used as ...

Camera Operations Guide
Page 6
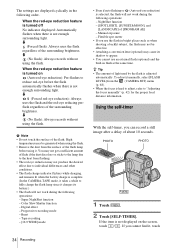
...Stick Duo" while recording movies on a tape ...35 Recording with ease 14 Getting started Step 1: Checking supplied items 15 Step 2: Charging the battery pack 16 Using an outside power source 19 Step 3: Turning the power on 19 Step 4: Adjusting the LCD panel and viewfinder 20 Adjusting the... Using zoom ...28 Recording in mirror mode 29 Using the self-timer ...29 Recording movies fit for "Memory Stick Duo" only. Easy Handycam 36 6 Table of Contents : Features available for tape only. : Features available for breaking into still images - Progressive recording mode 30 Recording still ...
...Stick Duo" while recording movies on a tape ...35 Recording with ease 14 Getting started Step 1: Checking supplied items 15 Step 2: Charging the battery pack 16 Using an outside power source 19 Step 3: Turning the power on 19 Step 4: Adjusting the LCD panel and viewfinder 20 Adjusting the... Using zoom ...28 Recording in mirror mode 29 Using the self-timer ...29 Recording movies fit for "Memory Stick Duo" only. Easy Handycam 36 6 Table of Contents : Features available for tape only. : Features available for breaking into still images - Progressive recording mode 30 Recording still ...

Camera Operations Guide
Page 9
Additional Information Using your camcorder abroad ..........126 Usable cassette tapes 127 About the "Memory Stick 128 About the "InfoLITHIUM" battery pack 130 About i.LINK 132 Maintenance and precautions ..........133 Specification 136 Quick Reference Identifying parts and controls ...........139 Index 147 Refer also to other operating instructions supplied with your camcorder: • Editing images with your computer cComputer Applications Guide 9
Additional Information Using your camcorder abroad ..........126 Usable cassette tapes 127 About the "Memory Stick 128 About the "InfoLITHIUM" battery pack 130 About i.LINK 132 Maintenance and precautions ..........133 Specification 136 Quick Reference Identifying parts and controls ...........139 Index 147 Refer also to other operating instructions supplied with your camcorder: • Editing images with your computer cComputer Applications Guide 9

Camera Operations Guide
Page 10
a Slide the BATT (battery release) b Attach the battery pack with c Press . when it lifts up . EJECT lever in the its lever in the direction of 2. automatically comes out and opens up in the direction of 1 and push terminal side facing your camcorder it clicks. OPEN/EJECT lever ...Window-side 10 Quick Start Guide To charge the battery, see page 16. as shown in the illustration and press Remove the battery terminal cover down the battery pack until it down in by itself. ...
a Slide the BATT (battery release) b Attach the battery pack with c Press . when it lifts up . EJECT lever in the its lever in the direction of 2. automatically comes out and opens up in the direction of 1 and push terminal side facing your camcorder it clicks. OPEN/EJECT lever ...Window-side 10 Quick Start Guide To charge the battery, see page 16. as shown in the illustration and press Remove the battery terminal cover down the battery pack until it down in by itself. ...

Camera Operations Guide
Page 12
Recording still images 1 Attach the charged battery pack to the camcorder. Insert it clicks. B mark 12 Quick Start Guide as shown in the illustration and press Remove the battery terminal cover down the battery pack until it down in until it so that the B mark is ...lifts up in the direction of 1 and push terminal side facing your camcorder it clicks. To charge the battery, see page 16. BATT (battery release) lever 2 Insert a "Memory Stick Duo" into the camcorder. a Slide the BATT (battery release) b Attach the battery pack with its lever in the direction of 2.
Recording still images 1 Attach the charged battery pack to the camcorder. Insert it clicks. B mark 12 Quick Start Guide as shown in the illustration and press Remove the battery terminal cover down the battery pack until it down in until it so that the B mark is ...lifts up in the direction of 1 and push terminal side facing your camcorder it clicks. To charge the battery, see page 16. BATT (battery release) lever 2 Insert a "Memory Stick Duo" into the camcorder. a Slide the BATT (battery release) b Attach the battery pack with its lever in the direction of 2.

Camera Operations Guide
Page 15
...," which is about half the size of a standard "Memory Stick," in your camcorder. See page 128 for details. Handycam Station (1) Wireless Remote Commander (1) A button-type lithium battery is not separately available in parentheses indicates the number of the devices compatible with your camcorder. USB cable (1) Shoulder Strap (1) AC Adaptor (1) Power cord (1) Lens cap (1) Attached...
...," which is about half the size of a standard "Memory Stick," in your camcorder. See page 128 for details. Handycam Station (1) Wireless Remote Commander (1) A button-type lithium battery is not separately available in parentheses indicates the number of the devices compatible with your camcorder. USB cable (1) Shoulder Strap (1) AC Adaptor (1) Power cord (1) Lens cap (1) Attached...

Camera Operations Guide
Page 16
... in the direction of the AC Adaptor or battery terminals with its terminal side facing your camcorder. BATT (battery release) lever 2 Attach the battery pack with any malfunction occurs. 1 Attach the charged battery pack to the camcorder. 1 Slide the BATT (battery release) lever in the direction of 1 and... when using the AC Adaptor. b Note • You cannot use batteries other than the "InfoLITHIUM" battery pack (F series) (p. 130). • Do not short-circuit the DC plug of 3. DC plug DC IN jack Handycam Station Power cord To the wall outlet AC Adaptor 16 Getting started ...
... in the direction of the AC Adaptor or battery terminals with its terminal side facing your camcorder. BATT (battery release) lever 2 Attach the battery pack with any malfunction occurs. 1 Attach the charged battery pack to the camcorder. 1 Slide the BATT (battery release) lever in the direction of 1 and... when using the AC Adaptor. b Note • You cannot use batteries other than the "InfoLITHIUM" battery pack (F series) (p. 130). • Do not short-circuit the DC plug of 3. DC plug DC IN jack Handycam Station Power cord To the wall outlet AC Adaptor 16 Getting started ...

Camera Operations Guide
Page 17
... using only the AC Adaptor DC plug DC IN jack Power cord To the wall outlet AC Adaptor You can charge the battery pack on your camcorder as shown in a vertical state. • Always attach the terminal cover to OFF (CHG). b Note • Be careful not to OFF (CHG). 2 Slide ...the BATT (battery release) lever in the direction of 1 and push it lifts up and charging starts. Remove the battery pack when it down in the direction of the battery pack. If you remove the battery pack if your camcorder into the Handycam Station. Disconnect the AC Adaptor from the DC...
... using only the AC Adaptor DC plug DC IN jack Power cord To the wall outlet AC Adaptor You can charge the battery pack on your camcorder as shown in a vertical state. • Always attach the terminal cover to OFF (CHG). b Note • Be careful not to OFF (CHG). 2 Slide ...the BATT (battery release) lever in the direction of 1 and push it lifts up and charging starts. Remove the battery pack when it down in the direction of the battery pack. If you remove the battery pack if your camcorder into the Handycam Station. Disconnect the AC Adaptor from the DC...

Camera Operations Guide
Page 18
...Getting started B Approximate possible recording time using the viewfinder. C Approximate possible recording time using the LCD panel. The actual battery life may be shorter. Battery pack Continuous Typical* recording recording time time NP-FF50 90 50 NP-FF51 105 55 (supplied) NP-FF70 190 105 NP... (supplied) 130 NP-FF70 150 NP-FF71 170 Recording time when recording with the viewfinder Approximate number of power left in the battery pack. Charging time Approximate number of minutes required when you repeatedly record, start/stop, slide the POWER switch to OFF (CHG)....
...Getting started B Approximate possible recording time using the viewfinder. C Approximate possible recording time using the LCD panel. The actual battery life may be shorter. Battery pack Continuous Typical* recording recording time time NP-FF50 90 50 NP-FF51 105 55 (supplied) NP-FF70 190 105 NP... (supplied) 130 NP-FF70 150 NP-FF71 170 Recording time when recording with the viewfinder Approximate number of power left in the battery pack. Charging time Approximate number of minutes required when you repeatedly record, start/stop, slide the POWER switch to OFF (CHG)....

Camera Operations Guide
Page 19
... of the Handycam Station and your camcorder in low temperature. • The CHARGE lamp flashes during charging, or the battery information will not be supplied from the battery pack even when the power cord is fully discharged. (For Battery information only.) • With a large capacity battery pack (NP...-FF70/FF71) installed, your camcorder will not lose its charge even when it while connected to the Handycam Station • The recording and playback time will ...
... of the Handycam Station and your camcorder in low temperature. • The CHARGE lamp flashes during charging, or the battery information will not be supplied from the battery pack even when the power cord is fully discharged. (For Battery information only.) • With a large capacity battery pack (NP...-FF70/FF71) installed, your camcorder will not lose its charge even when it while connected to the Handycam Station • The recording and playback time will ...

Camera Operations Guide
Page 20
... to the desired position. Maximum 90 degrees Open the LCD panel. Viewfinder lens adjustment lever To adjust the brightness of the LCD panel to the camcorder, then rotate it , touch [MENU], (STANDARD SET) menu, then touch [LCD/VF SET] (p. 85). 3 Adjust the item with the LCD screen facing ...LCD screen during the operation When you are obstructions between you and the subject, you can check the subject on the screen.) This setting saves battery power. • Even if you close the LCD panel with touch . / , then Adjust the viewfinder lens adjustment lever until the picture ...
... to the desired position. Maximum 90 degrees Open the LCD panel. Viewfinder lens adjustment lever To adjust the brightness of the LCD panel to the camcorder, then rotate it , touch [MENU], (STANDARD SET) menu, then touch [LCD/VF SET] (p. 85). 3 Adjust the item with the LCD screen facing ...LCD screen during the operation When you are obstructions between you and the subject, you can check the subject on the screen.) This setting saves battery power. • Even if you close the LCD panel with touch . / , then Adjust the viewfinder lens adjustment lever until the picture ...

Camera Operations Guide
Page 21
... the date and time Set the date and time when using the battery pack, p. 85). POWER switch 1 Turn on the LCD screen, touch . are using this camcorder for about 3 months, the built-in rechargeable button-type battery gets discharged and the date and time settings may be cleared from the... memory. To hide the buttons on your camcorder (p. 19). 2 Open the LCD panel. In that case, charge the rechargeable button-type battery (p. 135) and then set the clock for the first time. 3 Touch . 60min MENU 1/3 FADER SPOT...
... the date and time Set the date and time when using the battery pack, p. 85). POWER switch 1 Turn on the LCD screen, touch . are using this camcorder for about 3 months, the built-in rechargeable button-type battery gets discharged and the date and time settings may be cleared from the... memory. To hide the buttons on your camcorder (p. 19). 2 Open the LCD panel. In that case, charge the rechargeable button-type battery (p. 135) and then set the clock for the first time. 3 Touch . 60min MENU 1/3 FADER SPOT...

Camera Operations Guide
Page 24
... on the screen, touch / . Doing so may cause a malfunction of your camcorder. • When the access lamp is lit or flashing, your camcorder is not displayed on your camcorder, turn the power off, eject the "Memory Stick Duo," or remove the battery pack. Step 7: Setting the screen language You can select the language to... may be erased. • Do not insert anything other than a "Memory Stick Duo" into the "Memory Stick Duo" slot. Do not shake or knock your camcorder. 2 Open the LCD panel. 3 Touch . 4 Touch [LANGUAGE].
... on the screen, touch / . Doing so may cause a malfunction of your camcorder. • When the access lamp is lit or flashing, your camcorder is not displayed on your camcorder, turn the power off, eject the "Memory Stick Duo," or remove the battery pack. Step 7: Setting the screen language You can select the language to... may be erased. • Do not insert anything other than a "Memory Stick Duo" into the "Memory Stick Duo" slot. Do not shake or knock your camcorder. 2 Open the LCD panel. 3 Touch . 4 Touch [LANGUAGE].

Camera Operations Guide
Page 27
..., slide the POWER switch up to OFF (CHG). • In the default setting, when you do not operate the camcorder for Cassette Memory cassettes B Approximate remaining battery and continuous recording time The indicated time may not be recorded on the "Memory Stick Duo." To restart recording, slide the...the tape (p. 87) G Personal Menu button (p. 63) H END SEARCH/EDIT SEARCH/Rec review display switch button (p. 48) A Recording folder B Approximate remaining battery and continuous recording time The indicated time may not be those with short cuts on the Personal Menu. In order to prevent...
..., slide the POWER switch up to OFF (CHG). • In the default setting, when you do not operate the camcorder for Cassette Memory cassettes B Approximate remaining battery and continuous recording time The indicated time may not be recorded on the "Memory Stick Duo." To restart recording, slide the...the tape (p. 87) G Personal Menu button (p. 63) H END SEARCH/EDIT SEARCH/Rec review display switch button (p. 48) A Recording folder B Approximate remaining battery and continuous recording time The indicated time may not be those with short cuts on the Personal Menu. In order to prevent...
Camera Operations Guide
Page 34
... to individual differences and other conditions. • The flash charge indicator flickers while charging, and remains lit when the battery charge is not enough surrounding light. Flexible spot meter • If you use an external flash (optional) and the...regardless of the surrounding brightness. When the red-eye reduction feature is not enough surrounding light. Digital effect - High temperatures may be effective. • Attaching a conversion lens (optional) may cause its battery.) • The flash will not work during the following operations: - PHOTO PHOTO 1 Touch ...
... to individual differences and other conditions. • The flash charge indicator flickers while charging, and remains lit when the battery charge is not enough surrounding light. Flexible spot meter • If you use an external flash (optional) and the...regardless of the surrounding brightness. When the red-eye reduction feature is not enough surrounding light. Digital effect - High temperatures may be effective. • Attaching a conversion lens (optional) may cause its battery.) • The flash will not work during the following operations: - PHOTO PHOTO 1 Touch ...

Camera Operations Guide
Page 51
... may appear at the top, bottom, or in slow mode. 4 Touch , then . Playback Indicators displayed during tape playback 60min 0:00:00:15 30min P-MENU A Remaining battery B Recording mode (SP or LP) C Tape transport indicator D Time code (hour: minute: second: frame) or tape counter (hour: minute: second) E Personal Menu button (p. 63) F Video...
... may appear at the top, bottom, or in slow mode. 4 Touch , then . Playback Indicators displayed during tape playback 60min 0:00:00:15 30min P-MENU A Remaining battery B Recording mode (SP or LP) C Tape transport indicator D Time code (hour: minute: second: frame) or tape counter (hour: minute: second) E Personal Menu button (p. 63) F Video...

Camera Operations Guide
Page 54
... the next folder. To search for playback. Indicators displayed during "Memory Stick Duo" playback 60min 2016 101-0010 10 / 10 101 0:00:00 P-MENU A Remaining battery B Image size C Picture number/Total number of recorded pictures in "Viewing recordings on a "Memory Stick Duo"" (p. 53), the following indicators appear when the first or...
... the next folder. To search for playback. Indicators displayed during "Memory Stick Duo" playback 60min 2016 101-0010 10 / 10 101 0:00:00 P-MENU A Remaining battery B Image size C Picture number/Total number of recorded pictures in "Viewing recordings on a "Memory Stick Duo"" (p. 53), the following indicators appear when the first or...

Camera Operations Guide
Page 67
... is bright, or touch if the subject is black or the light is dim. • Use this function when [EXPOSURE] is selected in Digital effect. You brought your camcorder outdoors from outside. • Redo the [ONE PUSH] procedure when: - Soften Sharpen z Tip • You cannot adjust the sharpness when... [ONE PUSH]. - SHARPNESS You can adjust the exposure using the electronic shutter. SPOT FOCUS See page 41 for replacement. - You remove the battery pack for details. ,continued Using the Menu 67 You changed the [PROGRAM AE] settings when [WHITE BAL.] is set the exposure for about 10...
... is bright, or touch if the subject is black or the light is dim. • Use this function when [EXPOSURE] is selected in Digital effect. You brought your camcorder outdoors from outside. • Redo the [ONE PUSH] procedure when: - Soften Sharpen z Tip • You cannot adjust the sharpness when... [ONE PUSH]. - SHARPNESS You can adjust the exposure using the electronic shutter. SPOT FOCUS See page 41 for replacement. - You remove the battery pack for details. ,continued Using the Menu 67 You changed the [PROGRAM AE] settings when [WHITE BAL.] is set the exposure for about 10...

Camera Operations Guide
Page 78
Recording starts and z changes to 120 seconds for the first and last shots of Digital effect • Smooth interval recording is displayed on the interval length. b Note • The camcorder will shoot several frames, it records them on the tape, after shooting has begun. • Sounds are not recorded. &#...8226; The last few frames may not be recorded if the battery or tape has run out. • There may ...
Recording starts and z changes to 120 seconds for the first and last shots of Digital effect • Smooth interval recording is displayed on the interval length. b Note • The camcorder will shoot several frames, it records them on the tape, after shooting has begun. • Sounds are not recorded. &#...8226; The last few frames may not be recorded if the battery or tape has run out. • There may ...


