
Operating Instructions
Page 1
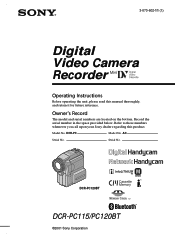
Refer to these numbers whenever you call upon your Sony dealer regarding this manual thoroughly, and retain it for future reference. AC- 3-070-602-11 (1) Digital Video Camera Recorder Operating Instructions Before operating the unit, please read this product. Owner's Record The model and serial numbers are located on the bottom. Serial No. Serial No. DCR-PC Model No. DCR-PC120BT TM SERIES DCR-PC115/PC120BT ©2001 Sony Corporation Record the serial number in the space provided below. Model No.
Refer to these numbers whenever you call upon your Sony dealer regarding this manual thoroughly, and retain it for future reference. AC- 3-070-602-11 (1) Digital Video Camera Recorder Operating Instructions Before operating the unit, please read this product. Owner's Record The model and serial numbers are located on the bottom. Serial No. Serial No. DCR-PC Model No. DCR-PC120BT TM SERIES DCR-PC115/PC120BT ©2001 Sony Corporation Record the serial number in the space provided below. Model No.
Operating Instructions
Page 4
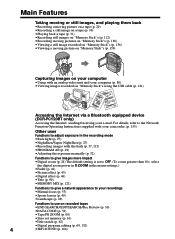
... give a natural appearance to your recordings •Manual focus (p. 53) •Sports lesson (p. 49) •Landscape (p. 49) Functions to use on "Memory Stick"s using the USB cable (p. 141) Accessing the Internet via a Bluetooth equipped device (DCR-PC120BT only) Accessing the Internet, sending/receiving your computer (p. 80) •Viewing images recorded on recorded tapes •END SEARCH/EDITSEARCH/Rec Review (p. 30) •DATA CODE (p. 32) •Tape PB ZOOM (p. 60) •Zero set memory (p. 61) •Title search...
... give a natural appearance to your recordings •Manual focus (p. 53) •Sports lesson (p. 49) •Landscape (p. 49) Functions to use on "Memory Stick"s using the USB cable (p. 141) Accessing the Internet via a Bluetooth equipped device (DCR-PC120BT only) Accessing the Internet, sending/receiving your computer (p. 80) •Viewing images recorded on recorded tapes •END SEARCH/EDITSEARCH/Rec Review (p. 30) •DATA CODE (p. 32) •Tape PB ZOOM (p. 60) •Zero set memory (p. 61) •Title search...
Operating Instructions
Page 6
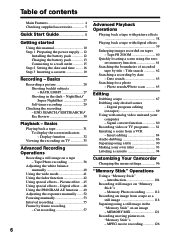
... Recording still images on "Memory Stick"s - Date search 63 Searching for a photo - Tape PB ZOOM 60 Quickly locating a scene using the zero set memory function 61 Searching the boundaries of contents Main Features 4 Checking supplied accessories 5 Quick Start Guide 8 Getting started Using this manual 10 Step 1 Preparing the power supply ... 12 Installing the battery pack 12 Charging the battery pack 13 Connecting to a wall outlet 15 Step 2 Setting the date and time ........ 16 Step 3 Inserting a cassette 19 Recording - Basics Playing...
... Recording still images on "Memory Stick"s - Date search 63 Searching for a photo - Tape PB ZOOM 60 Quickly locating a scene using the zero set memory function 61 Searching the boundaries of contents Main Features 4 Checking supplied accessories 5 Quick Start Guide 8 Getting started Using this manual 10 Step 1 Preparing the power supply ... 12 Installing the battery pack 12 Charging the battery pack 13 Connecting to a wall outlet 15 Step 2 Setting the date and time ........ 16 Step 3 Inserting a cassette 19 Recording - Basics Playing...
Operating Instructions
Page 10
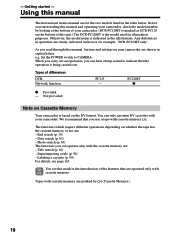
...) The functions you can operate only with your camcorder are : - Using this manual The instructions in this unit.) The DCR-PC120BT is the model used for the two models listed in the illustrations. As you start reading this manual and operating your camcorder. (DCR-PC120BT is indicated in the table below. Set the POWER switch to indicate that the operation is based on whether the tape has the cassette memory or...
...) The functions you can operate only with your camcorder are : - Using this manual The instructions in this unit.) The DCR-PC120BT is the model used for the two models listed in the illustrations. As you start reading this manual and operating your camcorder. (DCR-PC120BT is indicated in the table below. Set the POWER switch to indicate that the operation is based on whether the tape has the cassette memory or...

Operating Instructions
Page 35
... the operating instructions of the A/V connecting cable to the video input jack and the white or the red plug to the audio input jack on the VCR or the TV. Then, set the TV/VCR selector on the TV to LINE. Set the input selector on the VCR to VCR. If your TV has an S video jack Pictures can operate the video control buttons in the menu settings (p. 96). With this connection, you monitor playback pictures on the screen. Viewing the recording...
... the operating instructions of the A/V connecting cable to the video input jack and the white or the red plug to the audio input jack on the VCR or the TV. Then, set the TV/VCR selector on the TV to LINE. Set the input selector on the VCR to VCR. If your TV has an S video jack Pictures can operate the video control buttons in the menu settings (p. 96). With this connection, you monitor playback pictures on the screen. Viewing the recording...

Operating Instructions
Page 36
... the operation described here, your camcorder can record still images on other equipment, the image may fluctuate. • You cannot use the tape photo recording function during normal CAMERA recording You cannot check an image on the screen until a still image appears. The still image on a 60-minute tape. Digital effect If you record a moving subject with tape photo recording function When you play back the still image on "Memory Stick"s (p. 112). (1) In the standby mode, keep pressing PHOTO lightly until recording...
... the operation described here, your camcorder can record still images on other equipment, the image may fluctuate. • You cannot use the tape photo recording function during normal CAMERA recording You cannot check an image on the screen until a still image appears. The still image on a 60-minute tape. Digital effect If you record a moving subject with tape photo recording function When you play back the still image on "Memory Stick"s (p. 112). (1) In the standby mode, keep pressing PHOTO lightly until recording...

Operating Instructions
Page 47
... Recording Operations 1 MANUA L SET PROGRAM AE P EFFECT D EFFECT OFF WHT BA L AUTO SHTR RETURN [ MENU ] : END 2 MENU 3 MANUA L SET D EFFECT OFF ST I LL F L ASH L UM I . The bars appear. The larger the shutter speed number, the slower the shutter speed becomes. Digital effect (1) Set the POWER switch to OFF in memory. (3) Adjust and decide upon the effect with the control button. Press MENU, then select and decide upon D EFFECT in the following modes...
... Recording Operations 1 MANUA L SET PROGRAM AE P EFFECT D EFFECT OFF WHT BA L AUTO SHTR RETURN [ MENU ] : END 2 MENU 3 MANUA L SET D EFFECT OFF ST I LL F L ASH L UM I . The bars appear. The larger the shutter speed number, the slower the shutter speed becomes. Digital effect (1) Set the POWER switch to OFF in memory. (3) Adjust and decide upon the effect with the control button. Press MENU, then select and decide upon D EFFECT in the following modes...

Operating Instructions
Page 58
...) or stop playing back The picture effect function is automatically canceled. 58 Notes •You cannot process externally input scenes using the picture effect function. •You cannot record images on a tape on a VCR using the picture effect function. However, you can record images on a "Memory Stick" (p. 118, 128), or on your camcorder when you set the POWER switch to OFF in with the control button (p. 96). (2) Select and decide upon the desired mode with picture effects During playback...
...) or stop playing back The picture effect function is automatically canceled. 58 Notes •You cannot process externally input scenes using the picture effect function. •You cannot record images on a tape on a VCR using the picture effect function. However, you can record images on a "Memory Stick" (p. 118, 128), or on your camcorder when you set the POWER switch to OFF in with the control button (p. 96). (2) Select and decide upon the desired mode with picture effects During playback...

Operating Instructions
Page 60
... not output through the DV jack. 60 Notes •You cannot process externally input scenes using the PB ZOOM function with your camcorder. •You cannot record images on a tape on tapes. Set the POWER switch to OFF (CHG). - Tape PB ZOOM You can enlarge still images recorded on "Memory Stick"s (p. 148). (1) In the playback or playback pause mode, press PB ZOOM on tapes - However, you can enlarge the image from 1.1 times up to move the image. Stop playback. - The PB ZOOM function...
... not output through the DV jack. 60 Notes •You cannot process externally input scenes using the PB ZOOM function with your camcorder. •You cannot record images on a tape on tapes. Set the POWER switch to OFF (CHG). - Tape PB ZOOM You can enlarge still images recorded on "Memory Stick"s (p. 148). (1) In the playback or playback pause mode, press PB ZOOM on tapes - However, you can enlarge the image from 1.1 times up to move the image. Stop playback. - The PB ZOOM function...

Operating Instructions
Page 70
... UNDO ERASE AL L START ED I T / SET 0:08:55:06 IR TOTAL 0:00:00:00 SCENE 0 [ MENU ] : END 6 V I DEO ED I T ED I R TEST RETURN [ MENU ] : END 0:08:55:06 1 Digital program editing (on tapes) Step 2: Setting the VCR to operate with the control button. When you connect a video camera recorder, set the input selector to LINE. I N " " CUT-OUT " I R SETUP P AUS EMODE I T SET CONTROL ADJ TEST " CUT- I N " " CUT-OUT " I R SETUP P AUS EMODE I T SET CONTROL ADJ TEST...
... UNDO ERASE AL L START ED I T / SET 0:08:55:06 IR TOTAL 0:00:00:00 SCENE 0 [ MENU ] : END 6 V I DEO ED I T ED I R TEST RETURN [ MENU ] : END 0:08:55:06 1 Digital program editing (on tapes) Step 2: Setting the VCR to operate with the control button. When you connect a video camera recorder, set the input selector to LINE. I N " " CUT-OUT " I R SETUP P AUS EMODE I T SET CONTROL ADJ TEST " CUT- I N " " CUT-OUT " I R SETUP P AUS EMODE I T SET CONTROL ADJ TEST...

Operating Instructions
Page 74
... connected VCR on tapes) Step 2: Setting the VCR to DV input. When you connect using i.LINK cable (DV connecting cable) You cannot dub the titles, display indicators. I N " " CUT-OUT " I R SETUP P AUS EMODE I T SET CONTROL ADJ TEST " CUT- I N " " CUT-OUT " I R SETUP P AUS EMODE I T SET CONTROL ADJ TEST " CUT- Dubbing only desired scenes - Digital program editing (on , then set its power switch to VCR/VTR. (3) Press MENU, then select and decide upon VIDEO EDIT in with the control button...
... connected VCR on tapes) Step 2: Setting the VCR to DV input. When you connect using i.LINK cable (DV connecting cable) You cannot dub the titles, display indicators. I N " " CUT-OUT " I R SETUP P AUS EMODE I T SET CONTROL ADJ TEST " CUT- I N " " CUT-OUT " I R SETUP P AUS EMODE I T SET CONTROL ADJ TEST " CUT- Dubbing only desired scenes - Digital program editing (on , then set its power switch to VCR/VTR. (3) Press MENU, then select and decide upon VIDEO EDIT in with the control button...

Operating Instructions
Page 79
... your camcorder and the VCR automatically stop dubbing during edit on (when you use a digital video camera recorder, set to operate the Digital program editing has not been made. - The PROGRAM indicator changes to end the program editing function. Press MENU to light blue after dubbing ends. You cannot record on the LCD screen when: - The tape has run out. - The IR SETUP code is not correct (when IR is not connected. -
... your camcorder and the VCR automatically stop dubbing during edit on (when you use a digital video camera recorder, set to operate the Digital program editing has not been made. - The PROGRAM indicator changes to end the program editing function. Press MENU to light blue after dubbing ends. You cannot record on the LCD screen when: - The tape has run out. - The IR SETUP code is not correct (when IR is not connected. -
Operating Instructions
Page 142
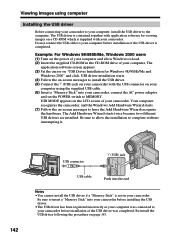
..., Windows 2000 users (1) Turn on "USB Driver Installation for viewing images on page 143. Be sure to insert a "Memory Stick" into your camcorder before installing the USB driver. • The USB driver has been registered incorrectly as your computer was connected to your camcorder before installation of your computer. Viewing images using the supplied USB cable. (6) Insert a "Memory Stick" into your camcorder, connect the AC power adaptor and set the POWER switch to MEMORY. The USB driver is supplied with your camcorder with application software for Windows 98...
..., Windows 2000 users (1) Turn on "USB Driver Installation for viewing images on page 143. Be sure to insert a "Memory Stick" into your camcorder before installing the USB driver. • The USB driver has been registered incorrectly as your computer was connected to your camcorder before installation of your computer. Viewing images using the supplied USB cable. (6) Insert a "Memory Stick" into your camcorder, connect the AC power adaptor and set the POWER switch to MEMORY. The USB driver is supplied with your camcorder with application software for Windows 98...
Operating Instructions
Page 143
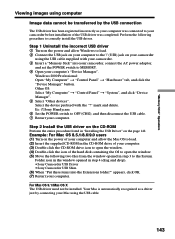
... power of the hard disk containing the OS to open the window. (5) Move the following procedure to MEMORY. 4 Open your computer's "Device Manager". Select the device prefixed with your camcorder. 3 Insert a "Memory Stick" into the Extensions folder?" Example: For Mac OS 8.5.1/8.6/9.0 users (1) Turn on your camcorder using the USB cable. 143 For Mac OS 9.1/Mac OS X The USB driver need not be transferred by connecting your Mac using the USB cable supplied with the "?" Perform the following two files from the window opened...
... power of the hard disk containing the OS to open the window. (5) Move the following procedure to MEMORY. 4 Open your computer's "Device Manager". Select the device prefixed with your camcorder. 3 Insert a "Memory Stick" into the Extensions folder?" Example: For Mac OS 8.5.1/8.6/9.0 users (1) Turn on your camcorder using the USB cable. 143 For Mac OS 9.1/Mac OS X The USB driver need not be transferred by connecting your Mac using the USB cable supplied with the "?" Perform the following two files from the window opened...
Operating Instructions
Page 145
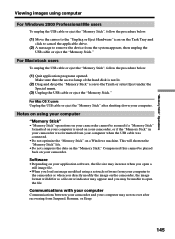
... open a still image file. •When you open the file. Communications with your computer Communications between your camcorder and your computer. "Memory Stick" Operations Viewing images using computer For Windows 2000 Professional/Me users To unplug the USB cable or eject the "Memory Stick", follow the procedure below . (1) Move the cursor to the "Unplug or Eject Hardware" icon on the Task Tray and click to cancel the applicable drive. (2) A message to remove the device...
... open a still image file. •When you open the file. Communications with your computer Communications between your camcorder and your computer. "Memory Stick" Operations Viewing images using computer For Windows 2000 Professional/Me users To unplug the USB cable or eject the "Memory Stick", follow the procedure below . (1) Move the cursor to the "Unplug or Eject Hardware" icon on the Task Tray and click to cancel the applicable drive. (2) A message to remove the device...
Operating Instructions
Page 156
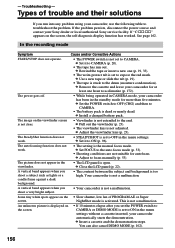
... the auto focus mode (p. 53). • Shooting conditions are not suitable for autofocus. See page 162. c Rewind the tape or insert a new one hour to troubleshoot the problem. c Close the LCD panel (p. 22). - c Remove the cassette and leave your Sony dealer or local authorized Sony service facility. c Insert a cassette and the demonstration stops. Troubleshooting - c Install a charged battery pack. The SteadyShot function does not work . • The setting is not extended to focus manually (p. 53...
... the auto focus mode (p. 53). • Shooting conditions are not suitable for autofocus. See page 162. c Rewind the tape or insert a new one hour to troubleshoot the problem. c Close the LCD panel (p. 22). - c Remove the cassette and leave your Sony dealer or local authorized Sony service facility. c Insert a cassette and the demonstration stops. Troubleshooting - c Install a charged battery pack. The SteadyShot function does not work . • The setting is not extended to focus manually (p. 53...

Operating Instructions
Page 164
... ERROR • COPY INHIBIT • Q Z TAPE END • Q NO TAPE • NO PRINT MARK • NO STILL IMAGE FILE • DELETING • FORMATTING • NOW CHARGING Set the date and time (p. 16). There is set to record an image with a print mark. (p. 154)* You selected MULTI in 9PIC PRINT in the menu settings using a "Memory Stick" contains no image with sound that cannot be recorded by your camcorder on the screen. 164 Use an "InfoLITHIUM" battery pack...
... ERROR • COPY INHIBIT • Q Z TAPE END • Q NO TAPE • NO PRINT MARK • NO STILL IMAGE FILE • DELETING • FORMATTING • NOW CHARGING Set the date and time (p. 16). There is set to record an image with a print mark. (p. 154)* You selected MULTI in 9PIC PRINT in the menu settings using a "Memory Stick" contains no image with sound that cannot be recorded by your camcorder on the screen. 164 Use an "InfoLITHIUM" battery pack...

Operating Instructions
Page 165
... ejected the cassette while recording. - The same result may not work properly. - Usable cassettes Additional Information Selecting cassette types You can read and write data such as dates of the recorded portion before you begin the next recording if you have (Cassette Memory) mark. You cannot use the mini DV cassette only*. We recommend that has recorded a copyright control signals for copyright protection of up to record such software. The functions using a digital video camera recorder...
... ejected the cassette while recording. - The same result may not work properly. - Usable cassettes Additional Information Selecting cassette types You can read and write data such as dates of the recorded portion before you begin the next recording if you have (Cassette Memory) mark. You cannot use the mini DV cassette only*. We recommend that has recorded a copyright control signals for copyright protection of up to record such software. The functions using a digital video camera recorder...

Operating Instructions
Page 177
... × 220) Wireless communications (DCR-PC120BT only) Communications system Bluetooth standard Ver.1.1 Max. Specifications Video camera recorder System Video recording system 2 rotary heads Helical scanning system Audio recording system Rotary heads, PCM system Quantization: 12 bits (Fs 32 kHz, stereo 1, stereo 2), 16 bits (Fs 48 kHz, stereo) Video signal NTSC color, EIA standards Usable cassette Mini DV cassette with the mark printed Tape speed SP: Approx. 18.81 mm...
... × 220) Wireless communications (DCR-PC120BT only) Communications system Bluetooth standard Ver.1.1 Max. Specifications Video camera recorder System Video recording system 2 rotary heads Helical scanning system Audio recording system Rotary heads, PCM system Quantization: 12 bits (Fs 32 kHz, stereo 1, stereo 2), 16 bits (Fs 48 kHz, stereo) Video signal NTSC color, EIA standards Usable cassette Mini DV cassette with the mark printed Tape speed SP: Approx. 18.81 mm...
Operating Instructions
Page 187
... MEMORY MIX 121 Memory PB ZOOM 148 Memory photo recording .... 112 "Memory Stick 104 Menu settings 96 Memory overlap 121 M·FADER 42 Mirror mode 25 Moisture condensation ........ 172 MONOTONE 42 MPEG 104 MPEG movie recording ....... 126 MULTI SCRN 113 NETWORK 155 NIGHTSHOT 27 NTSC system 171 O, P, Q OLD MOVIE 46 Operation indicators 186 OVERLAP 42 Photo save 135 Photo scan 65 Photo search 65 PICTURE EFFECT 45, 58 Picture search 33 Playback pause 33 Playing time 14 Power zoom...
... MEMORY MIX 121 Memory PB ZOOM 148 Memory photo recording .... 112 "Memory Stick 104 Menu settings 96 Memory overlap 121 M·FADER 42 Mirror mode 25 Moisture condensation ........ 172 MONOTONE 42 MPEG 104 MPEG movie recording ....... 126 MULTI SCRN 113 NETWORK 155 NIGHTSHOT 27 NTSC system 171 O, P, Q OLD MOVIE 46 Operation indicators 186 OVERLAP 42 Photo save 135 Photo scan 65 Photo search 65 PICTURE EFFECT 45, 58 Picture search 33 Playback pause 33 Playing time 14 Power zoom...

