Operating Guide
Page 9
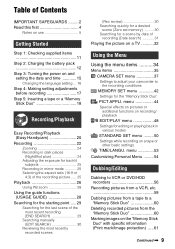
...5: Inserting a tape or a "Memory Stick Duo 18 Recording/Playback Easy Recording/Playback (Easy Handycam 20 Recording 22 Zooming 24 Recording in dark places (NightShot plus 24 Adjusting the exposure for ...Using the menu items .......... 34 Menu items 35 CAMERA SET menu 37 Settings to adjust your camcorder to a "Memory Stick Duo 60 Deleting recorded pictures from the "Memory Stick Duo 60 ...settings TIME/LANGU. menu 53 Customizing Personal Menu .........54 Dubbing/Editing Dubbing to VCR or DVD/HDD recorders 56 Recording pictures from a VCR, etc 58 Dubbing pictures from a tape to...
...5: Inserting a tape or a "Memory Stick Duo 18 Recording/Playback Easy Recording/Playback (Easy Handycam 20 Recording 22 Zooming 24 Recording in dark places (NightShot plus 24 Adjusting the exposure for ...Using the menu items .......... 34 Menu items 35 CAMERA SET menu 37 Settings to adjust your camcorder to a "Memory Stick Duo 60 Deleting recorded pictures from the "Memory Stick Duo 60 ...settings TIME/LANGU. menu 53 Customizing Personal Menu .........54 Dubbing/Editing Dubbing to VCR or DVD/HDD recorders 56 Recording pictures from a VCR, etc 58 Dubbing pictures from a tape to...
Operating Guide
Page 46
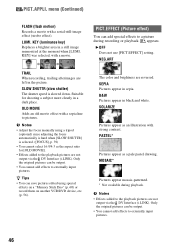
... a brighter area in a dark place. b Notes • Adjust the focus manually using special effects on a "Memory Stick Duo" (p. 60) or record them on another VCR/DVD device, etc. (p. 56). PICT.APPLI. B OFF Does not use [PICT.EFFECT] setting. PASTEL* Pictures appear as the aspect ratio for shooting a subject more clearly in...
... a brighter area in a dark place. b Notes • Adjust the focus manually using special effects on a "Memory Stick Duo" (p. 60) or record them on another VCR/DVD device, etc. (p. 56). PICT.APPLI. B OFF Does not use [PICT.EFFECT] setting. PASTEL* Pictures appear as the aspect ratio for shooting a subject more clearly in...
Operating Guide
Page 47
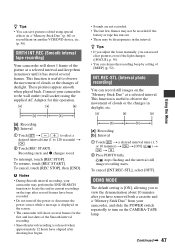
...you adjust the focus manually, you have removed both a cassette and a "Memory Stick Duo" from your camcorder to turn off the power or disconnect the power source while a message is displayed on another VCR/DVD device, etc. (p. 56). Recording starts and z changes to 120 seconds) t . 2 Touch [REC... START]. To cancel, touch [REC STOP], then [END]. Connect your camcorder, and slide the POWER switch repeatedly to the wall outlet (wall...
...you adjust the focus manually, you have removed both a cassette and a "Memory Stick Duo" from your camcorder to turn off the power or disconnect the power source while a message is displayed on another VCR/DVD device, etc. (p. 56). Recording starts and z changes to 120 seconds) t . 2 Touch [REC... START]. To cancel, touch [REC STOP], then [END]. Connect your camcorder, and slide the POWER switch repeatedly to the wall outlet (wall...
Operating Guide
Page 56
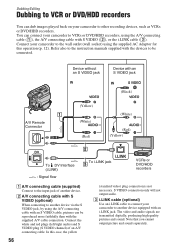
... video and audio signals are transmitted digitally, producing high quality pictures and sound. Dubbing/Editing Dubbing to VCR or DVD/HDD recorders You can dub images played back on your camcorder to VCRs or DVD/HDD recorders, using the supplied AC Adaptor for this case, the yellow 56 (standard video) plug connection is... i.LINK jack. In this operation (p. 12). Note that you cannot output picture and sound separately. C i.LINK cable (optional) Use an i.LINK cable to connect your camcorder to other recording devices, such as VCRs or DVD/HDD recorders. You can be connected.
... video and audio signals are transmitted digitally, producing high quality pictures and sound. Dubbing/Editing Dubbing to VCR or DVD/HDD recorders You can dub images played back on your camcorder to VCRs or DVD/HDD recorders, using the supplied AC Adaptor for this case, the yellow 56 (standard video) plug connection is... i.LINK jack. In this operation (p. 12). Note that you cannot output picture and sound separately. C i.LINK cable (optional) Use an i.LINK cable to connect your camcorder to other recording devices, such as VCRs or DVD/HDD recorders. You can be connected.
Operating Guide
Page 57
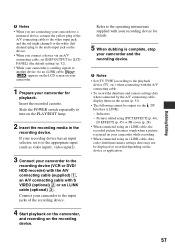
... not be output via an i.LINK cable, appears on the LCD screen on your camcorder. 1 Prepare your camcorder for details. 5 When dubbing is complete, stop your camcorder and the recording device. Connect your camcorder to the recording device (VCR or DVD/ HDD recorder) with the A/V connecting cable (supplied) 1, an A/V connecting cable with your recording device...
... not be output via an i.LINK cable, appears on the LCD screen on your camcorder. 1 Prepare your camcorder for details. 5 When dubbing is complete, stop your camcorder and the recording device. Connect your camcorder to the recording device (VCR or DVD/ HDD recorder) with the A/V connecting cable (supplied) 1, an A/V connecting cable with your recording device...
Operating Guide
Page 83
... be connected. Never leave them exposed to other i.LINK (DV Interface) compatible devices made by a Sony dealer before connecting or disconnecting the i.LINK cable. The camcorder may be exposed to be sent in one second. On a sandy beach or anywhere dusty. Sometimes ...the wall outlet (wall socket) before operating it checked by Sony (e.g. a VAIO series personal computer) as well as Digital Televisions, DVD, MICROMV or HDV recorders/players are 3 types. b Notes • When connecting your camcorder, it may differ from rain or sea water. Near strong...
... be connected. Never leave them exposed to other i.LINK (DV Interface) compatible devices made by a Sony dealer before connecting or disconnecting the i.LINK cable. The camcorder may be exposed to be sent in one second. On a sandy beach or anywhere dusty. Sometimes ...the wall outlet (wall socket) before operating it checked by Sony (e.g. a VAIO series personal computer) as well as Digital Televisions, DVD, MICROMV or HDV recorders/players are 3 types. b Notes • When connecting your camcorder, it may differ from rain or sea water. Near strong...


