Operating Guide
Page 42
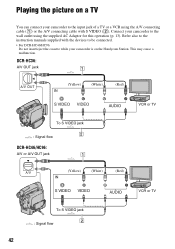
...can connect your camcorder to the wall outlet using the A/V connecting cable (1) or the A/V connecting cable with S VIDEO (2). DCR-HC36: A/V OUT jack 1 A/V OUT (Yellow) (White) (Red) VCR or TV To S VIDEO jack 2 : Signal flow DCR-HC46/HC96: A/V or A/V OUT jack 1 A/V (Yellow) (White) (Red) VCR or TV To S VIDEO jack 2 :...• For DCR-HC46/HC96: Do not insert/eject the cassette while your camcorder to the input jack of a TV or a VCR using the supplied AC Adaptor for this operation (p. 13). This may cause a malfunction. Playing the picture on the Handycam Station.
...can connect your camcorder to the wall outlet using the A/V connecting cable (1) or the A/V connecting cable with S VIDEO (2). DCR-HC36: A/V OUT jack 1 A/V OUT (Yellow) (White) (Red) VCR or TV To S VIDEO jack 2 : Signal flow DCR-HC46/HC96: A/V or A/V OUT jack 1 A/V (Yellow) (White) (Red) VCR or TV To S VIDEO jack 2 :...• For DCR-HC46/HC96: Do not insert/eject the cassette while your camcorder to the input jack of a TV or a VCR using the supplied AC Adaptor for this operation (p. 13). This may cause a malfunction. Playing the picture on the Handycam Station.
Operating Guide
Page 43
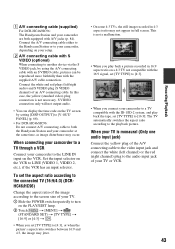
... setup. This is not necessary. A A/V connecting cable (supplied) For DCR-HC46/HC96: The Handycam Station and your camcorder are both the Handycam Station and your camcorder at the same time, as image disturbance may not appear in 16:9 aspect ratio on the TV screen by using the A/V connecting cable with an S VIDEO cable, pictures can display the time code...
... setup. This is not necessary. A A/V connecting cable (supplied) For DCR-HC46/HC96: The Handycam Station and your camcorder are both the Handycam Station and your camcorder at the same time, as image disturbance may not appear in 16:9 aspect ratio on the TV screen by using the A/V connecting cable with an S VIDEO cable, pictures can display the time code...
Operating Guide
Page 67
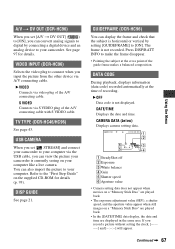
...97 for details (p. 93). The frame is not displayed. DATE/TIME Displays the date and time. B VIDEO Connects via video plug of recording. VIDEO INPUT (DCR-HC96) Selects the video plug to connect when you can view the picture your computer like a live camera. USB CAMERA When you... information (data code) recorded automatically at the cross point of the A/V connecting cable with S VIDEO cable. B OFF Data code is not recorded. Refer to your camcorder. If you can convert analog signals to digital by setting [GUIDEFRAME] to your computer. Press DISP/BATT INFO to [ON...
...97 for details (p. 93). The frame is not displayed. DATE/TIME Displays the date and time. B VIDEO Connects via video plug of recording. VIDEO INPUT (DCR-HC96) Selects the video plug to connect when you can view the picture your computer like a live camera. USB CAMERA When you... information (data code) recorded automatically at the cross point of the A/V connecting cable with S VIDEO cable. B OFF Data code is not recorded. Refer to your camcorder. If you can convert analog signals to digital by setting [GUIDEFRAME] to your computer. Press DISP/BATT INFO to [ON...
Operating Guide
Page 71
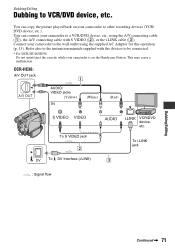
... your camcorder to VCR/DVD device, etc. This may cause a malfunction. Refer also to the instruction manuals supplied with the devices to the wall outlet using the A/V connecting cable (1), the A/V connecting cable with S VIDEO (2), or the i.LINK cable (3). You can copy the picture played back on the Handycam Station. To i.LINK jack Dubbing/Editing Continued , 71 DCR-HC36...
... your camcorder to VCR/DVD device, etc. This may cause a malfunction. Refer also to the instruction manuals supplied with the devices to the wall outlet using the A/V connecting cable (1), the A/V connecting cable with S VIDEO (2), or the i.LINK cable (3). You can copy the picture played back on the Handycam Station. To i.LINK jack Dubbing/Editing Continued , 71 DCR-HC36...
Operating Guide
Page 72
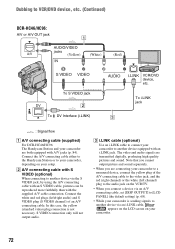
... to another device via an i.LINK cable, appears on the LCD screen on your camcorder. 72 B A/V connecting cable with S VIDEO (optional) When connecting to connect your camcorder are transmitted digitally, producing high quality pictures and sound. To i.LINK jack : Signal flow A A/V connecting cable (supplied) For DCR-HC46/HC96: The Handycam Station and your camcorder to VCR/DVD device, etc. (Continued...
... to another device via an i.LINK cable, appears on the LCD screen on your camcorder. 72 B A/V connecting cable with S VIDEO (optional) When connecting to connect your camcorder are transmitted digitally, producing high quality pictures and sound. To i.LINK jack : Signal flow A A/V connecting cable (supplied) For DCR-HC46/HC96: The Handycam Station and your camcorder to VCR/DVD device, etc. (Continued...
Operating Guide
Page 73
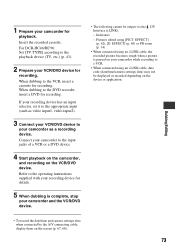
... 1 Prepare your camcorder as a recording device. For DCR-HC46/HC96: Set [TV TYPE] according to the DVD recorder, insert a DVD for recording. When dubbing to the playback device (TV, etc.) (p. 43). 2 Prepare your camcorder while recording to a VCR. • When connected using an i.LINK cable, data code ...(p. 67, 68). 73 If your recording device has an input selector, set it to the appropriate input (such as video input1, video input2). 3 Connect your camcorder and the VCR/DVD device. • The following cannot be displayed or recorded depending on the device or application. &#...
... 1 Prepare your camcorder as a recording device. For DCR-HC46/HC96: Set [TV TYPE] according to the DVD recorder, insert a DVD for recording. When dubbing to the playback device (TV, etc.) (p. 43). 2 Prepare your camcorder while recording to a VCR. • When connected using an i.LINK cable, data code ...(p. 67, 68). 73 If your recording device has an input selector, set it to the appropriate input (such as video input1, video input2). 3 Connect your camcorder and the VCR/DVD device. • The following cannot be displayed or recorded depending on the device or application. &#...
Operating Guide
Page 74
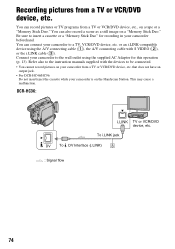
...DCR-HC36: To i.LINK jack DV To DV Interface (i.LINK) 3 : Signal flow TV or VCR/DVD device, etc. 74 Connect your camcorder to be connected. • You cannot record pictures on a tape or a "Memory Stick Duo." or an i.LINK-compatible device using the A/V connecting cable (1), the A/V connecting cable...to the instruction manuals supplied with S VIDEO (2), or the i.LINK cable (3). You can connect your camcorder is on a "Memory Stick Duo." Recording pictures from a TV or VCR/DVD device, etc. You can also record a scene as a still image on the Handycam Station. Be sure to a TV, ...
...DCR-HC36: To i.LINK jack DV To DV Interface (i.LINK) 3 : Signal flow TV or VCR/DVD device, etc. 74 Connect your camcorder to be connected. • You cannot record pictures on a tape or a "Memory Stick Duo." or an i.LINK-compatible device using the A/V connecting cable (1), the A/V connecting cable...to the instruction manuals supplied with S VIDEO (2), or the i.LINK cable (3). You can connect your camcorder is on a "Memory Stick Duo." Recording pictures from a TV or VCR/DVD device, etc. You can also record a scene as a still image on the Handycam Station. Be sure to a TV, ...

Operating Guide
Page 75
.... Connect the A/V connecting cable either to the Handycam Station or to another device via the S VIDEO jack, by using the A/V connecting cable with an S VIDEO cable, pictures can be reproduced more faithfully than with A/V jacks. Note that you are connecting your camcorder are transmitted digitally, producing high quality pictures and sound. B For DCR-HC96: A/V connecting cable with an i.LINK jack...
.... Connect the A/V connecting cable either to the Handycam Station or to another device via the S VIDEO jack, by using the A/V connecting cable with an S VIDEO cable, pictures can be reproduced more faithfully than with A/V jacks. Note that you are connecting your camcorder are transmitted digitally, producing high quality pictures and sound. B For DCR-HC96: A/V connecting cable with an i.LINK jack...
Operating Guide
Page 78
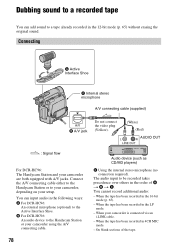
... recorded in the LP mode. - Connecting A Active Interface Shoe C Internal stereo microphone A/V connecting cable (supplied) A/V B A/V jack Do not connect the video plug (Yellow). (White) (Red) AUDIO OUT : Signal flow For DCR-HC96: The Handycam Station and your camcorder is connected via an i.LINK cable. - On blank sections of A t B t C. You cannot record additional audio: - When the tape...
... recorded in the LP mode. - Connecting A Active Interface Shoe C Internal stereo microphone A/V connecting cable (supplied) A/V B A/V jack Do not connect the video plug (Yellow). (White) (Red) AUDIO OUT : Signal flow For DCR-HC96: The Handycam Station and your camcorder is connected via an i.LINK cable. - On blank sections of A t B t C. You cannot record additional audio: - When the tape...
Operating Guide
Page 83
...on again and restart the operation from the Handycam Station (DCR-HC46/HC96). - Remove your camcorder. • If the printer stops working, disconnect the USB cable, turn the printer off . 83 Disconnect the USB cable from your camcorder. • PictBridge is an industry standard ...manufacturer. • For DCR-HC46/HC96: If you print a still image recorded with a device other than your camcorder (DCR-HC36) or the Handycam Station (DCR-HC46/HC96) or the printer. - Dubbing/Editing - Disconnect the power cord. - Refer to a digital video camera or digital still camera, regardless of...
...on again and restart the operation from the Handycam Station (DCR-HC46/HC96). - Remove your camcorder. • If the printer stops working, disconnect the USB cable, turn the printer off . 83 Disconnect the USB cable from your camcorder. • PictBridge is an industry standard ...manufacturer. • For DCR-HC46/HC96: If you print a still image recorded with a device other than your camcorder (DCR-HC36) or the Handycam Station (DCR-HC46/HC96) or the printer. - Dubbing/Editing - Disconnect the power cord. - Refer to a digital video camera or digital still camera, regardless of...
Operating Guide
Page 86
... CD-ROM (supplied) includes the following operations by connecting your camcorder to your computer. • Software and features available for Windows computers. USB cable This method is good for copying video and sound recorded on a tape. i.LINK cable This method is good for copying video and sound recorded on a tape to the computer, copying files...
... CD-ROM (supplied) includes the following operations by connecting your camcorder to your computer. • Software and features available for Windows computers. USB cable This method is good for copying video and sound recorded on a tape. i.LINK cable This method is good for copying video and sound recorded on a tape to the computer, copying files...
Operating Guide
Page 87
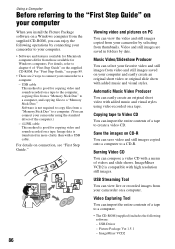
...(This must be provided as standard), DV Interface (IEEE1394, i.LINK) (to connect via an i.LINK cable), disc drive (You need a CD-R drive to play back movies.) Continued , 87 Operation is not... your computer. Refer to general operation the first time you can refer to on your camcorder and computer and making settings, to the Help guide for installation: 500 MB or more... CPU: MMX Pentium 200MHz or faster Application: Windows Media Player (This must be installed to create a video CD. "First Step Guide" About "First Step Guide" "First Step Guide" is required. System requirements ...
...(This must be provided as standard), DV Interface (IEEE1394, i.LINK) (to connect via an i.LINK cable), disc drive (You need a CD-R drive to play back movies.) Continued , 87 Operation is not... your computer. Refer to general operation the first time you can refer to on your camcorder and computer and making settings, to the Help guide for installation: 500 MB or more... CPU: MMX Pentium 200MHz or faster Application: Windows Media Player (This must be installed to create a video CD. "First Step Guide" About "First Step Guide" "First Step Guide" is required. System requirements ...

Operating Guide
Page 97
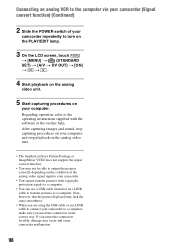
...VCR to a digital signal and transfer it to a digital device, such as a computer, via the S VIDEO jack, by using the supplied AC Adaptor for this case, the yellow (standard video) plug connection...Handycam Station or to another device via your camcorder are both equipped with the supplied A/V cable connection. B A/V connecting cable with S VIDEO (optional) When connecting to your camcorder, depending on the analog video unit. Continued , 97 In this operation (p. 13). C i.LINK cable (optional) Set [DISP OUTPUT] to the wall outlet using the A/V connecting cable with an S VIDEO cable...
...VCR to a digital signal and transfer it to a digital device, such as a computer, via the S VIDEO jack, by using the supplied AC Adaptor for this case, the yellow (standard video) plug connection...Handycam Station or to another device via your camcorder are both equipped with the supplied A/V cable connection. B A/V connecting cable with S VIDEO (optional) When connecting to your camcorder, depending on the analog video unit. Continued , 97 In this operation (p. 13). C i.LINK cable (optional) Set [DISP OUTPUT] to the wall outlet using the A/V connecting cable with an S VIDEO cable...
Operating Guide
Page 98
... may not be able to output the pictures correctly depending on the condition of an i.LINK cable to transfer pictures to your camcorder. • You cannot transfer pictures with the software or the on the analog video unit. • The bundled software Picture Package or ImageMixer VCD2 does not support the signal convert...
... may not be able to output the pictures correctly depending on the condition of an i.LINK cable to transfer pictures to your camcorder. • You cannot transfer pictures with the software or the on the analog video unit. • The bundled software Picture Package or ImageMixer VCD2 does not support the signal convert...

Operating Guide
Page 107
...sound breaks off. • Clean the head using an S VIDEO plug, make sure the red and white plugs of your camcorder (NTSC). is displayed on the screen. • The tape ...A/V connecting cable are using the cleaning cassette (optional) (p. 129). Noises appear and is not compatible with a scratch or noise cannot be played back. Your camcorder is displayed... on a tape with 4ch microphone recording. Fine patterns flicker, diagonal lines look jagged (DCR-HC96). • Adjust [SHARPNESS] to [STEREO] ...
...sound breaks off. • Clean the head using an S VIDEO plug, make sure the red and white plugs of your camcorder (NTSC). is displayed on the screen. • The tape ...A/V connecting cable are using the cleaning cassette (optional) (p. 129). Noises appear and is not compatible with a scratch or noise cannot be played back. Your camcorder is displayed... on a tape with 4ch microphone recording. Fine patterns flicker, diagonal lines look jagged (DCR-HC96). • Adjust [SHARPNESS] to [STEREO] ...
Operating Guide
Page 111
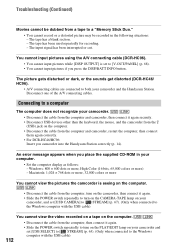
... device (DCR-HC46/HC96). • When attaching the camcorder to the Handycam Station, close the DC IN jack cover on the camcorder, and then fully insert the camcorder into the Handycam Station in the correct way securely (p. 14). Make sure that the proper video plug is not NTSC (p. 122). You cannot dub correctly using the A/V connecting cable. •...
... device (DCR-HC46/HC96). • When attaching the camcorder to the Handycam Station, close the DC IN jack cover on the camcorder, and then fully insert the camcorder into the Handycam Station in the correct way securely (p. 14). Make sure that the proper video plug is not NTSC (p. 122). You cannot dub correctly using the A/V connecting cable. •...
Operating Guide
Page 112
...for recording. - Connecting to a computer The computer does not recognize your camcorder. • Disconnect the cable from the (USB) jack on your camcorder and the Handycam Station. You cannot input pictures using the A/V connecting cable (DCR-HC96). • You cannot input pictures while [DISP OUTPUT] is seeing... or the sounds get distorted (DCR-HC46/ HC96). • A/V connecting cables are connected to both your camcorder, and set [USB SELECT] to [ STREAM] (p. 63). (Only when connected to the Windows computer with the USB cable) You cannot view the video recorded on a tape on the ...
...for recording. - Connecting to a computer The computer does not recognize your camcorder. • Disconnect the cable from the (USB) jack on your camcorder and the Handycam Station. You cannot input pictures using the A/V connecting cable (DCR-HC96). • You cannot input pictures while [DISP OUTPUT] is seeing... or the sounds get distorted (DCR-HC46/ HC96). • A/V connecting cables are connected to both your camcorder, and set [USB SELECT] to [ STREAM] (p. 63). (Only when connected to the Windows computer with the USB cable) You cannot view the video recorded on a tape on the ...
Operating Guide
Page 113
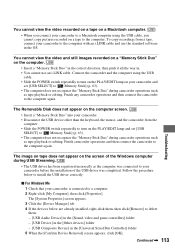
... the Windows computer during USB Streaming. • The USB driver has been registered incorrectly as the computer was connected to your camcorder to a Macintosh computer using the USB cable. • Slide the POWER switch repeatedly to turn on the PLAY/EDIT lamp and set [USB SELECT] to [ Memory ... the POWER switch repeatedly to a computer. 2 Right-click [My Computer], then click [Properties]. You cannot view the video and still images recorded on a "Memory Stick Duo" on your camcorder is connected to turn on the PLAY/EDIT lamp on the computer. • Insert a "Memory Stick Duo" in ...
... the Windows computer during USB Streaming. • The USB driver has been registered incorrectly as the computer was connected to your camcorder to a Macintosh computer using the USB cable. • Slide the POWER switch repeatedly to turn on the PLAY/EDIT lamp and set [USB SELECT] to [ Memory ... the POWER switch repeatedly to a computer. 2 Right-click [My Computer], then click [Properties]. You cannot view the video and still images recorded on a "Memory Stick Duo" on your camcorder is connected to turn on the PLAY/EDIT lamp on the computer. • Insert a "Memory Stick Duo" in ...
Operating Guide
Page 114
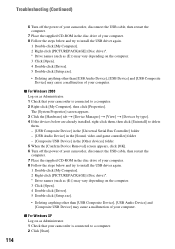
...[Properties]. x For Windows 2000 Log on as Administrator. 1 Check that your camcorder is connected to a computer. 2 Click [Start]. Troubleshooting (Continued) 114 6 Turn off the power of your camcorder, disconnect the USB cable, then restart the computer. 7 Place the supplied CD-ROM in the disc ...[USB Audio Device] in the [Sound, video and game controller] folder - [Composite USB Device] in the [Other devices] folder 5 When the [Confirm Device Removal] screen appears, click [OK]. 6 Turn off the power of your camcorder, disconnect the USB cable, then restart the computer. 7 Place the ...
...[Properties]. x For Windows 2000 Log on as Administrator. 1 Check that your camcorder is connected to a computer. 2 Click [Start]. Troubleshooting (Continued) 114 6 Turn off the power of your camcorder, disconnect the USB cable, then restart the computer. 7 Place the supplied CD-ROM in the disc ...[USB Audio Device] in the [Sound, video and game controller] folder - [Composite USB Device] in the [Other devices] folder 5 When the [Confirm Device Removal] screen appears, click [OK]. 6 Turn off the power of your camcorder, disconnect the USB cable, then restart the computer. 7 Place the ...
Operating Guide
Page 139
... Remaining battery 36 Remote Commander 40 REMOTE CTRL (Remote control 68 Remote sensor 35 RESET button 35 Reversal Playback 64 Review button 36 S S VIDEO cable ...43, 72, 75, 97 S VIDEO jack.....43, 72, 75, 97 Searching for the starting point 39 Self-diagnosis display.........117 SELF-TIMER 53 SEPIA 62 Setting the date...
... Remaining battery 36 Remote Commander 40 REMOTE CTRL (Remote control 68 Remote sensor 35 RESET button 35 Reversal Playback 64 Review button 36 S S VIDEO cable ...43, 72, 75, 97 S VIDEO jack.....43, 72, 75, 97 Searching for the starting point 39 Self-diagnosis display.........117 SELF-TIMER 53 SEPIA 62 Setting the date...


