Operating Guide
Page 11
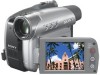
... a DVD (Direct Access to "Click to DVD 94 Connecting an analog VCR to the computer via your camcorder (Signal convert function) (DCR-HC96 97 Troubleshooting Troubleshooting 99 Warning indicators and messages 117 Additional Information Using your camcorder abroad 122 Usable cassette tapes 123 About the "Memory Stick 124 About the "InfoLITHIUM" battery pack 126 About...
... a DVD (Direct Access to "Click to DVD 94 Connecting an analog VCR to the computer via your camcorder (Signal convert function) (DCR-HC96 97 Troubleshooting Troubleshooting 99 Warning indicators and messages 117 Additional Information Using your camcorder abroad 122 Usable cassette tapes 123 About the "Memory Stick 124 About the "InfoLITHIUM" battery pack 126 About...
Operating Guide
Page 99
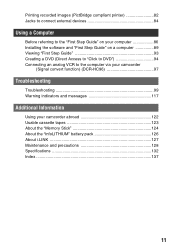
...that are not displayed on . • Disconnect the AC Adaptor from your camcorder (p. 24, 25). Continued , 99 Troubleshooting Troubleshooting Troubleshooting If you run into the Handycam Station correctly (p. 14). This is set to ON (p. 33). •...Handycam operation (p. 28, 46). [DEMO MODE] does not start. • You cannot view the demonstration when NIGHTSHOT PLUS (DCR-HC36/HC46)/ NIGHTSHOT (DCR-HC96) switch is set to on the screen return to a wall outlet (p. 13). • For DCR-HC46/HC96: Insert your Sony dealer. Previously made settings are functional (p. 29). The camcorder...
...that are not displayed on . • Disconnect the AC Adaptor from your camcorder (p. 24, 25). Continued , 99 Troubleshooting Troubleshooting Troubleshooting If you run into the Handycam Station correctly (p. 14). This is set to ON (p. 33). •...Handycam operation (p. 28, 46). [DEMO MODE] does not start. • You cannot view the demonstration when NIGHTSHOT PLUS (DCR-HC36/HC46)/ NIGHTSHOT (DCR-HC96) switch is set to on the screen return to a wall outlet (p. 13). • For DCR-HC46/HC96: Insert your Sony dealer. Previously made settings are functional (p. 29). The camcorder...

Operating Guide
Page 100
... the AC Adaptor from the wall outlet and contact your camcorder into the Handycam Station correctly (p. 14). A problem occurs when the camcorder is completed (p. 14). • For DCR-HC46/HC96: Insert your Sony dealer. Change the setting of [A.SHUT OFF] (p. 68...), or turn on the power again (p. 18), or use the AC Adaptor. • Charge the battery pack (p. 13). If the problem persists, the battery may not be worn-out. Replace it with a new one (p. 13, 126). Troubleshooting...
... the AC Adaptor from the wall outlet and contact your camcorder into the Handycam Station correctly (p. 14). A problem occurs when the camcorder is completed (p. 14). • For DCR-HC46/HC96: Insert your Sony dealer. Change the setting of [A.SHUT OFF] (p. 68...), or turn on the power again (p. 18), or use the AC Adaptor. • Charge the battery pack (p. 13). If the problem persists, the battery may not be worn-out. Replace it with a new one (p. 13, 126). Troubleshooting...

Operating Guide
Page 101
...viewfinder has disappeared. • Close the LCD panel. You cannot turn the LCD backlight off (DCR-HC46/HC96). • During Easy Handycam operation (p. 28), you disconnect the DC plug from your camcorder (or DISPLAY on the LCD screen. The buttons on /off the indicators. • You ... ratio of the buttons of the touch panel and indicators will switch to the selected one (p. 26). The picture in [DEMO MODE] (p. 63). Troubleshooting LCD screen/viewfinder A rippling effect appears on the screen (p. 117). The buttons do not work at all. • Adjust the screen ([CALIBRATION]) ...
...viewfinder has disappeared. • Close the LCD panel. You cannot turn the LCD backlight off (DCR-HC46/HC96). • During Easy Handycam operation (p. 28), you disconnect the DC plug from your camcorder (or DISPLAY on the LCD screen. The buttons on /off the indicators. • You ... ratio of the buttons of the touch panel and indicators will switch to the selected one (p. 26). The picture in [DEMO MODE] (p. 63). Troubleshooting LCD screen/viewfinder A rippling effect appears on the screen (p. 117). The buttons do not work at all. • Adjust the screen ([CALIBRATION]) ...
Operating Guide
Page 102
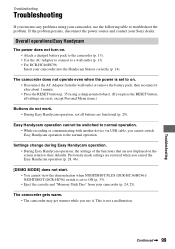
...Attach a charged battery pack to turn on the CAMERA-MEMORY or PLAY/EDIT lamp (p. 18). • Insert a "Memory Stick Duo" into your camcorder (p. 58). This is connected correctly (p. 13). • Remove the battery pack from the compartment. • Make sure the power source (battery pack...delete all pictures at one time is one (p. 124). • Cancel image protection on the LCD screen. • This is not a malfunction. Troubleshooting (Continued) Dots in lines appear on the pictures (p. 81). 102 "Memory Stick Duo" You cannot operate functions using the "Memory Stick Duo." ...
...Attach a charged battery pack to turn on the CAMERA-MEMORY or PLAY/EDIT lamp (p. 18). • Insert a "Memory Stick Duo" into your camcorder (p. 58). This is connected correctly (p. 13). • Remove the battery pack from the compartment. • Make sure the power source (battery pack...delete all pictures at one time is one (p. 124). • Cancel image protection on the LCD screen. • This is not a malfunction. Troubleshooting (Continued) Dots in lines appear on the pictures (p. 81). 102 "Memory Stick Duo" You cannot operate functions using the "Memory Stick Duo." ...

Operating Guide
Page 103
...Recording Refer also to moisture condensation. Delete unnecessary pictures recorded on the "Memory Stick Duo" (p. 80). • Format the "Memory Stick Duo" on your camcorder for print. Rewind it, or insert a new cassette. • Set the write-protect tab to REC or insert a new cassette (p. 123). •... The tape is stuck to the drum due to "Adjusting the image during recording" (p. 105) and "Memory Stick Duo" section (p. 102). Troubleshooting You cannot format the "Memory Stick Duo." • Release the lock on the write-protect tab of the "Memory Stick Duo" if there is one...
...Recording Refer also to moisture condensation. Delete unnecessary pictures recorded on the "Memory Stick Duo" (p. 80). • Format the "Memory Stick Duo" on your camcorder for print. Rewind it, or insert a new cassette. • Set the write-protect tab to REC or insert a new cassette (p. 123). •... The tape is stuck to the drum due to "Adjusting the image during recording" (p. 105) and "Memory Stick Duo" section (p. 102). Troubleshooting You cannot format the "Memory Stick Duo." • Release the lock on the write-protect tab of the "Memory Stick Duo" if there is one...
Operating Guide
Page 104
...remove the cassette. (The picture will be recorded on a "Memory Stick Duo" during tape recording. - [PROGRES.REC] (DCR-HC96) - [SMTH INT.REC] (DCR-HC46/HC96) • For DCR-HC36: You cannot record still images on the same tape. • Avoid stopping then recording a movie in SP mode and LP ...mode on the "Memory Stick Duo" using [WIDE SELECT] mode (p. 54). You cannot record a smooth transition on a tape from the last recorded scene to CAMERA-TAPE. Troubleshooting...
...remove the cassette. (The picture will be recorded on a "Memory Stick Duo" during tape recording. - [PROGRES.REC] (DCR-HC96) - [SMTH INT.REC] (DCR-HC46/HC96) • For DCR-HC36: You cannot record still images on the same tape. • Avoid stopping then recording a movie in SP mode and LP ...mode on the "Memory Stick Duo" using [WIDE SELECT] mode (p. 54). You cannot record a smooth transition on a tape from the last recorded scene to CAMERA-TAPE. Troubleshooting...
Operating Guide
Page 105
...Sony mini DV cassette. A vertical band appears when recording a bright subject. • This phenomenon is not a malfunction. Adjusting the image during Easy Handycam operation (p. 52). [DIGITAL ZOOM] does not function. • [DIGITAL...stops/[Smooth interval rec discontinued due to error.] appears and recording stops (DCR-HC46/HC96). • The video head may be changed during recording... is too high. This is not a malfunction. Continued , 105 Troubleshooting [END SEARCH] does not work during Easy Handycam operation (p. 29). Adjust the focus manually (p. 51). [STEADYSHOT] does...
...Sony mini DV cassette. A vertical band appears when recording a bright subject. • This phenomenon is not a malfunction. Adjusting the image during Easy Handycam operation (p. 52). [DIGITAL ZOOM] does not function. • [DIGITAL...stops/[Smooth interval rec discontinued due to error.] appears and recording stops (DCR-HC46/HC96). • The video head may be changed during recording... is too high. This is not a malfunction. Continued , 105 Troubleshooting [END SEARCH] does not work during Easy Handycam operation (p. 29). Adjust the focus manually (p. 51). [STEADYSHOT] does...
Operating Guide
Page 106
... at the top and bottom of the picture is not a malfunction. 106 This is not correctly displayed. • Deactivate the NightShot plus (DCR-HC36/HC46)/NightShot (DCR-HC96) function (p. 33), or cancel the BACK LIGHT function (p. 33). Black bands appear when you record a TV screen or computer screen... 55). The pictures stored on a "Memory Stick Duo" are not played back in their actual size. The screen picture is not a malfunction. Troubleshooting (Continued) Tiny spots in white, red, blue, or green appear on the screen. • The spots appear when you are playing back pictures...
... at the top and bottom of the picture is not a malfunction. 106 This is not correctly displayed. • Deactivate the NightShot plus (DCR-HC36/HC46)/NightShot (DCR-HC96) function (p. 33), or cancel the BACK LIGHT function (p. 33). Black bands appear when you record a TV screen or computer screen... 55). The pictures stored on a "Memory Stick Duo" are not played back in their actual size. The screen picture is not a malfunction. Troubleshooting (Continued) Tiny spots in white, red, blue, or green appear on the screen. • The spots appear when you are playing back pictures...

Operating Guide
Page 107
...are playing was recorded on the picture. "---" is displayed on the screen. • The tape you are also connected (p. 42). Troubleshooting Continued , 107 Fine patterns flicker, diagonal lines look jagged (DCR-HC96). • Adjust [SHARPNESS] to [STEREO] (p. 65). • Turn up the volume (p. 31). • Adjust [...). Image data stored on a "Memory Stick Duo" cannot be played back. • Image data cannot be read. Your camcorder is not a malfunction (p. 125). The sound breaks off. • Clean the head using the cleaning cassette (optional) (p. 129). This is...
...are playing was recorded on the picture. "---" is displayed on the screen. • The tape you are also connected (p. 42). Troubleshooting Continued , 107 Fine patterns flicker, diagonal lines look jagged (DCR-HC96). • Adjust [SHARPNESS] to [STEREO] (p. 65). • Turn up the volume (p. 31). • Adjust [...). Image data stored on a "Memory Stick Duo" cannot be played back. • Image data cannot be read. Your camcorder is not a malfunction (p. 125). The sound breaks off. • Clean the head using the cleaning cassette (optional) (p. 129). This is...

Operating Guide
Page 108
Troubleshooting (Continued) Date search does not work when the POWER switch is set to CAMERA-MEMORY. If one day's recording is a blank section in the beginning ... plus (DCR-HC36/HC46) - [SUPER NSPLUS] (DCR-HC36/HC46) NightShot plus (DCR-HC36/HC46) - [SUPER NSPLUS] (DCR-HC36/HC46) - Remote Commander The supplied Remote Commander does not function. • Set [REMOTE CTRL] to record more than VTR 2 for your VCR. • Cover the sensor of your camcorder may be obstructed by it. is not a malfunction. Cancel Easy Handycam operation (p. 28...
Troubleshooting (Continued) Date search does not work when the POWER switch is set to CAMERA-MEMORY. If one day's recording is a blank section in the beginning ... plus (DCR-HC36/HC46) - [SUPER NSPLUS] (DCR-HC36/HC46) NightShot plus (DCR-HC36/HC46) - [SUPER NSPLUS] (DCR-HC36/HC46) - Remote Commander The supplied Remote Commander does not function. • Set [REMOTE CTRL] to record more than VTR 2 for your VCR. • Cover the sensor of your camcorder may be obstructed by it. is not a malfunction. Cancel Easy Handycam operation (p. 28...

Operating Guide
Page 109
...Troubleshooting - EFFECT] (DCR-HC96) • If you set [PROGRAM AE], [EXPOSURE] is set to [MANUAL]. NightShot (DCR-HC96) - [SUPER NS] (DCR-HC96) - [COLOR SLOW S] - [CINEMA EFECT] of [D. You cannot use [SUPER NSPLUS] (DCR-HC36/HC46)/[SUPER NS] (DCR-HC96). • You cannot use [SUPER NSPLUS] (DCR-HC36/HC46)/[SUPER NS] (DCR... NSPLUS] (DCRHC36/HC46)/NightShot or [SUPER NS](DCR-HC96). You cannot use [EXPOSURE]. • You cannot use NightShot plus (DCR-HC36/HC46) - [SUPER NSPLUS] (DCR-HC36/HC46) - You cannot adjust [SHARPNESS] (DCR-HC96). • You cannot adjust [SHARPNESS] ...
...Troubleshooting - EFFECT] (DCR-HC96) • If you set [PROGRAM AE], [EXPOSURE] is set to [MANUAL]. NightShot (DCR-HC96) - [SUPER NS] (DCR-HC96) - [COLOR SLOW S] - [CINEMA EFECT] of [D. You cannot use [SUPER NSPLUS] (DCR-HC36/HC46)/[SUPER NS] (DCR-HC96). • You cannot use [SUPER NSPLUS] (DCR-HC36/HC46)/[SUPER NS] (DCR... NSPLUS] (DCRHC36/HC46)/NightShot or [SUPER NS](DCR-HC96). You cannot use [EXPOSURE]. • You cannot use NightShot plus (DCR-HC36/HC46) - [SUPER NSPLUS] (DCR-HC36/HC46) - You cannot adjust [SHARPNESS] (DCR-HC96). • You cannot adjust [SHARPNESS] ...
Operating Guide
Page 110
... use [D. EFFECT]. You cannot use [FADER]. • You cannot use [PROGRES.REC] with : - [SELF-TIMER] - [SUPER NSPLUS] (DCR-HC36/HC46) - [SUPER NS] (DCR-HC96) - [COLOR SLOW S] - [D. EFFECT]. • You cannot use [OLD MOVIE] together with: - [PICT. Troubleshooting (Continued) [COLOR SLOW S] does not operate correctly. • [COLOR SLOW S] may not operate correctly in [AE SHIFT...
... use [D. EFFECT]. You cannot use [FADER]. • You cannot use [PROGRES.REC] with : - [SELF-TIMER] - [SUPER NSPLUS] (DCR-HC36/HC46) - [SUPER NS] (DCR-HC96) - [COLOR SLOW S] - [D. EFFECT]. • You cannot use [OLD MOVIE] together with: - [PICT. Troubleshooting (Continued) [COLOR SLOW S] does not operate correctly. • [COLOR SLOW S] may not operate correctly in [AE SHIFT...
Operating Guide
Page 111
Troubleshooting Dubbing/Editing/Connecting to other devices Pictures output from the camcorder do not appear on the screen of another device for recording. Pictures from the [ST1] (original sound) side until the sound is set [VIDEO INPUT] ...), or to the input jack of the connected device (DCR-HC46/HC96). • When attaching the camcorder to the Handycam Station, close the DC IN jack cover on your camcorder (p. 71, 74). • For DCR-HC96: Set [DISP OUTPUT] to your camcorder if you press DISP/BATT INFO while [DISP OUTPUT] is heard appropriately (p. 80). Make...
Troubleshooting Dubbing/Editing/Connecting to other devices Pictures output from the camcorder do not appear on the screen of another device for recording. Pictures from the [ST1] (original sound) side until the sound is set [VIDEO INPUT] ...), or to the input jack of the connected device (DCR-HC46/HC96). • When attaching the camcorder to the Handycam Station, close the DC IN jack cover on your camcorder (p. 71, 74). • For DCR-HC96: Set [DISP OUTPUT] to your camcorder if you press DISP/BATT INFO while [DISP OUTPUT] is heard appropriately (p. 80). Make...
Operating Guide
Page 112
..., the mouse, and the camcorder from the (USB) jack on the computer. • Disconnect the cable from a tape to [V-OUT/PANEL] (p. 68). • You cannot input pictures if you camcorder into the Handycam Station correctly (p. 14). Troubleshooting (Continued) Movies cannot be dubbed... from the computer and camcorder, restart the computer, then connect them again correctly. • For DCR-HC46/HC96: Insert you press the DISP/BATT INFO...
..., the mouse, and the camcorder from the (USB) jack on the computer. • Disconnect the cable from a tape to [V-OUT/PANEL] (p. 68). • You cannot input pictures if you camcorder into the Handycam Station correctly (p. 14). Troubleshooting (Continued) Movies cannot be dubbed... from the computer and camcorder, restart the computer, then connect them again correctly. • For DCR-HC46/HC96: Insert you press the DISP/BATT INFO...
Operating Guide
Page 113
... and the camcorder from a tape, connect your camcorder to the computer with an i.LINK cable and use an i.LINK cable. To copy recordings from the computer. • Slide the POWER switch repeatedly to turn on the PLAY/EDIT lamp on a tape to the computer. Troubleshooting You cannot view... the video recorded on a tape on a Macintosh computer. • When you connect your camcorder to a Macintosh computer using the USB cable. • Slide the POWER switch repeatedly to ...
... and the camcorder from a tape, connect your camcorder to the computer with an i.LINK cable and use an i.LINK cable. To copy recordings from the computer. • Slide the POWER switch repeatedly to turn on the PLAY/EDIT lamp on a tape to the computer. Troubleshooting You cannot view... the video recorded on a tape on a Macintosh computer. • When you connect your camcorder to a Macintosh computer using the USB cable. • Slide the POWER switch repeatedly to ...
Operating Guide
Page 114
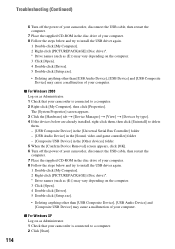
... may cause a malfunction of your computer. 8 Follow the steps below and try to a computer. 2 Click [Start]. Troubleshooting (Continued) 114 6 Turn off the power of your camcorder, disconnect the USB cable, then restart the computer. 7 Place the supplied CD-ROM in the disc drive of your computer....computer. 7 Place the supplied CD-ROM in the disc drive of your computer. x For Windows 2000 Log on as Administrator. 1 Check that your camcorder is connected to install the USB driver again. 1 Double-click [My Computer]. 2 Right-click [PICTUREPACKAGE] (Disc drive)*. * Drive names (such as...
... may cause a malfunction of your computer. 8 Follow the steps below and try to a computer. 2 Click [Start]. Troubleshooting (Continued) 114 6 Turn off the power of your camcorder, disconnect the USB cable, then restart the computer. 7 Place the supplied CD-ROM in the disc drive of your computer....computer. 7 Place the supplied CD-ROM in the disc drive of your computer. x For Windows 2000 Log on as Administrator. 1 Check that your camcorder is connected to install the USB driver again. 1 Double-click [My Computer]. 2 Right-click [PICTUREPACKAGE] (Disc drive)*. * Drive names (such as...

Operating Guide
Page 115
... Device] may take some time until the drive is recognized. 3 Double-click the desired image file. [Cannot start Easy Handycam.] or [Cannot cancel Easy Handycam.] appears on the screen of your camcorder. • You cannot start or cancel the Easy Handycam settings while the USB cable is connected. Disconnect the USB cable from your... game controller] folder - [USB Device] in the [Other devices] folder 6 When the [Confirm Device Removal] screen appears, click [OK]. 7 Turn off the power of your camcorder first. Troubleshooting 3 Right-click [My Computer], then click [Properties].
... Device] may take some time until the drive is recognized. 3 Double-click the desired image file. [Cannot start Easy Handycam.] or [Cannot cancel Easy Handycam.] appears on the screen of your camcorder. • You cannot start or cancel the Easy Handycam settings while the USB cable is connected. Disconnect the USB cable from your... game controller] folder - [USB Device] in the [Other devices] folder 6 When the [Confirm Device Removal] screen appears, click [OK]. 7 Turn off the power of your camcorder first. Troubleshooting 3 Right-click [My Computer], then click [Properties].
Operating Guide
Page 116
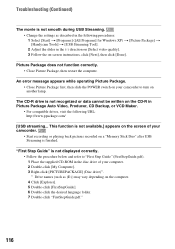
...] ([All Programs] for Windows XP) t [Picture Package] t [Handycam Tools] t [USB Streaming Tool]. 2 Adjust the slider in the (-) direction on [Select video quality]. 3 Follow the on-screen instructions, click [Next], then click [Done]. Troubleshooting (Continued) The movie is not smooth during USB Streaming. • ...pdf." 116 An error message appears while operating Picture Package. • Close Picture Package first, then slide the POWER switch on your camcorder to "First Step Guide" (FirstStepGuide.pdf). 1 Place the supplied CD-ROM in the disc drive of your computer. 2 Double-click ...
...] ([All Programs] for Windows XP) t [Picture Package] t [Handycam Tools] t [USB Streaming Tool]. 2 Adjust the slider in the (-) direction on [Select video quality]. 3 Follow the on-screen instructions, click [Next], then click [Done]. Troubleshooting (Continued) The movie is not smooth during USB Streaming. • ...pdf." 116 An error message appears while operating Picture Package. • Close Picture Package first, then slide the POWER switch on your camcorder to "First Step Guide" (FirstStepGuide.pdf). 1 Place the supplied CD-ROM in the disc drive of your computer. 2 Double-click ...

Operating Guide
Page 117
... remove the power source, and then leave it and operate your camcorder again. Press RESET (p. 35), and operate your Sony dealer or local authorized Sony service facility. Warning indicators and messages Self-diagnosis display/Warning indicators If...the cassette (p. 129). Inform them of the 5-digit code, which starts from "E." 101-1001(Warning indicator pertaining to the DC IN jack of times, contact your camcorder for about 1 hour with the cassette lid open ...Memory Stick Duo" is not an "InfoLITHIUM" battery pack. Troubleshooting Continued , 117 Some symptoms you have occurred.
... remove the power source, and then leave it and operate your camcorder again. Press RESET (p. 35), and operate your Sony dealer or local authorized Sony service facility. Warning indicators and messages Self-diagnosis display/Warning indicators If...the cassette (p. 129). Inform them of the 5-digit code, which starts from "E." 101-1001(Warning indicator pertaining to the DC IN jack of times, contact your camcorder for about 1 hour with the cassette lid open ...Memory Stick Duo" is not an "InfoLITHIUM" battery pack. Troubleshooting Continued , 117 Some symptoms you have occurred.

