
User Manual
Page 2
Contents Connecting Antenna and External Using the Remote Control and devices Peripherals Antenna Connection Video Device Connections 2 HDMI Connection 3 Component Connection 4 Composite (A/V) Connection Audio Input and Output Connections 5 Digital Audio (Optical) Connection 6 Audio ...
Contents Connecting Antenna and External Using the Remote Control and devices Peripherals Antenna Connection Video Device Connections 2 HDMI Connection 3 Component Connection 4 Composite (A/V) Connection Audio Input and Output Connections 5 Digital Audio (Optical) Connection 6 Audio ...

User Manual
Page 5
... 107 Testing the Picture I can 't hear the sound clearly 109 Testing the Sound There is a problem with the broadcast. Troubleshooting Getting Support 105 Support through Remote Management 106 Finding the Information You Need for Video Signals License Glossary I am having trouble launching/using apps.
... 107 Testing the Picture I can 't hear the sound clearly 109 Testing the Sound There is a problem with the broadcast. Troubleshooting Getting Support 105 Support through Remote Management 106 Finding the Information You Need for Video Signals License Glossary I am having trouble launching/using apps.

User Manual
Page 10
... optical cable does not automatically turn off the TV speakers. The connections are using it may indicate a problem with 5.1-channel broadcasts. "" Connecting a device using its remote control. Audio Input and Output Connections Your TV has a variety of external device connectors and their names and locations may vary depending on the manufacturer...
... optical cable does not automatically turn off the TV speakers. The connections are using it may indicate a problem with 5.1-channel broadcasts. "" Connecting a device using its remote control. Audio Input and Output Connections Your TV has a variety of external device connectors and their names and locations may vary depending on the manufacturer...

User Manual
Page 17
... the device from the list. Select the TV from the list. "" If the mobile device cannot connect, try turning the TV off and on your remote, and then selecting Screen Mirroring from the list at the top of Previously Connected Mobile Devices "" This function is also displayed. 2. In the pop-up...
... the device from the list. Select the TV from the list. "" If the mobile device cannot connect, try turning the TV off and on your remote, and then selecting Screen Mirroring from the list at the top of Previously Connected Mobile Devices "" This function is also displayed. 2. In the pop-up...
User Manual
Page 20
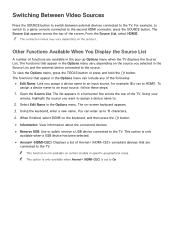
... List, select HDMI2. The functions that appear in the Options menu can enter up Options menu when the TV displays the Source List. Using your remote, highlight the source you selected in the Options menu vary, depending on the source you want to assign a device name to HDMI1. The on the...
... List, select HDMI2. The functions that appear in the Options menu can enter up Options menu when the TV displays the Source List. Using your remote, highlight the source you selected in the Options menu vary, depending on the source you want to assign a device name to HDMI1. The on the...
User Manual
Page 21
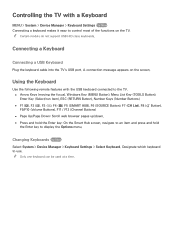
... to display the Options menu. A connection message appears on the TV. "" Only one keyboard can be used at a time. Using the Keyboard Use the following remote features with a Keyboard MENU > System > Device Manager > Keyboard Settings Try Now Connecting a keyboard makes it easy to use. "" Certain models do not support USB HID...
... to display the Options menu. A connection message appears on the TV. "" Only one keyboard can be used at a time. Using the Keyboard Use the following remote features with a Keyboard MENU > System > Device Manager > Keyboard Settings Try Now Connecting a keyboard makes it easy to use. "" Certain models do not support USB HID...

User Manual
Page 24
... keys. Enabling the Text Prediction feature eliminates the need to enter text (entering the network password, logging into your remote control. A predicted word will then appear next to enter text using your Samsung account, etc.), allowing you to the I ". Entering Text Using the On-Screen QWERTY Keypad A QWERTY keypad appears when you...
... keys. Enabling the Text Prediction feature eliminates the need to enter text (entering the network password, logging into your remote control. A predicted word will then appear next to enter text using your Samsung account, etc.), allowing you to the I ". Entering Text Using the On-Screen QWERTY Keypad A QWERTY keypad appears when you...

User Manual
Page 38
...enter capital letters. The Account Created screen appears. When finished, select Done on the remote when done. 7. Press the E button. Other functions in the same fashion. Creating a Samsung Account Using the Create Samsung Account Menu 1. Use the directional keys to move from month to day to year... by pressing the left to your e-mail address. "" Leave "Sign me in automatically" checked if you want your remote, and then select Smart Hub > Samsung Account > Create Account > Create Samsung Account. The Image Selection screen appears. 8. Press the MENU button on . 6.
...enter capital letters. The Account Created screen appears. When finished, select Done on the remote when done. 7. Press the E button. Other functions in the same fashion. Creating a Samsung Account Using the Create Samsung Account Menu 1. Use the directional keys to move from month to day to year... by pressing the left to your e-mail address. "" Leave "Sign me in automatically" checked if you want your remote, and then select Smart Hub > Samsung Account > Create Account > Create Samsung Account. The Image Selection screen appears. 8. Press the MENU button on . 6.

User Manual
Page 39
... appears. 2. On the Log In screen, select your password. If you are automatically linked. And then select Sign In on your remote, select Smart Hub > Samsung Account. Press the MENU button on the Sign In screen. 3. Select , and then select Create with Facebook on your Facebook ID ...password and select Sign In. 4. Press the MENU button on the Sign In screen. 3. Enter your remote, and then select Smart Hub > Samsung Account > Log In. 2. Follow the directions on - Once a Samsung account is created, you don't need to enter a password, the on the Create Account screen to ...
... appears. 2. On the Log In screen, select your password. If you are automatically linked. And then select Sign In on your remote, select Smart Hub > Samsung Account. Press the MENU button on the Sign In screen. 3. Select , and then select Create with Facebook on your Facebook ID ...password and select Sign In. 4. Press the MENU button on the Sign In screen. 3. Enter your remote, and then select Smart Hub > Samsung Account > Log In. 2. Follow the directions on - Once a Samsung account is created, you don't need to enter a password, the on the Create Account screen to ...
User Manual
Page 46
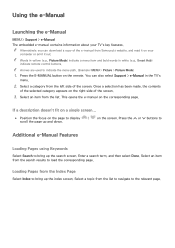
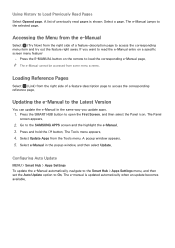
You can download a copy of the e-manual from the left side of the screen. 3. Select a category from Samsung's website, and read it on your TV's key features. Press the < or > buttons to scroll the page up the search screen. Additional e-Manual Features ... the selected category appears on the screen. Loading Pages from the list. "" Alternatively, you can also select Support > e-Manual in white (e.g., Smart Hub) indicate remote control buttons. Select an item from the Index Page Select Index to bring up the index screen. Enter a search term, and then select Done. "" Words...
You can download a copy of the e-manual from the left side of the screen. 3. Select a category from Samsung's website, and read it on your TV's key features. Press the < or > buttons to scroll the page up the search screen. Additional e-Manual Features ... the selected category appears on the screen. Loading Pages from the list. "" Alternatively, you can also select Support > e-Manual in white (e.g., Smart Hub) indicate remote control buttons. Select an item from the Index Page Select Index to bring up the index screen. Enter a search term, and then select Done. "" Words...
User Manual
Page 47
... right side of a feature-description page to access the corresponding reference page. Updating the e-Manual to the SAMSUNG APPS screen and the highlight the e-Manual. 3. A list of previously read the e-Manual entry on the remote to Load Previously Read Pages Select Opened page. "" The e-Manual cannot be accessed from the Tools menu...
... right side of a feature-description page to access the corresponding reference page. Updating the e-Manual to the SAMSUNG APPS screen and the highlight the e-Manual. 3. A list of previously read the e-Manual entry on the remote to Load Previously Read Pages Select Opened page. "" The e-Manual cannot be accessed from the Tools menu...

User Manual
Page 62
... the Guide by 2 hours in the Guide. 2. "" The information in the Guide as a favorite. Analog channels are not supported. Press the GUIDE button on the remote to put the channel into. button. Edit Favorite Channels Edit favorites lets you designate a channel you press the † or ... Favorites 5. and Favorites 1 - Schedule Manager...
... the Guide by 2 hours in the Guide. 2. "" The information in the Guide as a favorite. Analog channels are not supported. Press the GUIDE button on the remote to put the channel into. button. Edit Favorite Channels Edit favorites lets you designate a channel you press the † or ... Favorites 5. and Favorites 1 - Schedule Manager...
User Manual
Page 63
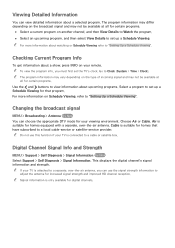
... view detailed information about upcoming programs. Select a program to a local cable-service or satellite-service provider. Cable is attached to adjust the antenna for your remote. Go to "Setting Up a Schedule Viewing". Viewing Detailed Information You can choose the appropriate DTV mode for increased signal strength and improved HD channel reception...
... view detailed information about upcoming programs. Select a program to a local cable-service or satellite-service provider. Cable is attached to adjust the antenna for your remote. Go to "Setting Up a Schedule Viewing". Viewing Detailed Information You can choose the appropriate DTV mode for increased signal strength and improved HD channel reception...
User Manual
Page 64
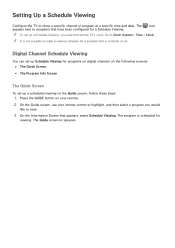
...Clock (System > Time > Clock). "" It is not possible to make a viewing schedule for a Schedule Viewing. On the Guide screen, use your remote. 2. The Guide screen re-appears. Digital Channel Schedule Viewing You can set up Schedule Viewing for viewing. icon "" To set up a scheduled viewing on... your remote control to highlight, and then select a program you must first set up a Schedule Viewing, you would like to programs that have been ...
...Clock (System > Time > Clock). "" It is not possible to make a viewing schedule for a Schedule Viewing. On the Guide screen, use your remote. 2. The Guide screen re-appears. Digital Channel Schedule Viewing You can set up Schedule Viewing for viewing. icon "" To set up a scheduled viewing on... your remote control to highlight, and then select a program you must first set up a Schedule Viewing, you would like to programs that have been ...

User Manual
Page 65
... it . Highlight the Repeat filed, and then select it . If you select manual, you must also highlight and select the days you only receive your remote. Highlight and then select the program you need to know the channel, day or days of the Schedule Viewing screen. Analog Channel Schedule Viewing MENU...
... it . Highlight the Repeat filed, and then select it . If you select manual, you must also highlight and select the days you only receive your remote. Highlight and then select the program you need to know the channel, day or days of the Schedule Viewing screen. Analog Channel Schedule Viewing MENU...

User Manual
Page 68
... it to select additional channels. 2. To select all channels, select Options, and then select Select All from the index of channels you have made your remote. 1.
... it to select additional channels. 2. To select all channels, select Options, and then select Select All from the index of channels you have made your remote. 1.
User Manual
Page 74
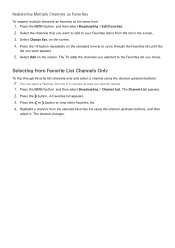
.... 4. The channel changes. The TV adds the channels you want appears. 5. The Channel List appears. 2. A Favorites list appears. 3. Press the E button repeatedly on the standard remote to your Favorites list(s) from the selected Favorites list using the channel up /down buttons: "" You can select a Favorites list only if it . Highlight a channel...
.... 4. The channel changes. The TV adds the channels you want appears. 5. The Channel List appears. 2. A Favorites list appears. 3. Press the E button repeatedly on the standard remote to your Favorites list(s) from the selected Favorites list using the channel up /down buttons: "" You can select a Favorites list only if it . Highlight a channel...
User Manual
Page 79
... TV channel mode or when a signal is supplied from an external device to display a list of the DVD or Blu-ray player and the player's remote control. To control DVD or Blu-ray subtitles, use the sub- title feature of subtitle modes.
... TV channel mode or when a signal is supplied from an external device to display a list of the DVD or Blu-ray player and the player's remote control. To control DVD or Blu-ray subtitles, use the sub- title feature of subtitle modes.

User Manual
Page 85
... Select one of the settings below from the Picture menu to DVI cable. Choose a different setting by pressing the ¡ or £ button on your remote. Dynamic, Standard, Natural, Movie - Decreasing the brightness reduces power consumption. ●● Contrast Try Now Adjusts the screen contrast. ●● Brightness Try Now Adjusts...
... Select one of the settings below from the Picture menu to DVI cable. Choose a different setting by pressing the ¡ or £ button on your remote. Dynamic, Standard, Natural, Movie - Decreasing the brightness reduces power consumption. ●● Contrast Try Now Adjusts the screen contrast. ●● Brightness Try Now Adjusts...
User Manual
Page 95
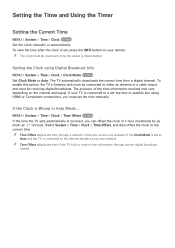
If your remote. "" Time Offset adjusts the time through normal digital broadcast signals. Select System > Time > Clock > Time Offset, and then offset the clock to either an antenna ...
If your remote. "" Time Offset adjusts the time through normal digital broadcast signals. Select System > Time > Clock > Time Offset, and then offset the clock to either an antenna ...

