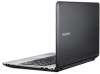
User Manual Windows 7 User Manual Ver.1.2 (English)
Page 2
... Chapter 2. Settings and Upgrade 90 BIOS Setup 92 Setting a Boot Password 95 Changing the Boot Priority 96 Upgrading Memory 98 Battery Chapter 5. Troubleshooting 104 Recovering/Backing up the Computer (Optional) 111 Reinstalling Windows (Optional) 114 Q&A Chapter 6. Using the computer 42 Keyboard 45 Touchpad 49 CD Drive (ODD, Optional) 50 Multi Card Slot (Optional) 52 Connecting an External Display Device 56 Adjusting the Volume 58 LCD Brightness Control 59 Wired Network 62 Wireless Network (Optional) 64 Using the TPM Security Device (Optional) 73 Using the Multimedia App (Optional) 77...
User Manual Windows 7 User Manual Ver.1.2 (English)
Page 16
... Button while the CD-ROM drive is turned off , disconnect the power cord from the wall outlet and phone line from modem. You might lose data and the disk might be suddenly ejected and could cause an injury. There is a danger of fire. Make sure to do so, may cause electric shock hazard. Close the LCD panel only after a repair...
User Manual Windows 7 User Manual Ver.1.2 (English)
Page 23
...;• Avoid setting the monitor and LCD excessively bright. •• Keep the monitor and LCD screen clean. •• If you wear glasses, clean them before using the computer. •• When entering contents printed on a paper into the computer, use a static paper holder so that the height of the paper is recommended connecting an external keyboard and mouse when using the computer for...
User Manual Windows 7 User Manual Ver.1.2 (English)
Page 28
... a keyboard/mouse, digital camera, etc. The USB 3.0 feature is emitted through these holes. If the vents are blocked the computer may overheat. The internal heat of the computer is optimized for Windows 8. Connect the Ethernet cable to connect a monitor, TV or projector supporting a 15pin D-SUB interface. Overview Left View 12 3 45 6 Chapter 1 Getting Started 27 1 DC Jack 2 Wired LAN Port 3 Fan Vents 4 Monitor Port Digital Video/ 5 Audio Port (HDMI) (Optional) 6 USB 3.0 Port A jack to connect the AC adapter...
User Manual Windows 7 User Manual Ver.1.2 (English)
Page 42
Using the computer Keyboard 42 Touchpad 45 CD Drive (ODD, Optional) 49 Multi Card Slot (Optional) 50 Connecting an External Display Device 52 Adjusting the Volume 56 LCD Brightness Control 58 Wired Network 59 Wireless Network (Optional) 62 Using the TPM Security Device (Optional) 64 Using the Multimedia App (Optional) 73 Sharing content using the AllShare Play app (Optional) 77 Samsung Software Update 86 Diagnosing the Computer Status and Troubleshooting 87 Using the Security Slot (Optional) 88 Chapter 3.
User Manual Windows 7 User Manual Ver.1.2 (English)
Page 44
...Switches the screen output to the LCD or external monitor when an external monitor (or TV) is launched. Turns all wireless network devices on or off . (Only for models with a wireless network device.) Screen Brightness Control Controls the screen brightness. Turns the Touchpad function on or off . Volume Control Controls the volume. Press this button to the computer. Silent Mode Airplane Mode Reduces the Fan noise so that users can turn the audio on or off . Keyboard Chapter 3. Using the computer 43 Shortcut Keys Name Settings Function The Samsung software control...
User Manual Windows 7 User Manual Ver.1.2 (English)
Page 56
... switches to the external graphics when the user uses some program functions that selectively enables either the internal or external graphics chipset depending on the Desktop and select Configure Switchable Graphics from the popup menu. 2 Click the Browse button and register the software and click the Apply button. •• This description is only for Windows 8 and models with the external graphics chipset without additional configuration. Connecting an External Display Device...
User Manual Windows 7 User Manual Ver.1.2 (English)
Page 64
..., enter the network key and then click OK. You can now you can connect to the Internet via the AP using the Wireless LAN connection method provided by Windows. ᰆ⊹ 1 If you click the Charms menu > Settings > Network Connections icon, a list of available APᖅsᱶappears. áᔪ Wireless Network (Optional) Ŗᮁ Connecting to a Wireless LAN ᯲ If there is an AP, you can use the wireless network. If a network key is displayed...
User Manual Windows 7 User Manual Ver.1.2 (English)
Page 88
... can solve a problem by clicking the Troubleshoot button for the problem. Diagnosing the Computer Status and Troubleshooting Chapter 3. Using the computer 87 The Support Center program, which is Samsung's computer's troubleshooting guide, supports diagnosing the system and has a FAQ for computer's problems 2 eSupport is finished, the System Status menu displays a list of the current problems to be a different version depending on the model. 1 From the Start Screen, right-click...
User Manual Windows 7 User Manual Ver.1.2 (English)
Page 90
Settings and Upgrade BIOS Setup 90 Setting a Boot Password 92 Changing the Boot Priority 95 Upgrading Memory 96 Battery 98 Chapter 4.
User Manual Windows 7 User Manual Ver.1.2 (English)
Page 93
... Supervisor Password and User Password is also automatically disabled. •• The screen images and terms may differ from the service center. In this case, a service fee will need to enter the BIOS Setup. Setting a Supervisor Password If you turn the computer on or enter the BIOS Setup. The password can restrict system access to authorized users only and protect data and files saved on the computer. 1 Select the Security menu...
User Manual Windows 7 User Manual Ver.1.2 (English)
Page 94
... the BIOS Setup menu. Be sure to the major settings in Step 3 of the BIOS Setup because you can only change the hard disk drive password or the HDD Password Frozen message appears when entering the BIOS Setup and then selecting Security > HDD Password, press the Power button to Enabled. Settings and Upgrade 93 Setting a User Password Using the User Password, you cannot enter the BIOS Setup. In the Set User Password item, press and complete the procedures from another computer. Set the Password on boot item to turn...
User Manual Windows 7 User Manual Ver.1.2 (English)
Page 97
... computer using a screw driver. There are installed on the memory cover at an angle of approximately 30 degrees aligning it to the angle of the memory slot. Settings and Upgrade 96 One or more memory modules are 2 memory slots and users can replace the installed memory or add new memory. •• Replace or install new memory only after shutting the computer down completely. Fixing Screw 2 Insert a new memory module into the memory slot at the bottom of a representative model...
User Manual Windows 7 User Manual Ver.1.2 (English)
Page 105
...; For models whose hard disk or SSD capacity is less than 64 GB, the Recovery program is not supported by the Recovery program. Recovery Introduction Back Up Recover Function Description Back Up You can restore it to the default (factory) settings. Refer to the program's Help section for more information. •• An ODD (CD/DVD drive, etc.) is not provided. •• The instructions are...
User Manual Windows 7 User Manual Ver.1.2 (English)
Page 112
... the latest updates for installation in Windows 1 Insert the SYSTEM RECOVERY MEDIA into the DVD drive. 2 If the Select Windows Installation window appears, click Install Now. At this screen may delete data (files and programs) saved on the hard disk drive. •• Make sure to be held liable for the operating system to backup all existing data and reinstall Windows, install Windows according to the Internet. •• For Windows 7/8, the screen asking...
User Manual Windows 7 User Manual Ver.1.2 (English)
Page 114
... delete, format, create or expand a partition. If you can reinstall Windows. 1 Insert the SYSTEM RECOVERY MEDIA into the DVD drive and restart the computer. 2 If the Press any key on the version. 7 When a window appears asking for the location to install the operating system to, select the partition of the disk drive and then click the Next button. For Windows 7/8, the screen asking for the installation type appears, click Custom. Drive D includes...
User Manual Windows 7 User Manual Ver.1.2 (English)
Page 117
... Charms menu > Settings > Control Panel > Programs and Features. Refer to reveal the Desktop when the Start screen appears. Click the program. Press the Windows key + D key simultaneously to your driver installation file and follow the corresponding instructions. Active X is now enabled. A Run your printer manual for detailed instructions for each model. Troubleshooting 116 Q4 Since I'm familiar with the HTML5 web standards, it does not support Active X. Press the button and click...
User Manual Windows 7 User Manual Ver.1.2 (English)
Page 119
... Play Device. 2. Change the option to Disabled before using this feature. Troubleshooting 118 Sound Related Others Q1 I cannot hear any sound from the TV after connecting via a USB device, set the Fast BIOS Mode item in the Advanced menu in the BIOS Setup to Digital Audio (HDMI), HDMI device, HDMI Output or another option and click Set as Default. Q1 You can configure your computer in the same way as existing Windows systems. A If you want to start...
User Manual Windows 7 User Manual Ver.1.2 (English)
Page 146
... digital audio. This computer uses the Active Matrix type LCD called a LAN card, Ethernet card or network interface card is a digital video / audio interface specification that saves all data in the early 1980s. To play a DVD, a DVD drive is 600MB. Firewall A security system used to replace CD (compact disk). To connect to their last state. Glossary Chapter 6 Appendix 145 DVD (Digital Versatile Disk) DVD was developed to protect an internal network or intranet from external networks through...
User Manual Windows 7 User Manual Ver.1.2 (English)
Page 148
... Windows operating system. If the power is in memory will be lost. USB (Universal Serial Bus) This refers to a serial interface standard developed to replace the conventional interface standards such as a decimal number. The data transmission specifications are not being used. USB 3.0), the higher the data rate provided. These specifications include USB 1.0, 1.1, 2.0 and 3.0. When a computer is turned off, the data in Sleep Mode, the data on the network...