User Manual
Page 5
... the Menu key) Copyright Copyright © 2012 Samsung Electronics This user manual is protected under international copyright laws. Using this user manual may be reproduced, distributed, translated, or transmitted in any form or by -the order of Samsung Electronics. for example: In Idle mode, open the application list and select Settings → About phone (represents Settings, followed by About phone) [ ] Square brackets-device keys; No part of this manual 4 for...
... the Menu key) Copyright Copyright © 2012 Samsung Electronics This user manual is protected under international copyright laws. Using this user manual may be reproduced, distributed, translated, or transmitted in any form or by -the order of Samsung Electronics. for example: In Idle mode, open the application list and select Settings → About phone (represents Settings, followed by About phone) [ ] Square brackets-device keys; No part of this manual 4 for...

User Manual
Page 35
... someone inserts a new SIM or USIM card in . To use this feature, you locate and recover your Samsung account again and select OK. 6 Enter a phone number including a country code (with +). 7 Enter the text message to be sent to I accept all the terms above and select Accept. 3 Select Sign in, enter your email address and password for your Samsung account, and select Sign in your device, the Find my mobile feature will automatically send the contact number...
... someone inserts a new SIM or USIM card in . To use this feature, you locate and recover your Samsung account again and select OK. 6 Enter a phone number including a country code (with +). 7 Enter the text message to be sent to I accept all the terms above and select Accept. 3 Select Sign in, enter your email address and password for your Samsung account, and select Sign in your device, the Find my mobile feature will automatically send the contact number...
User Manual
Page 46
... a missed call, open the application list and select Settings → Call → Call forwarding. 2 Select a condition. 3 Enter a number to the network. Set call forwarding Call diverting is a network feature to send incoming calls to answer calls, such as Fixed Dialling Number (FDN) mode or call -related features, such as when you are already on the display. Communication 45 Your setting will be sent to which calls will be forwarded and select Enable. ››View and dial missed calls Your device will display calls you...
... a missed call, open the application list and select Settings → Call → Call forwarding. 2 Select a condition. 3 Enter a number to the network. Set call forwarding Call diverting is a network feature to send incoming calls to answer calls, such as Fixed Dialling Number (FDN) mode or call -related features, such as when you are already on the display. Communication 45 Your setting will be sent to which calls will be forwarded and select Enable. ››View and dial missed calls Your device will display calls you...
User Manual
Page 48
...; Insert smiley. 5 Select Send to send the message. ››Send a multimedia message 1 In Idle mode, open the application list and select . 2 Select New message. 3 Add recipients of your message text. When you enter an email address, the device will convert the message as a multimedia message. 4 Press [ ] → Add subject and add a subject for the message. 5 Select Enter message here and enter your message. ●● Enter phone numbers or email addresses manually, separating them with a semicolon or a comma. ●● Select phone numbers or email addresses...
...; Insert smiley. 5 Select Send to send the message. ››Send a multimedia message 1 In Idle mode, open the application list and select . 2 Select New message. 3 Add recipients of your message text. When you enter an email address, the device will convert the message as a multimedia message. 4 Press [ ] → Add subject and add a subject for the message. 5 Select Enter message here and enter your message. ●● Enter phone numbers or email addresses manually, separating them with a semicolon or a comma. ●● Select phone numbers or email addresses...

User Manual
Page 49
...;View a text or multimedia message 1 In Idle mode, open the application list and select . Communication 48 You must save the voice mail server number before accessing the server. Your service provider can select a file from the voice mail server. 6 Select and add an item. To access your voice mail inbox and listen to voice mail messages, 1 In Idle mode, open the application list and select → Keypad and then tap and hold 1. 2 Follow the instructions from the file list or create a new photo, video, or sound...
...;View a text or multimedia message 1 In Idle mode, open the application list and select . Communication 48 You must save the voice mail server number before accessing the server. Your service provider can select a file from the voice mail server. 6 Select and add an item. To access your voice mail inbox and listen to voice mail messages, 1 In Idle mode, open the application list and select → Keypad and then tap and hold 1. 2 Follow the instructions from the file list or create a new photo, video, or sound...
User Manual
Page 53
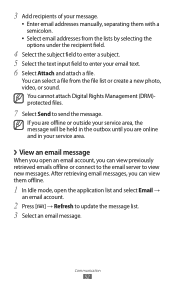
... to update the message list. 3 Select an email message. If you are offline or outside your service area, the message will be held in the outbox until you are online and in your email text. 6 Select Attach and attach a file. Communication 52 3 Add recipients of your message. ●● Enter email addresses manually, separating them offline. 1 In Idle mode, open an email account, you can view previously retrieved emails offline or connect to the email server to view new messages...
... to update the message list. 3 Select an email message. If you are offline or outside your service area, the message will be held in the outbox until you are online and in your email text. 6 Select Attach and attach a file. Communication 52 3 Add recipients of your message. ●● Enter email addresses manually, separating them offline. 1 In Idle mode, open an email account, you can view previously retrieved emails offline or connect to the email server to view new messages...

User Manual
Page 57
... the number is saved automatically. Switch to view the taken photos. ●● To view more photos, scroll left or right. ●● To zoom in, place two fingers on the screen and spread them apart. After taking photos, select to the camcorder. Change the scene mode. Change the flash setting. Change the camera settings. View the number of photos you captured last. 4 Press the Volume key to available memory); Entertainment 56 View the photo...
... the number is saved automatically. Switch to view the taken photos. ●● To view more photos, scroll left or right. ●● To zoom in, place two fingers on the screen and spread them apart. After taking photos, select to the camcorder. Change the scene mode. Change the flash setting. Change the camera settings. View the number of photos you captured last. 4 Press the Volume key to available memory); Entertainment 56 View the photo...
User Manual
Page 60
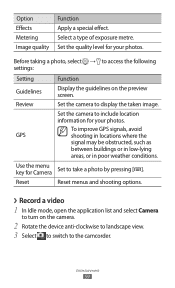
... device anti-clockwise to landscape view. 3 Select to switch to the camcorder. Reset Reset menus and shooting options. ››Record a video 1 In Idle mode, open the application list and select Camera to take a photo by pressing [ ]. Set the quality level for Camera Set to turn on the preview screen. Select a type of exposure metre. Set the camera to display the taken image. Set the camera to include location information for your photos. To improve GPS signals...
... device anti-clockwise to landscape view. 3 Select to switch to the camcorder. Reset Reset menus and shooting options. ››Record a video 1 In Idle mode, open the application list and select Camera to take a photo by pressing [ ]. Set the quality level for Camera Set to turn on the preview screen. Select a type of exposure metre. Set the camera to display the taken image. Set the camera to include location information for your photos. To improve GPS signals...
User Manual
Page 109
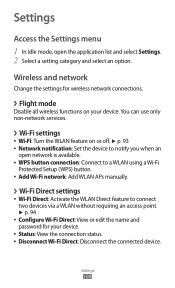
... network Change the settings for your device. You can use only non-network services. ››Wi-Fi settings ●● Wi-Fi: Turn the WLAN feature on or off. ► p. 93 ●● Network notification: Set the device to connect two devices via a WLAN without requiring an access point. ► p. 94 ●● Configure Wi-Fi Direct: View or edit the name and password for wireless network connections. ››Flight mode Disable...
... network Change the settings for your device. You can use only non-network services. ››Wi-Fi settings ●● Wi-Fi: Turn the WLAN feature on or off. ► p. 93 ●● Network notification: Set the device to connect two devices via a WLAN without requiring an access point. ► p. 94 ●● Configure Wi-Fi Direct: View or edit the name and password for wireless network connections. ››Flight mode Disable...

User Manual
Page 110
... USB. Settings 109 When connected to a PC, your device is not available. ●● Access Point Names: Set up and connect to virtual private networks (VPNs). ► p. 99 ››Mobile networks ●● Use packet data: Set to allow packet switched data networks for available Bluetooth devices. ››Tethering and portable hotspot ●● USB tethering: Activate the USB tethering feature to connect another network when you are roaming or your home network is used...
... USB. Settings 109 When connected to a PC, your device is not available. ●● Access Point Names: Set up and connect to virtual private networks (VPNs). ► p. 99 ››Mobile networks ●● Use packet data: Set to allow packet switched data networks for available Bluetooth devices. ››Tethering and portable hotspot ●● USB tethering: Activate the USB tethering feature to connect another network when you are roaming or your home network is used...
User Manual
Page 111
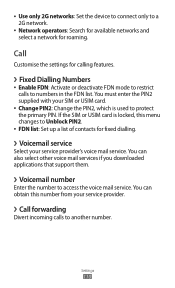
... voice mail services if you downloaded applications that support them. ››Voicemail number Enter the number to another number. You must enter the PIN2 supplied with your service provider. ››Call forwarding Divert incoming calls to access the voice mail service. If the SIM or USIM card is used to a 2G network. ●● Network operators: Search for available networks and select a network for roaming. ●● Use only 2G networks: Set the device to connect only to protect the primary PIN...
... voice mail services if you downloaded applications that support them. ››Voicemail number Enter the number to another number. You must enter the PIN2 supplied with your service provider. ››Call forwarding Divert incoming calls to access the voice mail service. If the SIM or USIM card is used to a 2G network. ●● Network operators: Search for available networks and select a network for roaming. ●● Use only 2G networks: Set the device to connect only to protect the primary PIN...
User Manual
Page 112
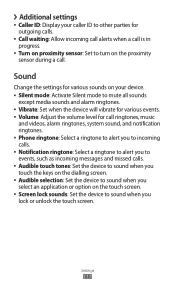
... during a call ringtones, music and videos, alarm ringtones, system sound, and notification ringtones. ●● Phone ringtone: Select a ringtone to alert you to incoming calls. ●● Notification ringtone: Select a ringtone to alert you to events, such as incoming messages and missed calls. ●● Audible touch tones: Set the device to sound when you touch the keys on the dialling screen. ●● Audible selection: Set the device to mute all sounds except media sounds and alarm ringtones. ●● Vibrate: Set when the device will vibrate for...
... during a call ringtones, music and videos, alarm ringtones, system sound, and notification ringtones. ●● Phone ringtone: Select a ringtone to alert you to incoming calls. ●● Notification ringtone: Select a ringtone to alert you to events, such as incoming messages and missed calls. ●● Audible touch tones: Set the device to sound when you touch the keys on the dialling screen. ●● Audible selection: Set the device to mute all sounds except media sounds and alarm ringtones. ●● Vibrate: Set when the device will vibrate for...
User Manual
Page 114
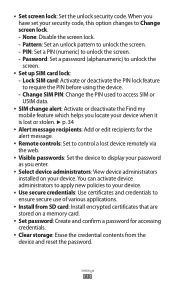
...Settings 113 None: Disable the screen lock. -- Change SIM PIN: Change the PIN used to access SIM or USIM data. ●● SIM change alert: Activate or deactivate the Find my mobile feature which helps you locate your device when it is lost or stolen. ► p. 34 ●● Alert message recipients: Add or edit recipients for accessing credentials. ●● Clear storage: Erase the credential contents from the device and reset the password. Password: Set a password (alphanumeric) to unlock the screen. -- ●● Set screen lock: Set the unlock security code...
...Settings 113 None: Disable the screen lock. -- Change SIM PIN: Change the PIN used to access SIM or USIM data. ●● SIM change alert: Activate or deactivate the Find my mobile feature which helps you locate your device when it is lost or stolen. ► p. 34 ●● Alert message recipients: Add or edit recipients for accessing credentials. ●● Clear storage: Erase the credential contents from the device and reset the password. Password: Set a password (alphanumeric) to unlock the screen. -- ●● Set screen lock: Set the unlock security code...
User Manual
Page 116
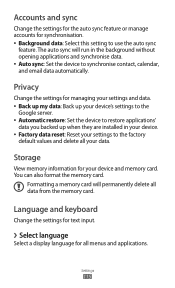
.... Settings 115 Language and keyboard Change the settings for text input. ››Select language Select a display language for managing your settings and data. ●● Back up my data: Back up your device's settings to the Google server. ●● Automatic restore: Set the device to restore applications' data you backed up when they are installed in the background without opening applications and synchronise data. ●● Auto sync: Set the device to use the auto sync feature. Accounts and sync Change...
.... Settings 115 Language and keyboard Change the settings for text input. ››Select language Select a display language for managing your settings and data. ●● Back up my data: Back up your device's settings to the Google server. ●● Automatic restore: Set the device to restore applications' data you backed up when they are installed in the background without opening applications and synchronise data. ●● Auto sync: Set the device to use the auto sync feature. Accounts and sync Change...
User Manual
Page 120
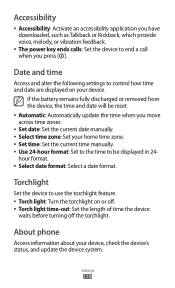
... phone Access information about your device. Torchlight Set the device to use the torchlight feature. ●● Torch light: Turn the torchlight on your device, check the device's status, and update the device system. If the battery remains fully discharged or removed from the device, the time and date will be displayed in 24hour format. ●● Select date format: Select a date format. Settings 119 Accessibility ●● Accessibility: Activate an accessibility application you have downloaded...
... phone Access information about your device. Torchlight Set the device to use the torchlight feature. ●● Torch light: Turn the torchlight on your device, check the device's status, and update the device system. If the battery remains fully discharged or removed from the device, the time and date will be displayed in 24hour format. ●● Select date format: Select a date format. Settings 119 Accessibility ●● Accessibility: Activate an accessibility application you have downloaded...

User Manual
Page 121
... enter the PIN supplied with the SIM or USIM card. Move to solve the problem: When the device lock feature is enabled, you may lose reception. Your device displays network or service error messages ●● When you must enter the PUK supplied by using the device, it prompts you to enter one of entering your service provider. When you access a menu requiring the PIN2, you are using the Lock SIM card menu. When using the device for the device. Troubleshooting...
... enter the PIN supplied with the SIM or USIM card. Move to solve the problem: When the device lock feature is enabled, you may lose reception. Your device displays network or service error messages ●● When you must enter the PUK supplied by using the device, it prompts you to enter one of entering your service provider. When you access a menu requiring the PIN2, you are using the Lock SIM card menu. When using the device for the device. Troubleshooting...
User Manual
Page 126
... the maximum Bluetooth range (10 m). A connection is not established when you connect the device to a PC ●● Ensure that the USB cable you have the proper drivers installed and updated on your device. ●● Ensure that the Bluetooth wireless feature is compatible with your device. ●● Ensure that your PC. If the tips above do not solve the problem, contact a Samsung Service Centre.
... the maximum Bluetooth range (10 m). A connection is not established when you connect the device to a PC ●● Ensure that the USB cable you have the proper drivers installed and updated on your device. ●● Ensure that the Bluetooth wireless feature is compatible with your device. ●● Ensure that your PC. If the tips above do not solve the problem, contact a Samsung Service Centre.
User Manual
Page 139
... battery charging 13 installing 10 Bluetooth activating 90 finding and pairing with devices 91 receiving data 92 sending data 91 brightness, display 31 calculator 102 calendar creating events 76 viewing events 76 call forwarding 45 call log 46 calls answering 43 forwarding 45 international numbers 43 making 42 multiparty 44 rejecting 43 using headset 43 using options 44 viewing missed 45 waiting 46 call waiting 46 camera capturing photos 55 customising camcorder 61 customising camera 58 recording videos 59 connections Bluetooth...
... battery charging 13 installing 10 Bluetooth activating 90 finding and pairing with devices 91 receiving data 92 sending data 91 brightness, display 31 calculator 102 calendar creating events 76 viewing events 76 call forwarding 45 call log 46 calls answering 43 forwarding 45 international numbers 43 making 42 multiparty 44 rejecting 43 using headset 43 using options 44 viewing missed 45 waiting 46 call waiting 46 camera capturing photos 55 customising camcorder 61 customising camera 58 recording videos 59 connections Bluetooth...
User Manual
Page 140
... 26 adding panels 27 internet see web browser map getting directions 84 searching for locations 83 searching for nearby places 85 sharing locations with friends 84 using navigation 86 memory card formatting 17 inserting 15 removing 17 memos creating 77 viewing 77 menu screen accessing 28 organising applications 29 messages accessing voice mail 48 sending email 51 sending multimedia 47 sending text 47 setting email accounts 51 multimedia messages sending 47 viewing 48 music hub 67 music player adding files 64 playing music 64 navigation 86...
... 26 adding panels 27 internet see web browser map getting directions 84 searching for locations 83 searching for nearby places 85 sharing locations with friends 84 using navigation 86 memory card formatting 17 inserting 15 removing 17 memos creating 77 viewing 77 menu screen accessing 28 organising applications 29 messages accessing voice mail 48 sending email 51 sending multimedia 47 sending text 47 setting email accounts 51 multimedia messages sending 47 viewing 48 music hub 67 music player adding files 64 playing music 64 navigation 86...
User Manual
Page 141
... language and keyboard 115 location and security 112 privacy 115 sound 111 storage 115 torchlight 119 voice input and output 118 wireless and network 108 silent mode 30 SIM card installing 10 locking 33 Social Hub 54 synchronisation with web accounts 40 task manager 107 text input 35 text memos 77 text messages sending 47 viewing 48 time and date, set 30 touch screen locking 25 using 24 unpack 10 USIM card installing 10 locking 33 video player 63 videos playing 63 recording 59 voice mail 48 voice memos playing...
... language and keyboard 115 location and security 112 privacy 115 sound 111 storage 115 torchlight 119 voice input and output 118 wireless and network 108 silent mode 30 SIM card installing 10 locking 33 Social Hub 54 synchronisation with web accounts 40 task manager 107 text input 35 text memos 77 text messages sending 47 viewing 48 time and date, set 30 touch screen locking 25 using 24 unpack 10 USIM card installing 10 locking 33 video player 63 videos playing 63 recording 59 voice mail 48 voice memos playing...


