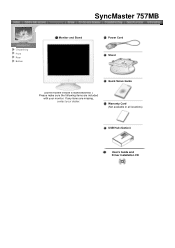
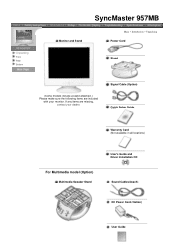
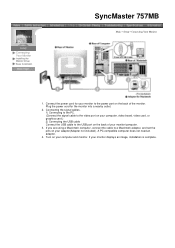
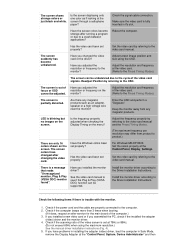
757MB Driver - Samsung
757MB Driver

Related Manual Pages


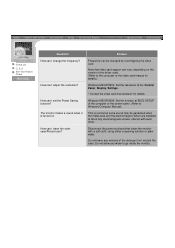
Similar Questions

Driver For Windows 10
Is there a driver out there for windows 10 for the samsung syncmaster 172v?Thank you!
Is there a driver out there for windows 10 for the samsung syncmaster 172v?Thank you!
(Posted by Anonymous-171043 2 years ago)

Is There A Driver Download For Samsung 953bw For Windows 7?
Is there an alternative driver download?
Is there an alternative driver download?
(Posted by abequinn9 11 years ago)

I Need A Driver Samsung Monitor Model S22b150n For Mac, Where Can I Download It
i need a driver samsung monitor model S22B150N for mac, where can I download it?
i need a driver samsung monitor model S22B150N for mac, where can I download it?
(Posted by rbojorges 11 years ago)