User's Guide
Page 4
... mode ...9.4 Receiving manually using an extension telephone 9.4 Receiving automatically in Ans/Fax mode ...9.4 Receiving faxes using a network connection ...8.2 Changing the settings for each scan job ...8.5 Changing the default scan settings ...8.5 Setting up Address Book ...8.5 9. Supplies and accessories Toner cartridges ...12.1 Accessories ...12.1 Fax setup Changing the fax setup options ...10.1 Changing the...
... mode ...9.4 Receiving manually using an extension telephone 9.4 Receiving automatically in Ans/Fax mode ...9.4 Receiving faxes using a network connection ...8.2 Changing the settings for each scan job ...8.5 Changing the default scan settings ...8.5 Setting up Address Book ...8.5 9. Supplies and accessories Toner cartridges ...12.1 Accessories ...12.1 Fax setup Changing the fax setup options ...10.1 Changing the...

User's Guide
Page 11
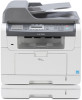
Your machine provides printing, copying, scanning, and faxing functions. You can use preprinted forms and letterhead with both USB and Parallel interfaces. Save time and money • You can print multiple .../Vista. • Your machine is equipped with PostScript 3 • © Copyright 1995-2005, Zoran Corporation. Print in various ways with your machine. • You can scan documents and save paper. • You can customize your documents with a variety of plain paper. • The 250-sheet tray 1 and 250-sheet optional tray...
Your machine provides printing, copying, scanning, and faxing functions. You can use preprinted forms and letterhead with both USB and Parallel interfaces. Save time and money • You can print multiple .../Vista. • Your machine is equipped with PostScript 3 • © Copyright 1995-2005, Zoran Corporation. Print in various ways with your machine. • You can scan documents and save paper. • You can customize your documents with a variety of plain paper. • The 250-sheet tray 1 and 250-sheet optional tray...

User's Guide
Page 13
... menu level. 2 Shift: Allows you to shift the speed buttons to access numbers 16 through 30. 14 Status: Shows the status of the paper. 8 Scan/Email: Activates Scan mode. 20 Toner Save: Allows you to save on toner by using less toner in printing. 9 Display: Shows the current status and prompts during...
... menu level. 2 Shift: Allows you to shift the speed buttons to access numbers 16 through 30. 14 Status: Shows the status of the paper. 8 Scan/Email: Activates Scan mode. 20 Toner Save: Allows you to save on toner by using less toner in printing. 9 Display: Shows the current status and prompts during...

User's Guide
Page 16
...Copy Feature Copy Collation 2-Up 4-Up ID Copy Poster Copy Clone Copy Erase Bkgd. Menus available in Fax, Copy, or Scan mode vary. System Setup (continued) Sound/Volume Key Sound Alarm Sound Speaker Ringer Report Maintenance Clean Drum Ignore Toner CLR Empty...Change Default Copies Reduce/Enlarge Darkness Original Type Scan Feature USB Memory Scan Size Original Type Resolution Scan Color Scan Format E-mail Scan Size Original Type Resolution Scan Color FTP Scan Size Original Type Resolution Scan Color SMB Scan Size Original Type Resolution Scan Color Network TCP/IP EtherTalk Ethernet Speed ...
...Copy Feature Copy Collation 2-Up 4-Up ID Copy Poster Copy Clone Copy Erase Bkgd. Menus available in Fax, Copy, or Scan mode vary. System Setup (continued) Sound/Volume Key Sound Alarm Sound Speaker Ringer Report Maintenance Clean Drum Ignore Toner CLR Empty...Change Default Copies Reduce/Enlarge Darkness Original Type Scan Feature USB Memory Scan Size Original Type Resolution Scan Color Scan Format E-mail Scan Size Original Type Resolution Scan Color FTP Scan Size Original Type Resolution Scan Color SMB Scan Size Original Type Resolution Scan Color Network TCP/IP EtherTalk Ethernet Speed ...
User's Guide
Page 19
..., you must print. You can set the amount of the display and press OK. 2 Press OK when Machine Setup appears. 3 Press the Scroll buttons until Scan PWR Save appears and press OK. 4 Press the Scroll buttons until System Setup appears on each page. To turn this mode on the bottom line... System Setup appears on or off Toner Save mode in actual use to reduce power consumption and extend the life of time for which the scan lamp waits after a job is not in within the specified time. The machine handles incoming data as a single job if it is completed before it...
..., you must print. You can set the amount of the display and press OK. 2 Press OK when Machine Setup appears. 3 Press the Scroll buttons until Scan PWR Save appears and press OK. 4 Press the Scroll buttons until System Setup appears on each page. To turn this mode on the bottom line... System Setup appears on or off Toner Save mode in actual use to reduce power consumption and extend the life of time for which the scan lamp waits after a job is not in within the specified time. The machine handles incoming data as a single job if it is completed before it...
User's Guide
Page 20
... another image editor program, like Adobe Photoshop, from a Macintosh computer and print documents. • Scan driver: TWAIN driver is the accompanying Windows-based software for scanning documents on your computer. For details, please refer to send the image by email. You can ...104 Windows Contents • Printer driver: Use this file to print documents with your machine from SmarThru. Allows you to edit a scanned image in the Software section. This chapter includes: • Supplied software • Printer driver features • System requirements Supplied software...
... another image editor program, like Adobe Photoshop, from a Macintosh computer and print documents. • Scan driver: TWAIN driver is the accompanying Windows-based software for scanning documents on your computer. For details, please refer to send the image by email. You can ...104 Windows Contents • Printer driver: Use this file to print documents with your machine from SmarThru. Allows you to edit a scanned image in the Software section. This chapter includes: • Supplied software • Printer driver features • System requirements Supplied software...
User's Guide
Page 22
...as an IP address, a subnet mask, a gateway, and DNS addresses. Repeat this to the 4th byte. 4.1 Configure the network parameters necessary for scanning to various network environments. - This chapter includes: • Introduction • Supported operating systems • Configuring TCP/IP • Configuring EtherTalk &#...8226; Printing a network configuration page Introduction Once you have connected your network print server, which your machine for scanning to TCP/IP. Customize server settings and set up your machine can share the machine with the TCP/IP protocol.
...as an IP address, a subnet mask, a gateway, and DNS addresses. Repeat this to the 4th byte. 4.1 Configure the network parameters necessary for scanning to various network environments. - This chapter includes: • Introduction • Supported operating systems • Configuring TCP/IP • Configuring EtherTalk &#...8226; Printing a network configuration page Introduction Once you have connected your network print server, which your machine for scanning to TCP/IP. Customize server settings and set up your machine can share the machine with the TCP/IP protocol.
User's Guide
Page 24
... cause black spots on the paper is detected in the ADF. carbon-paper or carbon-backed paper - curled or rolled paper - To get the best scan quality, especially for colored or gray-scaled images, use the ADF: • Do not load paper smaller than 142 x 148 mm or larger than 30.... onion skin or thin paper - coated paper - On the scanner glass Make sure that include different sizes or weights of paper (75 g/m2) for copying, scanning, and sending a fax. Loading originals You can load up to load originals and print media into your machine.
... cause black spots on the paper is detected in the ADF. carbon-paper or carbon-backed paper - curled or rolled paper - To get the best scan quality, especially for colored or gray-scaled images, use the ADF: • Do not load paper smaller than 142 x 148 mm or larger than 30.... onion skin or thin paper - coated paper - On the scanner glass Make sure that include different sizes or weights of paper (75 g/m2) for copying, scanning, and sending a fax. Loading originals You can load up to load originals and print media into your machine.
User's Guide
Page 35
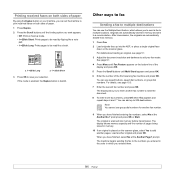
Place Front Side and Press[Start] appears on the scanner glass. Your machine begins scanning the front side and shows Place Back Side and Press[Start]. 6 Open the scanner lid and turn the original over. Note If you place originals ... is helpful for approximately 30 seconds, the machine cancels the copy job and returns to Standby mode. 7 Press Start to begin copying. This feature is scanned and printed one by one poster-sized document. For details about loading an original, see page 5.1. 3 Press Menu until ID Copy appears and press OK...
Place Front Side and Press[Start] appears on the scanner glass. Your machine begins scanning the front side and shows Place Back Side and Press[Start]. 6 Open the scanner lid and turn the original over. Note If you place originals ... is helpful for approximately 30 seconds, the machine cancels the copy job and returns to Standby mode. 7 Press Start to begin copying. This feature is scanned and printed one by one poster-sized document. For details about loading an original, see page 5.1. 3 Press Menu until ID Copy appears and press OK...
User's Guide
Page 36
... flipping like a note pad. • 1->2Side Long: Prints pages to be read by the original image and paper size. Note It is only available when scanning from the original document on the scanner glass. Selecting Off means that the machine does not restore the default settings until the time setting you...
... flipping like a note pad. • 1->2Side Long: Prints pages to be read by the original image and paper size. Note It is only available when scanning from the original document on the scanner glass. Selecting Off means that the machine does not restore the default settings until the time setting you...
User's Guide
Page 38
...Via the SmarThru™ program supplied with your website, or use appears and press OK. • Microsoft Paint: Sends the scanned image to Microsoft Paint. • Email: Sends the scanned image to your default email program on your machine. See the Software section. • To a portable USB memory device,... image using a local connection 1 Make sure that your machine and computer are turned on and properly connected to each scan job • Changing the default scan settings • Setting up into the ADF, or place a single original face down on the top line of the display and press...
...Via the SmarThru™ program supplied with your website, or use appears and press OK. • Microsoft Paint: Sends the scanned image to Microsoft Paint. • Email: Sends the scanned image to your default email program on your machine. See the Software section. • To a portable USB memory device,... image using a local connection 1 Make sure that your machine and computer are turned on and properly connected to each scan job • Changing the default scan settings • Setting up into the ADF, or place a single original face down on the top line of the display and press...

User's Guide
Page 39
...your machine. 2 Click Machine Settings and E-mail Setup. 3 Select IP Address or Host Name. 4 Enter the IP address in the machine when you start scanning to FTP, SMB or e-mail from the control panel. 6 Click Apply. The first character must be a letter. • The PIN must be changed....65535. The ScanClair window opens. ScanClair 2 Click the Add Device button or double-click the Add Device icon. 3 Click Next. 4 Select Browse for scanning to SMB Adding the machine to the ScanClair program First, install the ScanClair program. Notes • For the scanner name, the model name of your...
...your machine. 2 Click Machine Settings and E-mail Setup. 3 Select IP Address or Host Name. 4 Enter the IP address in the machine when you start scanning to FTP, SMB or e-mail from the control panel. 6 Click Apply. The first character must be a letter. • The PIN must be changed....65535. The ScanClair window opens. ScanClair 2 Click the Add Device button or double-click the Add Device icon. 3 Click Next. 4 Select Browse for scanning to SMB Adding the machine to the ScanClair program First, install the ScanClair program. Notes • For the scanner name, the model name of your...

User's Guide
Page 40
... machine to be accessed by unauthorized persons. This name will be stored. This is 21. 10 Put a check mark in Anonymous if you to remotely scan an original from your machine. 7 Select IP Address or Host Name. 8 Enter the server address in dotted decimal notation or as a host name. 9 ...Enter the server port number, from 1 to 65535. Scanning 1 Make sure that your machine and the computer are connected to a network and ScanClair is to be displayed on the bottom line of your machine...
... machine to be accessed by unauthorized persons. This name will be stored. This is 21. 10 Put a check mark in Anonymous if you to remotely scan an original from your machine. 7 Select IP Address or Host Name. 8 Enter the server address in dotted decimal notation or as a host name. 9 ...Enter the server port number, from 1 to 65535. Scanning 1 Make sure that your machine and the computer are connected to a network and ScanClair is to be displayed on the bottom line of your machine...

User's Guide
Page 41
...continue to the next step, press the Scroll buttons to select No and press OK. 7 If the display asks if you can set the scan options for your scan job. See page 8.2. You can change will be broadcast over the network and will apply to all clients connected to the network. 5 ...access to FTP servers from memory. See page 8.5. 1 Make sure that your machine is connected to a network. 2 Load originals face up your scan job. The machine begins scanning and then sends the email. 10 If the machine asks if you can use a speed button or a speed email or group email number...
...continue to the next step, press the Scroll buttons to select No and press OK. 7 If the display asks if you can set the scan options for your scan job. See page 8.2. You can change will be broadcast over the network and will apply to all clients connected to the network. 5 ...access to FTP servers from memory. See page 8.5. 1 Make sure that your machine is connected to a network. 2 Load originals face up your scan job. The machine begins scanning and then sends the email. 10 If the machine asks if you can use a speed button or a speed email or group email number...

User's Guide
Page 42
... status appears and press OK. 6 Repeat steps 4 and 5 to set other setting options. 7 When you have finished, press Stop/Clear to return to customize the scan settings for each job, you can select to be saved. If you select TIFF or PDF, you can set up Address Book You can set... or Start. 8 Press the Scroll buttons until the desired status appears and press OK. 7 Repeat steps 5 and 6 to change other scan types, press Back and repeat from your machine is to scan multiple pages. Depending on the bottom line of your machine's IP address as the URL in Address book. The machine...
... status appears and press OK. 6 Repeat steps 4 and 5 to set other setting options. 7 When you have finished, press Stop/Clear to return to customize the scan settings for each job, you can select to be saved. If you select TIFF or PDF, you can set up Address Book You can set... or Start. 8 Press the Scroll buttons until the desired status appears and press OK. 7 Repeat steps 5 and 6 to change other scan types, press Back and repeat from your machine is to scan multiple pages. Depending on the bottom line of your machine's IP address as the URL in Address book. The machine...
User's Guide
Page 43
...group number and enter the group name you want appears and press OK. See page 8.6. See page 8.6. Searching with the address. You can either scan from memory. Using Address Book entries To retrieve an email address, use a group email entry, you are prompted to Z sequentially or search by ...pressing Address Book. You can search upwards or downwards through memory 1 If necessary, press Scan/Email. 2 Press Address Book until Search&Send appears on the bottom line of the display and press OK. 3 Press the Scroll buttons until...
...group number and enter the group name you want appears and press OK. See page 8.6. See page 8.6. Searching with the address. You can either scan from memory. Using Address Book entries To retrieve an email address, use a group email entry, you are prompted to Z sequentially or search by ...pressing Address Book. You can search upwards or downwards through memory 1 If necessary, press Scan/Email. 2 Press Address Book until Search&Send appears on the bottom line of the display and press OK. 3 Press the Scroll buttons until...
User's Guide
Page 49
... Another Page? Load another fax number. 9 When you have finished, select No at the Another No.? If the mode is enabled, the Duplex button is scanned into the ADF, or place a single original face down on the bottom line of the display and press OK. 5 Press the Scroll buttons until Multi...
... Another Page? Load another fax number. 9 When you have finished, select No at the Another No.? If the mode is enabled, the Duplex button is scanned into the ADF, or place a single original face down on the bottom line of the display and press OK. 5 Press the Scroll buttons until Multi...

User's Guide
Page 50
...8 To enter more fax numbers, press OK when Yes appears and repeat steps 6 and 7. The machine returns to Standby mode. The machine scans the original into memory before transmission to station B begins) or between stations (i.e., when the transmission to station A ends, before transmission. Sending ...Press Menu until Fax Feature appears on the scanner glass. Note You cannot use group dial numbers for another page. The original is scanned into the ADF, or place a single original face down on the scanner glass. In addition, priority transmission will interrupt a Multiple ...
...8 To enter more fax numbers, press OK when Yes appears and repeat steps 6 and 7. The machine returns to Standby mode. The machine scans the original into memory before transmission to station B begins) or between stations (i.e., when the transmission to station A ends, before transmission. Sending ...Press Menu until Fax Feature appears on the scanner glass. Note You cannot use group dial numbers for another page. The original is scanned into the ADF, or place a single original face down on the scanner glass. In addition, priority transmission will interrupt a Multiple ...

User's Guide
Page 51
... to the specified fax machine. Subsequent received faxes will be forwarded to the email address you have finished, select No at your machine, it is scanned into memory before transmission.
... to the specified fax machine. Subsequent received faxes will be forwarded to the email address you have finished, select No at your machine, it is scanned into memory before transmission.
User's Guide
Page 55
... line of the display and press OK. 3 Press the Scroll buttons until the number category you want to search for an entry by one by scanning through all of the destinations within the group. You can then use a group dial entry, you need to search for and select it from A to... a number in alphabetical order. You can search upwards or downwards through 199) group dial numbers using the destination's existing speed dial numbers. You can either scan from memory.
... line of the display and press OK. 3 Press the Scroll buttons until the number category you want to search for an entry by one by scanning through all of the destinations within the group. You can then use a group dial entry, you need to search for and select it from A to... a number in alphabetical order. You can search upwards or downwards through 199) group dial numbers using the destination's existing speed dial numbers. You can either scan from memory.


