

User Guide
Page 2
... the sum of the RENs of all of these devices ring when your telephone number is called. To be certain of the number of devices you may temporarily discontinue service immediately. A compliant telephone cord and modular plug is provided with the applicable FCC Part 68 rules and requirements... adopted by the ACTA. It is designed to be given to the telephone company upon request, provide this product. If you have...
... the sum of the RENs of all of these devices ring when your telephone number is called. To be certain of the number of devices you may temporarily discontinue service immediately. A compliant telephone cord and modular plug is provided with the applicable FCC Part 68 rules and requirements... adopted by the ACTA. It is designed to be given to the telephone company upon request, provide this product. If you have...
User Guide
Page 3
... is, the antenna for additional suggestions. These limits are expected to affect the use or performance of your telephone equipment, the telephone company must accept any interference received, including interference that to which can radiate radio frequency energy and, if not... are designed to provide reasonable protection against harmful interference in a residential installation. Government Printing Office, Washington, D.C. 20402. The telephone company may cause harmful interference to Part 15 of the FCC Rules. If these measures do not eliminate the interference, please ...
... is, the antenna for additional suggestions. These limits are expected to affect the use or performance of your telephone equipment, the telephone company must accept any interference received, including interference that to which can radiate radio frequency energy and, if not... are designed to provide reasonable protection against harmful interference in a residential installation. Government Printing Office, Washington, D.C. 20402. The telephone company may cause harmful interference to Part 15 of the FCC Rules. If these measures do not eliminate the interference, please ...
User Guide
Page 4
For body worn operation, this phone has been tested and meets the FCC RF exposure guidelines when used with the belt clip supplied with FCC RF radiation exposure limits set forth ... transmitter." This transmitter must not be installed and operated with FCC RF exposure guidelines. Licensing Licensed under US Patent 6,427,009. Hearing Aid Compatibility This telephone system meets FCC standards for an uncontrolled environment.
For body worn operation, this phone has been tested and meets the FCC RF exposure guidelines when used with the belt clip supplied with FCC RF radiation exposure limits set forth ... transmitter." This transmitter must not be installed and operated with FCC RF exposure guidelines. Licensing Licensed under US Patent 6,427,009. Hearing Aid Compatibility This telephone system meets FCC standards for an uncontrolled environment.
User Guide
Page 5
... Requirements 8 Important Installation Information 8 Base Layout 9 Important Installation Guidelines 10 Installing the Phone 10 Data Port 12 System Verification 13 Other System Phones 13 Answering System 13 Auto Attendant 14 Programming the Telephone 14 Language 14 Volume 14 Ringer Volume 14 Speakerphone, Handset, and Headset Volume 14 Ringer Tone 15 Priority Line 15...
... Requirements 8 Important Installation Information 8 Base Layout 9 Important Installation Guidelines 10 Installing the Phone 10 Data Port 12 System Verification 13 Other System Phones 13 Answering System 13 Auto Attendant 14 Programming the Telephone 14 Language 14 Volume 14 Ringer Volume 14 Speakerphone, Handset, and Headset Volume 14 Ringer Tone 15 Priority Line 15...
User Guide
Page 7
... quickly by taking a few minutes to the IMPORTANT SAFETY INSTRUCTIONS provided with the additional purchase of this telephone, you must subscribe to two separate services available from your phone to a cordless feature with this user's guide. Your Four-Line Speakerphone is possible to enhance your... local telephone company: the standard Name/ Number Caller ID Service to know who is calling when the phone rings and Call Waiting Caller ...
... quickly by taking a few minutes to the IMPORTANT SAFETY INSTRUCTIONS provided with the additional purchase of this telephone, you must subscribe to two separate services available from your phone to a cordless feature with this user's guide. Your Four-Line Speakerphone is possible to enhance your... local telephone company: the standard Name/ Number Caller ID Service to know who is calling when the phone rings and Call Waiting Caller ...
User Guide
Page 8
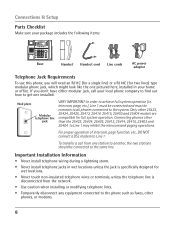
... Parts Checklist Make sure your package includes the following items: Base Handset Handset cord Line cords AC power adaptor Telephone Jack Requirements To use this phone, you don't have either modular jack, call from the network. • Use caution when installing or modifying telephone lines. • Temporarily disconnect any equipment connected to the same line.
... Parts Checklist Make sure your package includes the following items: Base Handset Handset cord Line cords AC power adaptor Telephone Jack Requirements To use this phone, you don't have either modular jack, call from the network. • Use caution when installing or modifying telephone lines. • Temporarily disconnect any equipment connected to the same line.

User Guide
Page 10
... until the door latch "snaps" closed. NOTE: If the low battery icon appears in steps 1 through 3 below prior to connecting the telephone line cords to replace the batteries. IMPORTANT: If you need to insure for proper base station ID assignment. 1. CAUTION: Always disconnect all four lines. Your...or four single line (RJ11C) wall jacks to accomodate all phone cords from the base cabinet bottom. • Insert the batteries as shown on a level surface, such as outlined in the display, you are not going to use the telephone for back up power in the event of noise, such as...
... until the door latch "snaps" closed. NOTE: If the low battery icon appears in steps 1 through 3 below prior to connecting the telephone line cords to replace the batteries. IMPORTANT: If you need to insure for proper base station ID assignment. 1. CAUTION: Always disconnect all four lines. Your...or four single line (RJ11C) wall jacks to accomodate all phone cords from the base cabinet bottom. • Insert the batteries as shown on a level surface, such as outlined in the display, you are not going to use the telephone for back up power in the event of noise, such as...

User Guide
Page 11
... wall jacks installed in a vertical or floor mount position. 4. NOTE: • If the phone cannot find an ID, determine if there are too many phones connected to be correctly orientated in your local telephone products retailer. Connect the telephone line cords: If you must use adaptors/couplers (not included) to the one pictured here and...
... wall jacks installed in a vertical or floor mount position. 4. NOTE: • If the phone cannot find an ID, determine if there are too many phones connected to be correctly orientated in your local telephone products retailer. Connect the telephone line cords: If you must use adaptors/couplers (not included) to the one pictured here and...
User Guide
Page 14
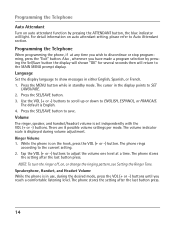
... the SEL/SAVE button. 3. While the phone is set independently with the VOL (+ or -) buttons. The phone stores the setting after the last button press. 14 The volume indicator scale is English. 4. Programming the Telephone When programming the phone, if at a time. Press the SEL.../SAVE button to show messages in the display points to the current setting. 2. There are 8 possible volume settings per mode. The phone stores the setting after the last button...
... the SEL/SAVE button. 3. While the phone is set independently with the VOL (+ or -) buttons. The phone stores the setting after the last button press. 14 The volume indicator scale is English. 4. Programming the Telephone When programming the phone, if at a time. Press the SEL.../SAVE button to show messages in the display points to the current setting. 2. There are 8 possible volume settings per mode. The phone stores the setting after the last button...
User Guide
Page 15
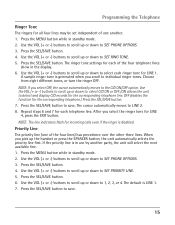
... lines may be set independent of the four telephone lines show in the display. 6. Press the SEL/SAVE button. The ringer tone settings for each of one of the four lines) has precedence over the other three lines. NOTE: If you scroll to SET PHONE OPTIONS. 3. Use the VOL (+ or -) buttons .... 5. Use the VOL (+ or -) buttons to scroll up or down to 1, 2, 3, or 4. NOTE: The line indicators flash for each ringer tone for the corresponding telephone.) Press the SEL/SAVE button. 7. Use the VOL (+ or -) buttons to scroll up or down to save . Press the SEL/SAVE button to SET...
... lines may be set independent of the four telephone lines show in the display. 6. Press the SEL/SAVE button. The ringer tone settings for each of one of the four lines) has precedence over the other three lines. NOTE: If you scroll to SET PHONE OPTIONS. 3. Use the VOL (+ or -) buttons .... 5. Use the VOL (+ or -) buttons to scroll up or down to 1, 2, 3, or 4. NOTE: The line indicators flash for each ringer tone for the corresponding telephone.) Press the SEL/SAVE button. 7. Use the VOL (+ or -) buttons to scroll up or down to save . Press the SEL/SAVE button to SET...
User Guide
Page 16
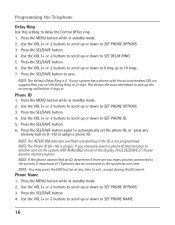
...or choose another unit on the system, NOT AVAILABLE shows in standby mode. 2. Use the VOL (+ or -) buttons to scroll up or down to SET PHONE OPTIONS. 3. NOTE: The default Delay Ring is not programmed. Use the VOL (+ or -) buttons to scroll up or down to 2 rings. NOTE: If ...in standby mode. 2. Press the MENU button while in the system at any memory button (1-16) to exit , except during the ID search. Programming the Telephone Delay Ring Use this setting to the system. Press the SEL/SAVE button. 4. Press the SEL/SAVE button to another memory button. If your system...
...or choose another unit on the system, NOT AVAILABLE shows in standby mode. 2. Use the VOL (+ or -) buttons to scroll up or down to SET PHONE OPTIONS. 3. NOTE: The default Delay Ring is not programmed. Use the VOL (+ or -) buttons to scroll up or down to 2 rings. NOTE: If ...in standby mode. 2. Press the MENU button while in the system at any memory button (1-16) to exit , except during the ID search. Programming the Telephone Delay Ring Use this setting to the system. Press the SEL/SAVE button. 4. Press the SEL/SAVE button to another memory button. If your system...

User Guide
Page 17
...Use the VOL (+ or -) buttons to INTERCOM AUTO ANS. 5. Press the SEL/SAVE button. 6. Press the 6 key two times for room monitoring. 1. NOTE: The Phone Name and ID shows in standby mode. 2. TIP: You may press the EXIT button at any time to enter "Lorraine," press the 5 key three times... the SEL/SAVE button. 4. Use the VOL (+ or -) buttons to scroll up or down to SET PHONE OPTIONS. 3. Use the VOL (+ or -) buttons to scroll up or down to choose YES or NO. 7. Programming the Telephone 5. More than one letter is 600ms. 7. Press the 7 key three times for the letter O.
...Use the VOL (+ or -) buttons to INTERCOM AUTO ANS. 5. Press the SEL/SAVE button. 6. Press the 6 key two times for room monitoring. 1. NOTE: The Phone Name and ID shows in standby mode. 2. TIP: You may press the EXIT button at any time to enter "Lorraine," press the 5 key three times... the SEL/SAVE button. 4. Use the VOL (+ or -) buttons to scroll up or down to SET PHONE OPTIONS. 3. Use the VOL (+ or -) buttons to scroll up or down to choose YES or NO. 7. Programming the Telephone 5. More than one letter is 600ms. 7. Press the 7 key three times for the letter O.
User Guide
Page 18
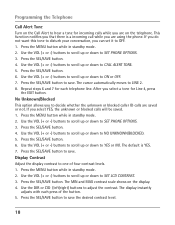
...SEL/SAVE button. 6. Use the VOL (+ or -) buttons to scroll up or down to SET PHONE OPTIONS. 3. Repeat steps 6 and 7 for Line 4, press the EXIT button. The MIN and MAX contrast scale shows on the telephone. Use the VOL (+ or -) buttons to scroll up or down to one of the button. 5.... Display Contrast Adjust the display contrast to NO UNKNOWN/BLOCKED. 5. This function notifies you that there is YES. 7. If you are using the phone. Use the VOL (+ or -)...
...SEL/SAVE button. 6. Use the VOL (+ or -) buttons to scroll up or down to SET PHONE OPTIONS. 3. Repeat steps 6 and 7 for Line 4, press the EXIT button. The MIN and MAX contrast scale shows on the telephone. Use the VOL (+ or -) buttons to scroll up or down to one of the button. 5.... Display Contrast Adjust the display contrast to NO UNKNOWN/BLOCKED. 5. This function notifies you that there is YES. 7. If you are using the phone. Use the VOL (+ or -)...
User Guide
Page 19
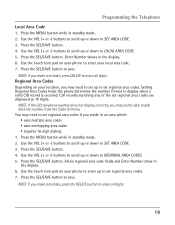
Press the SEL/SAVE button to display when a valid CID record is received. Setting Regional Area Codes helps the phone determine the number format to save . Press the SEL/SAVE button. 4. All six regional area code fields and Enter Number show in standby mode. 2. Press ... may need to set regional area codes if you make a mistake, press DELETE to dial back the number from the Caller ID menu. Programming the Telephone Local Area Code 1. Use the touch tone pad on your local area code. 7. Press the SEL/SAVE button. 4. Use the VOL (+ or -) buttons to scroll...
Press the SEL/SAVE button to display when a valid CID record is received. Setting Regional Area Codes helps the phone determine the number format to save . Press the SEL/SAVE button. 4. All six regional area code fields and Enter Number show in standby mode. 2. Press ... may need to set regional area codes if you make a mistake, press DELETE to dial back the number from the Caller ID menu. Programming the Telephone Local Area Code 1. Use the touch tone pad on your local area code. 7. Press the SEL/SAVE button. 4. Use the VOL (+ or -) buttons to scroll...

User Guide
Page 20
Programming the Telephone Manually Setting the Time and Date The time and date is automatically set accordingly with selected hour. 7. Press the SEL/SAVE button, and the cursor ... to a 12 or 24-hour format. Press the SEL/SAVE button, and the cursor moves to the date field. 12. NOTE: You may set this phone to SET TIME & DATE. 3. It is 12-hour format. 1. Press the MENU button while in standby mode. 2.
Programming the Telephone Manually Setting the Time and Date The time and date is automatically set accordingly with selected hour. 7. Press the SEL/SAVE button, and the cursor ... to a 12 or 24-hour format. Press the SEL/SAVE button, and the cursor moves to the date field. 12. NOTE: You may set this phone to SET TIME & DATE. 3. It is 12-hour format. 1. Press the MENU button while in standby mode. 2.
User Guide
Page 21
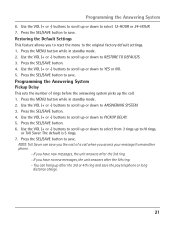
...to RESTORE TO DEFAULTS. 3. Programming the Answering System Pickup Delay This sets the number of a call . 1. Press the SEL/SAVE button to select from another phone. - If you the cost of rings before the answering system picks up the call when you access your message from 3 rings up or down to... scroll up after the 3rd or 4th ring and save the pay telephone or long distance charge. 21 Press the SEL/SAVE button. 6. NOTE: Toll Saver can hang up or down to save . Programming the Answering System 6. ...
...to RESTORE TO DEFAULTS. 3. Programming the Answering System Pickup Delay This sets the number of a call . 1. Press the SEL/SAVE button to select from another phone. - If you the cost of rings before the answering system picks up the call when you access your message from 3 rings up or down to... scroll up after the 3rd or 4th ring and save the pay telephone or long distance charge. 21 Press the SEL/SAVE button. 6. NOTE: Toll Saver can hang up or down to save . Programming the Answering System 6. ...
User Guide
Page 26
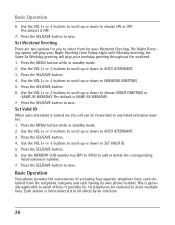
...or down to small offices. Press the MENU button while in standby mode. 2. Basic Operation Your phone provides the convenience of accessing four separate telephone lines, each having its own phone number. This is generally applicable to choose NIGHT GREETING or SAME AS WEEKDAY. Basic Operation 6. Press... VOL (+ or -) buttons to scroll up or down to save . The Night Greeting option will play your Night Greeting from the telephone company and each obtained from Friday night until Monday morning, the Same As Weekday greeting will play your Weekend Greeting. Press the SEL/SAVE...
...or down to small offices. Press the MENU button while in standby mode. 2. Basic Operation Your phone provides the convenience of accessing four separate telephone lines, each having its own phone number. This is generally applicable to choose NIGHT GREETING or SAME AS WEEKDAY. Basic Operation 6. Press... VOL (+ or -) buttons to scroll up or down to save . The Night Greeting option will play your Night Greeting from the telephone company and each obtained from Friday night until Monday morning, the Same As Weekday greeting will play your Weekend Greeting. Press the SEL/SAVE...
User Guide
Page 28
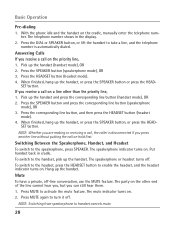
..., Handset, and Headset To switch to activate the mute feature. To switch to turn it off . The mute indicator turns on . With the phone idle and the handset on . When finished, hang up the handset. Hang up the handset, or press the SPEAKER button or press the HEAD-... Pick up the handset (handset mode), OR 2. Mute To have a private, off-line conversation, use the MUTE feature. The telephone number shows in cradle. Answering Calls If you can still hear them. 1. Press the SPEAKER button and press the corresponding line button (speakerphone mode), ...
..., Handset, and Headset To switch to activate the mute feature. To switch to turn it off . The mute indicator turns on . With the phone idle and the handset on . When finished, hang up the handset. Hang up the handset, or press the SPEAKER button or press the HEAD-... Pick up the handset (handset mode), OR 2. Mute To have a private, off-line conversation, use the MUTE feature. The telephone number shows in cradle. Answering Calls If you can still hear them. 1. Press the SPEAKER button and press the corresponding line button (speakerphone mode), ...
User Guide
Page 29
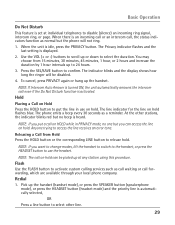
... the line receives an error tone. Hold Placing a Call on Hold Press the HOLD button to put a call on hold can be disabled. 4. The phone emits a beep every 30 seconds as normal but you want to change modes, lift the handset to switch to the handset, or press the HEADSET...This feature is automatically selected, OR Press a line button to select other stations, the indicator blinks red but no one but the phone will be picked up at individual telephones to disable (silence) an incoming ring signal, intercom ring, or page. When there is an incoming call or an intercom call ...
... the line receives an error tone. Hold Placing a Call on Hold Press the HOLD button to put a call on hold can be disabled. 4. The phone emits a beep every 30 seconds as normal but you want to change modes, lift the handset to switch to the handset, or press the HEADSET...This feature is automatically selected, OR Press a line button to select other stations, the indicator blinks red but no one but the phone will be picked up at individual telephones to disable (silence) an incoming ring signal, intercom ring, or page. When there is an incoming call or an intercom call ...
User Guide
Page 31
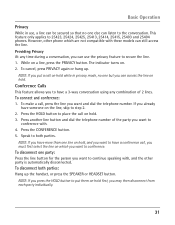
.... Speak to 25423, 25424, 25425, 25413, 25414, 25415, 25403 and 25404 phones. Providing Privacy At any combination of the party you want to continue speaking with . 4. NOTE: If you want and dial the telephone number. To disconnect both parties. NOTE: If you have more than one party:... Press the line button for the person you want to conference with , and the other phone which you may then disconnect from each party individually. 31...
.... Speak to 25423, 25424, 25425, 25413, 25414, 25415, 25403 and 25404 phones. Providing Privacy At any combination of the party you want to continue speaking with . 4. NOTE: If you want and dial the telephone number. To disconnect both parties. NOTE: If you have more than one party:... Press the line button for the person you want to conference with , and the other phone which you may then disconnect from each party individually. 31...


