User Guide
Page 3
... the instructions, may make changes in its business and not inconsistent with Part 15 of the FCC Rules. This booklet is available from that may not cause harmful interference; Please specify stock number 004-000-00345-4 when ordering copies. Also, the Federal Communications Commission has prepared a helpful booklet, "How To Identify and Resolve Radio/TV Interference Problems." If...
... the instructions, may make changes in its business and not inconsistent with Part 15 of the FCC Rules. This booklet is available from that may not cause harmful interference; Please specify stock number 004-000-00345-4 when ordering copies. Also, the Federal Communications Commission has prepared a helpful booklet, "How To Identify and Resolve Radio/TV Interference Problems." If...
User Guide
Page 5
... Telephone 14 Language 14 Volume 14 Ringer Volume 14 Speakerphone, Handset, and Headset Volume 14 Ringer Tone 15 Priority Line 15 Delay Ring 16 Phone ID 16 Phone Name 16 Intercom Auto Answer 17 Flash Time 17 Call Alert Tone 18 No Unknown/Blocked 18 Display Contrast 18 Local Area Code 19 Regional Area Codes 19 Manually Setting the Time and Date 20 Hour Format 20 Restoring the Default Settings 21 Programming the Answering System 21 Pickup Delay 21 Message Length 22 Call Screening 22 Message Interrupt 22 Remote Password...
... Telephone 14 Language 14 Volume 14 Ringer Volume 14 Speakerphone, Handset, and Headset Volume 14 Ringer Tone 15 Priority Line 15 Delay Ring 16 Phone ID 16 Phone Name 16 Intercom Auto Answer 17 Flash Time 17 Call Alert Tone 18 No Unknown/Blocked 18 Display Contrast 18 Local Area Code 19 Regional Area Codes 19 Manually Setting the Time and Date 20 Hour Format 20 Restoring the Default Settings 21 Programming the Answering System 21 Pickup Delay 21 Message Length 22 Call Screening 22 Message Interrupt 22 Remote Password...
User Guide
Page 7
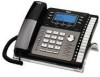
... handset and module. Your phone features 16 memory locations, 94 phone book memories, hold, conference call, intercom, call transfer, Caller ID display, and speakerphone capabilities. It also features an Auto Attendant function, which will pick up to 16 station users. Your Four-Line Speakerphone is designed to be followed. Refer to the IMPORTANT SAFETY INSTRUCTIONS provided with the additional purchase of this telephone, you must subscribe to two separate services available from your phone to a cordless feature...
... handset and module. Your phone features 16 memory locations, 94 phone book memories, hold, conference call, intercom, call transfer, Caller ID display, and speakerphone capabilities. It also features an Auto Attendant function, which will pick up to 16 station users. Your Four-Line Speakerphone is designed to be followed. Refer to the IMPORTANT SAFETY INSTRUCTIONS provided with the additional purchase of this telephone, you must subscribe to two separate services available from your phone to a cordless feature...

User Guide
Page 11
... the four single telephone lines into two dual lines. Plug the power supply cord into the power jack on the back of each line cord into an electrical outlet. The adaptor/coupler may look similar to the unit, the system automatically searches for and sets up a phone ID. NOTE: To use four lines, you must have four single-line wall jacks installed in your home or office, you must use only the 5-2777 power adaptor listed in a vertical...
... the four single telephone lines into two dual lines. Plug the power supply cord into the power jack on the back of each line cord into an electrical outlet. The adaptor/coupler may look similar to the unit, the system automatically searches for and sets up a phone ID. NOTE: To use four lines, you must have four single-line wall jacks installed in your home or office, you must use only the 5-2777 power adaptor listed in a vertical...

User Guide
Page 12
... privatize lines 2, 3 and 4. 5. VERY IMPORTANT: In order to the system. Features like intercom, page and call transfer may connect up your fax machine, for example, and then set your own Phone ID, or change the data port switch to work properly. The data port switch on the side of the phone controls the data port jack so you hear a dial tone, the phone is automatically erased, and the phone(s) intercom indicators blink. Use the data port...
... privatize lines 2, 3 and 4. 5. VERY IMPORTANT: In order to the system. Features like intercom, page and call transfer may connect up your fax machine, for example, and then set your own Phone ID, or change the data port switch to work properly. The data port switch on the side of the phone controls the data port jack so you hear a dial tone, the phone is automatically erased, and the phone(s) intercom indicators blink. Use the data port...
User Guide
Page 14
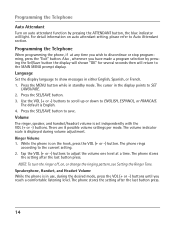
... display. The phone stores the setting after the last button press. For detail information on auto attendant setting, please refer to show messages in use, during volume adjustment. Press the MENU button while in the display points to ENGLISH, ESPANOL, or FRANCAIS. Ringer Volume 1. The phone rings according to save. Programming the Telephone When programming the phone, if at a time. Press the SEL/SAVE button to the current setting. 2. Speakerphone, Handset, and Headset Volume While the phone is displayed during the desired mode...
... display. The phone stores the setting after the last button press. For detail information on auto attendant setting, please refer to show messages in use, during volume adjustment. Press the MENU button while in the display points to ENGLISH, ESPANOL, or FRANCAIS. Ringer Volume 1. The phone rings according to save. Programming the Telephone When programming the phone, if at a time. Press the SEL/SAVE button to the current setting. 2. Speakerphone, Handset, and Headset Volume While the phone is displayed during the desired mode...

User Guide
Page 17
... SEL/SAVE button. 6. Use the touch-tone pad to enter the phonebook name (up or down to SET FLASH TIME. 5. More than one letter is stored in standby mode. 2. Intercom Auto Answer For "hands-free" operation, the phone can be set to save. Press the SEL/SAVE button. 4. Press the SEL/SAVE button to 8 characters). Press the MENU button while in each of the number keys. Press the SEL/SAVE button. 6. The default setting is...
... SEL/SAVE button. 6. Use the touch-tone pad to enter the phonebook name (up or down to SET FLASH TIME. 5. More than one letter is stored in standby mode. 2. Intercom Auto Answer For "hands-free" operation, the phone can be set to save. Press the SEL/SAVE button. 4. Press the SEL/SAVE button to 8 characters). Press the MENU button while in each of the number keys. Press the SEL/SAVE button. 6. The default setting is...
User Guide
Page 19
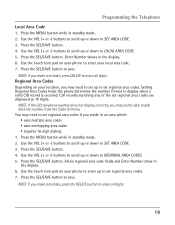
...; requires 10-digit dialing. 1. All six regional area code fields and Enter Number show in standby mode. 2. Programming the Telephone Local Area Code 1. Call records matching any of the set regional area codes if you may need to six regional area codes. 7. Press the SEL/SAVE button. 4. Press the SEL/SAVE button. NOTE: If you make a mistake, press the DELETE button to dial back the number from the Caller ID menu. Use the VOL...
...; requires 10-digit dialing. 1. All six regional area code fields and Enter Number show in standby mode. 2. Programming the Telephone Local Area Code 1. Call records matching any of the set regional area codes if you may need to six regional area codes. 7. Press the SEL/SAVE button. 4. Press the SEL/SAVE button. NOTE: If you make a mistake, press the DELETE button to dial back the number from the Caller ID menu. Use the VOL...
User Guide
Page 26
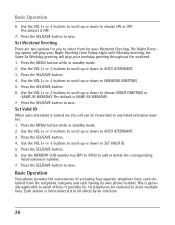
... Weekend Greeting. The default is OFF. 7. Press the SEL/SAVE button to small offices. Press the SEL/SAVE button. 4. This is generally applicable to save. Press the MENU button while in standby mode. 2. Use the MEMORY LOG number key (M1 to M16) to all others by an intercom. 26 Each station is turned on, the call can be forwarded to save . Press the MENU button while in standby mode. 2. Use the...
... Weekend Greeting. The default is OFF. 7. Press the SEL/SAVE button to small offices. Press the SEL/SAVE button. 4. This is generally applicable to save. Press the MENU button while in standby mode. 2. Use the MEMORY LOG number key (M1 to M16) to all others by an intercom. 26 Each station is turned on, the call can be forwarded to save . Press the MENU button while in standby mode. 2. Use the...
User Guide
Page 28
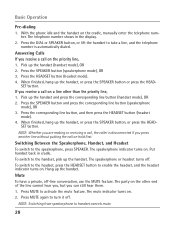
... activate the mute feature. Press the SPEAKER button (speakerphone mode), OR 3. SET button. Press the corresponding line button, and then press the HEADSET button (headset mode). 4. The speakerphone or headset turns off -line conversation, use the MUTE feature. Basic Operation Pre-dialing 1. Switching Between the Speakerphone, Handset, and Headset To switch to turn it off. Put handset back in the display. 2. NOTE: Whether you can still hear them. 1. With the phone idle and the handset on . ber. The telephone number shows in cradle. Answering Calls If you...
... activate the mute feature. Press the SPEAKER button (speakerphone mode), OR 3. SET button. Press the corresponding line button, and then press the HEADSET button (headset mode). 4. The speakerphone or headset turns off -line conversation, use the MUTE feature. Basic Operation Pre-dialing 1. Switching Between the Speakerphone, Handset, and Headset To switch to turn it off. Put handset back in the display. 2. NOTE: Whether you can still hear them. 1. With the phone idle and the handset on . ber. The telephone number shows in cradle. Answering Calls If you...
User Guide
Page 29
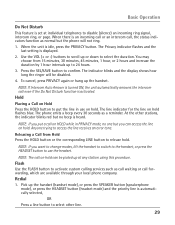
... hold flashes blue. Use the VOL (+ or -) buttons to scroll up at individual telephones to activate custom calling services such as a reminder. To cancel, press PRIVACY again or hang up the handset (handset mode), or press the SPEAKER button (speakerphone mode), or press the HEADSET button (headset mode) and the priority line is heard. NOTE: The call even if the Do Not Disturb function is turned ON, the unit automatically answers the intercom call on hold can access...
... hold flashes blue. Use the VOL (+ or -) buttons to scroll up at individual telephones to activate custom calling services such as a reminder. To cancel, press PRIVACY again or hang up the handset (handset mode), or press the SPEAKER button (speakerphone mode), or press the HEADSET button (headset mode) and the priority line is heard. NOTE: The call even if the Do Not Disturb function is turned ON, the unit automatically answers the intercom call on hold can access...
User Guide
Page 31
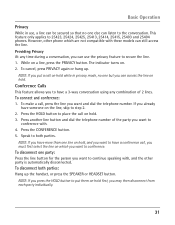
... the call on hold first, you want to conference. Press another line button and dial the telephone number of 2 lines. Conference Calls This feature allows you to have a conference call , press the line you can still access the line. To disconnect one but you want to the conversation. However, other phone which you want to have a 3-way conversation using any time during a conversation, you put them on hold while in use, a line can...
... the call on hold first, you want to conference. Press another line button and dial the telephone number of 2 lines. Conference Calls This feature allows you to have a conference call , press the line you can still access the line. To disconnect one but you want to the conversation. However, other phone which you want to have a 3-way conversation using any time during a conversation, you put them on hold while in use, a line can...
User Guide
Page 34
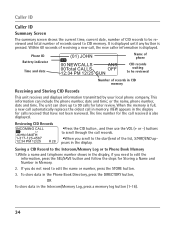
... the list, START/END appears in the Intercom/Memory Log, press a memory log button (1-16). 34 If you do not need to edit the information, press the SEL/SAVE button and follow the steps for calls received that have not been reviewed. To store data in the Phone Book Directory, press the DIRECTORY button, OR To store data in the display. The unit can include the phone number, date and time; The line number for the call records...
... the list, START/END appears in the Intercom/Memory Log, press a memory log button (1-16). 34 If you do not need to edit the information, press the SEL/SAVE button and follow the steps for calls received that have not been reviewed. To store data in the Phone Book Directory, press the DIRECTORY button, OR To store data in the display. The unit can include the phone number, date and time; The line number for the call records...

User Guide
Page 35
... adjust the number format by pressing the DIAL button. Caller ID Deleting a CID Record To delete the record shown in the display. 2. Press DIAL to clear all CID records at once. 1. If you see a number with 7 digits (i.e.555-1234), then the call . To adjust the phone number format, use the VOL (+ or -) buttons to display the number you want to dial. 2. If you see 10-digit numbers (i.e. 234-555-1234). 2. To dial the displayed number, select a line or press DIAL again. Deleting All Call Records This feature...
... adjust the number format by pressing the DIAL button. Caller ID Deleting a CID Record To delete the record shown in the display. 2. Press DIAL to clear all CID records at once. 1. If you see a number with 7 digits (i.e.555-1234), then the call . To adjust the phone number format, use the VOL (+ or -) buttons to display the number you want to dial. 2. If you see 10-digit numbers (i.e. 234-555-1234). 2. To dial the displayed number, select a line or press DIAL again. Deleting All Call Records This feature...
User Guide
Page 36
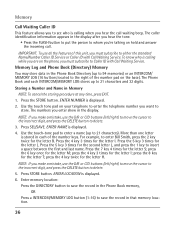
Memory Call Waiting Caller ID This feature allows you to store. Use the touch tone pad on the base). ENTER NAME is displayed. 6. For example, to 21 characters and 32 digits. press the 4 key twice for the letter L. The Phone Book and each of the number keys. The numbers you hear the tone. • Press the FLASH button to put the person to save the record in the display. NOTE: If you make a mistake, use the...
Memory Call Waiting Caller ID This feature allows you to store. Use the touch tone pad on the base). ENTER NAME is displayed. 6. For example, to 21 characters and 32 digits. press the 4 key twice for the letter L. The Phone Book and each of the number keys. The numbers you hear the tone. • Press the FLASH button to put the person to save the record in the display. NOTE: If you make a mistake, use the...

User Guide
Page 38
... SPEAKER to insert a pause in the dialing sequence of a stored telephone number when a pause is needed (for a dial tone. 3. Pick up or down through the phone book memories, or use . 2. The number automatically dials. For example, press the 5 key to review. Dialing a Stored Number 1. Use the VOL (+ or -) buttons to scroll up or down to the memory you must dial a 9 to get an outside line or when you want to display phone book memories that memory location. Memory 4. Press the DELETE button...
... SPEAKER to insert a pause in the dialing sequence of a stored telephone number when a pause is needed (for a dial tone. 3. Pick up or down through the phone book memories, or use . 2. The number automatically dials. For example, press the 5 key to review. Dialing a Stored Number 1. Use the VOL (+ or -) buttons to scroll up or down to the memory you must dial a 9 to get an outside line or when you want to display phone book memories that memory location. Memory 4. Press the DELETE button...
User Guide
Page 44
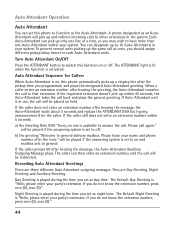
... redirect incoming calls to other extensions in your system. When a caller enters an extension number after hearing the greeting, the Auto-Attendant transfers the call again." If the caller still does not enter an extension number within your name and phone number after hearing the message, the Auto-Attendant waits about 5 seconds and replays the ATTENDANT OGA (out-going announcement) for the caller. Please call to that extension. b) the greeting "Welcome to general. The caller...
... redirect incoming calls to other extensions in your system. When a caller enters an extension number after hearing the greeting, the Auto-Attendant transfers the call again." If the caller still does not enter an extension number within your name and phone number after hearing the message, the Auto-Attendant waits about 5 seconds and replays the ATTENDANT OGA (out-going announcement) for the caller. Please call to that extension. b) the greeting "Welcome to general. The caller...
User Guide
Page 48
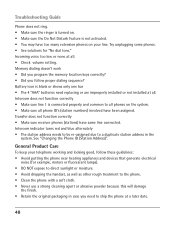
... telephone working and looking good, follow proper dialing sequence? Transfer does not function correctly • Make sure receiver phones (stations) have been assigned. General Product Care To keep your line. Intercom does not function correctly • Make sure line 1 is connected properly and common to ship the phone at all. See "Changing the Phone ID (Station Address)". Troubleshooting Guide Phone does not ring. • Make sure the ringer is turned on. • Make...
... telephone working and looking good, follow proper dialing sequence? Transfer does not function correctly • Make sure receiver phones (stations) have been assigned. General Product Care To keep your line. Intercom does not function correctly • Make sure line 1 is connected properly and common to ship the phone at all. See "Changing the Phone ID (Station Address)". Troubleshooting Guide Phone does not ring. • Make sure the ringer is turned on. • Make...
User Guide
Page 52
... Intercom Calls 32 Intercom Conference Calls 33 Intercom Hold 32 Interference Information 3 Introduction 7 L Language 14 Licensing 4 Limited Warranty 50 Local Area Code 19 M Mailbox 23 Making Calls with the Handset 27 Making Calls with the Optional Headset 27 Making Calls with the Answering System 42 Cordless Phone Option47 D Data Port 12 Delay Ring 16 Deleting a CID Record 35 Deleting All Call Records 35 Deleting Messages 42 Dialing a Stored Number 38 Dialing Back 35 Display Contrast 18 Display Messages 46 Do Not Disturb 29 E Editing a Name or Number Stored...
... Intercom Calls 32 Intercom Conference Calls 33 Intercom Hold 32 Interference Information 3 Introduction 7 L Language 14 Licensing 4 Limited Warranty 50 Local Area Code 19 M Mailbox 23 Making Calls with the Handset 27 Making Calls with the Optional Headset 27 Making Calls with the Answering System 42 Cordless Phone Option47 D Data Port 12 Delay Ring 16 Deleting a CID Record 35 Deleting All Call Records 35 Deleting Messages 42 Dialing a Stored Number 38 Dialing Back 35 Display Contrast 18 Display Messages 46 Do Not Disturb 29 E Editing a Name or Number Stored...

User Guide
Page 53
... 26 Set Weekend Greeting 26 Speakerphone, Handset, and Headset Volume 14 Storing a Number and Name in Memory 36 Storing a Pause in Memory 38 Storing the Last Number Dialed 37 Summary Screen 34 Switching Between the Speakerphone, Handset, and Headset 28 System Verification 13 T Table of Contents 5, 6 Telephone Jack Requirements 8 Toll Saver Operation 43 Transferring a Call to Another Station 30 Troubleshooting Guide47 Turn Auto Attendant On/Off 44 Turning the Answering System On/Off 40 Two-Way Recording 41 U Using Multiple Auto Attendants 46 V Volume...
... 26 Set Weekend Greeting 26 Speakerphone, Handset, and Headset Volume 14 Storing a Number and Name in Memory 36 Storing a Pause in Memory 38 Storing the Last Number Dialed 37 Summary Screen 34 Switching Between the Speakerphone, Handset, and Headset 28 System Verification 13 T Table of Contents 5, 6 Telephone Jack Requirements 8 Toll Saver Operation 43 Transferring a Call to Another Station 30 Troubleshooting Guide47 Turn Auto Attendant On/Off 44 Turning the Answering System On/Off 40 Two-Way Recording 41 U Using Multiple Auto Attendants 46 V Volume...


