User Guide
Page 5
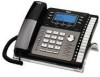
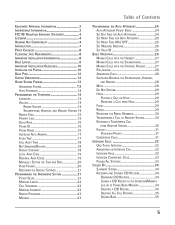
...Important Installation Information 8 Base Layout 9 Important Installation Guidelines 10 Installing the Phone 10 Data Port 12 System Verification 13 Other System Phones 13 Answering System 13 Auto Attendant 14 Programming the Telephone 14 Language 14 Volume 14 Ringer Volume 14 ...Manually Setting the Time and Date 20 Hour Format 20 Restoring the Default Settings 21 Programming the Answering System 21 Pickup Delay 21 Message Length 22 Call Screening 22 Message Interrupt 22 Remote Password 23 Mailbox 23 Table of Contents Programming the Auto Attendant 24 Auto Attendant...
...Important Installation Information 8 Base Layout 9 Important Installation Guidelines 10 Installing the Phone 10 Data Port 12 System Verification 13 Other System Phones 13 Answering System 13 Auto Attendant 14 Programming the Telephone 14 Language 14 Volume 14 Ringer Volume 14 ...Manually Setting the Time and Date 20 Hour Format 20 Restoring the Default Settings 21 Programming the Answering System 21 Pickup Delay 21 Message Length 22 Call Screening 22 Message Interrupt 22 Remote Password 23 Mailbox 23 Table of Contents Programming the Auto Attendant 24 Auto Attendant...
User Guide
Page 16
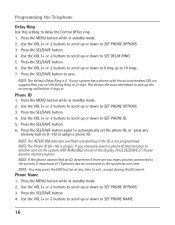
NOTE: The default Delay Ring is not programmed. If your system has a phone with the auto attendant ON, we suggest that belongs to another memory button. Use the VOL (+ or -) buttons to scroll up or down to SET PHONE OPTIONS. 3. Press the SEL/SAVE button. 4. Press the SEL/SAVE button. 6. Press the SEL... up or down to 0 ring up or down to exit , except during the ID search. If you manually select a phone ID that you set the phone ID, or press any time to SET PHONE OPTIONS. 3. NOTE: You may press the EXIT button at one time. Press the MENU button while in ...
NOTE: The default Delay Ring is not programmed. If your system has a phone with the auto attendant ON, we suggest that belongs to another memory button. Use the VOL (+ or -) buttons to scroll up or down to SET PHONE OPTIONS. 3. Press the SEL/SAVE button. 4. Press the SEL/SAVE button. 6. Press the SEL... up or down to 0 ring up or down to exit , except during the ID search. If you manually select a phone ID that you set the phone ID, or press any time to SET PHONE OPTIONS. 3. NOTE: You may press the EXIT button at one time. Press the MENU button while in ...
User Guide
Page 52
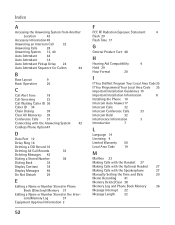
...Auto Attendant 14 Auto Attendant Pickup Delay 24 Auto Attendant Sequence for Callers 44 B Base Layout 9 Basic Operation 26 C Call Alert Tone 18 Call Screening 22 Call Waiting Caller ID 36 Caller ID 34 Chain Dialing 39 Clear All Memories 39 Conference Calls 31 Connecting with the Speakerphone 27 Manually...Programmed Your Local Area Code 35 Important Installation Guidelines 10 Important Installation Information 8 Installing the Phone 10 Intercom Auto Answer17 Intercom Calls 32 Intercom Conference Calls 33 Intercom Hold 32 Interference Information 3 Introduction ...
...Auto Attendant 14 Auto Attendant Pickup Delay 24 Auto Attendant Sequence for Callers 44 B Base Layout 9 Basic Operation 26 C Call Alert Tone 18 Call Screening 22 Call Waiting Caller ID 36 Caller ID 34 Chain Dialing 39 Clear All Memories 39 Conference Calls 31 Connecting with the Speakerphone 27 Manually...Programmed Your Local Area Code 35 Important Installation Guidelines 10 Important Installation Information 8 Installing the Phone 10 Intercom Auto Answer17 Intercom Calls 32 Intercom Conference Calls 33 Intercom Hold 32 Interference Information 3 Introduction ...


