User Guide
Page 5
... Compatibility 4 Introduction 7 Parts Checklist 8 Telephone Jack Requirements 8 Important Installation Information 8 Base Layout 9 Important Installation Guidelines 10 Installing the Phone 10 Data Port 12 System Verification 13 Other System Phones 13 Answering System 13 Auto Attendant 14 Programming the Telephone 14 Language 14 Volume 14 Ringer Volume 14 Speakerphone, Handset, and Headset Volume 14 Ringer...
... Compatibility 4 Introduction 7 Parts Checklist 8 Telephone Jack Requirements 8 Important Installation Information 8 Base Layout 9 Important Installation Guidelines 10 Installing the Phone 10 Data Port 12 System Verification 13 Other System Phones 13 Answering System 13 Auto Attendant 14 Programming the Telephone 14 Language 14 Volume 14 Ringer Volume 14 Speakerphone, Handset, and Headset Volume 14 Ringer...
User Guide
Page 6
...Not Program Your Local Area Code.35 Call Waiting Caller ID 36 Memory Log and Phone Book Memory 36 Storing a Number and Name in Memory........36 Reviewing Phone Book Memory 37 Reviewing the Intercom/Memory Log 37 Editing a Name or Number ...Toll Saver Operation 43 Auto Attendant 44 Turn Auto Attendant On/Off 44 Auto Attendant Sequence for Callers 44 Recording Auto Attendant Greetings 44 Playback and Erasing Auto Attendant Greetings 45 Using Multiple Auto Attendants 46 Display Messages 46 Operation By Battery 47 Operation without Power 47 Cordless Phone Option 47 Troubleshooting ...
...Not Program Your Local Area Code.35 Call Waiting Caller ID 36 Memory Log and Phone Book Memory 36 Storing a Number and Name in Memory........36 Reviewing Phone Book Memory 37 Reviewing the Intercom/Memory Log 37 Editing a Name or Number ...Toll Saver Operation 43 Auto Attendant 44 Turn Auto Attendant On/Off 44 Auto Attendant Sequence for Callers 44 Recording Auto Attendant Greetings 44 Playback and Erasing Auto Attendant Greetings 45 Using Multiple Auto Attendants 46 Display Messages 46 Operation By Battery 47 Operation without Power 47 Cordless Phone Option 47 Troubleshooting ...
User Guide
Page 7
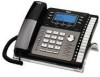
It also features an Auto Attendant function, which will pick up to 16 station users. It is calling while you are basic safety instructions that should always be simple to use . Your phone features 16 memory locations, 94 phone book memories, hold, conference call, intercom, call transfer, Caller ID ... to read this product and save them for home-office use , however, you must subscribe to two separate services available from your phone to a cordless feature with the additional purchase of the H5401 accessory handset and module. Your Four-Line Speakerphone is designed to be ...
It also features an Auto Attendant function, which will pick up to 16 station users. It is calling while you are basic safety instructions that should always be simple to use . Your phone features 16 memory locations, 94 phone book memories, hold, conference call, intercom, call transfer, Caller ID ... to read this product and save them for home-office use , however, you must subscribe to two separate services available from your phone to a cordless feature with the additional purchase of the H5401 accessory handset and module. Your Four-Line Speakerphone is designed to be ...
User Guide
Page 14
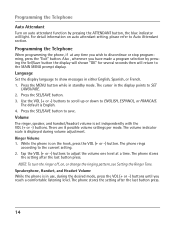
... you reach a comfortable listening level. Use the VOL (+ or -) buttons to scroll up or down to Auto Attendant section. There are 8 possible volume settings per mode. While the phone is set independently with the VOL (+ or -) buttons. NOTE: To turn the ringer off, on, or...SAVE button to the current setting. 2. Programming the Telephone Auto Attendant Turn on auto attendant function by pressing the Sel/Save button the display will shown "OK" for several seconds then will light. Ringer Volume 1. The phone stores the setting after the last button press. 14 Speakerphone,...
... you reach a comfortable listening level. Use the VOL (+ or -) buttons to scroll up or down to Auto Attendant section. There are 8 possible volume settings per mode. While the phone is set independently with the VOL (+ or -) buttons. NOTE: To turn the ringer off, on, or...SAVE button to the current setting. 2. Programming the Telephone Auto Attendant Turn on auto attendant function by pressing the Sel/Save button the display will shown "OK" for several seconds then will light. Ringer Volume 1. The phone stores the setting after the last button press. 14 Speakerphone,...
User Guide
Page 16
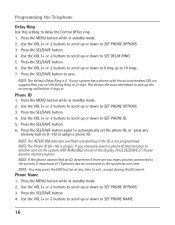
If your system has a phone with the auto attendant ON, we suggest that belongs to another memory button. NOTE: The INTERCOM indicator will flash red and blue if the ID is unique. NOTE: If the phone cannot find an ID, determine if there are too many phones connected to SET PHONE OPTIONS. 3. Use the VOL ... 1. Press the MENU button while in . Press the SEL/SAVE button to SET DELAY RING. 5. This allows the auto attendant to 2 rings. A maximum of 16 phones can be connected in standby mode. 2. NOTE: You may press the EXIT button at one time. Use the VOL (+ or -) buttons to ...
If your system has a phone with the auto attendant ON, we suggest that belongs to another memory button. NOTE: The INTERCOM indicator will flash red and blue if the ID is unique. NOTE: If the phone cannot find an ID, determine if there are too many phones connected to SET PHONE OPTIONS. 3. Use the VOL ... 1. Press the MENU button while in . Press the SEL/SAVE button to SET DELAY RING. 5. This allows the auto attendant to 2 rings. A maximum of 16 phones can be connected in standby mode. 2. NOTE: You may press the EXIT button at one time. Use the VOL (+ or -) buttons to ...

User Guide
Page 24
... feature, press the ATTENDANT button on the phone ID number. Press the MENU button while in standby mode. 2. Use the VOL (+ or -) buttons to scroll up or down to 15, or 16, the default pickup delay time is picked up by the Auto Attendant. 1. Press the ... input. Use the VOL (+ or -) buttons to scroll up or down to AUTO ATTENDANT. 3. Press the SEL/SAVE button, and the curser moves to save. Programming the Auto Attendant Programming the Auto Attendant Auto Attendant will light when Auto Attendant is activated. After you do not know the extension number, press zero (0), zero...
... feature, press the ATTENDANT button on the phone ID number. Press the MENU button while in standby mode. 2. Use the VOL (+ or -) buttons to scroll up or down to 15, or 16, the default pickup delay time is picked up by the Auto Attendant. 1. Press the ... input. Use the VOL (+ or -) buttons to scroll up or down to AUTO ATTENDANT. 3. Press the SEL/SAVE button, and the curser moves to save. Programming the Auto Attendant Programming the Auto Attendant Auto Attendant will light when Auto Attendant is activated. After you do not know the extension number, press zero (0), zero...

User Guide
Page 25
...to the minutes field. 8. Press the SEL/SAVE button to save , and the curser moves to save . 10. Set Night Time for Auto Attendant The Auto-Attendant Night outgoing message will be set accordingly with the selected hour. 7. Press the SEL/SAVE button, and the curser moves to save . 10...will be set accordingly with the selected hour. 7. Use the VOL (+ or -) buttons to scroll up or down to select the hour. Programming the Auto Attendant 6. Use the VOL (+ or -) buttons to scroll up or down to SET NIGHT TIME. 5. The pre-recorded announcement is 5:00 PM. 6....
...to the minutes field. 8. Press the SEL/SAVE button to save , and the curser moves to save . 10. Set Night Time for Auto Attendant The Auto-Attendant Night outgoing message will be set accordingly with the selected hour. 7. Press the SEL/SAVE button, and the curser moves to save . 10...will be set accordingly with the selected hour. 7. Use the VOL (+ or -) buttons to scroll up or down to select the hour. Programming the Auto Attendant 6. Use the VOL (+ or -) buttons to scroll up or down to SET NIGHT TIME. 5. The pre-recorded announcement is 5:00 PM. 6....
User Guide
Page 26
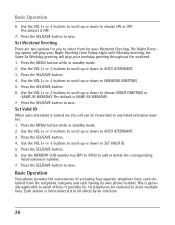
... the corresponding listed extension number. 7. Set Weekend Greeting There are two options for you to select from for 16 telephones (or stations) to AUTO ATTENDANT. 3. Use the VOL (+ or -) buttons to scroll up or down to save . Use the MEMORY LOG number key (M1 to M16...the telephone company and each having its own phone number. Press the SEL/SAVE button. 4. Press the SEL/SAVE button. 6. Use the VOL (+ or -) buttons to scroll up or down to WEEKEND GREETING. 5. Set Valid ID When auto attendant is interconnected to AUTO ATTENDANT. 3. Press the SEL/SAVE button. 4....
... the corresponding listed extension number. 7. Set Weekend Greeting There are two options for you to select from for 16 telephones (or stations) to AUTO ATTENDANT. 3. Use the VOL (+ or -) buttons to scroll up or down to save . Use the MEMORY LOG number key (M1 to M16...the telephone company and each having its own phone number. Press the SEL/SAVE button. 4. Press the SEL/SAVE button. 6. Use the VOL (+ or -) buttons to scroll up or down to WEEKEND GREETING. 5. Set Valid ID When auto attendant is interconnected to AUTO ATTENDANT. 3. Press the SEL/SAVE button. 4....
User Guide
Page 44
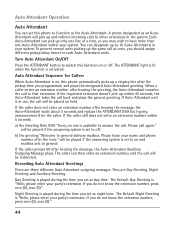
... Greeting is on or off . will pick up a ringing line after hearing the greeting, the Auto-Attendant transfers the call back and plays the general greeting. Auto Attendant Operation Auto Attendant You can set this phone to other extensions in the system. A phone designated as an AutoAttendant will be played if the answering system is available to switch...
... Greeting is on or off . will pick up a ringing line after hearing the greeting, the Auto-Attendant transfers the call back and plays the general greeting. Auto Attendant Operation Auto Attendant You can set this phone to other extensions in the system. A phone designated as an AutoAttendant will be played if the answering system is available to switch...
User Guide
Page 45
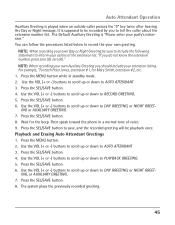
..."If you should include your party's extension." Press the SEL/SAVE button. 4. Press the SEL/SAVE button to PLAYBACK GREETING. 5. Playback and Erasing Auto Attendant Greetings 1. Use the VOL (+ or -) buttons to scroll up or down to save, and the recorded greeting will be sure to include the following...or -) buttons to scroll up or down to DAY GREETING, or NIGHT GREET- Wait for Mary Smith, extension #2, etc. 1. Then speak toward the phone in standby mode. 2. Use the VOL (+ or -) buttons to scroll up or down to DAY GREETING, or NIGHT GREET- Press the SEL/SAVE button. ...
..."If you should include your party's extension." Press the SEL/SAVE button. 4. Press the SEL/SAVE button to PLAYBACK GREETING. 5. Playback and Erasing Auto Attendant Greetings 1. Use the VOL (+ or -) buttons to scroll up or down to save, and the recorded greeting will be sure to include the following...or -) buttons to scroll up or down to DAY GREETING, or NIGHT GREET- Wait for Mary Smith, extension #2, etc. 1. Then speak toward the phone in standby mode. 2. Use the VOL (+ or -) buttons to scroll up or down to DAY GREETING, or NIGHT GREET- Press the SEL/SAVE button. ...
User Guide
Page 46
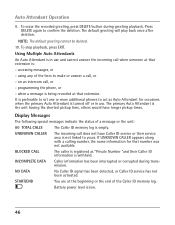
...has not been activated. START/END You are at that extension is preferable to set one or more additional phones to yours. Auto Attendant Operation 9. The primary Auto Attendant is the unit having the shortest pickup time, others would have Caller ID service or their service area ...To erase the recorded greeting, press DELETE button during transmission. NOTE: The default greeting cannot be deleted. 10. Using Multiple Auto Attendants An Auto Attendant is turned off or in use . Display Messages The following special messages indicate the status of the Caller ID memory log. ...
...has not been activated. START/END You are at that extension is preferable to set one or more additional phones to yours. Auto Attendant Operation 9. The primary Auto Attendant is the unit having the shortest pickup time, others would have Caller ID service or their service area ...To erase the recorded greeting, press DELETE button during transmission. NOTE: The default greeting cannot be deleted. 10. Using Multiple Auto Attendants An Auto Attendant is turned off or in use . Display Messages The following special messages indicate the status of the Caller ID memory log. ...
User Guide
Page 52
...Your Local Area Code 35 Important Installation Guidelines 10 Important Installation Information 8 Installing the Phone 10 Intercom Auto Answer17 Intercom Calls 32 Intercom Conference Calls 33 Intercom Hold 32 Interference Information 3 ...Phone Book (Directory) Memory 37 Editing a Name or Number Stored in the Inter- Index A Accessing the Answering System from Another Location 42 Accessory Information 49 Answering an Intercom Call 32 Answering Calls 28 Answering System 13, 40 Auto Attendant 44 Auto Attendant 14 Auto Attendant Pickup Delay 24 Auto Attendant...
...Your Local Area Code 35 Important Installation Guidelines 10 Important Installation Information 8 Installing the Phone 10 Intercom Auto Answer17 Intercom Calls 32 Intercom Conference Calls 33 Intercom Hold 32 Interference Information 3 ...Phone Book (Directory) Memory 37 Editing a Name or Number Stored in the Inter- Index A Accessing the Answering System from Another Location 42 Accessory Information 49 Answering an Intercom Call 32 Answering Calls 28 Answering System 13, 40 Auto Attendant 44 Auto Attendant 14 Auto Attendant Pickup Delay 24 Auto Attendant...

User Guide
Page 53
...By Battery 47 Operation without Power 47 Other System Phones 13 P Paging All Stations 33 Parts Checklist 8 Phone ID 16 Phone Name 16 Pickup Delay 21 Placing a Call on Hold 29 Playback and Erasing a Greeting 40 Playback and Erasing Auto Attendant Greetings 45 Pre-dialing 28 Priority Line 15 ...Tone 15 Ringer Volume 14 S Saving a CID Record to the Intercom/Memory Log or to Phone Book Memory 34 Warranty Assistance 49 Set Day Time for Auto Attendant 24 Set Night Time for Auto Attendant 25 Set Night Time ON / OFF 25 Set Valid ID 26 Set Weekend Greeting 26 Speakerphone...
...By Battery 47 Operation without Power 47 Other System Phones 13 P Paging All Stations 33 Parts Checklist 8 Phone ID 16 Phone Name 16 Pickup Delay 21 Placing a Call on Hold 29 Playback and Erasing a Greeting 40 Playback and Erasing Auto Attendant Greetings 45 Pre-dialing 28 Priority Line 15 ...Tone 15 Ringer Volume 14 S Saving a CID Record to the Intercom/Memory Log or to Phone Book Memory 34 Warranty Assistance 49 Set Day Time for Auto Attendant 24 Set Night Time for Auto Attendant 25 Set Night Time ON / OFF 25 Set Valid ID 26 Set Weekend Greeting 26 Speakerphone...


