User Guide
Page 5
... 14 Language 14 Volume 14 Ringer Volume 14 Speakerphone, Handset, and Headset Volume 14 Ringer Tone 15 Priority Line 15 Delay Ring 16 Phone ID 16 Phone Name 16 Intercom Auto Answer 17 Flash Time 17 Call Alert Tone 18 No Unknown/Blocked 18 Display Contrast 18 Local Area Code 19... Regional Area Codes 19 Manually Setting the Time and Date 20 Hour Format 20 Restoring the Default Settings 21 Programming the Answering System 21 Pickup ...
... 14 Language 14 Volume 14 Ringer Volume 14 Speakerphone, Handset, and Headset Volume 14 Ringer Tone 15 Priority Line 15 Delay Ring 16 Phone ID 16 Phone Name 16 Intercom Auto Answer 17 Flash Time 17 Call Alert Tone 18 No Unknown/Blocked 18 Display Contrast 18 Local Area Code 19... Regional Area Codes 19 Manually Setting the Time and Date 20 Hour Format 20 Restoring the Default Settings 21 Programming the Answering System 21 Pickup ...
User Guide
Page 16
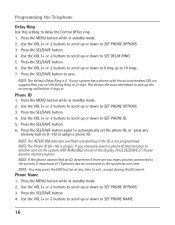
... 1. Use the VOL (+ or -) buttons to scroll up or down to 0 ring up or down to 2 rings. Phone ID 1. Use the VOL (+ or -) buttons to scroll up to SET PHONE ID. 5. NOTE: The Phone ID (01-16) is 0. Press the MENU button while in standby mode. 2. Use the VOL (+ or -) buttons to scroll... flash red and blue if the ID is not programmed. If you manually select a phone ID that you set the phone ID, or press any time to assign a phone ID. Use the VOL (+ or -) buttons to scroll up or down to SET PHONE NAME. 16 Use the VOL (+ or -) buttons to scroll up or down...
... 1. Use the VOL (+ or -) buttons to scroll up or down to 0 ring up or down to 2 rings. Phone ID 1. Use the VOL (+ or -) buttons to scroll up to SET PHONE ID. 5. NOTE: The Phone ID (01-16) is 0. Press the MENU button while in standby mode. 2. Use the VOL (+ or -) buttons to scroll... flash red and blue if the ID is not programmed. If you manually select a phone ID that you set the phone ID, or press any time to assign a phone ID. Use the VOL (+ or -) buttons to scroll up or down to SET PHONE NAME. 16 Use the VOL (+ or -) buttons to scroll up or down...

User Guide
Page 20
...Press the SEL/SAVE button, and the cursor moves to the hour field. 6. NOTE: You may set this phone to SET TIME & DATE. 3. Press the SEL/SAVE button. 4. Use the VOL (+ or -) buttons ... minute field. 8. Press the SEL/SAVE button, and the cursor moves to select the minutes. 9. To manually reset the time and date, follow the steps below. 1. NOTE: AM or PM will be set when you... only want to SET TIME & DATE. 3. Programming the Telephone Manually Setting the Time and Date The time and date is automatically set accordingly with selected hour. 7. Use the...
...Press the SEL/SAVE button, and the cursor moves to the hour field. 6. NOTE: You may set this phone to SET TIME & DATE. 3. Press the SEL/SAVE button. 4. Use the VOL (+ or -) buttons ... minute field. 8. Press the SEL/SAVE button, and the cursor moves to select the minutes. 9. To manually reset the time and date, follow the steps below. 1. NOTE: AM or PM will be set when you... only want to SET TIME & DATE. 3. Programming the Telephone Manually Setting the Time and Date The time and date is automatically set accordingly with selected hour. 7. Use the...
User Guide
Page 28
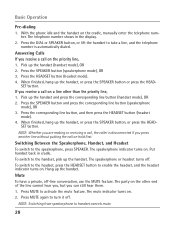
... making or receiving a call on the priority line, 1. Pick up the handset, or press the SPEAKER button or press the HEAD- With the phone idle and the handset on . 2. SET button. When finished, hang up the handset (handset mode), OR 2. Answering Calls If you receive a... call on a line other than the priority line, 1. Put handset back in the display. 2. The mute indicator turns on the cradle, manually enter the telephone num- NOTE: Switching from speakerphone to the speakerphone, press SPEAKER. Press the corresponding line button, and then press the HEADSET button...
... making or receiving a call on the priority line, 1. Pick up the handset, or press the SPEAKER button or press the HEAD- With the phone idle and the handset on . 2. SET button. When finished, hang up the handset (handset mode), OR 2. Answering Calls If you receive a... call on a line other than the priority line, 1. Put handset back in the display. 2. The mute indicator turns on the cradle, manually enter the telephone num- NOTE: Switching from speakerphone to the speakerphone, press SPEAKER. Press the corresponding line button, and then press the HEADSET button...
User Guide
Page 47
NOTE: Under battery operation mode, the RF module (optional for use the handset to manually make a call on line 1 only, 2) answer a call function and cordless handset. Make sure the line cords are connected to the same jack. In this mode, the user may: 1) use with the additional purchase of the 25425 ... the hook switch pops up when the handset is off. • Disconnect the phone from the wall jack and connect another phone to the phone and the wall jack. Troubleshooting Guide Operation By Battery If the power cord is not plugged into the unit and no dial tone in this mode, the...
NOTE: Under battery operation mode, the RF module (optional for use the handset to manually make a call on line 1 only, 2) answer a call function and cordless handset. Make sure the line cords are connected to the same jack. In this mode, the user may: 1) use with the additional purchase of the 25425 ... the hook switch pops up when the handset is off. • Disconnect the phone from the wall jack and connect another phone to the phone and the wall jack. Troubleshooting Guide Operation By Battery If the power cord is not plugged into the unit and no dial tone in this mode, the...
User Guide
Page 52
...39 Clear All Memories 39 Conference Calls 31 Connecting with the Speakerphone 27 Manually Setting the Time and Date 20 Memo Recording 41 Memory Delete/Clear 38 Memory Log and Phone Book Memory 36 Message Interrupt 22 Message Length 22 com/Memory Log 37...Program Your Local Area Code35 If You Programmed Your Local Area Code 35 Important Installation Guidelines 10 Important Installation Information 8 Installing the Phone 10 Intercom Auto Answer17 Intercom Calls 32 Intercom Conference Calls 33 Intercom Hold 32 Interference Information 3 Introduction 7 L Language 14 ...
...39 Clear All Memories 39 Conference Calls 31 Connecting with the Speakerphone 27 Manually Setting the Time and Date 20 Memo Recording 41 Memory Delete/Clear 38 Memory Log and Phone Book Memory 36 Message Interrupt 22 Message Length 22 com/Memory Log 37...Program Your Local Area Code35 If You Programmed Your Local Area Code 35 Important Installation Guidelines 10 Important Installation Information 8 Installing the Phone 10 Intercom Auto Answer17 Intercom Calls 32 Intercom Conference Calls 33 Intercom Hold 32 Interference Information 3 Introduction 7 L Language 14 ...


