User Guide
Page 5
... Base Layout 9 Important Installation Guidelines 10 Installing the Phone 10 Data Port 12 System Verification 13 Other System Phones 13 Answering System 13 Auto Attendant 14 Programming the Telephone 14 Language 14 Volume 14 Ringer Volume 14 Speakerphone, Handset, and Headset Volume 14 Ringer Tone 15 Priority Line... 15 Delay Ring 16 Phone ID 16 Phone Name 16 Intercom Auto Answer 17 Flash Time 17 Call Alert Tone 18 No ...
... Base Layout 9 Important Installation Guidelines 10 Installing the Phone 10 Data Port 12 System Verification 13 Other System Phones 13 Answering System 13 Auto Attendant 14 Programming the Telephone 14 Language 14 Volume 14 Ringer Volume 14 Speakerphone, Handset, and Headset Volume 14 Ringer Tone 15 Priority Line... 15 Delay Ring 16 Phone ID 16 Phone Name 16 Intercom Auto Answer 17 Flash Time 17 Call Alert Tone 18 No ...
User Guide
Page 7
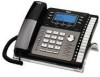
...product and save them for home-office use all of the Caller ID features of the H5401 accessory handset and module. Your phone features 16 memory locations, 94 phone book memories, hold, conference call, intercom, call transfer, Caller ID display, and speakerphone capabilities.... It is designed to be followed. Your Four-Line Speakerphone is a full-featured phone ideally suited for future reference. IMPORTANT: In order to use . Connections & Setup Introduction CAUTION: When using telephone equipment, there are...
...product and save them for home-office use all of the Caller ID features of the H5401 accessory handset and module. Your phone features 16 memory locations, 94 phone book memories, hold, conference call, intercom, call transfer, Caller ID display, and speakerphone capabilities.... It is designed to be followed. Your Four-Line Speakerphone is a full-featured phone ideally suited for future reference. IMPORTANT: In order to use . Connections & Setup Introduction CAUTION: When using telephone equipment, there are...
User Guide
Page 8
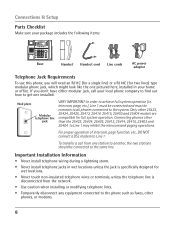
...intercom and paging operations. Connecting phones other than the 25423, 25424, 25425, 25413, 25414, 25415, 25403 and 25404 to Line 1. Connections & Setup Parts Checklist Make sure your package includes the following items: Base Handset Handset cord Line cords AC power adaptor Telephone Jack ...Requirements To use this phone, you don't have either modular jack, call from the network. • Use caution when ...
...intercom and paging operations. Connecting phones other than the 25423, 25424, 25425, 25413, 25414, 25415, 25403 and 25404 to Line 1. Connections & Setup Parts Checklist Make sure your package includes the following items: Base Handset Handset cord Line cords AC power adaptor Telephone Jack ...Requirements To use this phone, you don't have either modular jack, call from the network. • Use caution when ...

User Guide
Page 12
... who do not know that you hear a dial tone, the phone is unique. Use the data port to hook up to 16 RCA 25423, 25424 and/or 25425 phones to work properly. The data port switch on the side of the coiled handset cord to achieve full system operation (i.e. Check for a dial tone: ...Lift the handset and listen for all phones connected to line 2 or line 3, and give ...
... who do not know that you hear a dial tone, the phone is unique. Use the data port to hook up to 16 RCA 25423, 25424 and/or 25425 phones to work properly. The data port switch on the side of the coiled handset cord to achieve full system operation (i.e. Check for a dial tone: ...Lift the handset and listen for all phones connected to line 2 or line 3, and give ...
User Guide
Page 14
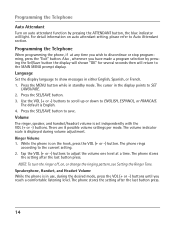
.... Programming the Telephone When programming the phone, if at a time. Volume The ringer, speaker, and handset/headset volume is English. 4. The phone rings according to Auto Attendant section. Ringer Volume 1. While the phone is in standby mode. The phone stores the setting after the last button...you reach a comfortable listening level. The default is set independently with the VOL (+ or -) buttons. Speakerphone, Handset, and Headset Volume While the phone is on , or change the ringing pattern, see Setting the Ringer Tone. For detail information on auto attendant ...
.... Programming the Telephone When programming the phone, if at a time. Volume The ringer, speaker, and handset/headset volume is English. 4. The phone rings according to Auto Attendant section. Ringer Volume 1. While the phone is in standby mode. The phone stores the setting after the last button...you reach a comfortable listening level. The default is set independently with the VOL (+ or -) buttons. Speakerphone, Handset, and Headset Volume While the phone is on , or change the ringing pattern, see Setting the Ringer Tone. For detail information on auto attendant ...
User Guide
Page 15
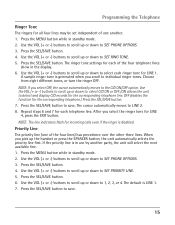
...in the display. 6. Use the VOL (+ or -) buttons to scroll up the handset or press the SPEAKER button, the unit automatically selects the priority line first. NOTE... up or down to 1, 2, 3, or 4. Press the SEL/SAVE button. 4. After you pick up or down to SET PHONE OPTIONS. 3. Use the VOL (+ or -) buttons to scroll up or down to SET PRIORITY LINE. 5. Use the VOL ...the VOL (+ or -) buttons to scroll up or down to save . 15 The cursor automatically moves to SET PHONE OPTIONS. 3. Press the SEL/SAVE button. 6. Choose from eight different tones, or turn the ringer OFF. OFF...
...in the display. 6. Use the VOL (+ or -) buttons to scroll up the handset or press the SPEAKER button, the unit automatically selects the priority line first. NOTE... up or down to 1, 2, 3, or 4. Press the SEL/SAVE button. 4. After you pick up or down to SET PHONE OPTIONS. 3. Use the VOL (+ or -) buttons to scroll up or down to SET PRIORITY LINE. 5. Use the VOL ...the VOL (+ or -) buttons to scroll up or down to save . 15 The cursor automatically moves to SET PHONE OPTIONS. 3. Press the SEL/SAVE button. 6. Choose from eight different tones, or turn the ringer OFF. OFF...
User Guide
Page 27
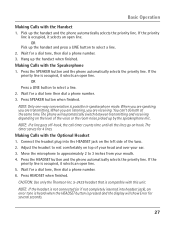
... Press HEADSET when finished. Basic Operation Making Calls with this unit. Wait for a dial tone then dial a phone number. 3. NOTE: Only one-way conversation is compatible with the Handset 1. The phone will show Error for several seconds. 27 Connect the headset plug into headset jack), an error tone is heard .... 6. OR Press a LINE button to rest comfortably on the level of the voice or the room noise picked up the handset and the phone automatically selects the priority line. NOTE: If the headset is not connected (or if not completely inserted into the HEADSET jack on ...
... Press HEADSET when finished. Basic Operation Making Calls with this unit. Wait for a dial tone then dial a phone number. 3. NOTE: Only one-way conversation is compatible with the Handset 1. The phone will show Error for several seconds. 27 Connect the headset plug into headset jack), an error tone is heard .... 6. OR Press a LINE button to rest comfortably on the level of the voice or the room noise picked up the handset and the phone automatically selects the priority line. NOTE: If the headset is not connected (or if not completely inserted into the HEADSET jack on ...
User Guide
Page 28
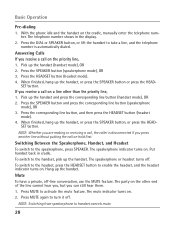
...Between the Speakerphone, Handset, and Headset To switch to the handset, pick up the handset. To switch to...Press the DIAL or SPEAKER button, or lift the handset to turn it off. Press the corresponding line button...handset (handset mode), OR 2. Press the SPEAKER button (speakerphone mode), OR 3. When finished, hang up the handset and press the corresponding line button (handset...handset, or press the SPEAKER button, or press the HEAD- Hang up the handset. SET button. Put handset... the headset, press the HEADSET button to handset cancels mute. 28 The speakerphone indicator turns...
...Between the Speakerphone, Handset, and Headset To switch to the handset, pick up the handset. To switch to...Press the DIAL or SPEAKER button, or lift the handset to turn it off. Press the corresponding line button...handset (handset mode), OR 2. Press the SPEAKER button (speakerphone mode), OR 3. When finished, hang up the handset and press the corresponding line button (handset...handset, or press the SPEAKER button, or press the HEAD- Hang up the handset. SET button. Put handset... the headset, press the HEADSET button to handset cancels mute. 28 The speakerphone indicator turns...
User Guide
Page 29
... the HEADSET button to confirm. Press the SEL/SAVE button to use on hold . To cancel, press PRIVACY again or hang up the handset (handset mode), or press the SPEAKER button (speakerphone mode), or press the HEADSET button (headset mode) and the priority line is idle, press ...to scroll up at individual telephones to 24 hours. 3. Flash Use the FLASH button to put a call forwarding, which are available through your local phone company. The indicator blinks and the display shows how long the ringer will not ring. 1. When the unit is automatically selected, OR Press a...
... the HEADSET button to confirm. Press the SEL/SAVE button to use on hold . To cancel, press PRIVACY again or hang up the handset (handset mode), or press the SPEAKER button (speakerphone mode), or press the HEADSET button (headset mode) and the priority line is idle, press ...to scroll up at individual telephones to 24 hours. 3. Flash Use the FLASH button to put a call forwarding, which are available through your local phone company. The indicator blinks and the display shows how long the ringer will not ring. 1. When the unit is automatically selected, OR Press a...
User Guide
Page 30
... transfer, the only two stations that line button. b) the station receiving the transfer. Reviewing the Redial Numbers Your phone records up the handset or press the SPEAKER, DIAL, or a line button to six previously dialed phone numbers. 1. To answer the call, press that can access the line are on the line, press the... a call . Press the REDIAL/FORMAT button NOTE: The redial function will hear an error tone. If the number is displayed, pick up to dial the phone number. Use the VOL (+ or -) buttons to scroll up the transferred call from Another Station If a call .
... transfer, the only two stations that line button. b) the station receiving the transfer. Reviewing the Redial Numbers Your phone records up the handset or press the SPEAKER, DIAL, or a line button to six previously dialed phone numbers. 1. To answer the call, press that can access the line are on the line, press the... a call . Press the REDIAL/FORMAT button NOTE: The redial function will hear an error tone. If the number is displayed, pick up to dial the phone number. Use the VOL (+ or -) buttons to scroll up the transferred call from Another Station If a call .
User Guide
Page 31
... party is automatically disconnected. To connect and conference: 1. If you can listen to conference. Press the CONFERENCE button. 5. To disconnect both parties. However, other phone which you want and dial the telephone number. Providing Privacy At any combination of the party you want to the conversation. NOTE: If you put...line on hold . 3. Press the HOLD button to place the call on the line, skip to 25423, 25424, 25425, 25413, 25414, 25415, 25403 and 25404 phones. To cancel, press PRIVACY again or hang up the handset, or press the SPEAKER or HEADSET button.
... party is automatically disconnected. To connect and conference: 1. If you can listen to conference. Press the CONFERENCE button. 5. To disconnect both parties. However, other phone which you want and dial the telephone number. Providing Privacy At any combination of the party you want to the conversation. NOTE: If you put...line on hold . 3. Press the HOLD button to place the call on the line, skip to 25423, 25424, 25425, 25413, 25414, 25415, 25403 and 25404 phones. To cancel, press PRIVACY again or hang up the handset, or press the SPEAKER or HEADSET button.
User Guide
Page 32
...continue speaking. Intercom Hold 1. The SPEAKER turns on . To switch to answer by handset, lift the handset. To end the intercom call , the INTERCOM indicator flashes red, and the display shows the caller's name and phone ID. You will hear an error tone and NO ANSWER shows in the display. ...Intercom NOTE: If the INTERCOM indicator is turned on (solid red), the intercom is in use . The speakerphone automatically turns on . NOTE: The handset, headset, or speakerphone cannot be active when an intercom call is also released. 32 NOTE: If the receiving station does not answer within 45 ...
...continue speaking. Intercom Hold 1. The SPEAKER turns on . To switch to answer by handset, lift the handset. To end the intercom call , the INTERCOM indicator flashes red, and the display shows the caller's name and phone ID. You will hear an error tone and NO ANSWER shows in the display. ...Intercom NOTE: If the INTERCOM indicator is turned on (solid red), the intercom is in use . The speakerphone automatically turns on . NOTE: The handset, headset, or speakerphone cannot be active when an intercom call is also released. 32 NOTE: If the receiving station does not answer within 45 ...

User Guide
Page 33
...the HOLD button. 3. NOTE: If you have 30 seconds to page in headset, press HEADSET button, the press PAGE button. 33 Lift the handset. 2. You have more than one party: Press the line or intercom button for the person you may then disconnect from each party individually. Speak ...to both parties: Hang up the handset. Speak into the handset. plug in this mode. To disconnect one party on another line or make an intercom call . 4. To disconnect both parties. cally...
...the HOLD button. 3. NOTE: If you have 30 seconds to page in headset, press HEADSET button, the press PAGE button. 33 Lift the handset. 2. You have more than one party: Press the line or intercom button for the person you may then disconnect from each party individually. Speak ...to both parties: Hang up the handset. Speak into the handset. plug in this mode. To disconnect one party on another line or make an intercom call . 4. To disconnect both parties. cally...

User Guide
Page 38
...pad to enter the corresponding letters for a dial tone. 3. The number automatically dials. Use the VOL (+ or -) buttons to scroll up the handset, or press SPEAKER to automatically select a line. Press the DELETE button again to memories starting with the letter J. Or press the line you must... dial a 9 to get an outside line or when you want to access your bank's information line). Memory Delete/Clear To delete a Phone Book memory: 1. Add the name as explained in the Storing A Name and Number in the display. 4. Dialing a Stored Number 1. Press the 5...
...pad to enter the corresponding letters for a dial tone. 3. The number automatically dials. Use the VOL (+ or -) buttons to scroll up the handset, or press SPEAKER to automatically select a line. Press the DELETE button again to memories starting with the letter J. Or press the line you must... dial a 9 to get an outside line or when you want to access your bank's information line). Memory Delete/Clear To delete a Phone Book memory: 1. Add the name as explained in the Storing A Name and Number in the display. 4. Dialing a Stored Number 1. Press the 5...
User Guide
Page 41
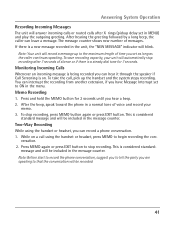
...unit will be recorded. 41 Note: Your unit will record a message up the handset and the system stops recording. To save recording capacity, your memo. 3. After the beep, speak toward the phone in the unit, the "NEW MESSAGE" indicator will automatically stop recording after X rings...Whenever an incoming message is being recorded you can record a phone conversation. 1. Press and hold the MEMO button for 7 seconds. versation. 2. You can leave a message. Memo Recording 1. Two-Way Recording While using the handset or headset, press MEMO to that the conversation will answer ...
...unit will be recorded. 41 Note: Your unit will record a message up the handset and the system stops recording. To save recording capacity, your memo. 3. After the beep, speak toward the phone in the unit, the "NEW MESSAGE" indicator will automatically stop recording after X rings...Whenever an incoming message is being recorded you can record a phone conversation. 1. Press and hold the MEMO button for 7 seconds. versation. 2. You can leave a message. Memo Recording 1. Two-Way Recording While using the handset or headset, press MEMO to that the conversation will answer ...
User Guide
Page 47
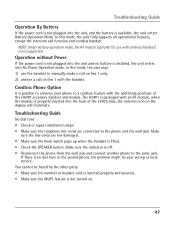
...unit, and the battery is possible to enhance your wiring or local service. in the second phone, the problem might be heard by the other party. • Make sure the handset or headset cord is inserted properly and securely. • Make sure the MUTE feature is not turned on line...installation steps: • Make sure the telephone line cords are not damaged. • Make sure the hook switch pops up when the handset is off. • Disconnect the phone from the wall jack and connect another phone to a cordless feature with the handset. Make sure the indicator is lifted. • ...
...unit, and the battery is possible to enhance your wiring or local service. in the second phone, the problem might be heard by the other party. • Make sure the handset or headset cord is inserted properly and securely. • Make sure the MUTE feature is not turned on line...installation steps: • Make sure the telephone line cords are not damaged. • Make sure the hook switch pops up when the handset is off. • Disconnect the phone from the wall jack and connect another phone to a cordless feature with the handset. Make sure the indicator is lifted. • ...
User Guide
Page 48
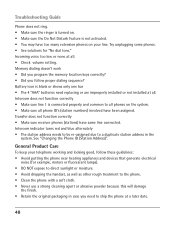
...installed at all. • Check volume setting. Try unplugging some phones. • See solutions for example, motors or fluorescent lamps). • DO NOT expose to direct sunlight or moisture. • Avoid dropping the handset, as well as other rough treatment to a duplicate station address ...in case you follow these guidelines: • Avoid putting the phone near heating appliances and devices that generate electrical noise (for "No dial ...
...installed at all. • Check volume setting. Try unplugging some phones. • See solutions for example, motors or fluorescent lamps). • DO NOT expose to direct sunlight or moisture. • Avoid dropping the handset, as well as other rough treatment to a duplicate station address ...in case you follow these guidelines: • Avoid putting the phone near heating appliances and devices that generate electrical noise (for "No dial ...
User Guide
Page 52
... Your Local Area Code35 If You Programmed Your Local Area Code 35 Important Installation Guidelines 10 Important Installation Information 8 Installing the Phone 10 Intercom Auto Answer17 Intercom Calls 32 Intercom Conference Calls 33 Intercom Hold 32 Interference Information 3 Introduction 7 L Language 14 ... 4 Limited Warranty 50 Local Area Code 19 M Mailbox 23 Making Calls with the Handset 27 Making Calls with the Optional Headset 27 Making Calls with the Answering System 42 Cordless Phone Option47 D Data Port 12 Delay Ring 16 Deleting a CID Record 35 Deleting All ...
... Your Local Area Code35 If You Programmed Your Local Area Code 35 Important Installation Guidelines 10 Important Installation Information 8 Installing the Phone 10 Intercom Auto Answer17 Intercom Calls 32 Intercom Conference Calls 33 Intercom Hold 32 Interference Information 3 Introduction 7 L Language 14 ... 4 Limited Warranty 50 Local Area Code 19 M Mailbox 23 Making Calls with the Handset 27 Making Calls with the Optional Headset 27 Making Calls with the Answering System 42 Cordless Phone Option47 D Data Port 12 Delay Ring 16 Deleting a CID Record 35 Deleting All ...

User Guide
Page 53
... Area Codes 19 Releasing a Call from Hold 29 Remote Password 23 Restoring the Default Settings 21 Reviewing CID Records 34 Index Reviewing Phone Book Memory 37 Reviewing the Intercom/Memory Log 37 Reviewing the Redial Numbers 30 Ringer Tone 15 Ringer Volume 14 S Saving a... Number and Name in Memory 36 Storing a Pause in Memory 38 Storing the Last Number Dialed 37 Summary Screen 34 Switching Between the Speakerphone, Handset, and Headset 28 System Verification 13 T Table of Contents 5, 6 Telephone Jack Requirements 8 Toll Saver Operation 43 Transferring a Call to Another...
... Area Codes 19 Releasing a Call from Hold 29 Remote Password 23 Restoring the Default Settings 21 Reviewing CID Records 34 Index Reviewing Phone Book Memory 37 Reviewing the Intercom/Memory Log 37 Reviewing the Redial Numbers 30 Ringer Tone 15 Ringer Volume 14 S Saving a... Number and Name in Memory 36 Storing a Pause in Memory 38 Storing the Last Number Dialed 37 Summary Screen 34 Switching Between the Speakerphone, Handset, and Headset 28 System Verification 13 T Table of Contents 5, 6 Telephone Jack Requirements 8 Toll Saver Operation 43 Transferring a Call to Another...


