User Guide
Page 5
... Phone Book (Directory) Memory 31 Storing a Number and Name in . Volume 15 Ringer Tone 15 Priority Line 15 Delay Ring 16 Phone ID 16 Phone Name 17 Intercom Auto Answer 17 Flash Time 18 Call Alert Tone 18 No Unknown/Blocked 18 Display Contrast 19 Local Area Code 19 Regional Area Codes 19 Manually Setting the Time and Date 20 Hour Format 21 Restoring the Default Settings 21 Basic Operation 21 Making Calls with the Handset 21 Making Calls with the Speakerphone 22 Making Calls with the Optional Headset........22 Pre-dialing 22 Answering Calls...
... Phone Book (Directory) Memory 31 Storing a Number and Name in . Volume 15 Ringer Tone 15 Priority Line 15 Delay Ring 16 Phone ID 16 Phone Name 17 Intercom Auto Answer 17 Flash Time 18 Call Alert Tone 18 No Unknown/Blocked 18 Display Contrast 19 Local Area Code 19 Regional Area Codes 19 Manually Setting the Time and Date 20 Hour Format 21 Restoring the Default Settings 21 Basic Operation 21 Making Calls with the Handset 21 Making Calls with the Speakerphone 22 Making Calls with the Optional Headset........22 Pre-dialing 22 Answering Calls...
User Guide
Page 7
... with the additional purchase of this telephone, you are basic safety instructions that should always be simple to use, however, you can reach its full potential more quickly by taking a few minutes to read this user's guide. It is a full-featured phone ideally suited for future reference. Your phone features 16 memory locations, 94 phone book memories, hold, conference call, intercom, call transfer, Caller ID display, and speakerphone capabilities. IMPORTANT: In order to...
... with the additional purchase of this telephone, you are basic safety instructions that should always be simple to use, however, you can reach its full potential more quickly by taking a few minutes to read this user's guide. It is a full-featured phone ideally suited for future reference. Your phone features 16 memory locations, 94 phone book memories, hold, conference call, intercom, call transfer, Caller ID display, and speakerphone capabilities. IMPORTANT: In order to...
User Guide
Page 12
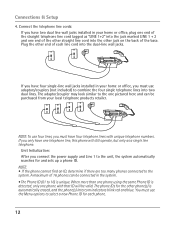
... sets up a phone ID. NOTE: To use the Menu options to combine the four single telephone lines into the dual-line wall jacks. Unit Initialization: After you only have two dual line wall jacks installed in the system. • The Phone ID (01 to the one telephone line, this phone will be purchased from your home or office, plug one end of the straight telephone line cord tagged as a single line telephone. If you connect the power supply...
... sets up a phone ID. NOTE: To use the Menu options to combine the four single telephone lines into the dual-line wall jacks. Unit Initialization: After you only have two dual line wall jacks installed in the system. • The Phone ID (01 to the one telephone line, this phone will be purchased from your home or office, plug one end of the straight telephone line cord tagged as a single line telephone. If you connect the power supply...
User Guide
Page 13
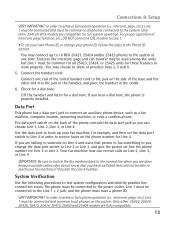
... a dial tone. You may connect up your fax machine, for example, and then set your own Phone ID, or change the data port switch to Line 2 or Line 3, and give the person on the back of the coiled handset cord to someone on Line 4 and want that you hear a dial tone, the phone is properly installed. Data Port This phone has a data port jack to test system configuration and identify possible line connection errors. Use...
... a dial tone. You may connect up your fax machine, for example, and then set your own Phone ID, or change the data port switch to Line 2 or Line 3, and give the person on the back of the coiled handset cord to someone on Line 4 and want that you hear a dial tone, the phone is properly installed. Data Port This phone has a data port jack to test system configuration and identify possible line connection errors. Use...
User Guide
Page 14
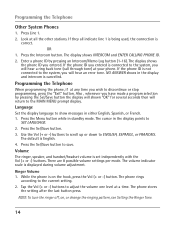
..., you will hear a ring back tone (call through tone) at all indicate line 1 is being used, the connection is correct. NO ANSWER shows in standby mode. While the phone is cancelled. If the phone ID you wish to SET LANGUAGE. 2. The default is displayed during volume adjustment. Press Line 1. 2. Press the Intercom button. Programming the Telephone When programming the phone, if at a time. The volume indicator scale is English. 4. NOTE: To turn the ringer off, on the hook...
..., you will hear a ring back tone (call through tone) at all indicate line 1 is being used, the connection is correct. NO ANSWER shows in standby mode. While the phone is cancelled. If the phone ID you wish to SET LANGUAGE. 2. The default is displayed during volume adjustment. Press Line 1. 2. Press the Intercom button. Programming the Telephone When programming the phone, if at a time. The volume indicator scale is English. 4. NOTE: To turn the ringer off, on the hook...

User Guide
Page 15
.... Programming the Telephone Speakerphone, Handset, and Headset Volume While the phone is in use by another . 1. The phone stores the setting after the last button press. Press the Sel/Save button. 4. Use the Vol (+ or -) buttons to scroll up or down to select CID ON or OFF. (ON allows the unit to select each ringer tone for the corresponding telephone line. Press the Menu button while in standby mode. 2. Press the Sel/Save button. Use...
.... Programming the Telephone Speakerphone, Handset, and Headset Volume While the phone is in use by another . 1. The phone stores the setting after the last button press. Press the Sel/Save button. 4. Use the Vol (+ or -) buttons to scroll up or down to select CID ON or OFF. (ON allows the unit to select each ringer tone for the corresponding telephone line. Press the Menu button while in standby mode. 2. Press the Sel/Save button. Use...
User Guide
Page 18
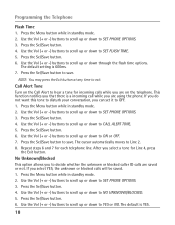
... default setting is YES. 18 Call Alert Tone Turn on the telephone. Use the Vol (+ or -) buttons to scroll up or down to hear a tone for incoming calls while you are saved or not. Use the Vol (+ or -) buttons to scroll up or down to NO UNKNOWN/BLOCKED. 5. If you select a tone for each telephone line. Use the Vol (+ or -) buttons to scroll up or down to CALL ALERT TONE. 5. Programming the Telephone Flash Time...
... default setting is YES. 18 Call Alert Tone Turn on the telephone. Use the Vol (+ or -) buttons to scroll up or down to hear a tone for incoming calls while you are saved or not. Use the Vol (+ or -) buttons to scroll up or down to NO UNKNOWN/BLOCKED. 5. If you select a tone for each telephone line. Use the Vol (+ or -) buttons to scroll up or down to CALL ALERT TONE. 5. Programming the Telephone Flash Time...
User Guide
Page 19
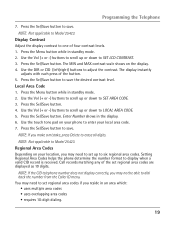
... able to SET AREA CODE. 3. Programming the Telephone 7. Enter Number shows in standby mode. 2. Call records matching any of the button. 5. The MIN and MAX contrast scale shows on your phone to Model 25423. Press the Sel/Save button to LOCAL AREA CODE. 5. Use the Vol (+ or -) buttons to scroll up or down to dial back the number from the Caller ID menu. Use the DIR or CID (left/right) buttons to...
... able to SET AREA CODE. 3. Programming the Telephone 7. Enter Number shows in standby mode. 2. Call records matching any of the button. 5. The MIN and MAX contrast scale shows on your phone to Model 25423. Press the Sel/Save button to LOCAL AREA CODE. 5. Use the Vol (+ or -) buttons to scroll up or down to dial back the number from the Caller ID menu. Use the DIR or CID (left/right) buttons to...
User Guide
Page 20
... first CID call. To manually reset the time and date, follow the steps below. 1. Press the Menu button while in the display. 6. Press the Sel/Save button, and the cursor moves back to the month field. 10. Press the Menu button while in the process. Press the Sel/Save button. NOTE: AM or PM will be set when you make a mistake, press the Delete button to SET CLOCK. 5. Press...
... first CID call. To manually reset the time and date, follow the steps below. 1. Press the Menu button while in the display. 6. Press the Sel/Save button, and the cursor moves back to the month field. 10. Press the Menu button while in the process. Press the Sel/Save button. NOTE: AM or PM will be set when you make a mistake, press the Delete button to SET CLOCK. 5. Press...
User Guide
Page 21
... mode. 2. Basic Operation Your phone provides the convenience of accessing four separate telephone lines, each obtained from the telephone company and each having its own phone number. Making Calls with the Handset 1. Wait for 16 telephones (or stations) to SET HOUR FORMAT. 5. The default is occupied, it selects an open line. Press the Menu button while in standby mode. 2. Use the Vol (+ or -) buttons to scroll up or down to the original factory default settings. 1. Use...
... mode. 2. Basic Operation Your phone provides the convenience of accessing four separate telephone lines, each obtained from the telephone company and each having its own phone number. Making Calls with the Handset 1. Wait for 16 telephones (or stations) to SET HOUR FORMAT. 5. The default is occupied, it selects an open line. Press the Menu button while in standby mode. 2. Use the Vol (+ or -) buttons to scroll up or down to the original factory default settings. 1. Use...
User Guide
Page 22
.... 3. When you are listening, you are receiving. With the phone idle and the handset on hook. Basic Operation Making Calls with the Optional Headset 1. You can't do both at the same time. If the priority line is compatible with this unit. Wait for several seconds. CAUTION: Use only the Thomson Inc. 5-2425 headset that is occupied, it selects an open line. 5. The telephone number shows in speakerphone mode.
.... 3. When you are listening, you are receiving. With the phone idle and the handset on hook. Basic Operation Making Calls with the Optional Headset 1. You can't do both at the same time. If the priority line is compatible with this unit. Wait for several seconds. CAUTION: Use only the Thomson Inc. 5-2425 headset that is occupied, it selects an open line. 5. The telephone number shows in speakerphone mode.
User Guide
Page 24
... Flash button to use on hold can access the line on hold . At the other stations, the indicator blinks red but no one but you want to change modes, lift the handset to switch to the handset, or press the Headset button to activate custom calling services such as normal but the phone will be picked up to select the duration. NOTE: If Intercom Auto Answer is turned ON, the unit automatically answers the intercom call forwarding...
... Flash button to use on hold can access the line on hold . At the other stations, the indicator blinks red but no one but you want to change modes, lift the handset to switch to the handset, or press the Headset button to activate custom calling services such as normal but the phone will be picked up to select the duration. NOTE: If Intercom Auto Answer is turned ON, the unit automatically answers the intercom call forwarding...

User Guide
Page 26
... to Model 25423. To make a call on hold. Message Waiting Provide your phone company offers voice messaging service and you subscribe to it, the New Message indicator flashes when the phone is not in use, a line can be connected to the conversation. Providing Privacy At any combination of the incoming call by pressing Hold, and then pick up . NOTE: If you put a call , press the line you want and dial the telephone number. Conference Calls This feature...
... to Model 25423. To make a call on hold. Message Waiting Provide your phone company offers voice messaging service and you subscribe to it, the New Message indicator flashes when the phone is not in use, a line can be connected to the conversation. Providing Privacy At any combination of the incoming call by pressing Hold, and then pick up . NOTE: If you put a call , press the line you want and dial the telephone number. Conference Calls This feature...
User Guide
Page 28
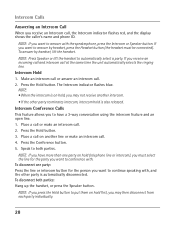
... each party individually. 28 Place a call or make an intercom call . 2. Intercom Calls Answering an Intercom Call When you receive an Intercom call at the same time the unit automatically selects the ringing line. Place a call . 2. Make an intercom call or answer an intercom call on hold (telephone line or intercom), you have a 3-way conversation using the intercom feature and an open line. 1. Press the Conference button. 5. NOTE: If you press the Hold button to answer by handset, lift the handset. NOTE: If you must be...
... each party individually. 28 Place a call or make an intercom call . 2. Intercom Calls Answering an Intercom Call When you receive an Intercom call at the same time the unit automatically selects the ringing line. Place a call . 2. Make an intercom call or answer an intercom call on hold (telephone line or intercom), you have a 3-way conversation using the intercom feature and an open line. 1. Press the Conference button. 5. NOTE: If you press the Hold button to answer by handset, lift the handset. NOTE: If you must be...
User Guide
Page 30
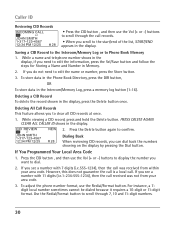
... area code. 3. To store data in the Phone Book Directory, press the DIR button, OR To store data in the display. 2. PRESS DELETE AGAIN CLEAR ALL CALLER ID shows in the Intercom/Memory Log, press a memory log button (1-16). To adjust the phone number format, use the Vol (+ or -) buttons to display the number you scroll to the start/end of the list, START/END appears in the display, if you need to edit the name or number, press the Store button. 3. Saving a CID Record...
... area code. 3. To store data in the Phone Book Directory, press the DIR button, OR To store data in the display. 2. PRESS DELETE AGAIN CLEAR ALL CALLER ID shows in the Intercom/Memory Log, press a memory log button (1-16). To adjust the phone number format, use the Vol (+ or -) buttons to display the number you scroll to the start/end of the list, START/END appears in the display, if you need to edit the name or number, press the Store button. 3. Saving a CID Record...
User Guide
Page 31
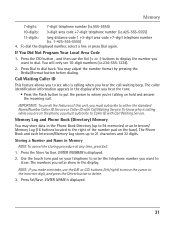
... Sel/Save. The caller identification information appears in the Phone Book Directory (up to dial back. Memory Log and Phone Book (Directory) Memory You may adjust the number format by pressing the Redial/Format button before dialing. The Phone Book and each Intercom/Memory Log stores up to 94 memories) or an Intercom/ Memory Log (16 buttons located to the right of this unit, you must subscribe to delete. 3. Memory 7-digits: 7-digit telephone number (i.e.555-5555) 10-digits: 3-digit area code +7-digit telephone number (i.e.425-555...
... Sel/Save. The caller identification information appears in the Phone Book Directory (up to dial back. Memory Log and Phone Book (Directory) Memory You may adjust the number format by pressing the Redial/Format button before dialing. The Phone Book and each Intercom/Memory Log stores up to 94 memories) or an Intercom/ Memory Log (16 buttons located to the right of this unit, you must subscribe to delete. 3. Memory 7-digits: 7-digit telephone number (i.e.555-5555) 10-digits: 3-digit area code +7-digit telephone number (i.e.425-555...
User Guide
Page 35
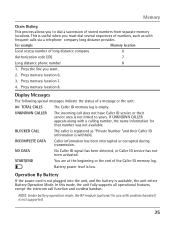
... useful when you want. 2. Display Messages The following special messages indicate the status of the Caller ID memory log. Battery power level is available, the unit enters Battery Operation Mode. If UNKNOWN CALLER appears along with a calling number, the name information for use with frequent calls via a telephone company long distance provider. BLOCKED CALL The caller is registered as with cordless handset) is not supported. 35 In this mode, the unit fully supports all operational features, except the intercom call...
... useful when you want. 2. Display Messages The following special messages indicate the status of the Caller ID memory log. Battery power level is available, the unit enters Battery Operation Mode. If UNKNOWN CALLER appears along with a calling number, the name information for use with frequent calls via a telephone company long distance provider. BLOCKED CALL The caller is registered as with cordless handset) is not supported. 35 In this mode, the unit fully supports all operational features, except the intercom call...
User Guide
Page 36
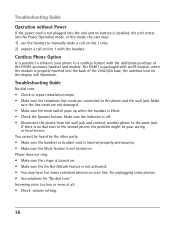
...; Make sure the handset or headset cord is inserted properly and securely. • Make sure the Mute feature is not turned on your line. Make sure the indicator is off. • Disconnect the phone from the wall jack and connect another phone to manually make a call on line 1 only, 2) answer a call on the display will illuminate. Troubleshooting Guide Operation without Power If the power cord is not plugged into the unit and no dial tone in this mode, the user may...
...; Make sure the handset or headset cord is inserted properly and securely. • Make sure the Mute feature is not turned on your line. Make sure the indicator is off. • Disconnect the phone from the wall jack and connect another phone to manually make a call on line 1 only, 2) answer a call on the display will illuminate. Troubleshooting Guide Operation without Power If the power cord is not plugged into the unit and no dial tone in this mode, the user may...
User Guide
Page 42
... Statement 4 Flash 24 Flash Time 18 B Base Layout 9 Basic Operation 21 C Call Alert Tone 18 Call Waiting Caller ID 31 Caller ID 29 Chain Dialing 35 Clear All Memories 34 Conference Calls 26 Cordless Phone Option 36 D Data Port 13 Delay Ring 16 Deleting a CID Record 30 Deleting All Call Records 30 Dialing a Stored Number 33 Dialing Back 30 Display Contrast 19 Display Messages 35 Do Not Disturb 24 E Editing a Name or Number Stored in Phone Book (Directory) Memory 33 Editing a Name or Number Stored in the Intercom/Memory Log (Memory Location) 33...
... Statement 4 Flash 24 Flash Time 18 B Base Layout 9 Basic Operation 21 C Call Alert Tone 18 Call Waiting Caller ID 31 Caller ID 29 Chain Dialing 35 Clear All Memories 34 Conference Calls 26 Cordless Phone Option 36 D Data Port 13 Delay Ring 16 Deleting a CID Record 30 Deleting All Call Records 30 Dialing a Stored Number 33 Dialing Back 30 Display Contrast 19 Display Messages 35 Do Not Disturb 24 E Editing a Name or Number Stored in Phone Book (Directory) Memory 33 Editing a Name or Number Stored in the Intercom/Memory Log (Memory Location) 33...

User Guide
Page 43
M Making Calls with the Handset 21 Making Calls with the Optional Headset 22 Making Calls with the Speakerphone 22 Manually Setting the Time and Date 20 Memory Delete/Clear 34 Memory Log and Phone Book (Directory) Memory 31 Message Waiting 26 Mute 23 N No Unknown/Blocked 18 O One-Touch Intercom 27 Operation By Battery 35 Operation without Power 36 Other System Phones 14 P Paging All Stations 29 Parts Checklist 8 Phone ID 16 Phone Name 17 Placing a Call on Hold 24 Pre-dialing 22 Priority Line 15 Privacy 26 Programming the Telephone 14 Providing...
M Making Calls with the Handset 21 Making Calls with the Optional Headset 22 Making Calls with the Speakerphone 22 Manually Setting the Time and Date 20 Memory Delete/Clear 34 Memory Log and Phone Book (Directory) Memory 31 Message Waiting 26 Mute 23 N No Unknown/Blocked 18 O One-Touch Intercom 27 Operation By Battery 35 Operation without Power 36 Other System Phones 14 P Paging All Stations 29 Parts Checklist 8 Phone ID 16 Phone Name 17 Placing a Call on Hold 24 Pre-dialing 22 Priority Line 15 Privacy 26 Programming the Telephone 14 Providing...


