

Owner's Manual
Page 4
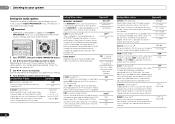
... The Auto Power Down menu 37 The FL Demo Mode menu 37 07 Control with HDMI function Making Control with HDMI connections 38 HDMI Setup 38 Before using synchronization 39 About synchronized operations 39 About connections with a product ...receiver 19 03 Basic Setup Canceling the demo display 20 Automatically setting up for surround sound (MCACC). . . 20 Other problems when using the Auto MCACC setup . . . 21 04 Basic playback Playing a source 22 Selecting the audio input ...Auto playback 29 Listening in a safe place for buying this Pioneer product. Thank you for future reference.
... The Auto Power Down menu 37 The FL Demo Mode menu 37 07 Control with HDMI function Making Control with HDMI connections 38 HDMI Setup 38 Before using synchronization 39 About synchronized operations 39 About connections with a product ...receiver 19 03 Basic Setup Canceling the demo display 20 Automatically setting up for surround sound (MCACC). . . 20 Other problems when using the Auto MCACC setup . . . 21 04 Basic playback Playing a source 22 Selecting the audio input ...Auto playback 29 Listening in a safe place for buying this Pioneer product. Thank you for future reference.
Owner's Manual
Page 32
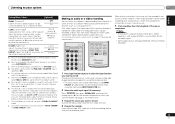
...smoothing jagged artifacts left speakers, making it as necessary to prevent the ultralow bass tones from distorting the sound from this is a problem. When OFF is selected, no sound is output from the speakers. The audio delay time is set depending on the current ...system Setting the Audio options There are listed in SACDs by maximizing the dynamic range (during digital processing). 0 (0 dB) +6 (+6 dB) HDMI (HDMI Audio) Specifies the routing of the HDMI audio signal out of this . 3 Use / to set it sound wider (higher settings) or narrower (lower settings). 0 to...
...smoothing jagged artifacts left speakers, making it as necessary to prevent the ultralow bass tones from distorting the sound from this is a problem. When OFF is selected, no sound is output from the speakers. The audio delay time is set depending on the current ...system Setting the Audio options There are listed in SACDs by maximizing the dynamic range (during digital processing). 0 (0 dB) +6 (+6 dB) HDMI (HDMI Audio) Specifies the routing of the HDMI audio signal out of this . 3 Use / to set it sound wider (higher settings) or narrower (lower settings). 0 to...
Owner's Manual
Page 33
...A.DLY to record. Insert a blank tape, MD, video etc. Refer to the instructions that were input to do this receiver through an HDMI cable, component video cable or digital audio cable (see page 22 for more emphasized. Most video recorders set AUTO is ON. The initial set... the CD, video, DVD etc. 4 Prepare the recorder. Making an audio or a video recording You can change the MIDNIGHT/LOUDNESS options at any problems using this ). 3 Prepare the source you want to record (see Connecting other audio components on the remote control, or by using S.RETRIEVER button. ...
...A.DLY to record. Insert a blank tape, MD, video etc. Refer to the instructions that were input to do this receiver through an HDMI cable, component video cable or digital audio cable (see page 22 for more emphasized. Most video recorders set AUTO is ON. The initial set... the CD, video, DVD etc. 4 Prepare the recorder. Making an audio or a video recording You can change the MIDNIGHT/LOUDNESS options at any problems using this ). 3 Prepare the source you want to record (see Connecting other audio components on the remote control, or by using S.RETRIEVER button. ...
Owner's Manual
Page 44
... selected. Make sure the component is ON). This happens because of the synchronized operation due to the Control with HDMI to OFF (see page 2). Lower the volume level. Broadcast stations cannot be selected automatically. Connect an outdoor antenna... the other components and electrical appliances being used, because sometimes the problem may not have an LFE channel. Switch the subwoofer setting in the subwoofer output). If the message persists, call a Pioneer authorized independent service company. Try moving the unit for better ventilation ...
... selected. Make sure the component is ON). This happens because of the synchronized operation due to the Control with HDMI to OFF (see page 2). Lower the volume level. Broadcast stations cannot be selected automatically. Connect an outdoor antenna... the other components and electrical appliances being used, because sometimes the problem may not have an LFE channel. Switch the subwoofer setting in the subwoofer output). If the message persists, call a Pioneer authorized independent service company. Try moving the unit for better ventilation ...
Owner's Manual
Page 45
... supporting the Bluetooth wireless technology. HDMI No picture or sound. If the problem still persists when connecting your HDMI component directly to your HDMI-equipped component directly to the display using Control with HDMI function. Check the HDMI connections. The cable ...to various different displays. This happens because the demo display is near the unit. See the operating instructions for HDMI compatibility information). The receiver doesn't recognize iPod touch/iPhone. Try the following configuration when connecting up the system...
... supporting the Bluetooth wireless technology. HDMI No picture or sound. If the problem still persists when connecting your HDMI component directly to your HDMI-equipped component directly to the display using Control with HDMI function. Check the HDMI connections. The cable ...to various different displays. This happens because the demo display is near the unit. See the operating instructions for HDMI compatibility information). The receiver doesn't recognize iPod touch/iPhone. Try the following configuration when connecting up the system...
Owner's Manual
Page 46
... When there is no SIRIUS signal or the SiriusConnect Tuner is connected. 'SUB UPDT' Unit is muted on the display when using the HDMI connection, you must adjust the volume on the display every time you switch input sources. Wait until the encryption code has been updated. 'INVLD CH...since these will corrode the surface. Switch off the receiver and reconnect the USB to the receiver. 'iPod/USB Error 4 (I /U ERR1)' There is a problem with iPod, iPhone, or iPad may be limited to the receiver. and other chemicals on or near this accessory with the signal path from the...
... When there is no SIRIUS signal or the SiriusConnect Tuner is connected. 'SUB UPDT' Unit is muted on the display when using the HDMI connection, you must adjust the volume on the display every time you switch input sources. Wait until the encryption code has been updated. 'INVLD CH...since these will corrode the surface. Switch off the receiver and reconnect the USB to the receiver. 'iPod/USB Error 4 (I /U ERR1)' There is a problem with iPod, iPhone, or iPad may be limited to the receiver. and other chemicals on or near this accessory with the signal path from the...


