Owner's Manual
Page 6
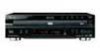
... should be noted that can start using the basic player functions, you are having trouble understanding some of the various options DVD and this manual. The Setup screen menus, described in the section starting on page 15 shows how video and audio connections may also be made , you... the same way. Track 1 Track 2 Track 3 Track 4 Video CD Track 1 Track 2 Track 3 Track 4 Track 5 CD How to the answers given in This Manual DVD is also a list of other format. A DVD which enable easy access to title, depending on page 42 describes how to use the Setup Navigator...
... should be noted that can start using the basic player functions, you are having trouble understanding some of the various options DVD and this manual. The Setup screen menus, described in the section starting on page 15 shows how video and audio connections may also be made , you... the same way. Track 1 Track 2 Track 3 Track 4 Video CD Track 1 Track 2 Track 3 Track 4 Track 5 CD How to the answers given in This Manual DVD is also a list of other format. A DVD which enable easy access to title, depending on page 42 describes how to use the Setup Navigator...
Owner's Manual
Page 8
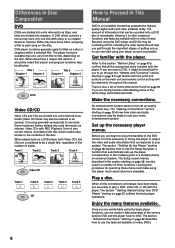
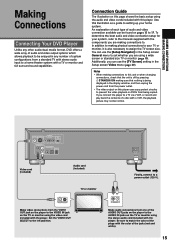
... insert new batteries. • When disposing of used up to 7 m (23 feet) from battery corrosion. The remote control can be possible when pointed at this manual) 8 TV DVD TV FUNC TV CD MODE CD 5 4 DDIISSCC CHANNEL RANDOM 3 2 1 VOLUME CH + A CH-B - Before Using Checking Accessories Please confirm that apply in the direction...
... insert new batteries. • When disposing of used up to 7 m (23 feet) from battery corrosion. The remote control can be possible when pointed at this manual) 8 TV DVD TV FUNC TV CD MODE CD 5 4 DDIISSCC CHANNEL RANDOM 3 2 1 VOLUME CH + A CH-B - Before Using Checking Accessories Please confirm that apply in the direction...
Owner's Manual
Page 15
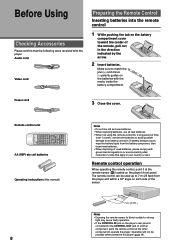
... setup using the stereo audio cord included with the player. To determine the best audio and video connection setup for your system, refer to the manuals supplied with the components you connect the player to a TV via a VCR, or record and play back the contents of a disc with a VCR, the playback...
... setup using the stereo audio cord included with the player. To determine the best audio and video connection setup for your system, refer to the manuals supplied with the components you connect the player to a TV via a VCR, or record and play back the contents of a disc with a VCR, the playback...
Owner's Manual
Page 16
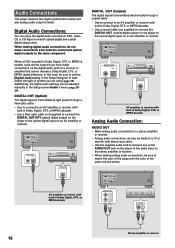
... the optical digital input on DVD, Video CD or CD discs from both optical digital and coaxial digital output jacks. In this case, be adjusted manually in Dolby Digital, DTS, or MPEG decoder. • Use a fiber-optic cable (not supplied) to connect the DIGITAL OUT OPT (optical digital output) on the...
... the optical digital input on DVD, Video CD or CD discs from both optical digital and coaxial digital output jacks. In this case, be adjusted manually in Dolby Digital, DTS, or MPEG decoder. • Use a fiber-optic cable (not supplied) to connect the DIGITAL OUT OPT (optical digital output) on the...
Owner's Manual
Page 17
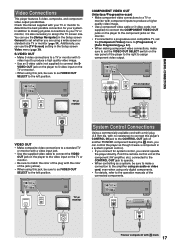
...player to the video input on the TV or monitor. • When using this player's CONTROL IN jack to the CONTROL OUT jack of another PIONEER component bearing the Î mark, you can control the player as a system, be sure to assign component video output. CONTROL AC IN S-... VIDEO OUT SELECT TV or monitor COMPONENT VIDEO IN Y PB PR System Control Connections Using a commercially available cord with Î mark. 17 Check the manual supplied with your TV or monitor to a TV or monitor with component inputs to produce a higher quality video image. • Use a component video...
...player to the video input on the TV or monitor. • When using this player's CONTROL IN jack to the CONTROL OUT jack of another PIONEER component bearing the Î mark, you can control the player as a system, be sure to assign component video output. CONTROL AC IN S-... VIDEO OUT SELECT TV or monitor COMPONENT VIDEO IN Y PB PR System Control Connections Using a commercially available cord with Î mark. 17 Check the manual supplied with your TV or monitor to a TV or monitor with component inputs to produce a higher quality video image. • Use a component video...
Owner's Manual
Page 18
... that if the Setup Navigator is exited before the Setup Navigator is pressed for the first time Some DVDs start playing automatically when loaded in manual Setup screen menu operation (page 26). 4 Press ENTER. OPEN/ CLOSE 0 AUDIO SUBTITLE ANGLE DISPLAY DISP SETUP VNR MENU 5 TOP MENU RETURN 5 5 ENTER PREV 4 5 STOP 7 PLAY...
... that if the Setup Navigator is exited before the Setup Navigator is pressed for the first time Some DVDs start playing automatically when loaded in manual Setup screen menu operation (page 26). 4 Press ENTER. OPEN/ CLOSE 0 AUDIO SUBTITLE ANGLE DISPLAY DISP SETUP VNR MENU 5 TOP MENU RETURN 5 5 ENTER PREV 4 5 STOP 7 PLAY...
Owner's Manual
Page 26
... not to use the Setup Navigator, be sure to enter the menu. In these settings, press STOP 7 first before proceeding. 1 Press ( STANDBY/ON on this manual.
... not to use the Setup Navigator, be sure to enter the menu. In these settings, press STOP 7 first before proceeding. 1 Press ( STANDBY/ON on this manual.
Owner's Manual
Page 27
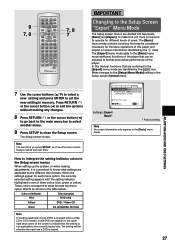
... FUNC TV DVD TV Î 7, 8 7 IMPORTANT Changing to the Setup Screen "Expert" Menu Mode The Setup screen menus are identified by the i mark. In this manual, functions that may be considered necessary for the basic operations of this unit more convenient to operate for each menu option, the currently selected setting...
... FUNC TV DVD TV Î 7, 8 7 IMPORTANT Changing to the Setup Screen "Expert" Menu Mode The Setup screen menus are identified by the i mark. In this manual, functions that may be considered necessary for the basic operations of this unit more convenient to operate for each menu option, the currently selected setting...
Owner's Manual
Page 34
...during the 16:9 parts. DVD Connecting to a progressive scancompatible TV Compared to [Interlace] or [Auto progressive]. Check the TV's instruction manual if you may see the picture in the Setup screen Video menu. Your TV/monitor must be switched between progressive and interlace modes. ...accidently do this setting with regular TVs that is compatible with TVs and monitors that are not sure about this setting with the following Pioneer displays and monitors." When making component video connections, make sure to COMPOSITE & SVIDEO. Make changes to the [Component Video] setting ...
...during the 16:9 parts. DVD Connecting to a progressive scancompatible TV Compared to [Interlace] or [Auto progressive]. Check the TV's instruction manual if you may see the picture in the Setup screen Video menu. Your TV/monitor must be switched between progressive and interlace modes. ...accidently do this setting with regular TVs that is compatible with TVs and monitors that are not sure about this setting with the following Pioneer displays and monitors." When making component video connections, make sure to COMPOSITE & SVIDEO. Make changes to the [Component Video] setting ...


