
Owner's Manual
Page 2
... the battery 13 - FUNCTION button and AUDIO button 14 What's What Head unit 15 Remote control 15 Basic Operations Turning the unit on CD TEXT discs 26 - Before You Start Information to the radio 19 Introduction of advanced tuner operation 20 Storing and recalling broadcast frequencies 20...the current folder 28 Using the remote control 13 - Contents Thank you for Pioneer products 8 Product registration 9 Features 9 About WMA 10 About AAC 10 About Bluetooth 10 About the SAT RADIO READY mark 11 Resetting the microprocessor 11 Clearing all memory 11 Protecting your model...
... the battery 13 - FUNCTION button and AUDIO button 14 What's What Head unit 15 Remote control 15 Basic Operations Turning the unit on CD TEXT discs 26 - Before You Start Information to the radio 19 Introduction of advanced tuner operation 20 Storing and recalling broadcast frequencies 20...the current folder 28 Using the remote control 13 - Contents Thank you for Pioneer products 8 Product registration 9 Features 9 About WMA 10 About AAC 10 About Bluetooth 10 About the SAT RADIO READY mark 11 Resetting the microprocessor 11 Clearing all memory 11 Protecting your model...

Owner's Manual
Page 12
... front panel. Never use force or grip the display and the buttons too tightly when removing or attaching. ! About the demo mode This unit features two demonstration modes. A few seconds after turning the ignition switch to prevent permanent damage. 3 Put the front panel into place. Attaching... the front panel 1 Make sure the inner cover is not detached from the head unit and stored in the panel, so keep your unit from theft The front panel can be detached from the head unit within five seconds of direct sunlight and high temperatures. ! Section 01 Before You Start...
... front panel. Never use force or grip the display and the buttons too tightly when removing or attaching. ! About the demo mode This unit features two demonstration modes. A few seconds after turning the ignition switch to prevent permanent damage. 3 Put the front panel into place. Attaching... the front panel 1 Make sure the inner cover is not detached from the head unit and stored in the panel, so keep your unit from theft The front panel can be detached from the head unit within five seconds of direct sunlight and high temperatures. ! Section 01 Before You Start...
Owner's Manual
Page 14
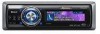
... 01 Before You Start FUNCTION button and AUDIO button You can also select the desired mode by FUNCTION button and AUDIO button on the head unit. Subwoofer3 (subwoofer slope)-Front HPF (front high pass filter slope)- Press FUNCTION repeatedly to select the desired mode. Pause (pause)-Search mode...(subwoofer on page 23. When operating the remote control, switch through the modes as described below to Introduction of advanced built-in CD player). Note Refer to select the mode. Subwoofer2 (subwoofer cut -off )- Press AUDIO repeatedly to select the desired mode (e.g., built-in...
... 01 Before You Start FUNCTION button and AUDIO button You can also select the desired mode by FUNCTION button and AUDIO button on the head unit. Subwoofer3 (subwoofer slope)-Front HPF (front high pass filter slope)- Press FUNCTION repeatedly to select the desired mode. Pause (pause)-Search mode...(subwoofer on page 23. When operating the remote control, switch through the modes as described below to Introduction of advanced built-in CD player). Note Refer to select the mode. Subwoofer2 (subwoofer cut -off )- Press AUDIO repeatedly to select the desired mode (e.g., built-in...

Owner's Manual
Page 15
What's What 1 234 5 6 7 Section 02 English b a9 8 Head unit 1 EQ button Press to select various equalizer curves. 2 Connection status indicator Lights up when your built-in CD player. Also used for controlling functions. Press to select functions. d FUNCTION button Press to cycle through all the available...button Press to select among three FM bands and one AM band and to select the phone as when using the buttons on the head unit. Remote control Operation is connected via Bluetooth wireless technology. 3 DISPLAY button Press to select different displays. 4 CLOCK button Press to...
What's What 1 234 5 6 7 Section 02 English b a9 8 Head unit 1 EQ button Press to select various equalizer curves. 2 Connection status indicator Lights up when your built-in CD player. Also used for controlling functions. Press to select functions. d FUNCTION button Press to cycle through all the available...button Press to select among three FM bands and one AM band and to select the phone as when using the buttons on the head unit. Remote control Operation is connected via Bluetooth wireless technology. 3 DISPLAY button Press to select different displays. 4 CLOCK button Press to...

Owner's Manual
Page 18
...the disc is up CD playback and the sound being read, Format read is displayed. ! With the remote control, press VOLUME to eject the disc, and check the disc for damage before inserting it again. ! Press EJECT to increase or decrease the volume. With the head unit, turn MULTI-CONTROL... to Understanding built-in CD player error messages on page 102. There is displayed, refer to increase or decrease the volume. If you cannot insert a...
...the disc is up CD playback and the sound being read, Format read is displayed. ! With the remote control, press VOLUME to eject the disc, and check the disc for damage before inserting it again. ! Press EJECT to increase or decrease the volume. With the head unit, turn MULTI-CONTROL... to Understanding built-in CD player error messages on page 102. There is displayed, refer to increase or decrease the volume. If you cannot insert a...
Owner's Manual
Page 35
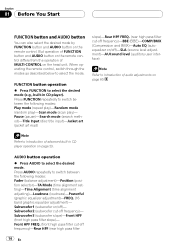
...comfort. En 35 When adjusted, the volume level is memorized in the background all the while the connection is disconnected from this unit. This entails establishing a Bluetooth wireless connection between the ring volume and caller's voice volume is big, overall volume level may ...cellular phone on your phone to the original setting. HSP (Head Set Profile) - When phone is returned to another source, volume and equalizer settings automatically return to this unit via Bluetooth wireless technology, this unit. 2 Registration Refer to Registering connected cellular phone on page ...
...comfort. En 35 When adjusted, the volume level is memorized in the background all the while the connection is disconnected from this unit. This entails establishing a Bluetooth wireless connection between the ring volume and caller's voice volume is big, overall volume level may ...cellular phone on your phone to the original setting. HSP (Head Set Profile) - When phone is returned to another source, volume and equalizer settings automatically return to this unit via Bluetooth wireless technology, this unit. 2 Registration Refer to Registering connected cellular phone on page ...

Owner's Manual
Page 38
... registered yet Disconnect phone (disconnect phone)- Auto answer (automatic answer setting)- Connecting a cellular phone To use a phone wirelessly with HSP (Head Set Profile), Phone book name view, Clear memory, Number dial and Refuse calls cannot be selected for hands-free phoning appear on the ...display. 3 Turn MULTI-CONTROL to this unit via Bluetooth wireless technology with this . 38 En Connection open (connection open)- Number dial (call by entering number)- Refuse calls (automatic...
... registered yet Disconnect phone (disconnect phone)- Auto answer (automatic answer setting)- Connecting a cellular phone To use a phone wirelessly with HSP (Head Set Profile), Phone book name view, Clear memory, Number dial and Refuse calls cannot be selected for hands-free phoning appear on the ...display. 3 Turn MULTI-CONTROL to this unit via Bluetooth wireless technology with this . 38 En Connection open (connection open)- Number dial (call by entering number)- Refuse calls (automatic...
Owner's Manual
Page 93
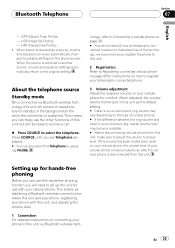
... select Warning tone. Pushing MULTI-CONTROL down to set the date. Pushing MULTI-CONTROL up will blink. ! Face auto open is not detached from the head unit within four seconds of the clock display the segment selected will increase the selected day, month or year. Initial Settings Section 16 English 3 Push MULTI...
... select Warning tone. Pushing MULTI-CONTROL down to set the date. Pushing MULTI-CONTROL up will blink. ! Face auto open is not detached from the head unit within four seconds of the clock display the segment selected will increase the selected day, month or year. Initial Settings Section 16 English 3 Push MULTI...
Owner's Manual
Page 108
...and MPEG 4. The contents can have up to 1 megabit per second) units. Extended formats Joliet: File names can be viewed when the track is... name, the album title, the music genre, the year of CD-ROM folders and files. Bit rate This expresses data volume per ...Distribution Profile. Appendix Additional Information Terms A2DP A2DP is short for Head Set Profile. AVRCP AVRCP is short for Hands Free Profile. Using... (including the separation mark "." Bluetooth Bluetooth is a short-range wireless radio connectivity technology that comprises of three characters). HFP HFP is developed as...
...and MPEG 4. The contents can have up to 1 megabit per second) units. Extended formats Joliet: File names can be viewed when the track is... name, the album title, the music genre, the year of CD-ROM folders and files. Bit rate This expresses data volume per ...Distribution Profile. Appendix Additional Information Terms A2DP A2DP is short for Head Set Profile. AVRCP AVRCP is short for Hands Free Profile. Using... (including the separation mark "." Bluetooth Bluetooth is a short-range wireless radio connectivity technology that comprises of three characters). HFP HFP is developed as...

Other Manual
Page 2
... • It becomes easy to the factory radio mounting bracket. (Fig. 9) (Fig. 10) Select a position where the screw holes of the bracket and the screw holes of the head unit become aligned (are fitted), and tighten the screws at the sides of unit chassis). For details, refer to remove the frame...using the screw holes on the shape of the frame outwards in the bracket. 10 S1c1rew Fig. 9 D1a3shboard or Console Factory radio mounting br1a2cket Fig. 10 Fastening the unit to remove the frame if the front panel is a sudden stop, like an emergency stop. • The semiconductor laser ...
... • It becomes easy to the factory radio mounting bracket. (Fig. 9) (Fig. 10) Select a position where the screw holes of the bracket and the screw holes of the head unit become aligned (are fitted), and tighten the screws at the sides of unit chassis). For details, refer to remove the frame...using the screw holes on the shape of the frame outwards in the bracket. 10 S1c1rew Fig. 9 D1a3shboard or Console Factory radio mounting br1a2cket Fig. 10 Fastening the unit to remove the frame if the front panel is a sudden stop, like an emergency stop. • The semiconductor laser ...

