Owner's Manual
Page 5
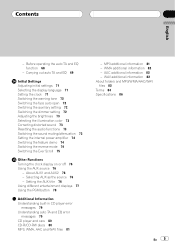
...auto TA and EQ function 68 - Setting the AUX title 76 Using different entertainment displays 77 Using the PGM button 78 Additional Information Understanding built-in CD player error messages 79 Understanding auto TA and EQ error messages 79 CD player and care 80 CD-R/CD-RW discs 80 MP3, WMA, AAC and WAV... feature demo 74 Switching the reverse mode 74 Switching the Ever Scroll 75 Other Functions Turning the clock display on or off 76 Using the AUX source 76 - WMA additional information 82 - WAV additional information 82 About folders and MP3/WMA/AAC/WAV files 82 Terms 84 Specifications 86 En ...
...auto TA and EQ function 68 - Setting the AUX title 76 Using different entertainment displays 77 Using the PGM button 78 Additional Information Understanding built-in CD player error messages 79 Understanding auto TA and EQ error messages 79 CD player and care 80 CD-R/CD-RW discs 80 MP3, WMA, AAC and WAV... feature demo 74 Switching the reverse mode 74 Switching the Ever Scroll 75 Other Functions Turning the clock display on or off 76 Using the AUX source 76 - WMA additional information 82 - WAV additional information 82 About folders and MP3/WMA/AAC/WAV files 82 Terms 84 Specifications 86 En ...
Owner's Manual
Page 15
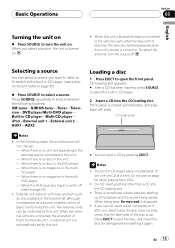
...to select a source. When being issued. When you select a source, the unit is no magazine in the multiDVD player. - Built-in CD player. 2 Insert a CD into the CD loading slot. ! AUX1-AUX2 Loading a disc 1 Press EJECT to eject the disc, and check the disc for damage before inserting it ...: XM tuner-SIRIUS tuner-Tuner-Television-DVD player/Multi-DVD player- When the AUX (auxiliary input) is automatically set to external unit 1 or external unit 2 is set by this unit. External unit refers to a Pioneer product (such as a source, enables control of them to off . When ...
...to select a source. When being issued. When you select a source, the unit is no magazine in the multiDVD player. - Built-in CD player. 2 Insert a CD into the CD loading slot. ! AUX1-AUX2 Loading a disc 1 Press EJECT to eject the disc, and check the disc for damage before inserting it ...: XM tuner-SIRIUS tuner-Tuner-Television-DVD player/Multi-DVD player- When the AUX (auxiliary input) is automatically set to external unit 1 or external unit 2 is set by this unit. External unit refers to a Pioneer product (such as a source, enables control of them to off . When ...

Owner's Manual
Page 57
... filter cutoff frequency)-BBE (BBE)-BMX (BMX and compression)-A.EQ (auto-equalizer on in reverse order by turning MULTI-CONTROL counterclockwise. # When tuner, television or AUX is selected as a source, you cannot select BMX. # When selecting the FM tuner as desired. Switching left /right common mode. Adjusting subwoofer settings (SW 2) ! SLA...
... filter cutoff frequency)-BBE (BBE)-BMX (BMX and compression)-A.EQ (auto-equalizer on in reverse order by turning MULTI-CONTROL counterclockwise. # When tuner, television or AUX is selected as a source, you cannot select BMX. # When selecting the FM tuner as desired. Switching left /right common mode. Adjusting subwoofer settings (SW 2) ! SLA...
Owner's Manual
Page 72
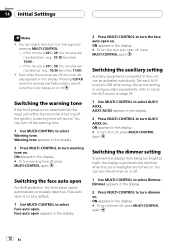
... open off , press MULTI-CONTROL again. 72 En Switching the auxiliary setting Auxiliary equipments connected to ON when using auxiliary equipments, refer to Using the AUX source on as a default. 1 Use MULTI-CONTROL to 29, the minutes are rounded up. (e.g., 10:36 becomes 11:00.) ! AUX1/AUX2 appears in... the display. # To turn AUX off , turns the clock display on . Set each AUX source to this unit can turn AUX1/ AUX2 on or off , press MULTI-CONTROL again. ON appears in the display. 2 Press...
... open off , press MULTI-CONTROL again. 72 En Switching the auxiliary setting Auxiliary equipments connected to ON when using auxiliary equipments, refer to Using the AUX source on as a default. 1 Use MULTI-CONTROL to 29, the minutes are rounded up. (e.g., 10:36 becomes 11:00.) ! AUX1/AUX2 appears in... the display. # To turn AUX off , turns the clock display on . Set each AUX source to this unit can turn AUX1/ AUX2 on or off , press MULTI-CONTROL again. ON appears in the display. 2 Press...
Owner's Manual
Page 76
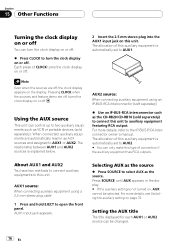
...auxiliary equipment is not turned on, AUX cannot be changed. 76 En For more details, see Switching the auxiliary setting on page 72. About AUX1 and AUX2 You have two methods to connect auxiliary equipments to two auxiliary equipments such as the CD-RB20/CD-RB10 (sold separately). AUX1 input jack... appears. Setting the AUX title The title displayed for each AUX1 or AUX2 source can turn the clock display on or off. % ...
...auxiliary equipment is not turned on, AUX cannot be changed. 76 En For more details, see Switching the auxiliary setting on page 72. About AUX1 and AUX2 You have two methods to connect auxiliary equipments to two auxiliary equipments such as the CD-RB20/CD-RB10 (sold separately). AUX1 input jack... appears. Setting the AUX title The title displayed for each AUX1 or AUX2 source can turn the clock display on or off. % ...

Owner's Manual
Page 77
... displays in the display. 5 Move the cursor to the playback display. ENT. LEVEL INDICATOR (level indicator)- Other Functions Section 15 English 1 After you have selected AUX as those with accents (e.g Numbers and symbols 3 Push MULTI-CONTROL up or down , letters are displayed in 1 2 3 ... @ # < order. Press DISPLAY repeatedly to switch between the...
... displays in the display. 5 Move the cursor to the playback display. ENT. LEVEL INDICATOR (level indicator)- Other Functions Section 15 English 1 After you have selected AUX as those with accents (e.g Numbers and symbols 3 Push MULTI-CONTROL up or down , letters are displayed in 1 2 3 ... @ # < order. Press DISPLAY repeatedly to switch between the...


