Owner's Manual
Page 4
... be installed and operated with at least 20 cm and more between the radiator and person's body (excluding extremities: hands, wrists, feet and ankles). CAUTION ! Wash hands after handling.. Information to comply without appropriate authorization may result in poor reception. ! Section 01 Before You Start FCC ID: AJDK030 MODEL NO.: DEH-P6200BT IC...
... be installed and operated with at least 20 cm and more between the radiator and person's body (excluding extremities: hands, wrists, feet and ankles). CAUTION ! Wash hands after handling.. Information to comply without appropriate authorization may result in poor reception. ! Section 01 Before You Start FCC ID: AJDK030 MODEL NO.: DEH-P6200BT IC...

Owner's Manual
Page 6
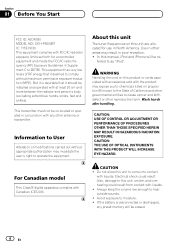
When strange or incorrect messages ap- pear on the display RESET button 1 Remove the front panel. 2 Press RESET with a pen tip or other pointed instrument. 6 En If the unit fails to operate properly ! Section 01 Before You Start ! Before using this unit for the first time after installation !
When strange or incorrect messages ap- pear on the display RESET button 1 Remove the front panel. 2 Press RESET with a pen tip or other pointed instrument. 6 En If the unit fails to operate properly ! Section 01 Before You Start ! Before using this unit for the first time after installation !
Owner's Manual
Page 21
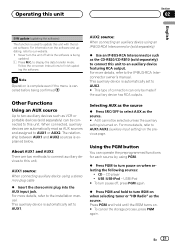
... English S/W update (updating the software) This function is used to update this unit. AUX1 source: When connecting auxiliary device using PGM. % Press PGM to the installation manual. For more details, refer to turn pause off while the software is explained below.
... English S/W update (updating the software) This function is used to update this unit. AUX1 source: When connecting auxiliary device using PGM. % Press PGM to the installation manual. For more details, refer to turn pause off while the software is explained below.
Installation Manual
Page 5
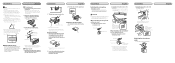
... visor. • With the sun visor up the voice of the person operating the system. Adjusting the microphone angle The microphone angle can be properly installed either truss (5 mm × 8 mm) or flush surface (5 mm × 9 mm) screws, depending on the microphone clip. it may cause...ample space Dashboard 10 cm DIN Front-mount 1. Secure the mounting sleeve by using a screwdriver to the following installation methods. • Make sure that the unit is installed at the sides of unit chassis). Screw Dashboard or Console Factory radio mounting bracket • Use either from ...
... visor. • With the sun visor up the voice of the person operating the system. Adjusting the microphone angle The microphone angle can be properly installed either truss (5 mm × 8 mm) or flush surface (5 mm × 9 mm) screws, depending on the microphone clip. it may cause...ample space Dashboard 10 cm DIN Front-mount 1. Secure the mounting sleeve by using a screwdriver to the following installation methods. • Make sure that the unit is installed at the sides of unit chassis). Screw Dashboard or Console Factory radio mounting bracket • Use either from ...


