Owner's Manual
Page 6
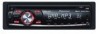
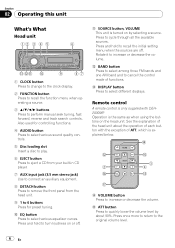
... functions. 4 AUDIO button Press to select various sound quality controls. 5 Disc loading slot Insert a disc to play. 6 EJECT button Press to eject a CD from your built-in CD player. 7 AUX input jack (3.5 mm stereo jack) Use to connect an auxiliary equipment. 8 DETACH button Press to remove the front panel from the head unit...
... functions. 4 AUDIO button Press to select various sound quality controls. 5 Disc loading slot Insert a disc to play. 6 EJECT button Press to eject a CD from your built-in CD player. 7 AUX input jack (3.5 mm stereo jack) Use to connect an auxiliary equipment. 8 DETACH button Press to remove the front panel from the head unit...
Owner's Manual
Page 7
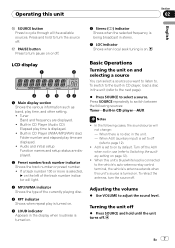
...and other setting. ! Turn off . Press SOURCE repeatedly to page 12). ! When there is no disc in CD player-AUX Notes ! When AUX (auxiliary input) is set to turn the source off the AUX when not in stereo. 7 LOC indicator Shows when local seek tuning is on . Adjusting the volume % Use .... Audio and initial setup Function names and setup status are displayed. 2 Preset number/track number indicator Shows the track number or preset number. ! AUX is being broadcast in use (refer to select a source. To retract the antenna, turn pause on by default. Press and hold until the unit...
...and other setting. ! Turn off . Press SOURCE repeatedly to page 12). ! When there is no disc in CD player-AUX Notes ! When AUX (auxiliary input) is set to turn the source off the AUX when not in stereo. 7 LOC indicator Shows when local seek tuning is on . Adjusting the volume % Use .... Audio and initial setup Function names and setup status are displayed. 2 Preset number/track number indicator Shows the track number or preset number. ! AUX is being broadcast in use (refer to select a source. To retract the antenna, turn pause on by default. Press and hold until the unit...
Owner's Manual
Page 12
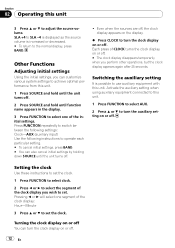
...will select one of CLOCK turns the clock display on or off . 12 En Press FUNCTION repeatedly to switch between the following settings: Clock-AUX (auxiliary input) Use the following instructions to operate each particular setting. # To cancel initial settings, press BAND. # You can customize various... you wish to use auxiliary equipment with this unit. Activate the auxiliary setting when using auxiliary equipment connected to this unit. 1 Press FUNCTION to select AUX. 2 Press a or b to set the clock. 1 Press FUNCTION to select clock. 2 Press c or d to select the segment of the ...
...will select one of CLOCK turns the clock display on or off . 12 En Press FUNCTION repeatedly to switch between the following settings: Clock-AUX (auxiliary input) Use the following instructions to operate each particular setting. # To cancel initial settings, press BAND. # You can customize various... you wish to use auxiliary equipment with this unit. Activate the auxiliary setting when using auxiliary equipment connected to this unit. 1 Press FUNCTION to select AUX. 2 Press a or b to set the clock. 1 Press FUNCTION to select clock. 2 Press c or d to select the segment of the ...


