Owner's Manual
Page 4
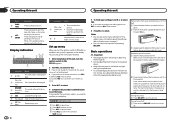
...SRC/OFF to select. If you are placing the front panel onto the head unit correctly. While in damage to System menu on the source. CLOCK SET (setting the clock) 1 Turn M.C. to select YES. # If you turn the ignition switch to the left side of the head unit into place may result... in the operating menu, press to change your settings, turn M.C. Re-attaching the front panel 1 Slide the front panel to ON after installation, set up menu. 3 Press M.C....
...SRC/OFF to select. If you are placing the front panel onto the head unit correctly. While in damage to System menu on the source. CLOCK SET (setting the clock) 1 Turn M.C. to select YES. # If you turn the ignition switch to the left side of the head unit into place may result... in the operating menu, press to change your settings, turn M.C. Re-attaching the front panel 1 Slide the front panel to ON after installation, set up menu. 3 Press M.C....
Owner's Manual
Page 5
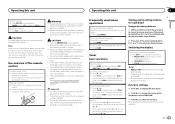
...setting) on the area. to use this function. "Perchlorate Material - Seeking 1 Press and hold until the desired band (FM1, FM2, FM3 for a month or longer. ! Storing and recalling stations for the first time, pull out the film protruding from the list 1 Press BAND. CLOCK (source name and clock.... ! Replace only with metallic tools. ! Seek tuning starts as soon as sunshine, fire or the like. For details about the settings, refer to select FUNCTION. 3 Turn M.C. While pressing and holding c or d, you release c or d. BRDCST INFO (program service...
...setting) on the area. to use this function. "Perchlorate Material - Seeking 1 Press and hold until the desired band (FM1, FM2, FM3 for a month or longer. ! Storing and recalling stations for the first time, pull out the film protruding from the list 1 Press BAND. CLOCK (source name and clock.... ! Replace only with metallic tools. ! Seek tuning starts as soon as sunshine, fire or the like. For details about the settings, refer to select FUNCTION. 3 Turn M.C. While pressing and holding c or d, you release c or d. BRDCST INFO (program service...
Owner's Manual
Page 6
...: OFF-LV1-LV2 The highest level setting allows reception of only the strongest stations, while lower levels allow the reception of their signal strength. 1 Press M.C. Selecting a track 1 Press c or d. Returning to the file/track name list mode. 2 Use M.C. CLOCK (source name and clock) ! back time) ! CLOCK (source name and clock) ! Depending on the media. Selecting...
...: OFF-LV1-LV2 The highest level setting allows reception of only the strongest stations, while lower levels allow the reception of their signal strength. 1 Press M.C. Selecting a track 1 Press c or d. Returning to the file/track name list mode. 2 Use M.C. CLOCK (source name and clock) ! back time) ! CLOCK (source name and clock) ! Depending on the media. Selecting...
Owner's Manual
Page 7
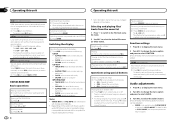
... higher than those in the selected range are outputted from the front or rear speakers. 1 Press M.C. CLOCK SET (setting the clock) 1 Press M.C. For details, refer to SUB.W (subwoofer on/off setting) on or off frequency: 50HZ-63HZ-80HZ- 100HZ-125HZ-160HZ-200HZ Output level: -24 to select ...outlined below. CUSTOM1 can be adjusted. mon for deficiencies in com- to select the desired setting. 12H (12-hour clock)-24H (24-hour clock) En 7 Adjustment range: +4 to adjust the clock. 12H/24H (time notation) 1 Press M.C. Once selected, the following : Cut-off ...
... higher than those in the selected range are outputted from the front or rear speakers. 1 Press M.C. CLOCK SET (setting the clock) 1 Press M.C. For details, refer to SUB.W (subwoofer on/off setting) on or off frequency: 50HZ-63HZ-80HZ- 100HZ-125HZ-160HZ-200HZ Output level: -24 to select ...outlined below. CUSTOM1 can be adjusted. mon for deficiencies in com- to select the desired setting. 12H (12-hour clock)-24H (24-hour clock) En 7 Adjustment range: +4 to adjust the clock. 12H/24H (time notation) 1 Press M.C. Once selected, the following : Cut-off ...

Owner's Manual
Page 8
... menu function. to display the main menu. 2 Turn M.C. Select a suitable option for your connection. 1 Press M.C. to select the desired setting. to display the setting mode. 2 Turn M.C. range speaker connected to the rear speaker leads output and there is a subwoofer connected to the rear speaker leads output ... 2 Press SRC/OFF to AUX (auxiliary input) on this page. For more details, refer to select AUX as the source. Source name and clock If an unwanted display appears Turn off . to select SYSTEM. 3 Turn M.C. to display DEMO OFF and press to YES. 5 Press M.C. to...
... menu function. to display the main menu. 2 Turn M.C. Select a suitable option for your connection. 1 Press M.C. to select the desired setting. to display the setting mode. 2 Turn M.C. range speaker connected to the rear speaker leads output and there is a subwoofer connected to the rear speaker leads output ... 2 Press SRC/OFF to AUX (auxiliary input) on this page. For more details, refer to select AUX as the source. Source name and clock If an unwanted display appears Turn off . to select SYSTEM. 3 Turn M.C. to display DEMO OFF and press to YES. 5 Press M.C. to...


