
PTST10U User Guide
Page 1
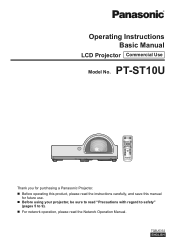
Operating Instructions Basic Manual LCD Projector Commercial Use Model No. PT-ST10U AUTO SETUP MENU RETURN FREEZE ENTER AV MUTE COMPUTER VIDEO DEFAULT FUNCTION INDEX- TQBJ0332 ENGLISH WIN. DIGITAL ZOOM VOLUME Thank you for purchasing a Panasonic Projector. „„ Before operating this product, please read the instructions carefully, and save this manual for future use. „„ Before using your projector, be sure to read "Precautions with regard to safety" (pages 5 to 9). „„ For network operation, please read the Network Operation Manual.
Operating Instructions Basic Manual LCD Projector Commercial Use Model No. PT-ST10U AUTO SETUP MENU RETURN FREEZE ENTER AV MUTE COMPUTER VIDEO DEFAULT FUNCTION INDEX- TQBJ0332 ENGLISH WIN. DIGITAL ZOOM VOLUME Thank you for purchasing a Panasonic Projector. „„ Before operating this product, please read the instructions carefully, and save this manual for future use. „„ Before using your projector, be sure to read "Precautions with regard to safety" (pages 5 to 9). „„ For network operation, please read the Network Operation Manual.
PTST10U User Guide
Page 2
... you need to use higher voltages or currents than this booklet with arrowhead symbol, within an equilateral triangle, is both safe to you and your Panasonic LCD projector for power supplies up to 125 V, 7 A. CAUTION: This equipment is designed to operate on 100 V - 240 V, 50 Hz/60 Hz AC, house current only. If...
... you need to use higher voltages or currents than this booklet with arrowhead symbol, within an equilateral triangle, is both safe to you and your Panasonic LCD projector for power supplies up to 125 V, 7 A. CAUTION: This equipment is designed to operate on 100 V - 240 V, 50 Hz/60 Hz AC, house current only. If...

PTST10U User Guide
Page 4
... The lamp replacement cycle is employed, images can be thrown on a screen of the ordinary projector. ( page 14) 60 inch: Approx. 1.7 m (PT-LB2U) 60 inch: Approx. 0.6 m (PT-ST10U) This projector can be used as one unit. For details, please contact your company's logo when projection ... 5 Preparation Start-up display 10 Details of your projector 11 Getting started Set up your projector 14 Connections 16 Basic operations Turn the projector ON or OFF 18 Project an image 22 Remote control operation 23 PROJECTOR SETUP MENU 36 SECURITY MENU 40 NETWORK MENU 42 ...
... The lamp replacement cycle is employed, images can be thrown on a screen of the ordinary projector. ( page 14) 60 inch: Approx. 1.7 m (PT-LB2U) 60 inch: Approx. 0.6 m (PT-ST10U) This projector can be used as one unit. For details, please contact your company's logo when projection ... 5 Preparation Start-up display 10 Details of your projector 11 Getting started Set up your projector 14 Connections 16 Basic operations Turn the projector ON or OFF 18 Project an image 22 Remote control operation 23 PROJECTOR SETUP MENU 36 SECURITY MENU 40 NETWORK MENU 42 ...
PTST10U User Guide
Page 5
...damage the power cord or the power plug. If the power cord is used while damaged, electric shocks, short-circuits or fire will cause the projector to overheat, which can damage the insulation. • If not using too many adapters), overheating may come into a bundle. Doing so will... attempt to it, place it near the equipment and shall be necessary. Installation work (such as ceiling mount brackets) may cause the projector which are damaged or wall outlets which is broken, cut off the power supply immediately. Please contact an Authorized Service Center for an ...
...damage the power cord or the power plug. If the power cord is used while damaged, electric shocks, short-circuits or fire will cause the projector to overheat, which can damage the insulation. • If not using too many adapters), overheating may come into a bundle. Doing so will... attempt to it, place it near the equipment and shall be necessary. Installation work (such as ceiling mount brackets) may cause the projector which are damaged or wall outlets which is broken, cut off the power supply immediately. Please contact an Authorized Service Center for an ...

PTST10U User Guide
Page 6
...power connector. Essential information Precautions with regard to safety (continued) Do not look and place your skin into the lights emitted from the projector. ACCESSORIES Do not use unspecified batteries. • Use manganese batteries but not rechargeable batteries. • Do not dissemble dry cell batteries... bag and keep them away from metallic objects. • Make sure the polarities (+ and -) are away from the lens while the projector is not done. 6 ENGLISH Do not project an image with clean water and seek medical advice immediately. Rinse with clean water...
...power connector. Essential information Precautions with regard to safety (continued) Do not look and place your skin into the lights emitted from the projector. ACCESSORIES Do not use unspecified batteries. • Use manganese batteries but not rechargeable batteries. • Do not dissemble dry cell batteries... bag and keep them away from metallic objects. • Make sure the polarities (+ and -) are away from the lens while the projector is not done. 6 ENGLISH Do not project an image with clean water and seek medical advice immediately. Rinse with clean water...
PTST10U User Guide
Page 7
...it is thermally affected by the light from the ceiling, purchase an optional hanging attachment (Model No. CAUTIONS WHEN TRANSPORTING When transporting the projector, the leg adjusters must be exposed to OFF. CAUTIONS WHEN INSTALLING DO NOT USE UNDER THE FOLLOWING CONDITIONS. • Do not set... which was released when the lamp broke and which are subject to the internal parts, causing failure. See "TEMP INDICATOR" on the projector. The product will be shortened. Failure to sudden temperature changes, such as fluorescent lamps, and the broken pieces will be shortened. If...
...it is thermally affected by the light from the ceiling, purchase an optional hanging attachment (Model No. CAUTIONS WHEN TRANSPORTING When transporting the projector, the leg adjusters must be exposed to OFF. CAUTIONS WHEN INSTALLING DO NOT USE UNDER THE FOLLOWING CONDITIONS. • Do not set... which was released when the lamp broke and which are subject to the internal parts, causing failure. See "TEMP INDICATOR" on the projector. The product will be shortened. Failure to sudden temperature changes, such as fluorescent lamps, and the broken pieces will be shortened. If...
PTST10U User Guide
Page 8
...advance. DO NOT TOUCH THE SURFACE OF THE PROJECTOR LENS WITH YOUR BARE HAND. Note that is simple to shield the air exhaust vents and consider the direction of time, as this reason, take care not to guess. • Panasonic and its internal components will greatly affect the life... cycle. THE PROJECTOR HAS A HIGH PRESSURE MERCURY LAMP THAT IS CHARACTERIZED AS FOLLOWS: • The brightness of the lamp will decrease...
...advance. DO NOT TOUCH THE SURFACE OF THE PROJECTOR LENS WITH YOUR BARE HAND. Note that is simple to shield the air exhaust vents and consider the direction of time, as this reason, take care not to guess. • Panasonic and its internal components will greatly affect the life... cycle. THE PROJECTOR HAS A HIGH PRESSURE MERCURY LAMP THAT IS CHARACTERIZED AS FOLLOWS: • The brightness of the lamp will decrease...

PTST10U User Guide
Page 9
... cleaning costs. Please discuss with regard to safety (continued) CLEANING AND MAINTENANCE ASK AN AUTHORIZED SERVICE CENTER TO CLEAN THE INSIDE OF THE PROJECTOR AT LEAST ONCE A YEAR. Remote control (×1) (N2QAYA000011) Power cord (×1) (K2CG3YY00073) RGB signal cable (×1) 1.8 m ...cable (1 set) (TTRA0141) Attachment screw (x1) Safety cable (x1) Lens cover (×1) (TKKL5503) (Attached to clean the inside the projector without notice. ENGLISH 9 NOTE: This product contains a CR Coin Cell Lithium Battery which contains Perchlorate Material - WIN. Ask your...
... cleaning costs. Please discuss with regard to safety (continued) CLEANING AND MAINTENANCE ASK AN AUTHORIZED SERVICE CENTER TO CLEAN THE INSIDE OF THE PROJECTOR AT LEAST ONCE A YEAR. Remote control (×1) (N2QAYA000011) Power cord (×1) (K2CG3YY00073) RGB signal cable (×1) 1.8 m ...cable (1 set) (TTRA0141) Attachment screw (x1) Safety cable (x1) Lens cover (×1) (TKKL5503) (Attached to clean the inside the projector without notice. ENGLISH 9 NOTE: This product contains a CR Coin Cell Lithium Battery which contains Perchlorate Material - WIN. Ask your...

PTST10U User Guide
Page 10
... ft) above sea level) 3 ENTER NOTE: • To return to INITIAL SETTING ENTER menu. NOTE: • When the projector is turned on for the first time, you may be displayed when the projector is turned on for the first time or after it on the ceiling with a ceiling mount bracket (sold separately... Start-up display The LANGUAGE and INITIAL SETTING menu will be required to adjust the "focus ring" ( page 11) on the top of the projector body to its application and environment settings.
... ft) above sea level) 3 ENTER NOTE: • To return to INITIAL SETTING ENTER menu. NOTE: • When the projector is turned on for the first time, you may be displayed when the projector is turned on for the first time or after it on the ceiling with a ceiling mount bracket (sold separately... Start-up display The LANGUAGE and INITIAL SETTING menu will be required to adjust the "focus ring" ( page 11) on the top of the projector body to its application and environment settings.

PTST10U User Guide
Page 11
... damage or injury. • Do not place your hands or face, or objects which cannot withstand heat near the air outlet port. Details of your projector PROJECTOR'S MAIN UNIT Top and front view ① ⑥ Preparation ② ③ ⑦ ④ ⑤ ⑧ ① Control Panel / Indicators... button ( page 22) ⑧ Projection lens NOTE: • Do not cover the air outlet port. • Putting a finger in the projector can cause injury. • Do not place your hands or other objects close to certain selected function. ( page 25, 38) ⑧ Switch...
... damage or injury. • Do not place your hands or face, or objects which cannot withstand heat near the air outlet port. Details of your projector PROJECTOR'S MAIN UNIT Top and front view ① ⑥ Preparation ② ③ ⑦ ④ ⑤ ⑧ ① Control Panel / Indicators... button ( page 22) ⑧ Projection lens NOTE: • Do not cover the air outlet port. • Putting a finger in the projector can cause injury. • Do not place your hands or other objects close to certain selected function. ( page 25, 38) ⑧ Switch...

PTST10U User Guide
Page 12
... IN 2 AUDIO IN ⑤ ⑥ ① Connect to a network cable. (See "Network Operation Manual".) ② Connect to a computer to control the projector's operation. ( page 17, 51) ③ Connect to a computer or YPBPR signal cable. ( page 17) ④ Connect to an S-VIDEO signal... output to this terminal, no sound comes out of the air intake port. If it is connected to the connected equipment. Preparation Details of your projector (continued) Rear and bottom view ① ⑨ ② ⑧ ③ ⑦ ④ ⑤ ⑥ ① Terminals &#...
... IN 2 AUDIO IN ⑤ ⑥ ① Connect to a network cable. (See "Network Operation Manual".) ② Connect to a computer to control the projector's operation. ( page 17, 51) ③ Connect to a computer or YPBPR signal cable. ( page 17) ④ Connect to an S-VIDEO signal... output to this terminal, no sound comes out of the air intake port. If it is connected to the connected equipment. Preparation Details of your projector (continued) Rear and bottom view ① ⑨ ② ⑧ ③ ⑦ ④ ⑤ ⑥ ① Terminals &#...

PTST10U User Guide
Page 13
... • The remote control operates within the range of 7 m (23' 0"), approximately ±30 ° vertically and horizontally from the projector avoiding any obstacles. • The operating range may differ due to the screen material and may not be effective with [ENTER]. ( page... ⑪ Turn off the projection temporarily. ( page 23) ⑫ Detect the input signal. Adjust the settings of your projector (continued) PROJECTOR'S REMOTE CONTROL Top and rear view Remote control signal emitters Installing/removing batteries Press the tab and lift up the cover. ENGLISH &#...
... • The remote control operates within the range of 7 m (23' 0"), approximately ±30 ° vertically and horizontally from the projector avoiding any obstacles. • The operating range may differ due to the screen material and may not be effective with [ENTER]. ( page... ⑪ Turn off the projection temporarily. ( page 23) ⑫ Detect the input signal. Adjust the settings of your projector (continued) PROJECTOR'S REMOTE CONTROL Top and rear view Remote control signal emitters Installing/removing batteries Press the tab and lift up the cover. ENGLISH &#...

PTST10U User Guide
Page 14
... diagonal". Close window shades or curtains to malfunction. -30 ° However, you can calculate and define the throw distance as this may cause the projector to block the light and turn off the lightings. +30 ° • Do not use the... projector at a raised or horizontally tilted position. Getting started Getting started Set up your projector SCREEN SIZE AND THROW DISTANCE You can tilt the projector's body approximately ±30 ° vertically and ±10 ° horizontally. You can...
... diagonal". Close window shades or curtains to malfunction. -30 ° However, you can calculate and define the throw distance as this may cause the projector to block the light and turn off the lightings. +30 ° • Do not use the... projector at a raised or horizontally tilted position. Getting started Getting started Set up your projector SCREEN SIZE AND THROW DISTANCE You can tilt the projector's body approximately ±30 ° vertically and ±10 ° horizontally. You can...

PTST10U User Guide
Page 15
Getting started Set up your projector (continued) PROJECTION METHOD See "INSTALLATION" on page 37 to select the projection method. „„Put it on a desk or floor and project from the ... translucent screen) Menu INSTALLATION Method REAR/DESK Menu INSTALLATION Method REAR/CEILING NOTE: • Use the optional ceiling mount bracket (ET-PKB2) when mounting the projector on the ceiling. • You can adjust the projection angle in the vertical direction by adjusting the leg adjuster button. ( page 22) ENGLISH ...
Getting started Set up your projector (continued) PROJECTION METHOD See "INSTALLATION" on page 37 to select the projection method. „„Put it on a desk or floor and project from the ... translucent screen) Menu INSTALLATION Method REAR/DESK Menu INSTALLATION Method REAR/CEILING NOTE: • Use the optional ceiling mount bracket (ET-PKB2) when mounting the projector on the ceiling. • You can adjust the projection angle in the vertical direction by adjusting the leg adjuster button. ( page 22) ENGLISH ...

PTST10U User Guide
Page 16
... and turn the peripheral devices off prior to making any connections. • Prepare the selected peripheral devices with the connection cables that correspond to the projector's terminals. • All peripheral devices and cables used for the connections are sold separately unless indicated otherwise. • If the input signal is affected by...
... and turn the peripheral devices off prior to making any connections. • Prepare the selected peripheral devices with the connection cables that correspond to the projector's terminals. • All peripheral devices and cables used for the connections are sold separately unless indicated otherwise. • If the input signal is affected by...

PTST10U User Guide
Page 17
If any other cables are necessary, purchase them from the market. Getting started Connections (continued) Example: Computers Computer (Controlling a projector) Computer Audio system LAN SERIAL S-VIDEO IN AAUUDDIOIO OUT COMPUTER 1 IN COMPUTER 2 IN 1 VIDEO IN 2 AUDIO IN Computer Computer (Controlling a projector) NOTE: • For the network connection between the projector and computers, see "Network Operation Manual" in the CD-ROM provided. • Only the RGB signal cable (1 piece) is attached. ENGLISH 17
If any other cables are necessary, purchase them from the market. Getting started Connections (continued) Example: Computers Computer (Controlling a projector) Computer Audio system LAN SERIAL S-VIDEO IN AAUUDDIOIO OUT COMPUTER 1 IN COMPUTER 2 IN 1 VIDEO IN 2 AUDIO IN Computer Computer (Controlling a projector) NOTE: • For the network connection between the projector and computers, see "Network Operation Manual" in the CD-ROM provided. • Only the RGB signal cable (1 piece) is attached. ENGLISH 17

PTST10U User Guide
Page 18
...operating using the internal power supply and automatically stops when cooled. Latch 2 Align the side of the "power cord secure lock" with INITIAL START UP (PROJECTOR SETUP menu) is set to 9) Install the "power cord secure lock" Detach the "power cord secure lock" 1 Push the connector all the way... matches that of the AC IN terminal and slide it . For details, see "Precautions with the POWER indicator lit. Basic operations Turn the projector ON or OFF POWER CORD Fix the provided "power cord secure lock" to the power cord on function If the power cord is disabled. ...
...operating using the internal power supply and automatically stops when cooled. Latch 2 Align the side of the "power cord secure lock" with INITIAL START UP (PROJECTOR SETUP menu) is set to 9) Install the "power cord secure lock" Detach the "power cord secure lock" 1 Push the connector all the way... matches that of the AC IN terminal and slide it . For details, see "Precautions with the POWER indicator lit. Basic operations Turn the projector ON or OFF POWER CORD Fix the provided "power cord secure lock" to the power cord on function If the power cord is disabled. ...

PTST10U User Guide
Page 19
...The power is on . No power supply and the power is lit red), power of the projector's power When the TEMP indicator flashes, the POWER indicator lights red and you cannot turn the projector on and preparing for being turned off (when STANDBY MODE is set in STANDBY MODE) after ...a while. Basic operations ENGLISH 19 The projector is pressed, projection starts. Recovery may take a while. • While the power is not operating. POWER indicator status Indicator status No ...
...The power is on . No power supply and the power is lit red), power of the projector's power When the TEMP indicator flashes, the POWER indicator lights red and you cannot turn the projector on and preparing for being turned off (when STANDBY MODE is set in STANDBY MODE) after ...a while. Basic operations ENGLISH 19 The projector is pressed, projection starts. Recovery may take a while. • While the power is not operating. POWER indicator status Indicator status No ...

PTST10U User Guide
Page 20
... small rattling or tinkling sound may flicker due to the specifications of the operational sound depends on the external temperature. • If INITIAL START UP (PROJECTOR SETUP menu) is set to ENABLE. ( page 42) When setting the SECURITY menu, you will be asked to a wall outlet. ( page 37)...and remove lens cap 1 Match the lens cap with the remote control) under CONTROL DEVICE SETUP in the SECURITY menu is set to ON, the projector starts projecting when the power cord is connected to input the password. ( page 40) • When starting up and the STARTUP LOGO is...
... small rattling or tinkling sound may flicker due to the specifications of the operational sound depends on the external temperature. • If INITIAL START UP (PROJECTOR SETUP menu) is set to ENABLE. ( page 42) When setting the SECURITY menu, you will be asked to a wall outlet. ( page 37)...and remove lens cap 1 Match the lens cap with the remote control) under CONTROL DEVICE SETUP in the SECURITY menu is set to ON, the projector starts projecting when the power cord is connected to input the password. ( page 40) • When starting up and the STARTUP LOGO is...

PTST10U User Guide
Page 21
...to ENABLE. ( page 42) • Power can be displayed - NOTE: • Confirm that CONTROL PANEL (when operating with the projector body) or REMOTE CONTROLLER (when operating with the remote control) under CONTROL DEVICE SETUP in the SECURITY menu is set to projection if there... is installed. Turn the projector ON or OFF (continued) TURN THE PROJECTOR OFF STANDBY (R) ON (G) POWER indicator 1) 2) AUTO SETUP MENU RETURN FREEZE ENTER AV MUTE When operating the projector, check the status of the POWER indicator. ( page 19)...
...to ENABLE. ( page 42) • Power can be displayed - NOTE: • Confirm that CONTROL PANEL (when operating with the projector body) or REMOTE CONTROLLER (when operating with the remote control) under CONTROL DEVICE SETUP in the SECURITY menu is set to projection if there... is installed. Turn the projector ON or OFF (continued) TURN THE PROJECTOR OFF STANDBY (R) ON (G) POWER indicator 1) 2) AUTO SETUP MENU RETURN FREEZE ENTER AV MUTE When operating the projector, check the status of the POWER indicator. ( page 19)...


