
Protocol Functions
Page 1
RS232 Commands and Protocol Function List RS232 Pin Assignments D-Sub 9 pin (from the projector side) 1 1 CD 2 RXD 3 TXD 4 DTR 5 GND 6 DSR 7 RTS 8 CTS 9 RI (from the cable side) C1 COLOR 1 Black 2 Brown 3 Red 4 Orange 5 Yellow 6 Green 7 Blue 8 Purple 9 White SHELL DW C2 1 3 2 6 5 4 8 7 9 SHELL EN-81
RS232 Commands and Protocol Function List RS232 Pin Assignments D-Sub 9 pin (from the projector side) 1 1 CD 2 RXD 3 TXD 4 DTR 5 GND 6 DSR 7 RTS 8 CTS 9 RI (from the cable side) C1 COLOR 1 Black 2 Brown 3 Red 4 Orange 5 Yellow 6 Green 7 Blue 8 Purple 9 White SHELL DW C2 1 3 2 6 5 4 8 7 9 SHELL EN-81

Protocol Functions
Page 2
RS232 Protocol Function List Baud Rate Data Bits Parity Stop Bits Flow Control UART16550 FIFO Projector Return (Pass) Projector Return (Fail) 9600 8 None 1 None Disable P F Lead Code ~ Fix code One Digit Projector ID X X Set in OSD 00~99 Two Digit Command ID X X X space variable carriage return n... CR Defined by a carriage return 'r'. „ There is a after all ASCII commands. „ 0D is "AMX" in ASCII followed by Optoma 2 or 3 Digit See ...
RS232 Protocol Function List Baud Rate Data Bits Parity Stop Bits Flow Control UART16550 FIFO Projector Return (Pass) Projector Return (Fail) 9600 8 None 1 None Disable P F Lead Code ~ Fix code One Digit Projector ID X X Set in OSD 00~99 Two Digit Command ID X X X space variable carriage return n... CR Defined by a carriage return 'r'. „ There is a after all ASCII commands. „ 0D is "AMX" in ASCII followed by Optoma 2 or 3 Digit See ...
Protocol Functions
Page 3
SEND to projector 232 ASCII Code HEX Code Function Description ~XX00 1 7E 30 30 30 30 20 31 0D Power ON ~XX00 0 7E 30 30 30 30 20 ... 20 31 0D Format 4:3 ~XX60 2 7E 30 30 36 30 20 32 0D 16:9 ~XX60 3 7E 30 30 36 30 20 33 0D 16:10(W501) ~XX60 5 7E 30 30 36 30 20 35 0D LBX ~XX60 6 7E 30 30 36 30 20 36 0D Native ~XX60 7 7E 30 30 36...
SEND to projector 232 ASCII Code HEX Code Function Description ~XX00 1 7E 30 30 30 30 20 31 0D Power ON ~XX00 0 7E 30 30 30 30 20 ... 20 31 0D Format 4:3 ~XX60 2 7E 30 30 36 30 20 32 0D 16:9 ~XX60 3 7E 30 30 36 30 20 33 0D 16:10(W501) ~XX60 5 7E 30 30 36 30 20 35 0D LBX ~XX60 6 7E 30 30 36 30 20 36 0D Native ~XX60 7 7E 30 30 36...

Protocol Functions
Page 4
... Disable(0/2 for backward compatible) ~nnnn = ~0000 (a=7E 30 30 30 30) ~9999 (a=7E 39 39 39 39) ~XX79 n 7E 30 30 37 39 20 a 0D Projector ID n = 00 (a=30 30) ~ 99 (a=39 39) ~XX80 1 7E 30 30 38 30 20 31 0D Mute On ~XX80 0 7E 30 30 38 30 20...
... Disable(0/2 for backward compatible) ~nnnn = ~0000 (a=7E 30 30 30 30) ~9999 (a=7E 39 39 39 39) ~XX79 n 7E 30 30 37 39 20 a 0D Projector ID n = 00 (a=30 30) ~ 99 (a=39 39) ~XX80 1 7E 30 30 38 30 20 31 0D Mute On ~XX80 0 7E 30 30 38 30 20...

Protocol Functions
Page 6
... n : 0/1/2/3/4/6/7/8/ = Standby/Warming/Cooling/Out of Range/Lamp fail/Fan Lock/Over Temperature/Lamp Hours Running Out/Cover Open READ from projector 232 ASCII Code HEX Code Function Projector Return Description ~XX121 1 7E 30 30 31 32 31 20 31 0D Input Source Commands OKn n: 0/1/2/3/4/5/6/7/8/9 = None/VGA1/VGA2/Video...Status 7E 30 30 34 35 31 20 32 0D WLAN IP Address 7E 30 30 34 35 31 20 33 0D SSID OKn n:1/2/3=X501/W501/EH501 OKbbbb bbbb: LampHour Cumulative Lamp Hours OKbbbbb bbbbb: (5 digits) Total Lamp Filter Usage Hours OKbbbb bbbb: Filter Usage Hours Okn n=0/1 ...
... n : 0/1/2/3/4/6/7/8/ = Standby/Warming/Cooling/Out of Range/Lamp fail/Fan Lock/Over Temperature/Lamp Hours Running Out/Cover Open READ from projector 232 ASCII Code HEX Code Function Projector Return Description ~XX121 1 7E 30 30 31 32 31 20 31 0D Input Source Commands OKn n: 0/1/2/3/4/5/6/7/8/9 = None/VGA1/VGA2/Video...Status 7E 30 30 34 35 31 20 32 0D WLAN IP Address 7E 30 30 34 35 31 20 33 0D SSID OKn n:1/2/3=X501/W501/EH501 OKbbbb bbbb: LampHour Cumulative Lamp Hours OKbbbbb bbbbb: (5 digits) Total Lamp Filter Usage Hours OKbbbb bbbb: Filter Usage Hours Okn n=0/1 ...

User's Manual
Page 1
... devices 21 Operation 24 Powering On/Off the Projector 24 Adjusting the Projector Height 25 Adjusting the Projector Zoom and Focus 25 Adjusting Projection Image Size 26 Menu Operation ...30 Controlling the projector through a LAN environment 50 Controlling the projector through a web browser 54 Displaying images through Optoma Presenter 61 Displaying pictures with a USB storage device...
... devices 21 Operation 24 Powering On/Off the Projector 24 Adjusting the Projector Height 25 Adjusting the Projector Zoom and Focus 25 Adjusting Projection Image Size 26 Menu Operation ...30 Controlling the projector through a LAN environment 50 Controlling the projector through a web browser 54 Displaying images through Optoma Presenter 61 Displaying pictures with a USB storage device...

User's Manual
Page 2
... (intake) and ventilation holes (exhaust). Refer all of these instructions before you operate your projector and save for cleaning the projector housing. Accessories Do not place this projector yourself. Unauthorized substitutions may occur, causing picture degradation or damage to service this product on ...or place anything near these bags may fall, causing serious damage to qualified service personnel. 8. Servicing Do not attempt to the projector. 6. The product may result in fire, electric shock or other hazards. EN-2 Usage Notice Safety Instructions Read all servicing to...
... (intake) and ventilation holes (exhaust). Refer all of these instructions before you operate your projector and save for cleaning the projector housing. Accessories Do not place this projector yourself. Unauthorized substitutions may occur, causing picture degradation or damage to service this product on ...or place anything near these bags may fall, causing serious damage to qualified service personnel. 8. Servicing Do not attempt to the projector. 6. The product may result in fire, electric shock or other hazards. EN-2 Usage Notice Safety Instructions Read all servicing to...

User's Manual
Page 3
When the projector is an extreme or sudden change in temperature. EN-3 Moisture Condensation Never operate this projector immediately after moving it from possible damage, do not use the projector for at least 2 hours when there is exposed to a warm one. 9. To prevent the unit from a cold location to such a change in temperature, moisture may condense on the lens and the crucial internal parts.
When the projector is an extreme or sudden change in temperature. EN-3 Moisture Condensation Never operate this projector immediately after moving it from possible damage, do not use the projector for at least 2 hours when there is exposed to a warm one. 9. To prevent the unit from a cold location to such a change in temperature, moisture may condense on the lens and the crucial internal parts.

User's Manual
Page 4
... purpose of countries where you use this grounding type plug. Ground Ground For Australia and Mainland China Ground For Continental Europe For the U.S.A. This projector is used. Please ensure that your AC plug type with the graphics below and ensure that the proper AC Power Cord is equipped with a ... your AC outlet, please contact your sales dealer. Notes on the AC Power Cord AC Power Cord must meet the requirement of this projector. We highly recommend using a video source device also equipped with a grounding type AC line plug. and Canada Ground For the U.K. EN-4
... purpose of countries where you use this grounding type plug. Ground Ground For Australia and Mainland China Ground For Continental Europe For the U.S.A. This projector is used. Please ensure that your AC plug type with the graphics below and ensure that the proper AC Power Cord is equipped with a ... your AC outlet, please contact your sales dealer. Notes on the AC Power Cord AC Power Cord must meet the requirement of this projector. We highly recommend using a video source device also equipped with a grounding type AC line plug. and Canada Ground For the U.K. EN-4
User's Manual
Page 5
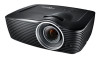
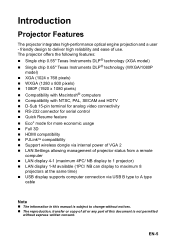
EN-5 friendly design to change without express written consent. The projector offers the following features: „ Single chip 0.55" Texas Instruments DLP® technology (XGA model) „ Single chip 0.65" Texas Instruments DLP® ... wireless dongle via internal power of VGA 2 „ LAN Settings allowing management of projector status from a remote computer „ LAN display 4-1 (maximum 4PC/ NB display to 1 projector) „ LAN display 1-M available (1PC/ NB can display to maximum 8 projectors at the same time) „ USB display supports computer connection via USB B type...
EN-5 friendly design to change without express written consent. The projector offers the following features: „ Single chip 0.55" Texas Instruments DLP® technology (XGA model) „ Single chip 0.65" Texas Instruments DLP® ... wireless dongle via internal power of VGA 2 „ LAN Settings allowing management of projector status from a remote computer „ LAN display 4-1 (maximum 4PC/ NB display to 1 projector) „ LAN display 1-M available (1PC/ NB can display to maximum 8 projectors at the same time) „ USB display supports computer connection via USB B type...
User's Manual
Page 6
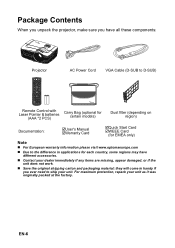
... please visit www.optomaeurope.com „ Due to ship your unit. Package Contents When you unpack the projector, make sure you ever need to the difference in handy if you have all these components: Projector AC Power Cord VGA Cable (D-SUB to D-SUB) Remote Control with Laser Pointer & batteries (AAA *2 PCS) Carry...
... please visit www.optomaeurope.com „ Due to ship your unit. Package Contents When you unpack the projector, make sure you ever need to the difference in handy if you have all these components: Projector AC Power Cord VGA Cable (D-SUB to D-SUB) Remote Control with Laser Pointer & batteries (AAA *2 PCS) Carry...

User's Manual
Page 7
sor 5 Security bar 6 Speaker 7 Ventilation holes 8 Control panel 9 Zoom ring 10 Top cover EN-7 Projector Overview Front View 10 98 1 23 4 5 6 7 1 Front adjustment foot 2 Projection lens 3 Focus ring 4 Front IR remote control sen-
sor 5 Security bar 6 Speaker 7 Ventilation holes 8 Control panel 9 Zoom ring 10 Top cover EN-7 Projector Overview Front View 10 98 1 23 4 5 6 7 1 Front adjustment foot 2 Projection lens 3 Focus ring 4 Front IR remote control sen-

User's Manual
Page 8
Rear View 1 2 3 45 678 1 Optional air dust 2 AC power socket 3 Connection ports 4 Kensington lock Bottom View 5 Rear IR remote control sensor 6 Optional wireless dongle slot 7 Speaker 8 Ventilation holes 1 2 1 Ceiling mount holes 22 Rear adjustment feet Note „ This projector can be used with a ceiling mount for information to mount the projector on a ceiling. EN-8 The ceiling mount is not included in the package. „ Contact your dealer for support.
Rear View 1 2 3 45 678 1 Optional air dust 2 AC power socket 3 Connection ports 4 Kensington lock Bottom View 5 Rear IR remote control sensor 6 Optional wireless dongle slot 7 Speaker 8 Ventilation holes 1 2 1 Ceiling mount holes 22 Rear adjustment feet Note „ This projector can be used with a ceiling mount for information to mount the projector on a ceiling. EN-8 The ceiling mount is not included in the package. „ Contact your dealer for support.

User's Manual
Page 9
... Messages" on page 88. 8 Four directional buttons Use four directional buttons to select items or make adjustments to your selection. 9 Re-SYNC Automatically synchronize the projector to the input source. 10 Power Turn the projector on or off. 11 ENTER Confirm your item selection.
... Messages" on page 88. 8 Four directional buttons Use four directional buttons to select items or make adjustments to your selection. 9 Re-SYNC Automatically synchronize the projector to the input source. 10 Power Turn the projector on or off. 11 ENTER Confirm your item selection.

User's Manual
Page 10
... mode (Standby), VGA-OUT is disabled. EN-10 Connection Ports 1 2 345 6 7 89 17 16 15 14 13 12 11 10 1 RS-232C When operating the projector via a computer, connect this jack. 7 DISPLAY USB display supports computer connection via USB B type to an external monitor. In Eco mode (Standby), VGA-OUT is...
... mode (Standby), VGA-OUT is disabled. EN-10 Connection Ports 1 2 345 6 7 89 17 16 15 14 13 12 11 10 1 RS-232C When operating the projector via a computer, connect this jack. 7 DISPLAY USB display supports computer connection via USB B type to an external monitor. In Eco mode (Standby), VGA-OUT is...

User's Manual
Page 12
... your selection. Remote Control 1 13 14 2 15 3 16 4 17 18 5 19 6 20 7 21 8 22 9 23 10 24 11 25 12 26 27 1 Power Turn the projector on or off. 2 Source Switch between input signals. 3 Left mouse Perform the left key for emulation of USB mouse. "UP" key: When menu is off...
... your selection. Remote Control 1 13 14 2 15 3 16 4 17 18 5 19 6 20 7 21 8 22 9 23 10 24 11 25 12 26 27 1 Power Turn the projector on or off. 2 Source Switch between input signals. 3 Left mouse Perform the left key for emulation of USB mouse. "UP" key: When menu is off...

User's Manual
Page 13
Enter key for customized function. 15 Re-SYNC Automatically synchronize the projector to activate the laser pointer. 19 Page+ Perform page up function when mouse mode is activated. 20 Volume (+/-) Adjust the volume level. 21 Menu Display ...
Enter key for customized function. 15 Re-SYNC Automatically synchronize the projector to activate the laser pointer. 19 Page+ Perform page up function when mouse mode is activated. 20 Volume (+/-) Adjust the volume level. 21 Menu Display ...

User's Manual
Page 14
... a password when required. See "Connecting a computer" on page 19 for the Remote with the remote control gives you more flexibility when delivering presentations. 1. Connect the projector to your computer with Laser Pointer. Note „ Remote Control (IR) or Remote Control with a USB cable prior to VGA1 or VGA2. 3.
... a password when required. See "Connecting a computer" on page 19 for the Remote with the remote control gives you more flexibility when delivering presentations. 1. Connect the projector to your computer with Laser Pointer. Note „ Remote Control (IR) or Remote Control with a USB cable prior to VGA1 or VGA2. 3.

User's Manual
Page 16
Remote Control Operation Point the remote control at the infrared remote sensor and press a button. „ Operating the projector from the front 15 15 5m 10m 7m „ Operating the projector from the rear 15 15 5m 10m 7m Note „ The remote control may not operate when there is sunlight or other...
Remote Control Operation Point the remote control at the infrared remote sensor and press a button. „ Operating the projector from the front 15 15 5m 10m 7m „ Operating the projector from the rear 15 15 5m 10m 7m Note „ The remote control may not operate when there is sunlight or other...

User's Manual
Page 17
Ensure the cables are firmly inserted. 1 23 4 1 5 6 7 8 9 10 11 12 3 1 VGA cable (D-Sub to D-Sub) 2 USB cable (B type to A type) 3 Audio cable 4 DVI-D cable 5 VGA to DVI-A cable 6 VGA (D-Sub) to : 1. Turn all equipment off before making any connections. 2. Use the correct signal cables for each source. 3. Connection When connecting a signal source to the projector, be sure to HDTV (RCA) cable 7 S-Video cable 8 HDMI cable 9 Audio L/R cable EN-17
Ensure the cables are firmly inserted. 1 23 4 1 5 6 7 8 9 10 11 12 3 1 VGA cable (D-Sub to D-Sub) 2 USB cable (B type to A type) 3 Audio cable 4 DVI-D cable 5 VGA to DVI-A cable 6 VGA (D-Sub) to : 1. Turn all equipment off before making any connections. 2. Use the correct signal cables for each source. 3. Connection When connecting a signal source to the projector, be sure to HDTV (RCA) cable 7 S-Video cable 8 HDMI cable 9 Audio L/R cable EN-17


